Axess CS3607 Manuel utilisateur

1
360 ACTION CAM
CS3607
Copyright © 2014 Axess Products Corporation. All Rights Reserved

2
User’s Manual
Description
Description of
of appearance
appearance and
and keys
keys
1. LCD display screen
3.Power/Mode
5.Busy indicator (red)
7. WIFI indicator (red)
2.Shutter key
4.Wifikey
6. Charging indicator (blue)
8. Lens
10. Interface lid (USB, HDMI)
11. Speaker
9. Gear adjusting triangle nut
Copyright © 2014 Axess Products Corporation. All Rights Reserved

3
Use your WIFI camera
1. First insert a micro SD or micro SDHC card, as shown in the right figure:
A high-speed card of Class 6 or above is recommended, and a Class 10 card is needed for video recording in
professional mode.
Copyright © 2014 Axess Products Corporation. All Rights Reserved

4
Be sure to turn off the video camera before a card is inserted or taken out.
2. Power on/off
Power on: Press and hold Power key for about 2 seconds and release it, accompanied by a sound of the
buzzer, the LCD screen will be started (video recording mode is started by default), and the working indicator in
red/Busy indicator will be normally on.
Power saving mode: The device will enter power saving mode when it is in an idle state for one minute (default
setting of the system) without any operation, LCD display will be turned off automatically. And it can be
activated by pressing any key after it is turned off.
Power off: Press and hold Power key for about 3 seconds and release it, accompanied by a sound of the
buzzer, the LCD screen will be shut down.
The device will be turned off automatically when it is in power saving mode for 3 minutes (default setting of the
system) without any operation, “Goodbye” will be displayed on the LCD screen when it is turned off.
Copyright © 2014 Axess Products Corporation. All Rights Reserved
5
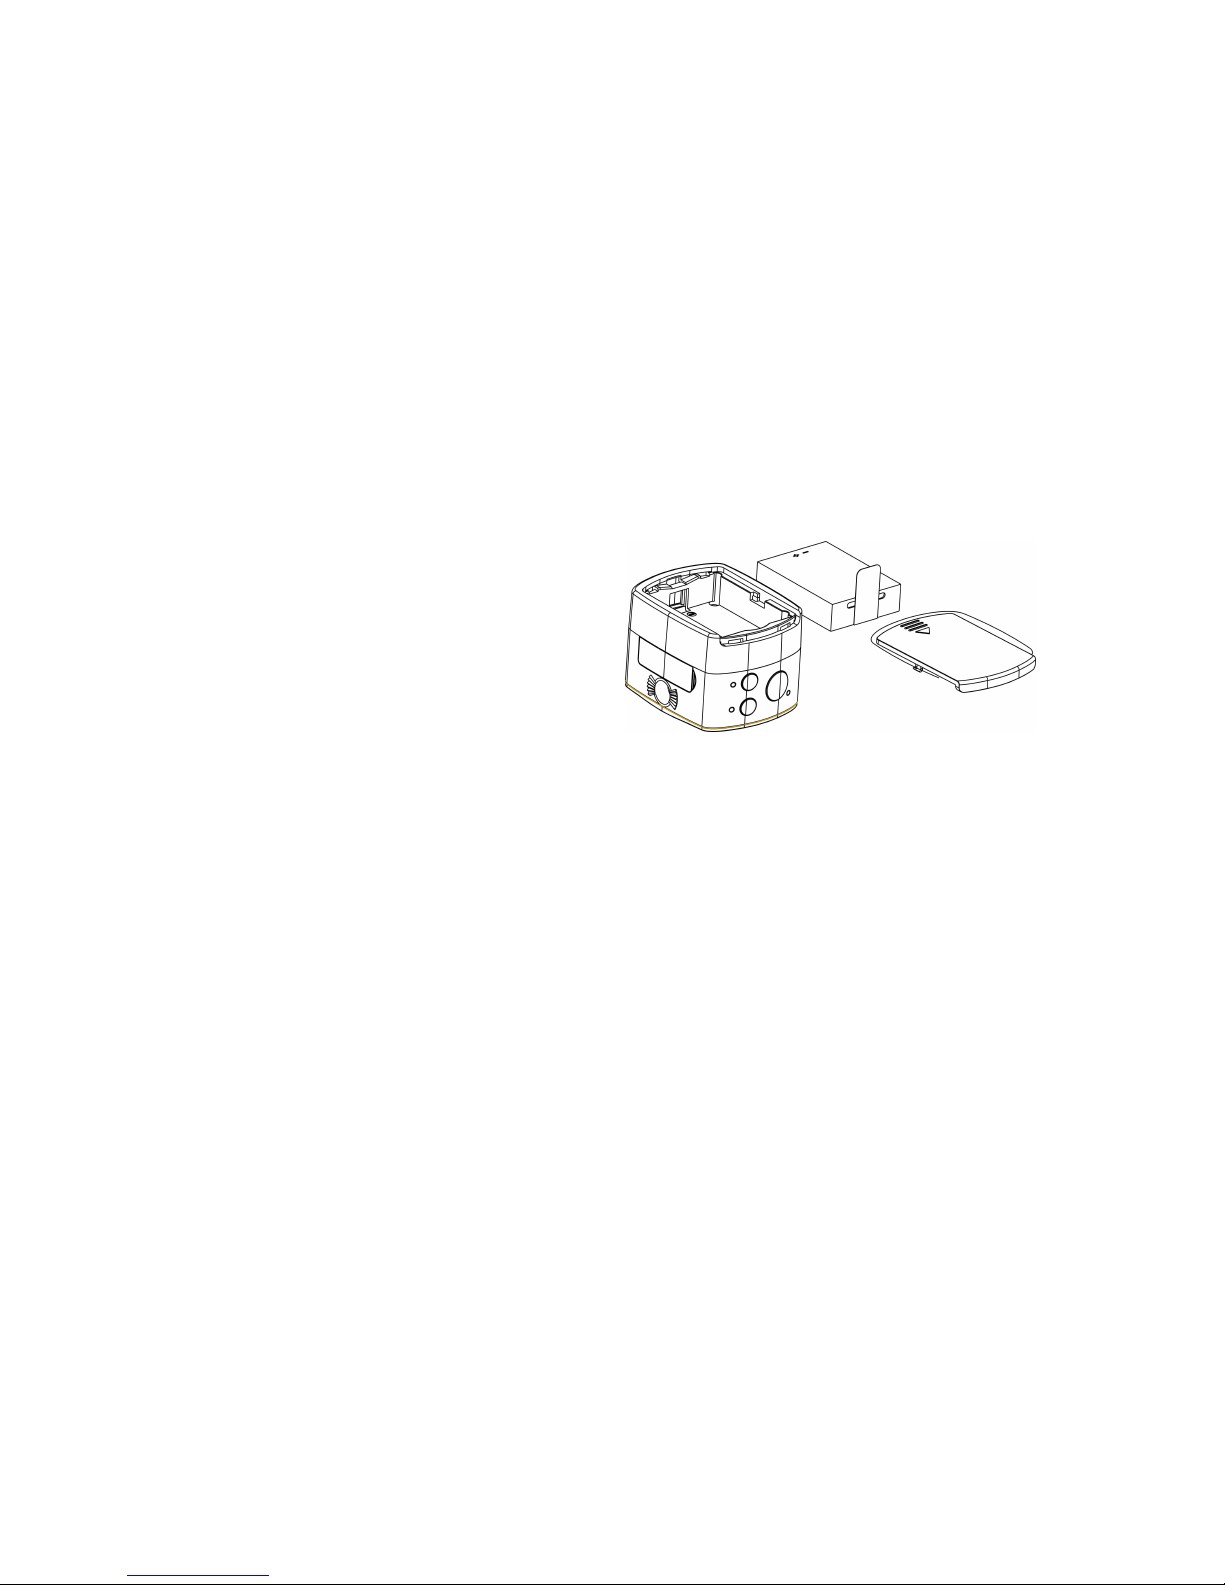
3. Charging the camera
An external chargeable lithium battery is used in this device, and its installation is as shown in the figure below:
Open the cover of the battery:
Mount the battery as per the correct marks
for positive and negative poles;
Then put on the cover of the battery;
In power-off state, connect the device to the USB interface of the computer with a USB cable for charging. The
charging indicator will be in blue in charging. It takes at least 4 hours to complete charging due to current limit
of the USB interface of the computer. After charging is completed, charging indicator will be off.
4. Switch of functional modes
This video camera has three modes: video recording mode, driving mode and photographing mode.
After power is on, modes can be switched by pressing Power/Mode key, or through APP.
Copyright © 2014 Axess Products Corporation. All Rights Reserved
6
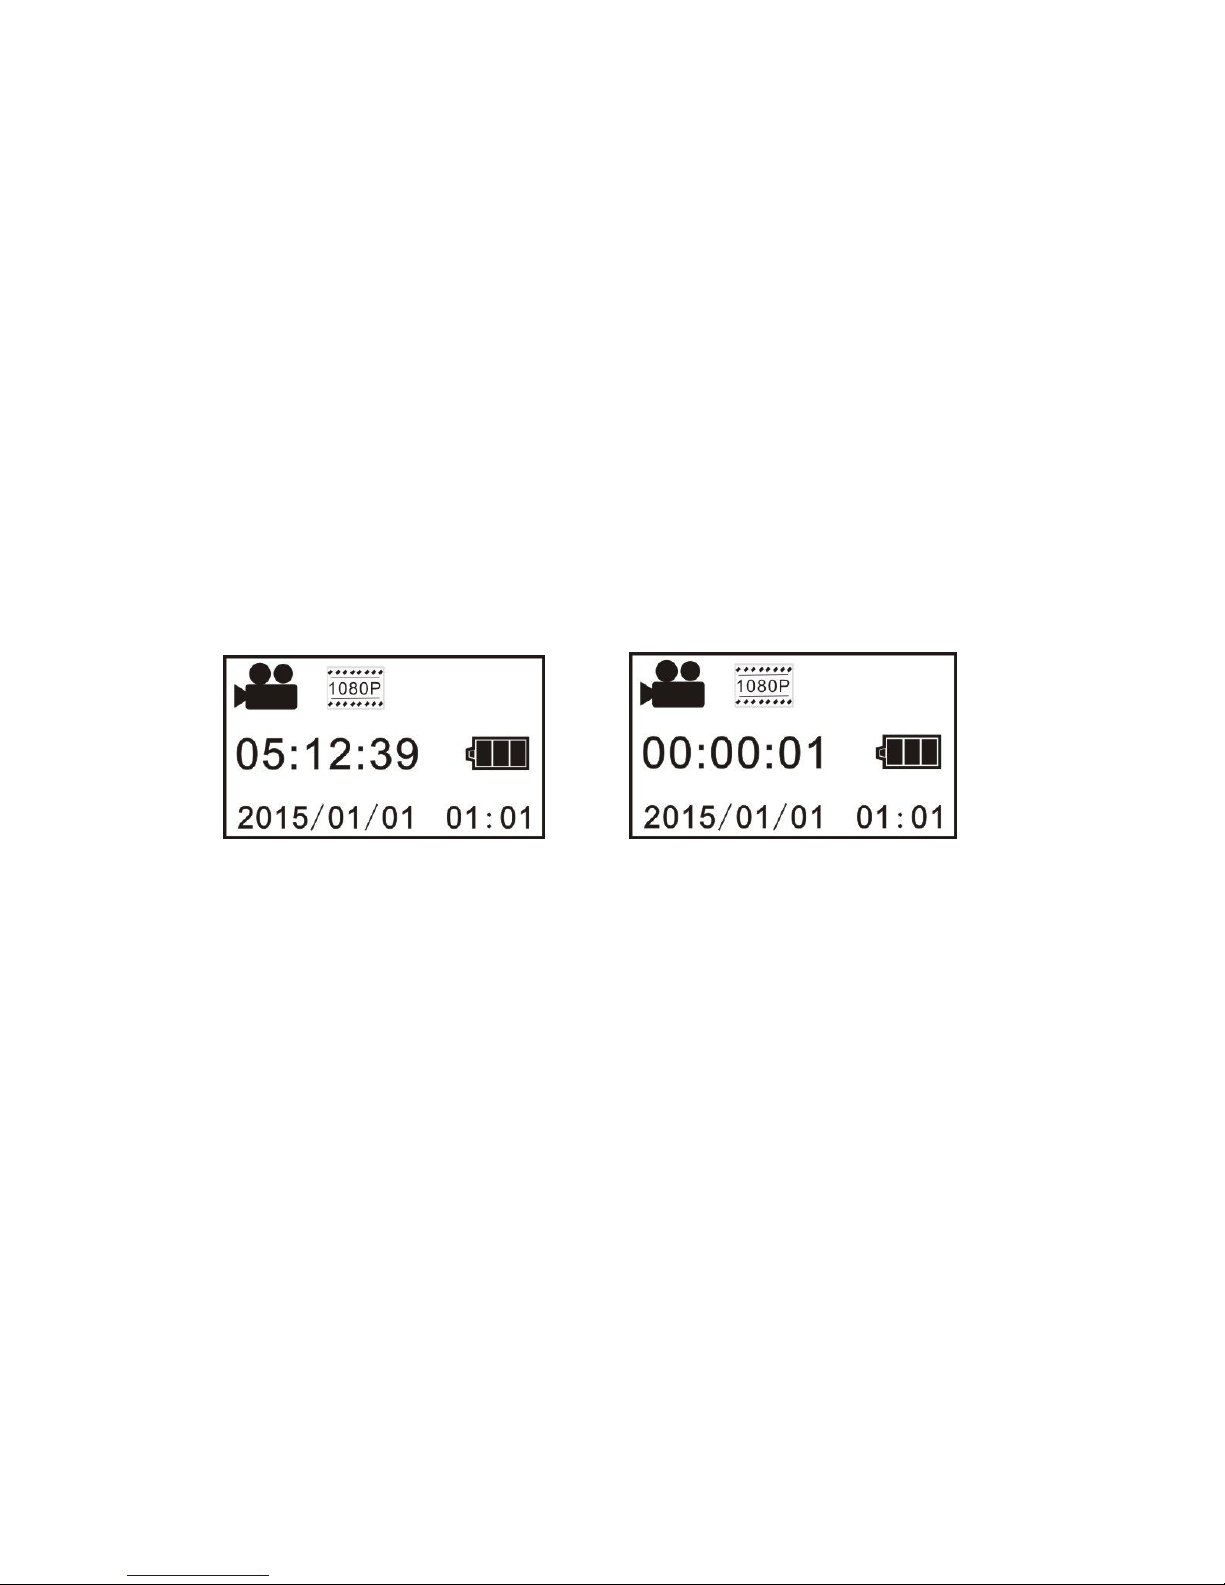
Video recording mode: As illustrated below, press Shutter key to start video recording, accompanied with a
sound from the buzzer. In video recording, Busy indicator will be flashing in red all the time, and LCD timer
will start timing. To stop video recording, press this key again.
Driving mode: In driving mode, video will be recorded in a cycled way, with a passage of video being recorded
for three minutes by default. When the card is full, the file recorded earliest will be deleted automatically so that
video recording can continue. As illustrated below, press Shutter key to start video recording, accompanied
with a sound from the buzzer. In video recording, Busy indicator will be flashing in red all the time, and LCD
Copyright © 2014 Axess Products Corporation. All Rights Reserved

7
timer will start timing. To stop video recording, press this key again.
Photographing mode: After switching to photographing mode, press Photograph key to take a photo,
accompanied with a sound from the buzzer, and Busy indicator will be flashing in red all the time in
photographing. After photographing, the timer will count in a decreasing way.
Copyright © 2014 Axess Products Corporation. All Rights Reserved

8
5. Menu operation:
After power is on, hold WIFI key for 2 seconds to activate the menu:
Menu in photographing mode Menu in setting mode
Press Power key to switch between menu in photographing mode and that in setting mode;
Press WIFI key and move the cursor to select on the menu
Press Shutter key to confirm;
Hold WIFI key to cancel setting or exit from the menu;
Copyright © 2014 Axess Products Corporation. All Rights Reserved

9
6. Application of watch-type remote controller:
1. Definition of keys on the watch-type remote controller:
Keys of the remote controller are illustrated as below:
1. Power key
2. Video recording key
3. Photographing key
4. Key indicator (red)
5. Watch band
6. Watch buckle
2. Use of watch-type remote controller:
Use the watch-type remote controller to for operations of power on, video recording, photographing, and
power off within a range of 30m without operating on the camera, and just press one key to realize
corresponding functions.
Remarks: Press any key, the two indicators on two sides will be on in red simultaneously.
Copyright © 2014 Axess Products Corporation. All Rights Reserved

10
3. Turn on or off the camera with the watch-type remote controller
Power on: Hold key till indicator is off and release, the camera will be turned on and the buzzer will
sound.
Power off: Press and release it, the camera will be turned off and the buzzer will sound.
4. Replacement of battery of watch-type remote controller
When electrical quantity in the remote controller is low and the battery needs to be replaced, open the battery
door with a coin carefully, and avoid its appearance being damaged.
II. Connecting the device to an HDTV
Connect the video camera to a HDTV with a HD cable as illustrated below. After power is on, display signals
in the video camera will be output to the HDTV automatically, and HD videos and photos can be browsed in the
HD TV.
Copyright © 2014 Axess Products Corporation. All Rights Reserved
Table des matières
Autres manuels Axess Caméra d'action


