Avalon Instruments M-tre Manuel utilisateur

M-tre
USER MANUAL
Version 1.0.0. October 2023
All the pictures and contents included here are propriety of AVALON INSTRUMENTS.
They cannot be reproduced, published, copied or transmitted in any way, including the internet, without the
written permission of AVALON INSTRUMENTS.

SAFETY RECOMMENDATIONS AND WARNINGS
•Read carefully the manual before nstall ng and us ng the mount.
•Use the power cable suppl ed w th the mount or a 12V- 3A stab l zed power supply
as suggested n the manual.
•Connect the power cable correctly and securely to the power socket.
•Do not bend, pull or press the cable as th s may damage t.
•For any ass stance or repa r, please contact only the manufacturer.
•Be sure to remove the power supply at the end of ts use or before any clean ng or
ma ntenance.
•Th s mount must be used exclus vely by adults, do not allow use to ch ldren or to
people w th reduced mental capac ty.
•Avo d to operate the mount except as str ctly nd cated n the manual.
•Mod fy ng or alter ng n any way the character st cs of the mount w ll vo d the
manufacturer’s l m ted warranty.
•Never mod fy the tens on of the belts (by ded cated screw), these s set n the factory
and any unauthor zed change w ll vo d the manufacturer’s l m ted warranty.
•After us ng t, avo d to store the mount n areas exposed to sunl ght or n wet places.
IMPORTANT NOTE: DO NOT USE ANY KIND OF LUBRICANT, SPRY, LIQUID OR
OIL ON THE BELT DRIVE SYSTEM!!!
Any use of lubr cants w ll vo d the manufacturer’s l m ted warranty.
© All Rights reserved - 2

Table of Contents
SAFETY RECOMMENDATIONS AND WARNINGS.....................................................................................................2
Technical Specifications.......................................................................................................................................................
Forewords..............................................................................................................................................................................5
1. Packing Content................................................................................................................................................................6
2 Mount Description.............................................................................................................................................................7
3. M-tre Initial Setup.............................................................................................................................................................9
3.1 Latitude Range Setting............................................................................................................................................10
3.3 Telescope installation..............................................................................................................................................13
. Telescope Balancing.......................................................................................................................................................15
.1 Dec Balancing..........................................................................................................................................................15
.2 RA Balancing...........................................................................................................................................................17
5. M-tre mount stationing....................................................................................................................................................19
5.1 Latitude Fine Adjustment........................................................................................................................................19
5.2 Azimuth Regulation.................................................................................................................................................20
5. StarGo2 Pro installing.............................................................................................................................................21
5.5 Cables connection....................................................................................................................................................23
5.3. More modern and precise approaches to Polar Alignment.............................................................................26
5.3.5 Dual Axis Alignment......................................................................................................................................26
© All Rights reserved - 3

Techn cal Spec f cat ons
Type of mount Single Arm Equatorial Fast-Reverse
Mount weight 35 Kg
Maximum load 38 kg single telescope setup, 50 kg double telescope setup
Motion System Four-step reducer via pulley timing belt system on ball
bearings, with no play on both axis. (Belt Drive System)
Construction
Materials
Machined from solid blocks of anodized aluminum with high
precision CNC machines
Transmission System Pulleys made with special polymer + fiber glass and high
quality toothed belts
Encoder 21 bit Absolute encoders
Control System StatGo2 Pro Multiplatform Astronomical Control System
Dovetail Plate Losmandy, 3" (75mm) dovetail, single knob with 2 tightening
points
Warranty 2 years from the purchase date, 5 years for the transmission
system (Belt Drive System )
© All Rights reserved -

Forewords
This manual describes the Avalon M-Tre mount, the procedures for its mounting on the
Adjustable Angle Pier and for the installation of a telescope. Additional Information on the M-
tre mount and on the StarGO2 Pro control system, containing also the procedures for the use
with third-party software and in particular with the INDI and ASCOM and Alpaca ASCOM
drivers, are reported in the StarGO2 Pro manual which is part of the mount supply.
A careful reading of this manual will enable the use of your mount safely and with the
maximum satisfaction.
The mount design and its configuration could be subject to modifications, without prior
notification, based upon designer’s improvements and the requests, if applicable, by the mount
users.
© All Rights reserved - 5

1. Pack ng Content
Open the box to take all the content out. Extract all the components from the small cardboard
box and from the mount bag side pocket putting them on a clean, flat surface.
Component L st
•Mount Head
•StarGo2 Pro Box
•StarGO control Keypad
•125/2 0 VAC / 12 VDC power supply
•Metric Hexagonal key set
•RS232 Cables
•USB Flash drive with softwares and manuals
•RJ11 RA/DEC motor cables
•Attachment screws
Package picture
© All Rights reserved - 6

2 Mount Descr pt on
The M-tre is a single arm fork Dual Dec mount devoted to deep-sky imaging in the capacity
range up to 35 kg single telescope setup and 50 kg in double telescope setup.
The M-tre design was developed on the basis of the M-uno, making use of the same technical
concepts:
•Fast Reverse technology
•Computer aided design (CAD)
•High quality manufacturing with digital control 5 axes CNC machines (CNC + CAM)
•Absolute quality materials: Anodized aluminium from milled mono-bloc, stainless steel
components and screws, brass components, techno-polymers
The M-tre motion transmission technology is based on pulley-tooth belt without play, while its
peculiar geometry makes easy the imaging at the meridian crossing regardless the typical
problem affecting the classic German Equatorial Mounts, for both the risk of touching the tripod
and the need of waiting for the object cross the meridian.
Moreover, considering that at the meridian the sky is less subject to light pollution and to
atmospheric turbulence, the M-tre is the ideal tool to shoot deepsky objects in their best
conditions, close to the meridian, especially when the time is short and the sky is not so dark and
clear.
Another M-tre basic advantage is that counterweights may be not required.
Its declination axis can be quickly balanced like in an equatorial mount, while, for the RA axis,
it is possible to fix the arm on several possible positions and to make the fine balance using a
very small counterweight.
The M-tre mount, is equipped with the new StarGo2 Pro Multiplatform Astronomical Control
System.
The use of pulleys and toothed belts has allowed to obtain several advantages: a really steady
motion without play (no backlash) and sudden peaks, factors of paramount relevance for long
guided exposures and during high magnification visual observations. These features are of
particular relevance especially for the declination axis motor that can now quickly reverse the
motion without breaks to recover the plays: from here the mount name FAST REVERSE. The
toothed belts used in the M-tre have the structure made of special material with steel strands to
avoid any deformation, elongation and stress, much better than those used in the automotive
engine distribution system (which are generally made of rubber with nylon strands).
Considering that the service time for the automotive toothed belts is around 100.000 km (60.000
miles), assuming a medium regime of 2.000 rpm and thermal stress from 0 to 90°C (30 to 195 F)
in a few minutes, we can think that the life cycle of the M-tre toothed belts will be extremely
long ! It is important to underline that in the gear-worm systems the motion transmission has
only one tangent point of contact, any errors on each of the two components will, sooner or
© All Rights reserved - 7

later, result into a tracking errors. On the contrary, in the pulley-toothed belt system, no direct
contact occurs between the pulley and the motion is transmitted by the belt engaging from 50%
to 90% of the girth surface. Consequently any error, eventually present, is averaged among the
cogs, moreover soft, greatly reducing the tracking error.
No wearing effects since no relevant frictions occur. In fact, all the pulleys and the axes rotate
on roller bearings that allow to reduce the total friction almost to zero.
Another significant advantage of very low frictions is that the risks of motor slipping during
GOTO operation is virtually null. On the contrary, it is well known the difficulty to regulate the
coupling between gear and worm in the conventional mounts. If the coupling is tight the motors
can stuck with consequent loss of the position, if the coupling is too loose the plays increase. On
the other hands, the absence of significant play in the M-tre makes the initial calibration of
guiding CCD quick and easy.
Since there are no gears, there is no need of periodical lubrication of the internal components
and therefore the maintenance is extremely reduced and limited to the external cleaning.
© All Rights reserved - 8
3. M-tre In t al Setup
The M-tre can work at latitudes range from about 35° to about 60°. This mount comes with the
latitude preset adjusted at 5°, so the first operation to perform, is the regulation of the latitude
to the value related to the site in which the mount will be used. The same operations will be
carried out in the case the mount is transferred in a site with a different value of latitude. This
operation will be described in the section 3.1 below.
It is strongly recommended that the M-tre mount is used with the Avalon Instruments T-pod
tripod which has been designed to guarantee maximum performance. If a different kind of
tripod is used, it must have dimensions and characteristics compatible with the mount weight
and with the astronomical load to be installed. Section 3.2 describes the mount installation on T-
Pod tripod.
In order to contain as much as possible the overall packaging dimension, the mount comes in the
package with the t-pod adapter flange already assembled.
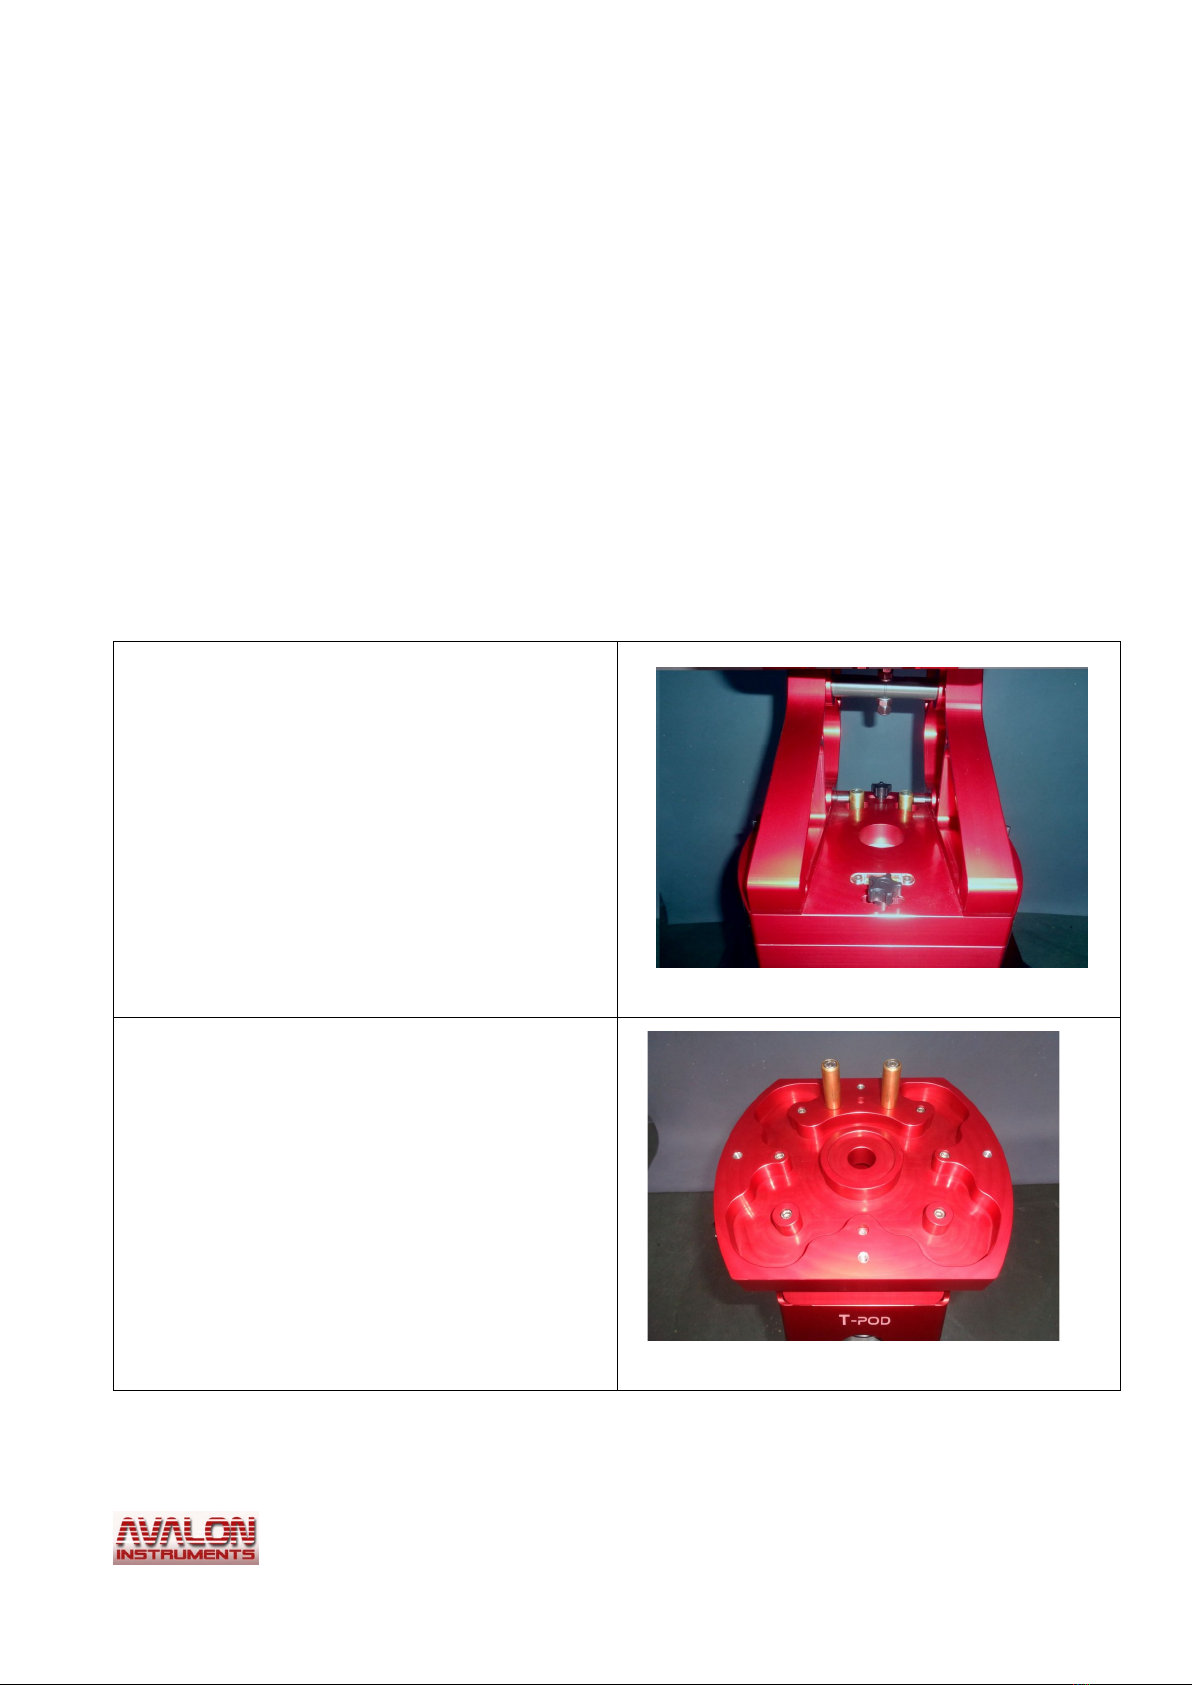
Remove the three flange fixing knob.
Remove the flange from the mount bottom and
fix it on the T-pod or on a Pier as shown in the
image on the right.
© All Rights reserved - 9

3.1 Lat tude Range Sett ng
This section describes in detail the procedures to switch set the correct range of latitudes of the
site where the mount will be used.
The following are the steps to adjust the mount’s latitude range
Rough lat tude range sett ng.
Choose the correct hole
Loosen the lateral bolts that is
currently holding the mount
lateral base flange, then loose and
remove the bolt that is holding the
adjustment cylinder in it’s
position hole position hole.
NOTE: due to the M-tre weight
it’s better to perform this
operation in at least two people,
while one unscrew the bolts, the
other should hold up the mount.
Move to upper holes for low
latitudes area, move to lower
holes for higher latitudes area.
© All Rights reserved - 10
Table des matières
Autres manuels Avalon Instruments Support et étagère


Manuels Support et étagère populaires d'autres marques

Salamander
Salamander Acadia AC/W/L400/WH Manuel utilisateur

Fohhn
Fohhn VAT-09 Guide de l'utilisateur

ricoo
ricoo FS0522 Manuel utilisateur

AMSOIL
AMSOIL BMK-22 Guide rapide

Kargo Master
Kargo Master 48220 Manuel utilisateur

Milestone AV Technologies
Milestone AV Technologies SIMPLICITY SLF2 Manuel utilisateur


