
Amber DT-two Manuel utilisateur

DT-two Thermostat User Guide
Easy Touch. Easy Warm.

02 0800 056 0494

04 Introduction
04 Technical Specifications
05 Installation
06 Wiring Diagram
07 Thermostat Controls
08 Benefits of Underfloor
Heating
10 Function & Operation
10 1. On/Off
10 2. Manual Temperature Override
10 3. Key-Lock
10 4. Brightness
11 5. Set the Time
11 6. Holiday Mode
12 7. Hold Mode
13 8. Edit Setting
14 9. Advanced Setting
16 Troubleshooting
16 Dimensions
Contents
www.amberufh.co.uk 03
Introduction
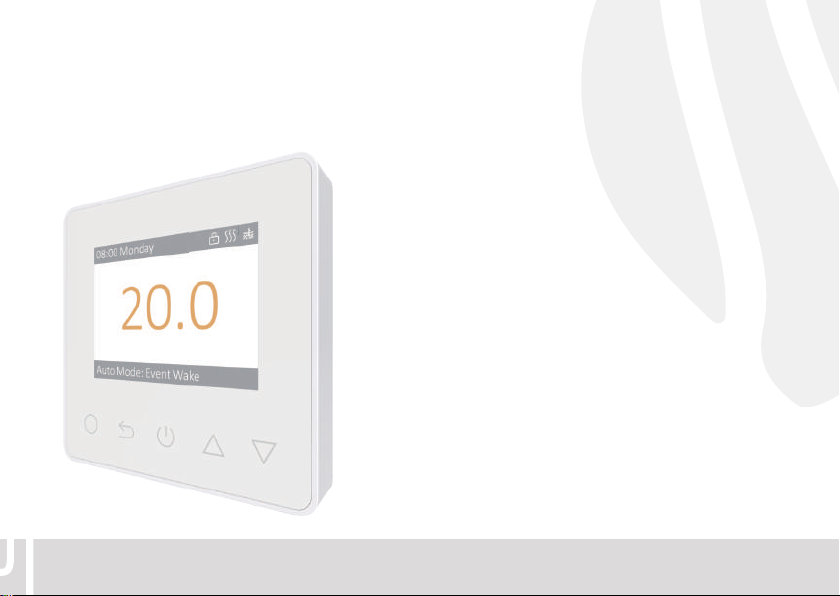
The DT-two is an intuitive programmable thermostat used to control your underfloor heating. Featuring a colour
screen, 7 day schedule and open window technology, it will keep your home at a comfortable temperature whilst
minimising energy use.
04 0800 056 0494
APP
for ET-84W
Technical Specifications
Supply Voltage: 85-265Vac 50/60Hz
Standby Power: < 1W
Max Load: 16A
IP Class: IP21
Cable Specification: ≤2.5mm²
APP
for ET-84W

TECHNICAL SPECIFICATIONS
INTRODUCTION INSTALLATION
The 84 series is an intuitive programmable thermostat used to control
electrical floor heating system or water heating system. It will keep
home at comfortable temp whilst minimizing energy use. Install the
app on your smart phone to control heating system remotely with the
WiFi or zigbee thermostat.
01 02
Supply voltage: 85-265Vac 50/60Hz
Standby power: <1W
Max load: 16A
IP class: IP21
Cable specification: ≤2.5mm²
Step 1:
Loosen fixing screw
located in the bottom of the
thermostat to get the front
panel.
Step 2: Connect the thermo-
stat according to the Wiring
Instruction.
Step 3: Insert the back panel
into wall box with provided
screws.
Step 4: Align top part of front
panel and back panel to fit
these two parts. Then fix
them with screw.
TECHNICAL SPECIFICATIONS
INTRODUCTION INSTALLATION
The 84 series is an intuitive programmable thermostat used to control
electrical floor heating system or water heating system. It will keep
home at comfortable temp whilst minimizing energy use. Install the
app on your smart phone to control heating system remotely with the
WiFi or zigbee thermostat.
01 02
Supply voltage: 85-265Vac 50/60Hz
Standby power: <1W
Max load: 16A
IP class: IP21
Cable specification: ≤2.5mm²
Step 1: Loosen fixing screw
located in the bottom of the
thermostat to get the front
panel.
Step 2: Connect the thermo-
stat according to the Wiring
Instruction.
Step 3: Insert the back panel
into wall box with provided
screws.
Step 4: Align top part of front
panel and back panel to fit
these two parts. Then fix
them with screw.
TECHNICAL SPECIFICATIONS
INTRODUCTION INSTALLATION
The 84 series is an intuitive programmable thermostat used to control
electrical floor heating system or water heating system. It will keep
home at comfortable temp whilst minimizing energy use. Install the
app on your smart phone to control heating system remotely with the
WiFi or zigbee thermostat.
01 02
Supply voltage: 85-265Vac 50/60Hz
Standby power: <1W
Max load: 16A
IP class: IP21
Cable specification: ≤2.5mm²
Step 1: Loosen fixing screw
located in the bottom of the
thermostat to get the front
panel.
Step 2: Connect the thermo-
stat according to the Wiring
Instruction.
Step 3: Insert the back panel
into wall box with provided
screws.
Step 4: Align top part of front
panel and back panel to fit
these two parts. Then fix
them with screw.
Loosen the fixing screw
located at the bottom of
the thermostat to remove
the front panel from the
back panel.
Connect the thermostat
according to the
wiring diagram.
Align the top part of
the front panel with the
back panel and connect
them back together,
then replace the fixing
screw at the bottom.
www.amberufh.co.uk 05
1 2
3 4
Insert the back panel
into the wall box with the
screws provided.
TECHNICAL SPECIFICATIONS
INTRODUCTION INSTALLATION
The 84 series is an intuitive programmable thermostat used to control
electrical floor heating system or water heating system. It will keep
home at comfortable temp whilst minimizing energy use. Install the
app on your smart phone to control heating system remotely with the
WiFi or zigbee thermostat.
01 02
Supply voltage: 85-265Vac 50/60Hz
Standby power: <1W
Max load: 16A
IP class: IP21
Cable specification: ≤2.5mm²
Step 1: Loosen fixing screw
located in the bottom of the
thermostat to get the front
panel.
Step 2: Connect the thermo-
stat according to the Wiring
Instruction.
Step 3: Insert the back panel
into wall box with provided
screws.
Step 4: Align top part of front
panel and back panel to fit
these two parts. Then fix
them with screw.
Installation

06 retail@amberufh.co.uk
Wiring Diagram
Suggestion: Please keep the max load around 90% of 16A to prolong the lifetime.
Down Key
Up Key
Power Key
Confirm Key
Return Key
Clock
Period
Detected Temperature
Lock / Heat / WiFi / Floor Sensor
Suggestion: Please keep the max load around 90% of 16A to prolong the lifetime.
03 04
MAX LOAD: 16A
SENSOR
L1N1 N L
FLOOR
SENSOR
POWER
85V-265V
50/60Hz
IP 21
N1 NLL1 S2 COM S1
POWER FLOOR SENSOR - The floor sensor must be installed in conduitFLOOR SENSOR - The floor sensor must be installed in conduit
to enable replacement (available separately) and validate yourto enable replacement (available separately) and validate your
thermostat warranty.thermostat warranty.

0800 056 0494 07
Thermostat Symbols
Down Key
Up Key
Power Key
Confirm Key
Return Key
Clock
Period
Temperature
Lock / Heat / Sensor
Suggestion: Please keep the max load around 90% of 16A to prolong the lifetime.
03 04
MAX LOAD: 16A
SENSOR
N1 N L
FLOOR
SENSOR
POWER
85V-265V
50/60Hz
IP 21
N1 NLL1 COM S1
POWER
Down Key
Up Key
Power Key
Confirm Key
Return Key
Clock
Period
Temperature
Lock / Heat / WiFi / Sensor
Suggestion: Please keep the max load around 90% of 16A to prolong the lifetime.
03 04
MAX LOAD: 16A
SENSOR
N1 N L
FLOOR
SENSOR
POWER
85V-265V
50/60Hz
IP 21
N1 NLL1 COM S1
POWER

08 retail@amberufh.co.uk
Luxurious warm floors
Even heat from floor to ceiling
Works with all floor coverings
Saving space throughout your home
Energy efficient and cost effective
Benefits of Underfloor Heating

0800 056 0494 09

10 0800 056 0494
Function & Operation
1. On/Off
Press 1to turn On/Off. Note: When frost protection is active, the thermostat will maintain the frost protection
temperature when on standby.
2. Manual Temperature Override
You can temporarily override the current temperature, if this done it will only be for the current timed period
and will not be saved. To override the current temperature, with the temperature showing, press
@ \
to set
the temporary override temperature. Press Oto confirm and return to the displayed temperature.
3. Key-Lock
Lock all keys to prevent the settings from being changed. On the actual temperature interface, press and hold
r
for 3 seconds to lock or unlock all the keys.
4. Brightness
Change the brightness of the display.
On the actual temperature interface, press O to enter Setting on the thermostat.
Press
@ \
to select Brightness.
Press Oto enter Brightness.
Press
@ \
to set brightness.
Press Oto go back to Setting.
Table des matières
Autres manuels Amber Thermostat


Manuels Thermostat populaires d'autres marques

EWELLY
EWELLY EW-181 Manuel utilisateur

Prolon
Prolon T1100 Instructions d'installation

Computherm
Computherm Q20 Manuel utilisateur

Heatmiser
Heatmiser neoStat Manuel utilisateur

Aube Technologies
Aube Technologies TH111GFCI-NP 240 VCA Manuel utilisateur

Mars
Mars HEAT CONTROLLER IR Wireless Thermostat Manuel utilisateur


