Albis SceneGate Micro Manuel utilisateur

SceneGate Micro
User Manual

2

3
Content
1 Introduction ..................................................................................... 4
1.1 Scope .............................................................................................. 4
1.2 Features .......................................................................................... 4
1.3 What is High-Denition Television (HDTV)...................................... 5
2 Package Content............................................................................. 5
3 Getting familiar with your STB......................................................... 6
3.1 Front View ....................................................................................... 6
3.2 Rear View........................................................................................ 8
3.3 Remote Control Functions .............................................................. 8
3.3.1 Inserting/Replacing the Batteries .................................................... 9
3.3.2 Using the Remote Control............................................................... 9
4 Installation ..................................................................................... 10
4.1 Picking a good Spot ...................................................................... 10
4.2 Connecting a High Denition TV-Set via HDMI™ ..........................11
4.3 Connecting an Audio/Video Device (optional)............................... 12
4.4 Installation Example ...................................................................... 13
4.5 Connecting the Power Cord .......................................................... 13
5 Switching on the STB the rst time ............................................... 14
5.1 Software Update ........................................................................... 14
6 Troubleshooting............................................................................. 15
7 Abbreviations ................................................................................ 16
8 Technical Data............................................................................... 17
9 Disposal of Equipment .................................................................. 17

4
1 Introduction
1.1 Scope
The document provides step-by-step instructions of how to install and opera-
te the Set-top Box (STB) and additional technical information. This document
is provided by Albis Technologies.
Note:
Before connecting the external power supply for the rst time to the STB,
make sure the STB has been connected properly. For this purpose follow
this user manual carefully step by step.
The STB may run a software update when powered for the rst time. Please
be patient and do not unplug the external power supply until the software
update is nished!
The network specic conguration data with the Graphical User Interface
(GUI) depends on the IPTV Supplier and is not part of this manual. It has to
be provided by the IPTV supplier in addition to the information in this manu-
al. Please follow the instructions in this manual carefully. Do not throw this
manual away, keep it near your STB and check if something is not working
properly. Damages as a result of incorrect handling lead to loss of warranty.
1.2 Features
The STB supports:
High Denition Television (HDTV) with resolution up to 1080p •
H.264 - the new bandwidth optimized Video Codec for improved picture •
quality
Digital Television over IP •
Video on Demand •
High-speed Internet surng over the TV, Web mail and Simple Gaming •
(depending on your Service Provider)
To be able to use all these features you will require a subscription with a
Network Operator or Service Provider.

5
1.3 What is High-Denition Television (HDTV)
What is HDTV and how does it differ from today‘s analog TV? To learn more,
here comes some helpful information.
Analog TV ist the type of TV broadcast you may be most familiar with. A
standard analog TV can display an image at a resolution of 480i (NTSC) or
576i (PAL).
Digital TV is a new system for broadcasting TV signals delivering higher qua-
lity for audio and video. Digital TV requires a television set that can receive
and display digital images at resolutions of 1080p, 1080i, 720p, 576i, 480p
or 480i.
HDTV stands for “High Denition Television” and provides best-ever picture
quality. In 16:9 widescreen format, with Dolby Digital surround sound and
picture resolution almost ve times that of analog TV, HDTV gives viewers a
cinema experience at home.
2 Package Content
Unpack the product with caution; inspect the items closely to make sure no
item is missing or damaged.
Set-Top Box •
External mains power supply•
User Manual•
Product Safety, Copyright Notice, License Notice•
Infrared remote control & batteries •
Optional content:
Ethernet cable •
Combined video (CVBS) and audio (L/R) cable•
S/PDIF optical cable•
HDMI™ cable •
External infrared receiver•
If you nd any item damaged or missing, contact your local distributor
immediately. Keep the box and packing material for future use.

6
3 Getting familiar with your STB
3.1 Front view
On the STB‘s front side you nd the Infrared Receiver, the Operation Mode
Indicator and an USB-Interface.
Operation Mode Indicator
The meaning of the Operation Mode Indicator is as follows:
Note:
Do not unplug the external power plug during a software update! This could
damage your STB
Standby Mode
Operation Mode Illumination of Standby Button
STB switched off OFF
STB in standby red
STB switched on (startup and operation) green
Key pressed on Remote Control green ashing
During Software Update green
Software Update successful green
Software Upadate failed red fast blinking
IR Receiver
Operation Mode
Indicator
Standby Button on
the Remote Control
You can set the STB to standby by pressing the standby
button on the Remote Control.
The STB can be switched on by pressing the standby button
on the Remote Control again. After switching on the STB is
ready to use within a few seconds.
7
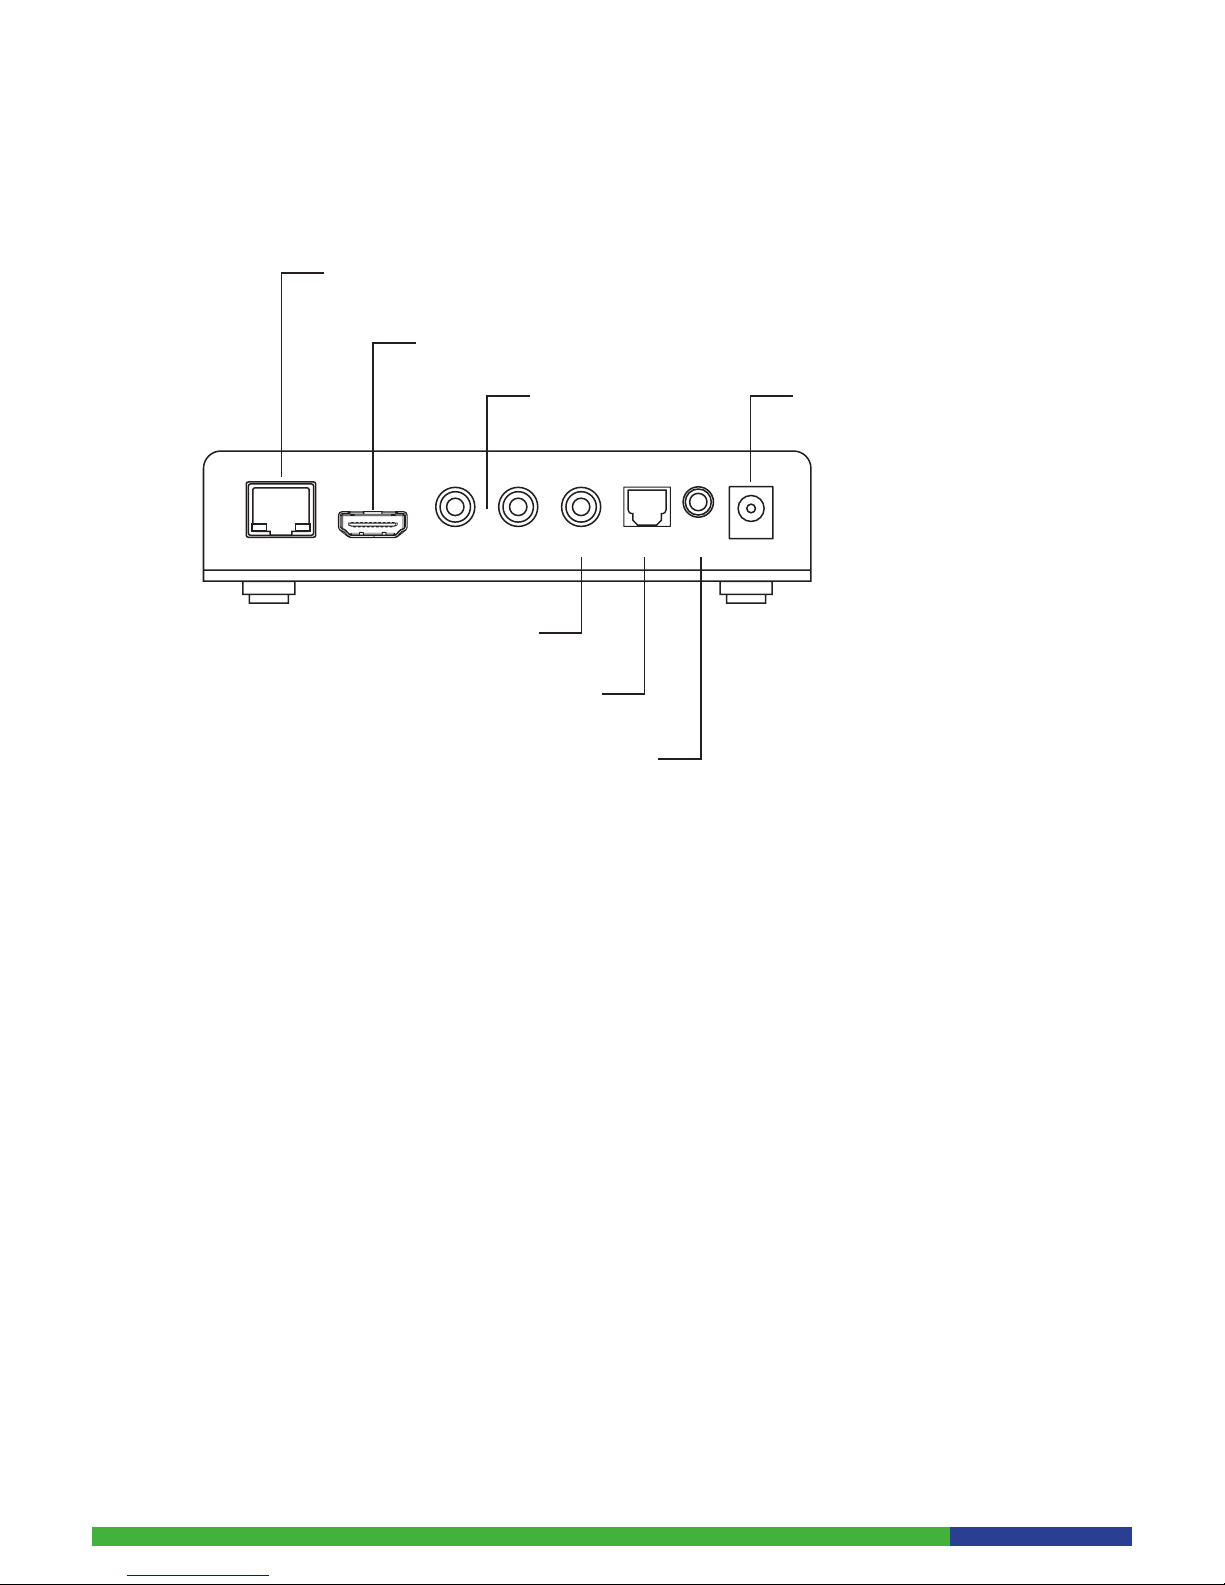
3.2 Rear View
The rear side allows you to connect all your home entertainment equipment
to the STB.
LAN HDMIR CVBS S/PDIF IR DC12VL
Network Connector 10/100Base-T
(connect a lead from here to your network connection socket)
CVBS Video Output
Digital Audio Output
(for an optical connection to
your audio receiver)
HDMITM 1.3
(output connector for High Definition)
Analog Audio Output
(right / left)
Power Jack
(for the power lead)
IR
(for connection of an
external Infrared Receiver)
8
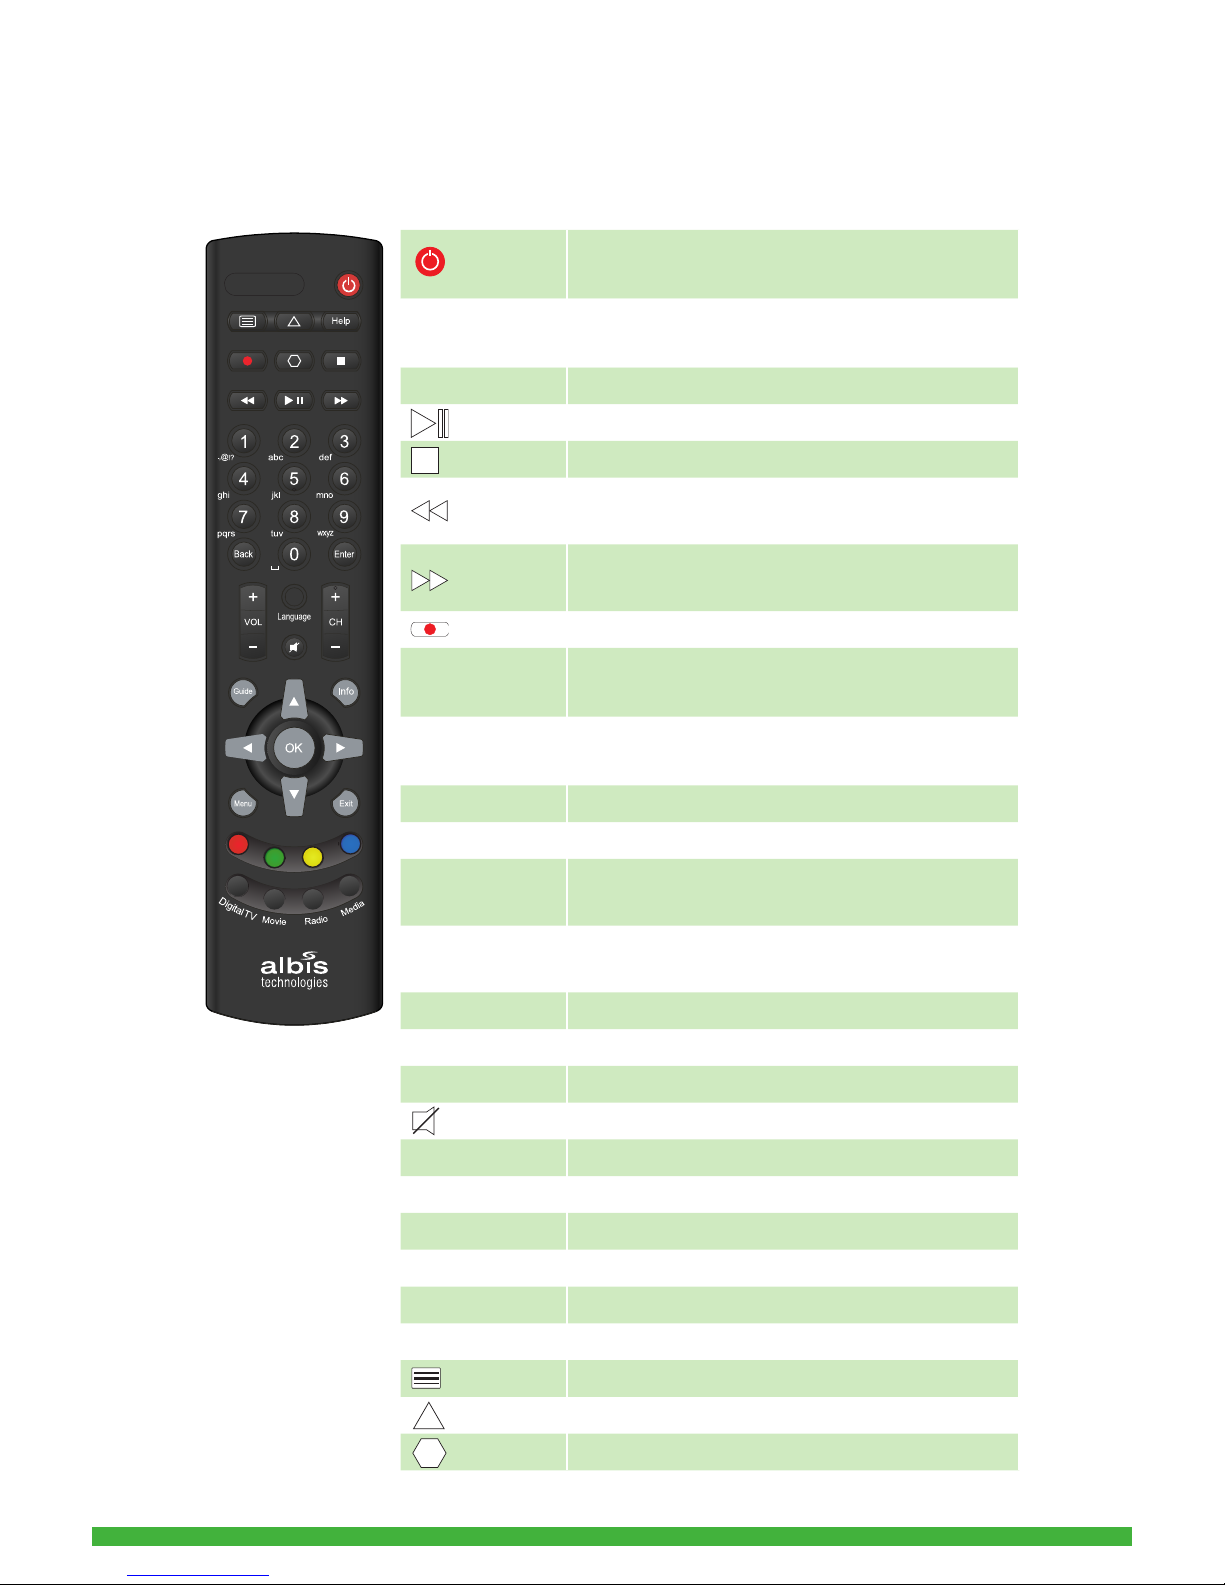
3.3 Remote Control Functions
The following gure depicts the layout of the remote control delivered with
the STB. The functionality depends on the STB Application feature set.
Switch between Operation and Standby
mode
NUMMERICAL
BUTTONS
Enter a TV/Radio channel number
MENU Display or Exit the menu
Play/Pause the live program, recording or movie
Stop a recording or go to the live program
Rewinds at high speed. Each time you press this
button the rewind speed is increased
Fast forward at high speed. Each time you press
this button the fast forward speed is increased
Records a program
COLOUR
BUTTONS
Select colour keys for interactive inputs or Teletext
services
ARROW
BUTTONS
Changes the channel or navigates through the
menu options
Exit Exits the Menu or Guide
VOL (+/-) Adjusts the STB volume level
Info Displays the information about the channel and
programs
Guide Display Program Guide and toggle through Favo-
rites
Enter/OK Select the active item
Back Returns to the previous channel or menu option
CH (+/-) Changes the Channel or Page up and down
Mute/Unmute the STB audio
Help Quick navigation to STB help page
DigitalTV Quick navigation to Digital TV
Movie Quick navigation to demand movie selection
Media Quick navigation to web browser
Radio Quick navigation to radio channels
Language Select video language
Enter the Teletext service
Special function 1
Special function 2
P
o
w
e
r
ECEL JU090601
UPPER CASE /LOWER CASE/BATTERY DOOR
Material color:BLACK
Printing color: WHITE
BLACK
PANTONE COOL GRAY 8C
Printing color:WHITE
RUBBER MATERIAL COLOR:
RED(PO-192-R)
GREEN(PZ-385-G)
YELLOW(PZ-351-Y)
BLUE(PZ-391-B)
9
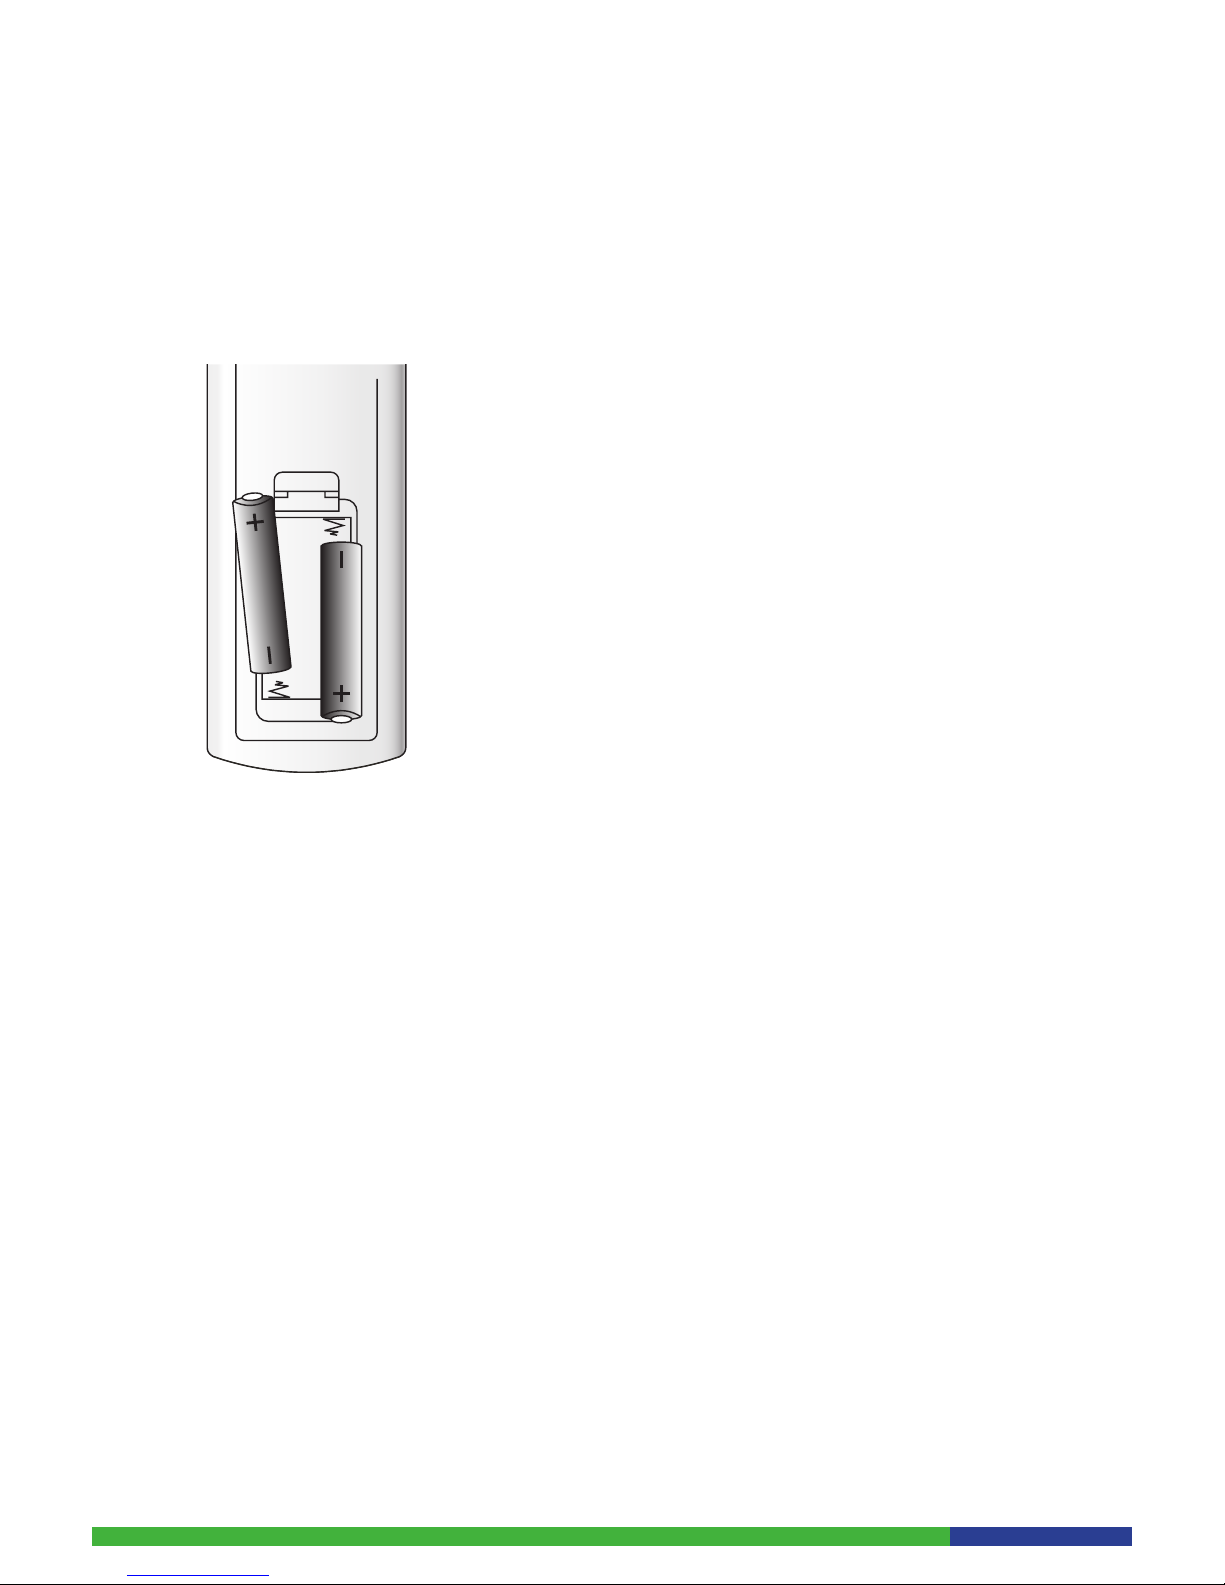
3.3.1 Inserting/Replacing the Batteries
The remote control is powered by 2 batteries (Type AAA). The life time of the
batteries depends on how often you use your remote control. The battery
compartment is on the bottom side of your remote control. Lift off the cover
by pushing the clip.
Insert batteries as shown and replace the cover.
Precautions for battery replacement:
When inserting new batteries, make sure that they are the correct way •
round.
Remove empty batteries immediately.•
When disposing used batteries, please comply with governmental regulati-•
ons or environmental public institution’s rules that apply in your country.
Never attempt to recharge the batteries.•
Always replace both batteries at the same time. Do not use old and new-•
batteries together, and do not use batteries of different types.
If the remote control is not going to be used for a long time, remove the •
batteries.
3.3.2 Using the Remote Control
Navigating through the main menu:
Press the ‘Menu’ button on the remote control. The main menu appears 1.
on the left side of the TV-Screen.
Use the ‘Arrow’ buttons to navigate through the menu.2.
Press the ‘OK’ button to activate the selected function.3.
10
4 Installation
This chapter describes the installation of the STB and connection to your
Audio/Video equipment.
Note:
Do not connect the external power supply to the STB until you have nished
the installation procedure.
4.1 Picking a good Spot
Stability
Place your STB on a rm, at surface.•
Keep away from domestic heating equipment and avoid direct sunlight.•
Allow about 10 cm of free space all around the STB for adequate •
ventilation.
Do not cover the ventilation holes.•
Prolonging the lifespan
Avoid storing or operating the STB in abnormal conditions. High tempe-•
ratures or excessive humidity could cause the unit to malfunction and
shorten its useful lifespan.
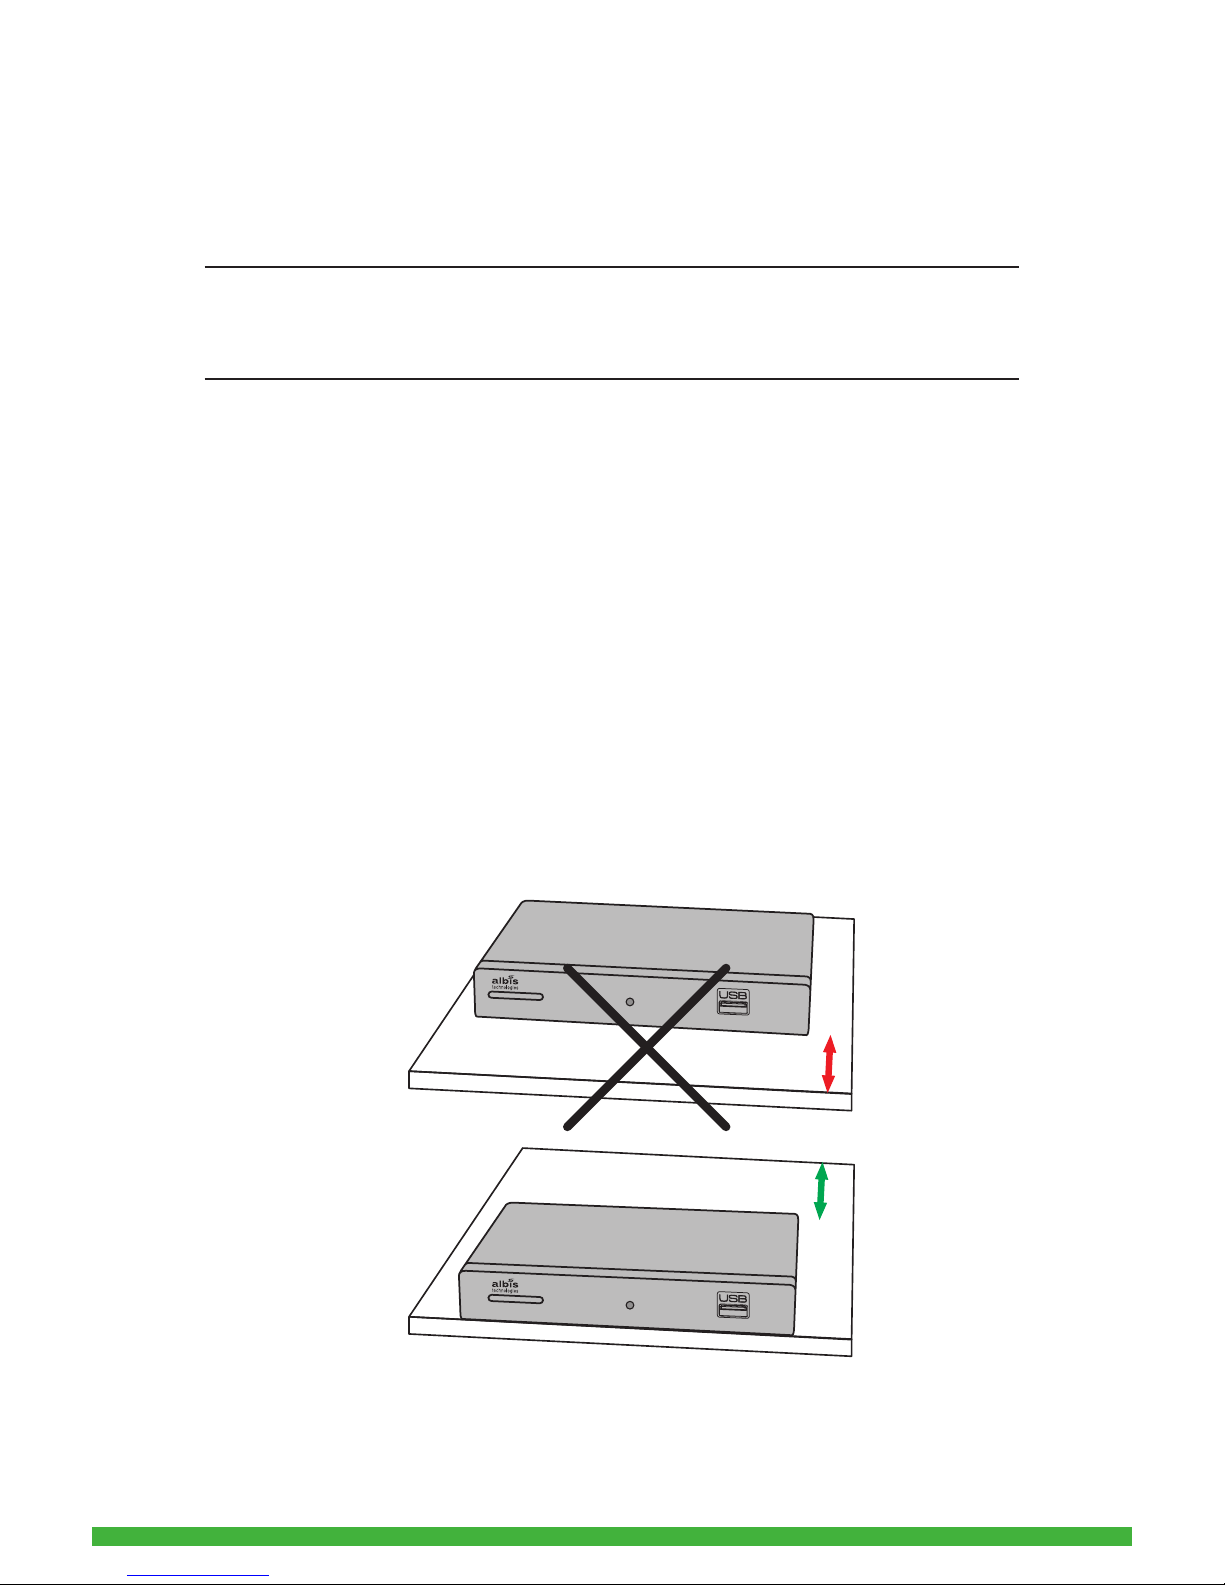
To avoid reections and irritations of the infrared receiver of the STB, make
sure to place the STB close to the edge of the shelf as depicted below.
Table des matières


