Akai ASB90I Manuel utilisateur
England: ASB90I
Index
1. Safety
2. Preparations for use
3. Installation
4. Functions
5. Operation
o5.1. Master power switch
o5.2. Quick start
o5.3. iPod functions
o5.4. Radio functions
o5.5. Clock functions
6. Cleaning and maintenance
7. Technical data
8. Disposal of used electrical and electronic equipment
Safety
Intended use
The iPod Music System functions as a docking station to play music from an iPod. The appliance also
plays music from radio. The clock function includes an alarm and sleep program.
Read the manual carefully before the first use.
Labels in this manual
WARNING A warning means that injury or death is possible if the instructions are not obeyed.
CAUTION A caution means that damage to the equipment is possible.

A note gives additional information, e.g. for a procedure.
General safety instructions
WARNING Do not put force on the appliance. The appliance can fall and can cause serious injury.
CAUTION Do not spill any liquid on the appliance.
WARNING Do not insert any objects in the ventilation holes.
CAUTION Do not block the ventilation holes.
This appliance is double insulated; therefore no earth wire is required. Always check that the mains
voltage corresponds to the voltage on the rating plate.
Preparations for use
Unpacking
Unpack the appliance carefully.
Check the package contents as described below. If any item is missing, please contact your
reseller.
Remove the labels from the front panel carefully if present.
We recommend that you retain the original carton and packing materials in case it ever becomes
necessary to return your product for service. This is the only way to safely protect the product against
damage in transit. If you do dispose of the carton and the packing materials, please remember to
recycle with due care to the environment.
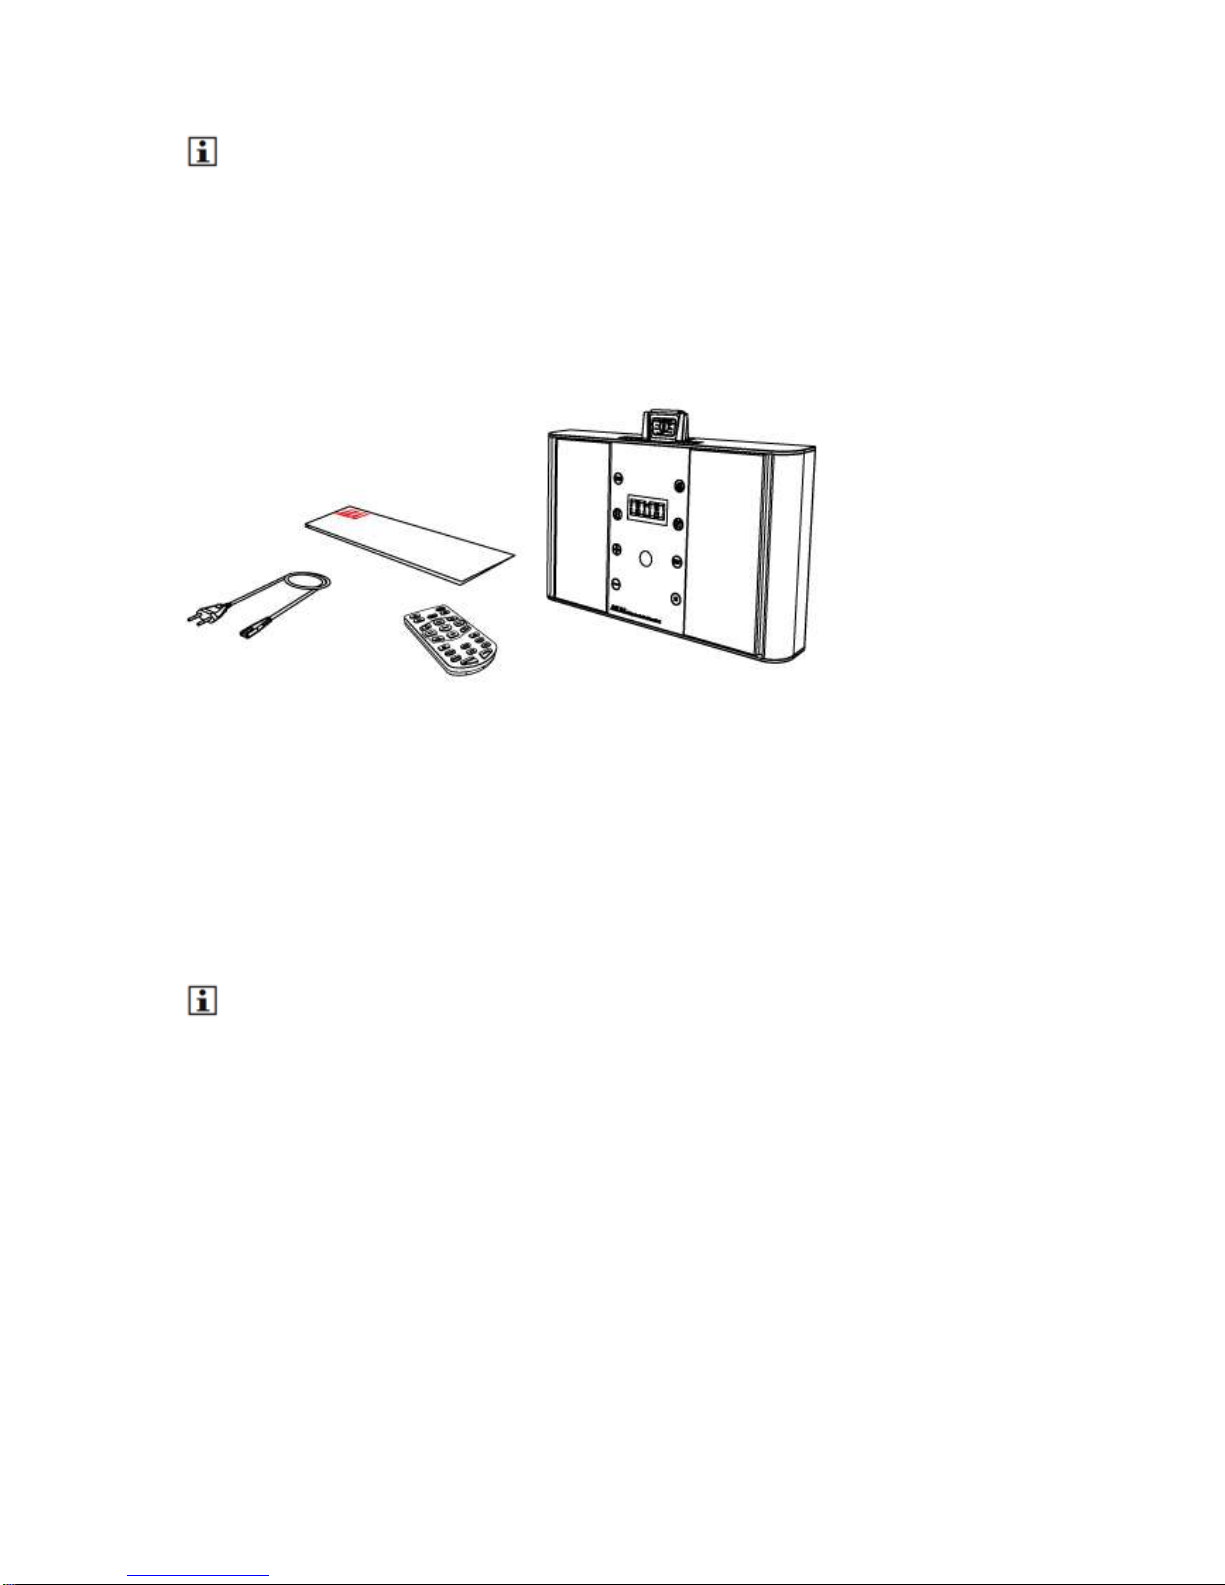
Package contents
The following items are included in the received package:
1 iPod Music System
1 Remote control
1 Button cell (CR2025)
1 x Quick start guide
If any item is missing, please contact your reseller.
Installation
Put the appliance on a horizontal flat surface.
Connect the random equipment to the appliance. Read the paragraph "Connecting random
equipment".
Connect the appliance to the mains.
Activate the battery.
Read the paragraph "Remote control".
CAUTION Do not put the appliance near a heat source.
Do not expose the appliance to direct sunlight.
This appliance is equipped with rubber feet to prevent it from moving. The feet are made from non-
migrating material specially formulated to avoid leaving any marks or stains on furniture. However,
certain types of furniture polishes, wood preservatives or cleaning sprays cause the rubber to soften
and leave marks or a residue on the furniture, and potentially risk the surface to become damaged. To
prevent damage to wooden surfaces, we recommend that you apply self-adhesive pads to the bottom
of the rubber feet before installation.
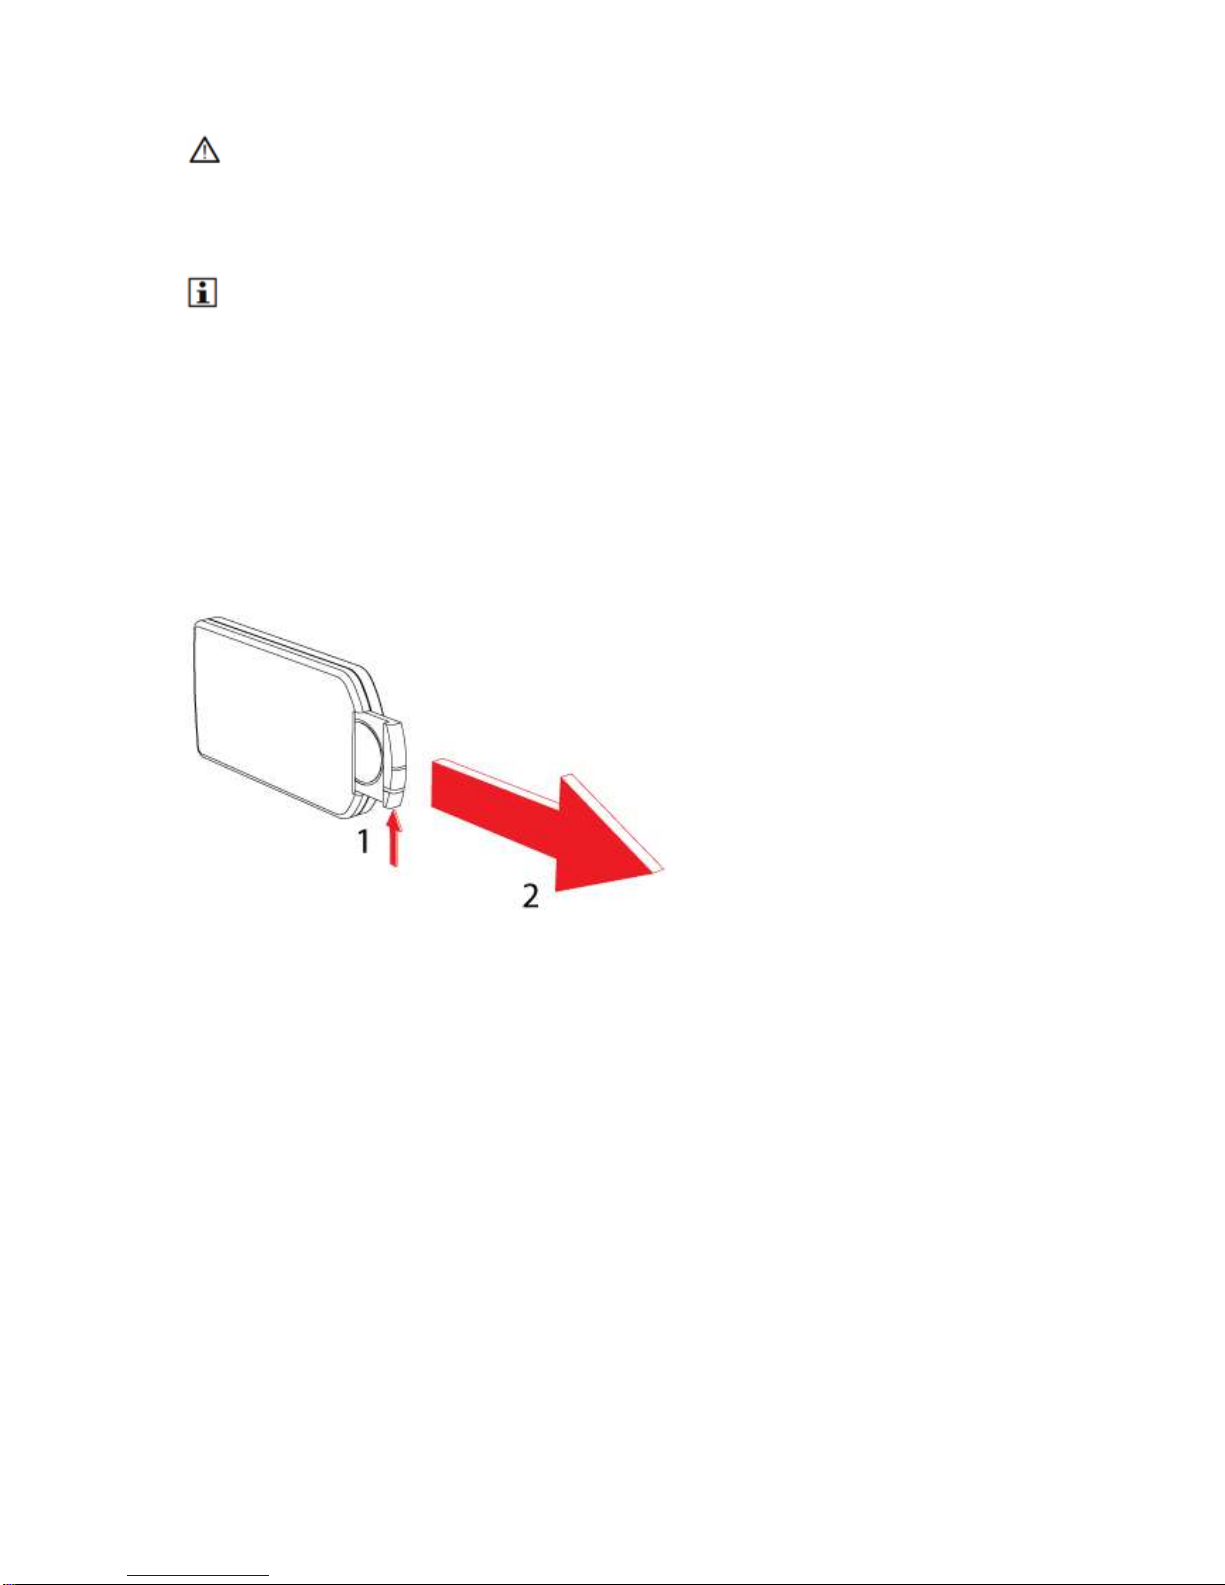
Install batteries
Insert/Replace the battery
Press the catch and at the same time pull out the battery tray.
Insert 1 lithium battery, type CR2025 3V battery with the stamped (+) mark facing upward.
Insert the battery tray into the remote control.
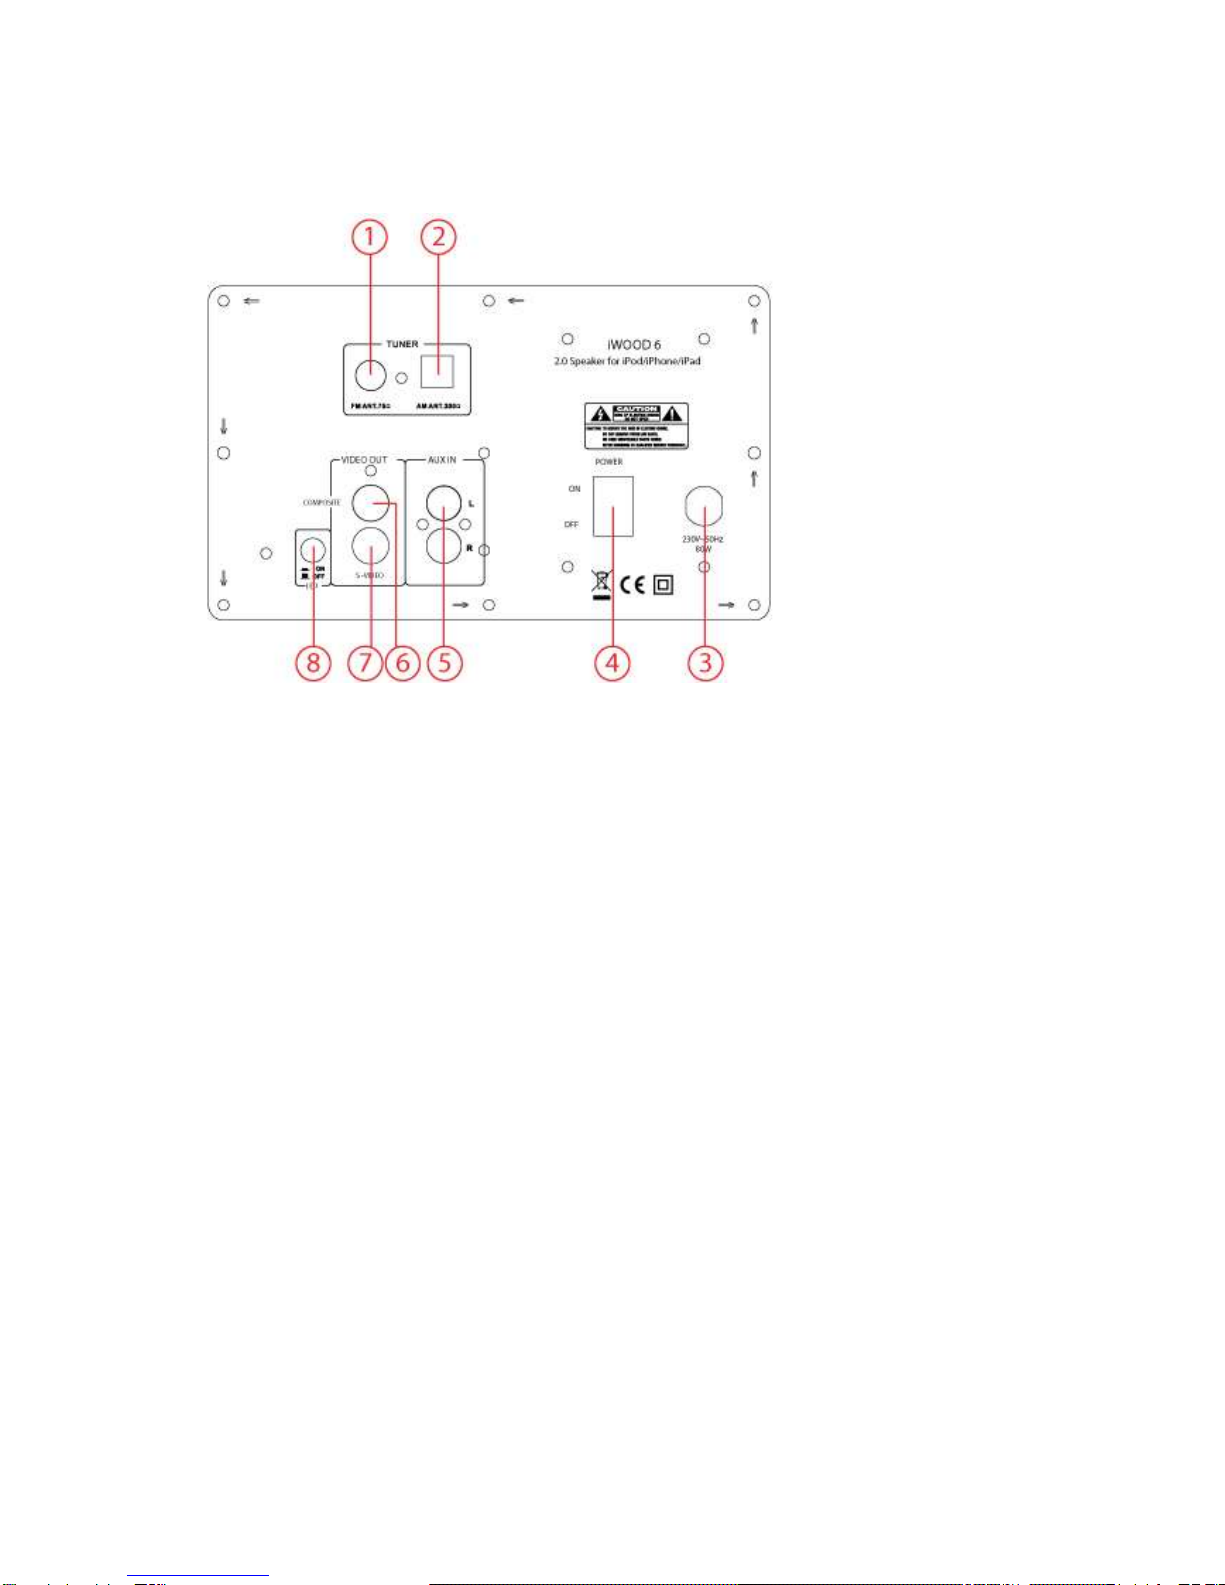
Connections
1. FM 75 OHM antenna input
2. AM 300 OHM antenna input
220V connection
On / Off key (POWER)
1. AUX IN
2. Composite video OUT
3. S-Video
4. Warning LED
Connecting the system
Audio connections (input)
These connections allow you to receive audio signal from a connected CD/DVD player or amplifier.
Connect a suitable cable to the R/L channels of the AUX IN connection.
The video connections allow you to send to video signal (still images or movies) to a connected TV.
The appliance has the following video outputs (in order of preference):
S-Video: Insert a suitable cable into the S-VIDEO OUTPUT connection.
Composite video: Insert a suitable cable into the COMPOSITE connection.
Do not make all connections simultaneously as this will affect the output quality.
Aerial connection (FM radio)
Insert an FM aerial or a suitable cable into the FM ANT connection.
Aerial connection (AM radio)
Place the aerial on a horizontal flat surface. Place the aerial close enough to the appliance to be able
to connect the wires.
To connect the aerial to the appliance:
1. Press the latches to open the terminals. Keep the latches depressed.
2. Connect the wire ends to the appliance.
3. Release the latches to lock the wire ends.
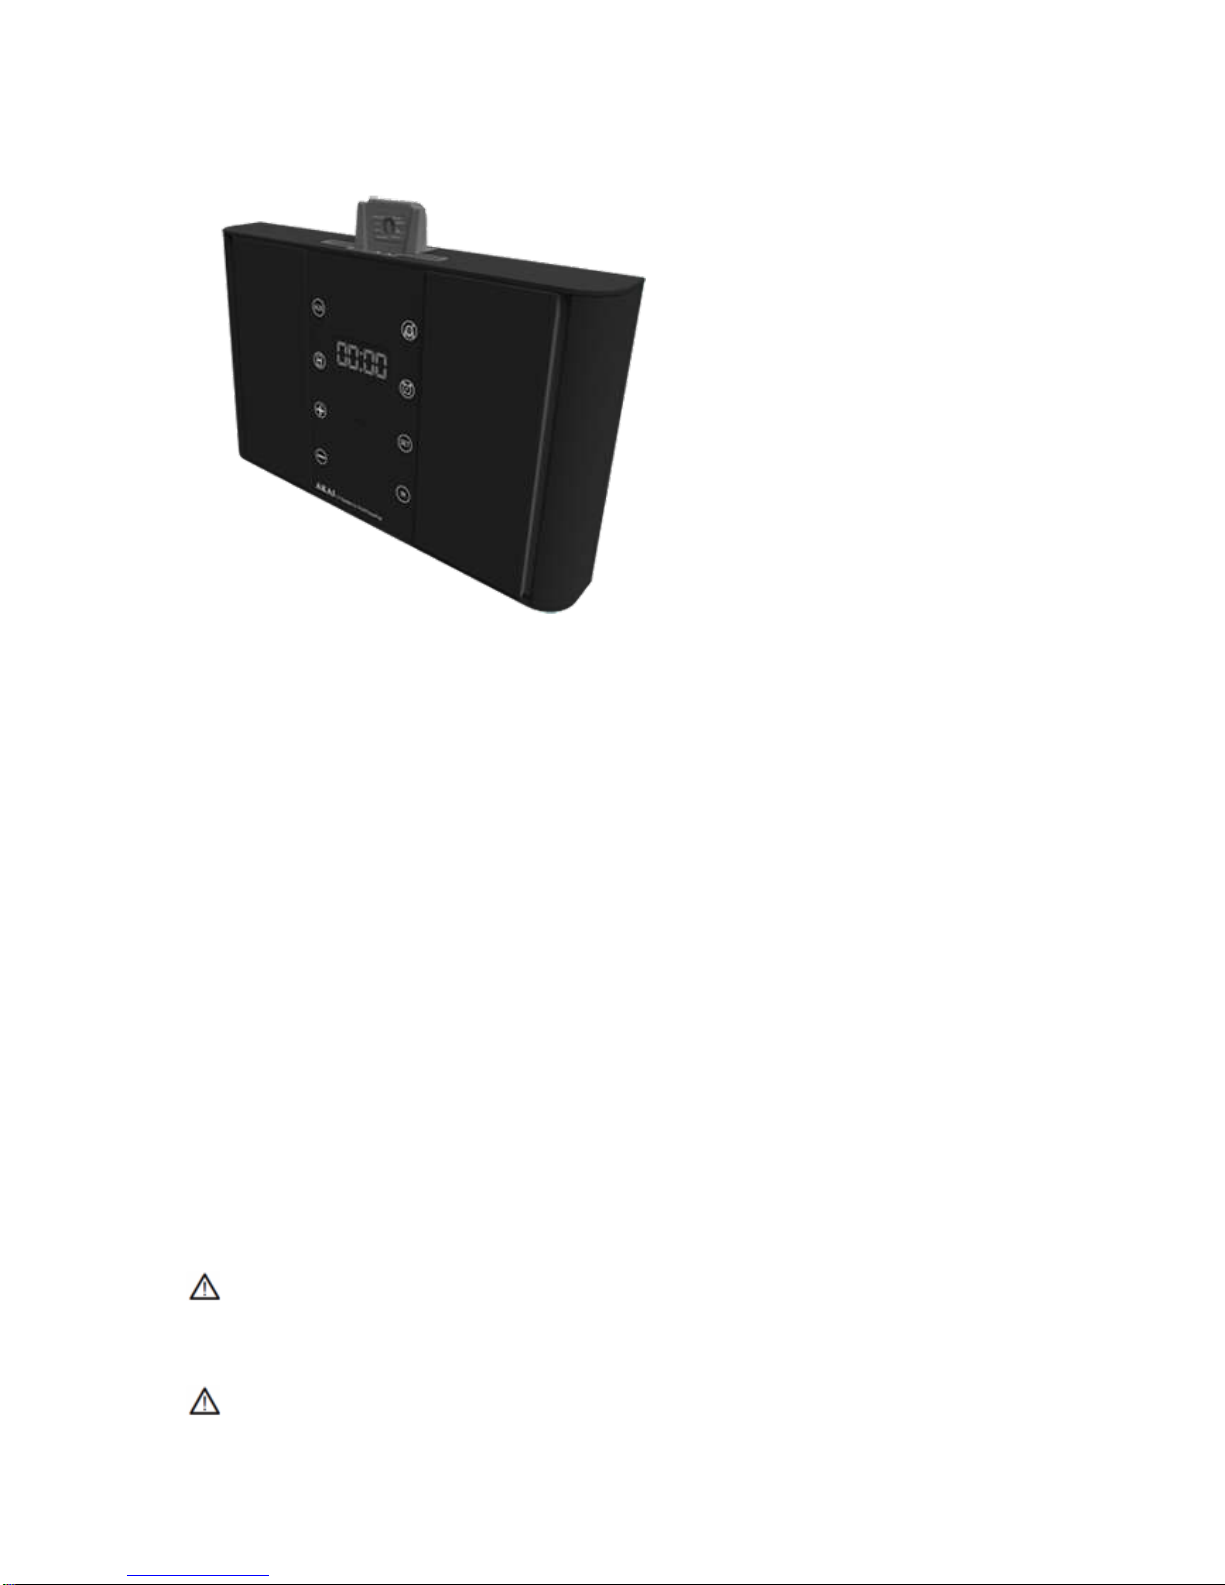
Functions
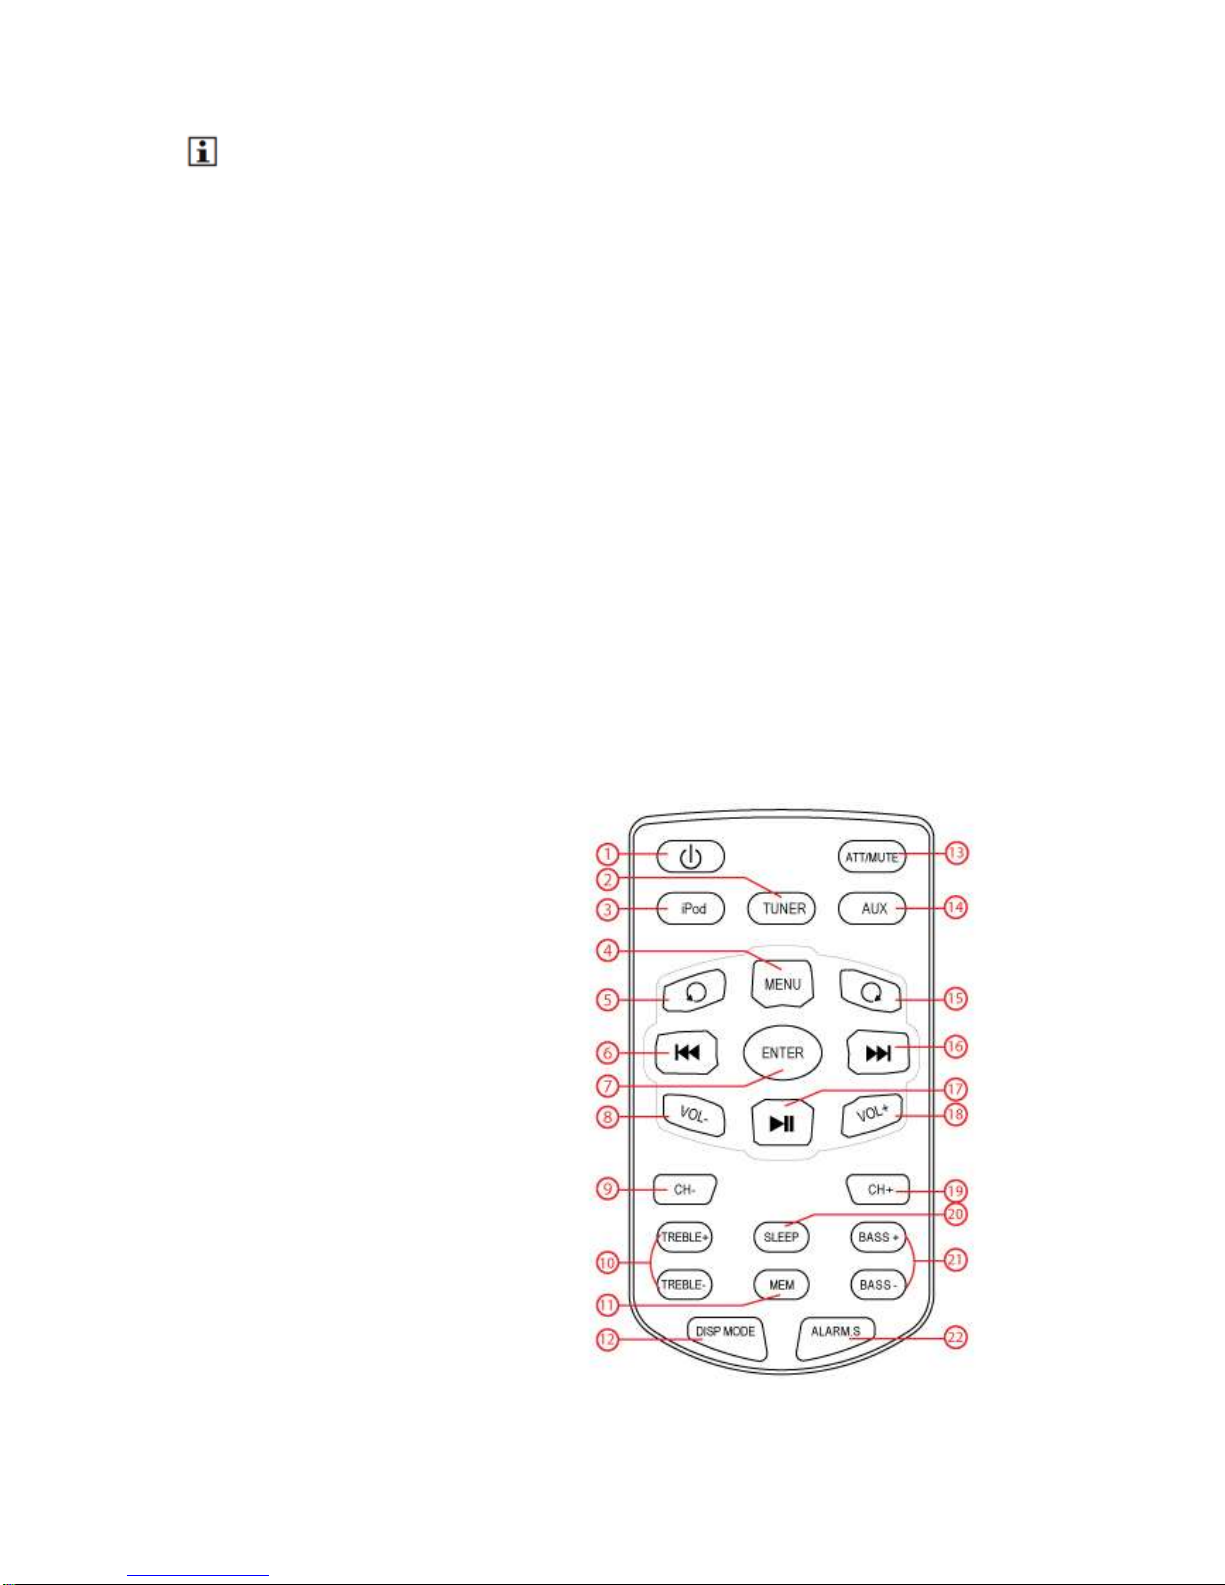
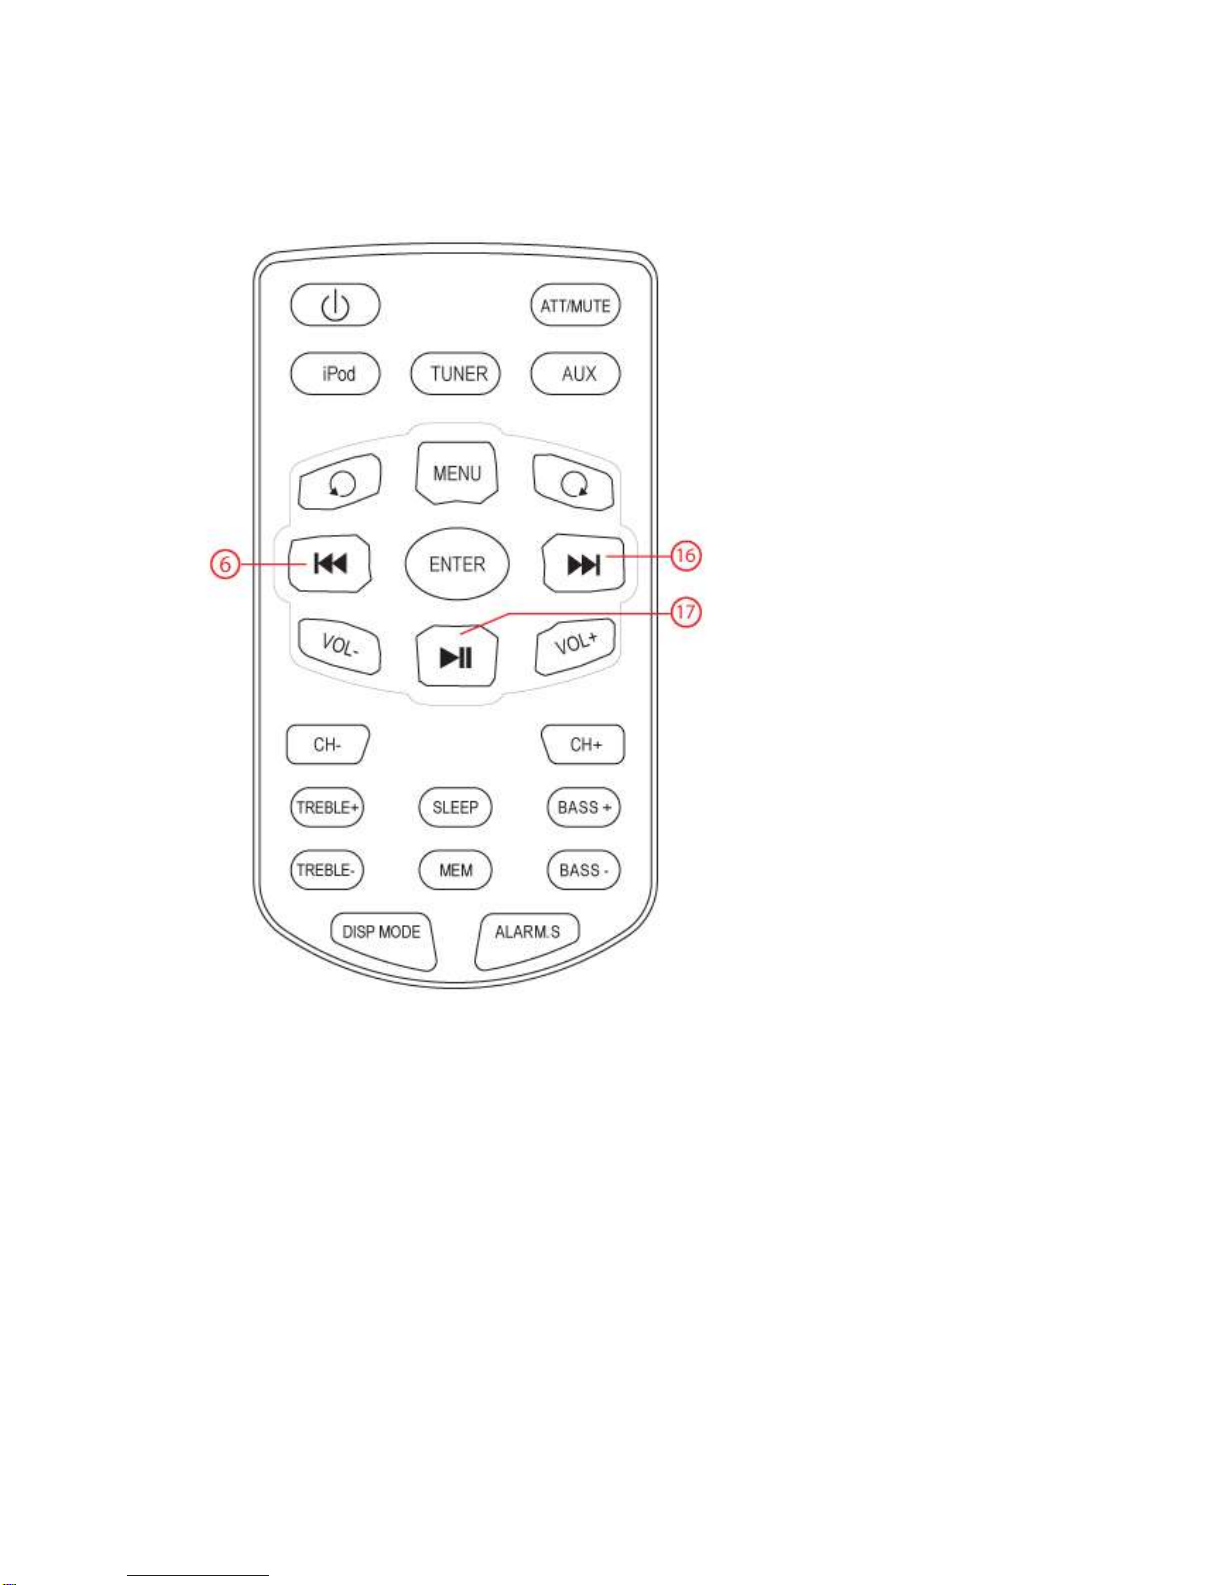
Remote control
1. STANBY button
2. TUNER button
3. IPOD button
4. MENU button
5. IPOD MENU DOWN button
6. PREV button
7. ENTER button
8. VOL - button
9. CHANNEL DOWN button
10. TREBLE (+/-) button
11. MEM button
12. DISP MODE button
13. ATT/MUTE button
14. AUX button
15. IPOD MENU UP button
16. NEXT button
17. PLAY/ PAUSE button
18. VOL + button
19. CHANNEL + button
20. SLEEP button
21. BASS (+/-) button
22. ALARM button
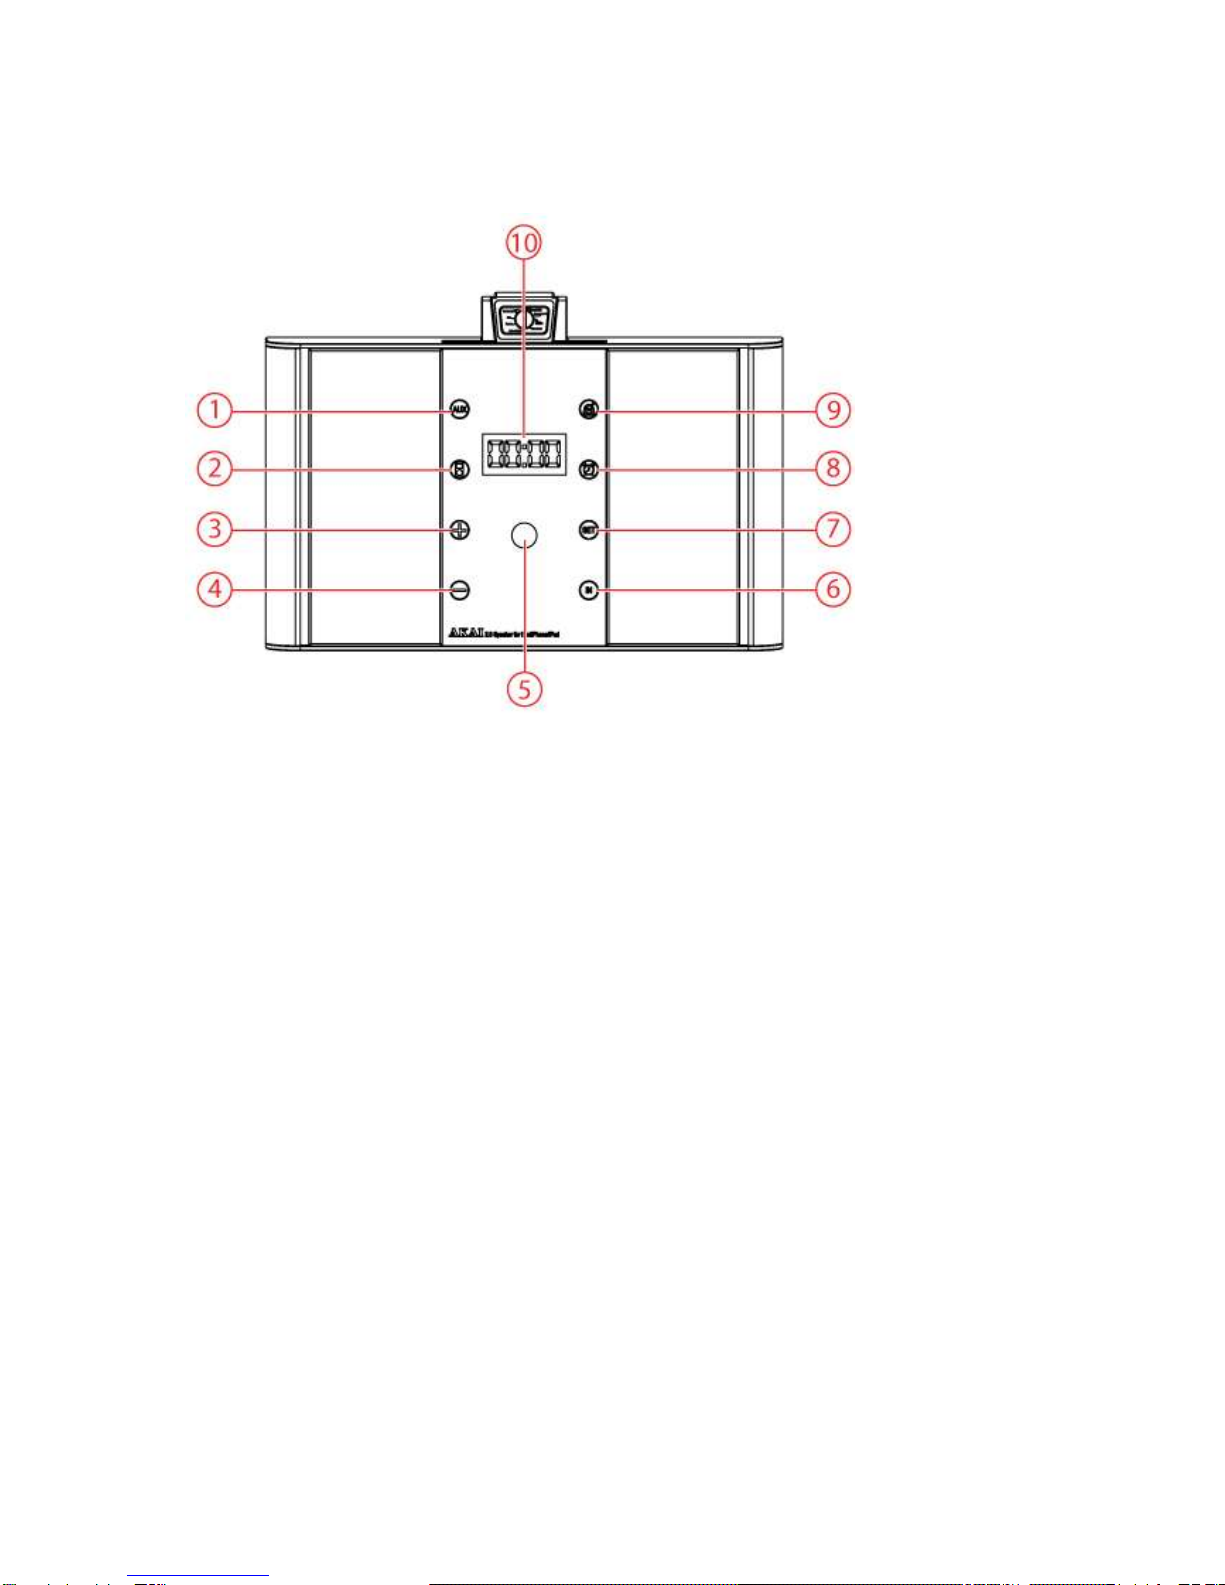
ASB90I Docking Station
1. REPEAT iAUX
2. REPEAT iiPod
3. VOL + button
4. VOL - button
5. IR receiver
6. Input selection
7. SET button
8. REPEAT iALARM
9. TUNER button
10. LED Display
Operation
All functions of the appliance are accessible using the remote control. All instructions refer to operation
with the remote control, unless indicated otherwise.
Master power switch
The appliance is equipped with a master power switch located at the back panel.
Set the switch into the ON position prior to taking the appliance into operation.
Set the switch into the OFF position prior to disconnecting from the mains.
The appliance is designed to be operated using the remote control. For regular use you may find it
convenient to switch the appliance to standby mode after use. However, if you wish to care for the
environment and not waste energy by leaving the appliance in standby mode, you can also switch off
at the master power switch.
When the appliance is not in use for longer period, we recommend to switch the appliance off at the
master power switch.
Quick start
General functions
To switch on the appliance, press the STANDBY button (1). To switch back to the standby mode,
press the STANDBY button (1) again.
To select the source mode (iPod/ TUNER/ AUX), press the corresponding button (iPod, TUNER,
AUX).
To adjust the volume, press the VOLUME - button or the VOLUME + button (8/ 18).
To adjust the treble, press the TREBLE - button or the TREBLE + button (10).
To adjust the bass, press the BASS + button or the BASS - - button (21) .
To mute or restore sound, press the ATT/ MUTE button (13).
To mute or restore sound, press the MUTE button .
iPod/iPhone/iPad functions
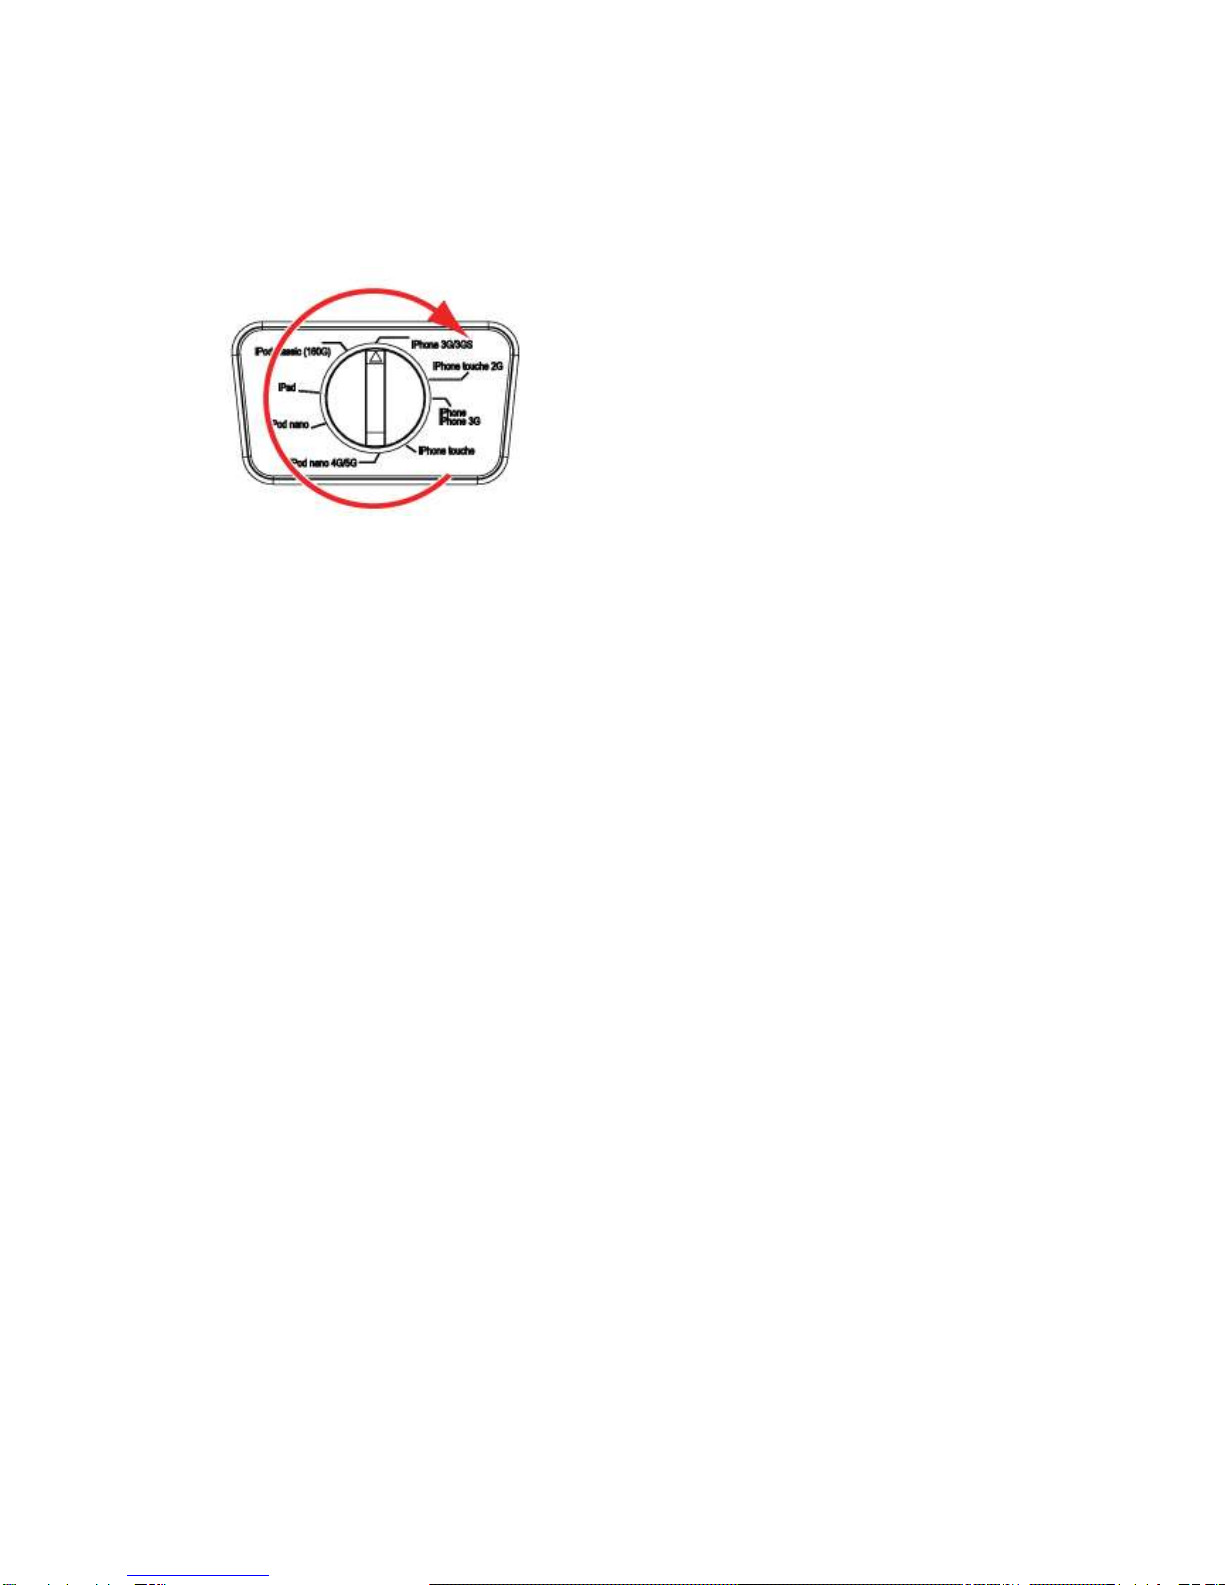
Select your type iPad/ iPhone/ iPad.
Place your iPad/ iPhone/ iPad in the docking station.
Press the IPOD button (3).
This key is located on your remote control.
To start playback, press the PLAY/PAUSE button (17) once.
For extended instructions, read the paragraph "iPod functions" further on in this manual.
Radio functions
Switch on the appliance. Select the tuner mode.
Quick installation of the list of stations: Press 3 seconds on the key MEM (11) to start the search
programme for automatically setting the available channels.
For extended instructions, read the paragraph "Radio functions" further on in this manual.
Clock functions
Read the paragraph "Clock functions" further on in this manual.
iPod functions
Audio playback
During playback, the following functions are available:
To select a track, press the PREV button (6) or the NEXT button (16) until the desired track is set.
To forward or rewind the track, press and hold the PREV button (6) or the NEXT button (16).
To pause playback, press the PLAY/PAUSE button (17) once; to resume playback, press the
button again.
Table des matières
Autres manuels Akai Station d'accueil

Akai
Akai ADI-18K Manuel utilisateur

Akai
Akai ARC300I Manuel utilisateur

Akai
Akai ACI-7T Manuel utilisateur

Akai
Akai ASB20I Manuel utilisateur

Akai
Akai ASB70I Manuel utilisateur

Akai
Akai ASB15I Manuel utilisateur

Akai
Akai ADI-19K Manuel utilisateur

Akai
Akai ASB10i Manuel utilisateur

Akai
Akai ASB220I Manuel utilisateur


