Airvana AV600APH Manuel utilisateur
English
Models:
AV600APH
AV600APH-B
AV600APH-G
AV600APH-SG
AV600APH-W
Form #AV600APH
20220426
©2022 Registered Trademark/TM Trademark of Airvana
Manufactured exclusively for Airvana
All rights reserved
Air Purifier & Humidifier
Owner’s Manual

Table of Contents
At A Glance
Safety Warnings.................................... 1
Initial Set Up........................................... 4
Operation.............................................. 5
Control Panel........................................ 6
Display Screen...................................... 7
Remote Control.................................... 8
Using Your Product
Filter Replacement............................... 10
Cleaning the Synthetic Wick............... 11
Cleaning the Unit.................................. 12
Maintenance
Troubleshooting..................................... 13
Filter/Wick Ordering.............................. 14
Technical Support................................. 14
Humidifier Assistance
2-Year Guarantee................................
15
Warranty
1
Safety Warnings
Your safety and the safety of others are very important.
We have provided many important safety messages in this manual and
on your appliance. Always read and obey all safety messages.
This is the safety alert symbol. This symbol alerts you to
potential hazards that can kill or hurt you and others.
All safety messages will follow the safety alert symbol
and either the word “DANGER” or “WARNING.” These
words mean:
All safety messages will tell you what the potential hazard is, tell you how
to reduce the chance of injury, and tell you what can happen if the
instructions are not followed.
You can be killed or
seriously injured if you
don’t immediately follow
instructions.
DANGER
WARNING
This appliance has a polarized plug (one blade is wider than the other). To
reduce the risk of electric shock, this plug is intended to fit into a polarized
outlet only one way. If the plug does not fit fully into the outlet, reverse the
plug. If it still does not fit, contact a qualified electrician. Do not attempt to
defeat this safety feature.
Do not operate appliance with a damaged cord or plug. Discard product
or return to an authorized service facility for examination or repair.
Unplug appliance before servicing.
Do not run cord under carpeting. Do not cover cord with throw rugs,
runners, or similar covering. Do not route cord under furniture, or appliances.
Arrange cord away from traffic area and where it will be tripped over.
IMPORTANT SAFETY INSTRUCTIONS
READ AND SAVE THESE INSTRUCTIONS
WARNING: To reduce the risk of fire or electrical shock, DO NOT use the
appliance with any Solid-State Speed Control Device.
WARNING: To reduce the risk of fire or electrical shock and injury to
persons, DO NOT use in a window.

2
Safety Warnings
READ AND SAVE THESE INSTRUCTIONS!
Important Safety Instructions: Read all instructions before using
this product.
● This product may not work properly on an uneven surface.
● ALWAYS place it on a firm, level, and water resistant surface.
●ALWAYS place the product at least six inches away from walls,
heat sources, and electrical appliances such as stoves,
radiators, or heaters.
●ALWAYS place the product in an area that is out of the reach
of children.
●Before using the product, extend the cord and inspect for any
signs of damage. DO NOT use the product if the cord has been
damaged.
●This product has a polarized plug (one blade is wider than the
other) as a safety feature. This plug will fit into a polarized outlet
only one way. If the plug does not fit fully into the outlet, reverse
the plug. If it still does not fit, contact a qualified electrician. DO
NOT attempt to defeat or override this safety feature.
●ALWAYS UNPLUG AND EMPTY the humidifier tank when it is not
in operation or while it is being cleaned.
●Use only fresh, clean tap water when filling the tank. DO NOT
use hot water.
●You should never leave the humidifier unattended in a closed
room. Always leave a door partially open.
●This device complies with part 18 of the FCC Rules.
●DO NOT add detergents, chemical solutions or medications.
●DO NOT touch water in water tank or components in water
when unit is turned on.
●DO NOT overfill the water tank.
●Avoid spilling water on the unit while refilling the water tank.
●ALWAYS lift the product by the handle or base, DO NOT lift by
the tank.
●DO NOT clean with detergents or chemical solutions.

3
Safety Warnings
●Keep away from children under the age of 8 unless supervised
by an adult.
●For indoor use only.
● NEVER drop or insert any object into any openings.
● DO NOT run cord under carpeting, throw rugs or runners.
● DO NOT route cord under furniture or appliances. Arrange cord
away from traffic area and where it will not be tripped over.
● NEVER block the air openings, grills/outlets.
● NEVER place the product on a soft surface, such as a bed or
sofa, as this could cause the unit to tip over, blocking the air
intake or outtake opening.
● DO NOT place anything on top of the unit.
● DO NOT expose eyes or other body parts directly to UVC light,
as UVC light can be harmful to skin.
● UVC light should not be used on plants or animals, as it can
cause harm.
● The UVC light is inside this product, you will not come into
contact with it. The light on the top of the product is the accent
light.
● DO NOT attempt to repair or adjust any electrical or
mechanical functions on this unit, doing so will void your
warranty.
If you need any assistance with setup, operation, or parts for
your new Airvana product, please call us. Our technical support
staff is ready to help!
USA/Canada: 888-704-2112
Email: [email protected]
Hours of operation are from 8:00 AM to 6:00 PM EST.
You may also contact us online at:
www.airvanaair.com
Initial Set Up
4
1. Remove the product from packaging and place on a
sturdy, flat surface.
2. Unravel and straighten the cord before use.
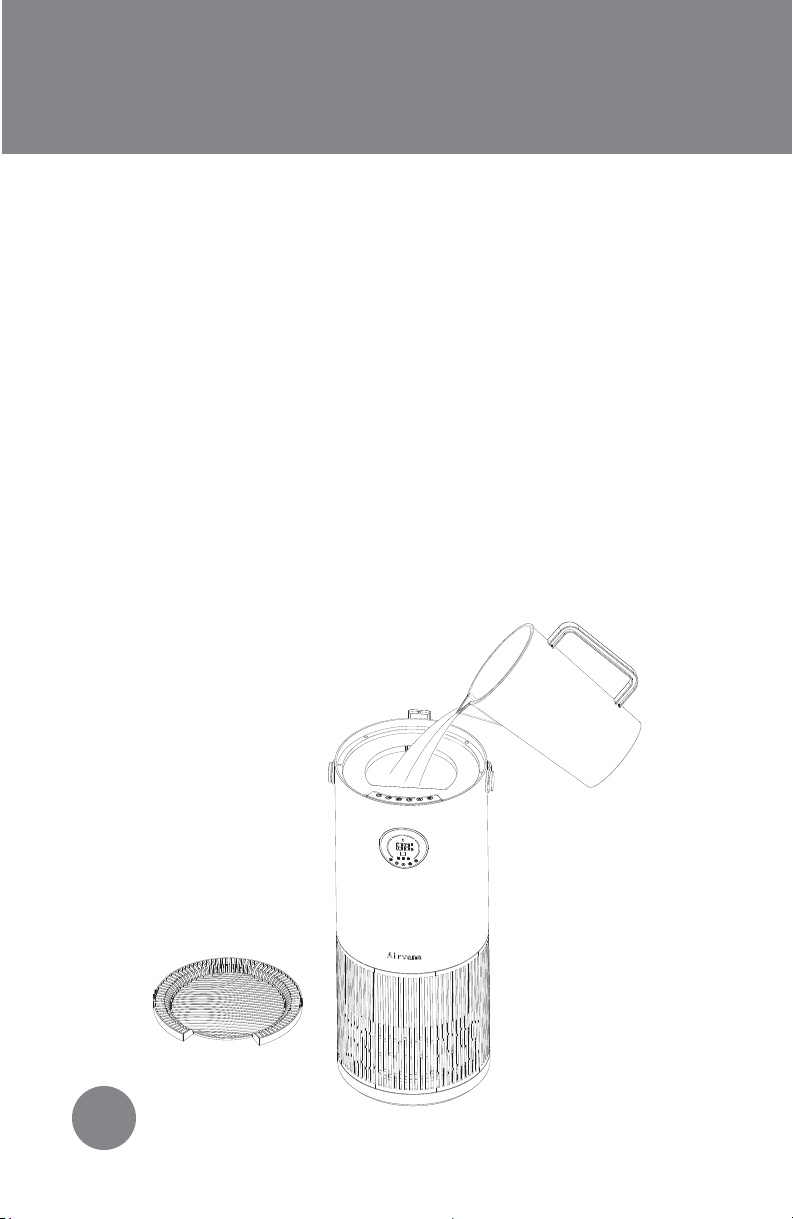
3. Remove the top cover from the unit.
4. Use a pitcher to add fresh, clean tap water to tank. DO
NOT overfill. FIGURE 1
5. Reattach top cover.
WARNING: Never fill the humidifier with hot water.
FIGURE 1

Power ON:Follow the initial setup instructions. Plug product into
wall outlet. On product, press power switch to ON. Product will
beep and light up as indication that it is working. Current humidity
will automatically display.
Power OFF:Press power switch to OFF. Empty water tank.
Refill Water Tank:See initial setup for instructions on refilling
water tank. DO NOT overfill. If tank is empty, product will still run as
an air purifier. Refill the tank to use the humidifier function. When
tank is empty a water drop will flash 10 times on the display screen
before turning red. This will disappear once the tank is refilled.
(FIGURE 4)
Operation
5
HEPA Filter:Helps purify your air.
Recommended to replace every 6
months. See Filter Replacement for
further instructions .
Water Wick:Helps purify your water.
Recommended to clean or replace
as needed due to environmental
reasons. See Filter Replacement for
further instructions .
Control Panel:How you operate
your machine. See Control Panel for
further instructions .
Handle:Always carry your unit by
the handle.
FIGURE 2
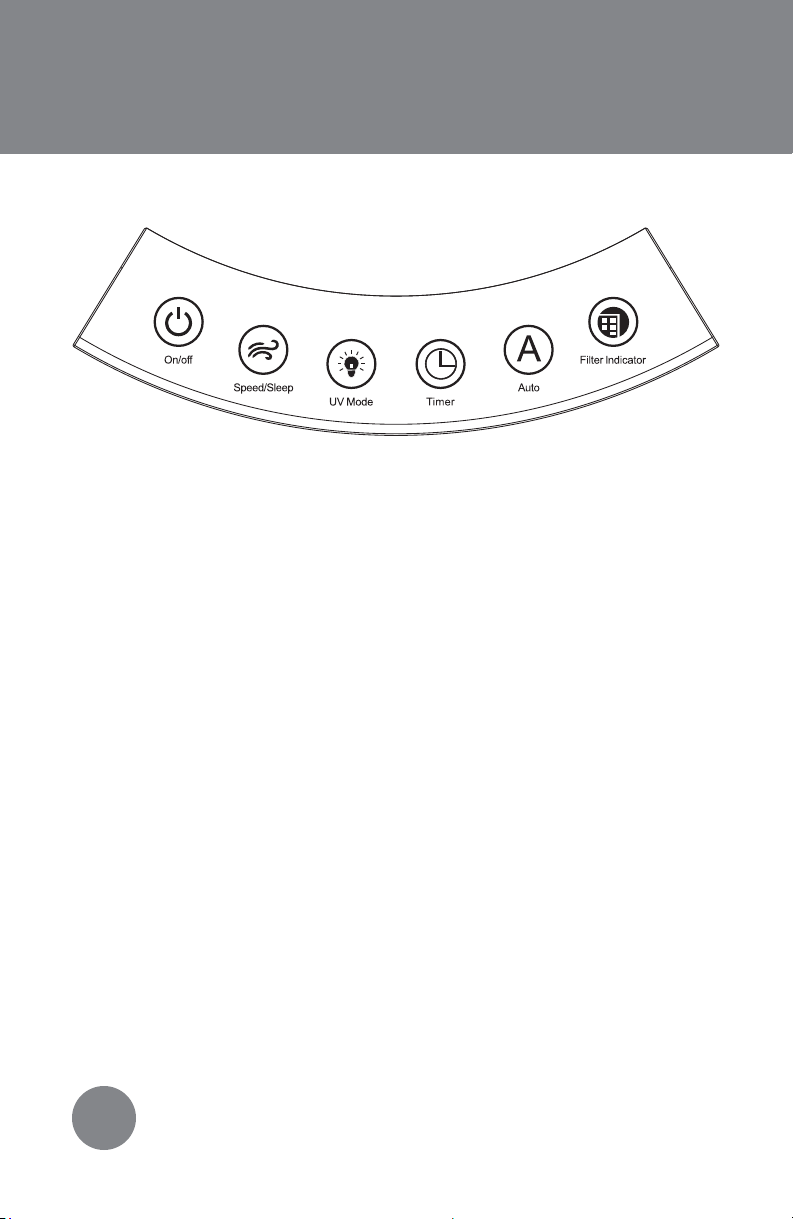
Control Panel
On/Off: Press button to power humidifier on or off.
Speed/Sleep:By default, the machine will start running on low
speed. Press the button once to run on medium speed, twice for high
speed and a third time for sleep mode. (FIGURE 4) The display screen
will dim and the Sleep icon will appear. Press button again to turn off
sleep mode and return to low speed.
UV Mode: The UV mode will automatically turn on when you power
on your unit. Press the UV mode button once to turn it off. Press it
again to turn it on. When UV mode is on, the icon will appear on the
display screen. (FIGURE 4) When UV mode is running the blue accent
light will be on. This accent light is NOT the UV light, and is safe to look
at.
Timer: Press button to set timer. Timer will then increase by one hour
each time button is pressed, up to 12 hours. Press through all options
to not set a timer. Once desired time displays, the number will flash
five times on the display screen to signal timer is set. The Timer icon will
appear on the display screen when a timer is set. (FIGURE 4) Unit will
automatically shut off after the set time runs out.
6
FIGURE 3

Auto: Press button to have the unit work in Auto mode. The unit’s
running speed will be based on the room’s humidity. Humidity
below 40% will light up RED on the display screen and the unit will
run on high speed. Humidity between 41-69% will light up GREEN
on the display screen and the unit will run on medium speed.
Humidity above 70% will light up ORANGE on the display screen
and the unit will run on low speed. (FIGURE 4) The product will try
to get the room’s humidity between 41-69% and adjust its speeds
accordingly. Press Auto button again to turn off Auto mode. The
Auto icon will appear on the display screen when Auto mode is
on. Your room’s current humidity level will appear on the display
screen.
Filter Indicator: This icon will appear on the display screen
when it is time to change your HEPA filter. (FIGURE 4) It is
recommended to replace the HEPA filter every 6 months, based
on continuous use. However, depending on air quality and
environmental factors, the filter may need to be replaced more
frequently. After the filter is replaced, press and hold the filter
indicator button to reset it. The unit will beep 3 times to indicate
reset,and the icon will disappear off the display screen.
Display Screen
7
FIGURE 4
ORANGE RED
GREEN
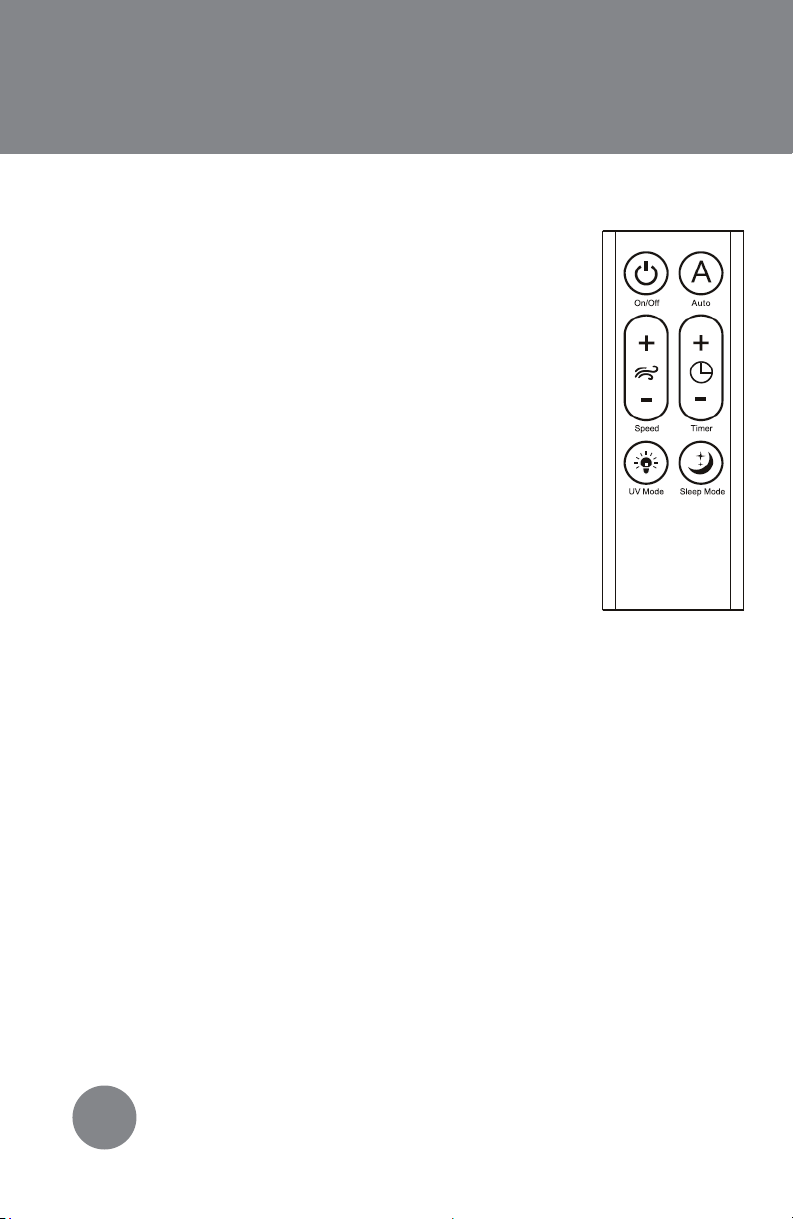
Remote Control
8
Using the Remote:
Your remote comes with a battery installed and
does not need to be programmed. Before using
your remote for the first time, you must take out the
pull tab. To use remote, make sure to point it at the
front of the unit. The remote will not work when
pointed to the backside of the unit.
On/Off: Press button to power product on or off.
Auto:Press once to turn on Auto mode. Press
again to turn off Auto function.
Speed: There are three speed settings to choose
from: low, medium and high. Press the + to
increase the speed setting. Press the - to decrease
the speed setting.
Timer: Timer can be set between 1 - 12 hours. Press the + to increase
the timer by 1 hour each time button is pressed. Press the - to
decrease the timer by 1 hour each time button is pressed. Once
desired timer displays, the timer will blink five times to signal timer is
set.
UV Mode:The UV mode will automatically turn on when you power
on your unit. Press the UV mode button once to turn it off. Press it
again to turn it on. The accent light on the top of the unit is NOT the
UV light, but it will turn on when the UV light is in use.
Sleep Mode:Press once to turn off the display lights and run on the
low settings. Press again to turn off sleep mode.
FIGURE 5
Ce manuel convient aux modèles suivants
4
Table des matières


