Content
Introduction .......................................................................................................................................................... 1
Chapter 1 Feature and Performance ............................................................................................................... 1
1.1
Print Performance ........................................................................................................................................ 1
1.2
Print Paper .................................................................................................................................................... 2
1.3
Print Font ....................................................................................................................................................... 2
1.4
Interface......................................................................................................................................................... 2
1.5
Print Control Commands............................................................................................................................. 3
1.6
Power Supply................................................................................................................................................ 3
1.7
Operation Environment ............................................................................................................................... 3
1.8
Outline Dimension........................................................................................................................................ 3
1.9
Model classification...................................................................................................................................... 4
Chapter 2 Operation Specification ................................................................................................................... 4
2.1
Printer Appearance ...................................................................................................................................... 4
2.2
Paper Installation.......................................................................................................................................... 5
2.2.1
Paper Loading................................................................................................................................... 5
2.2.2
Solution to Paper Jam...................................................................................................................... 5
2.3
Interface......................................................................................................................................................... 6
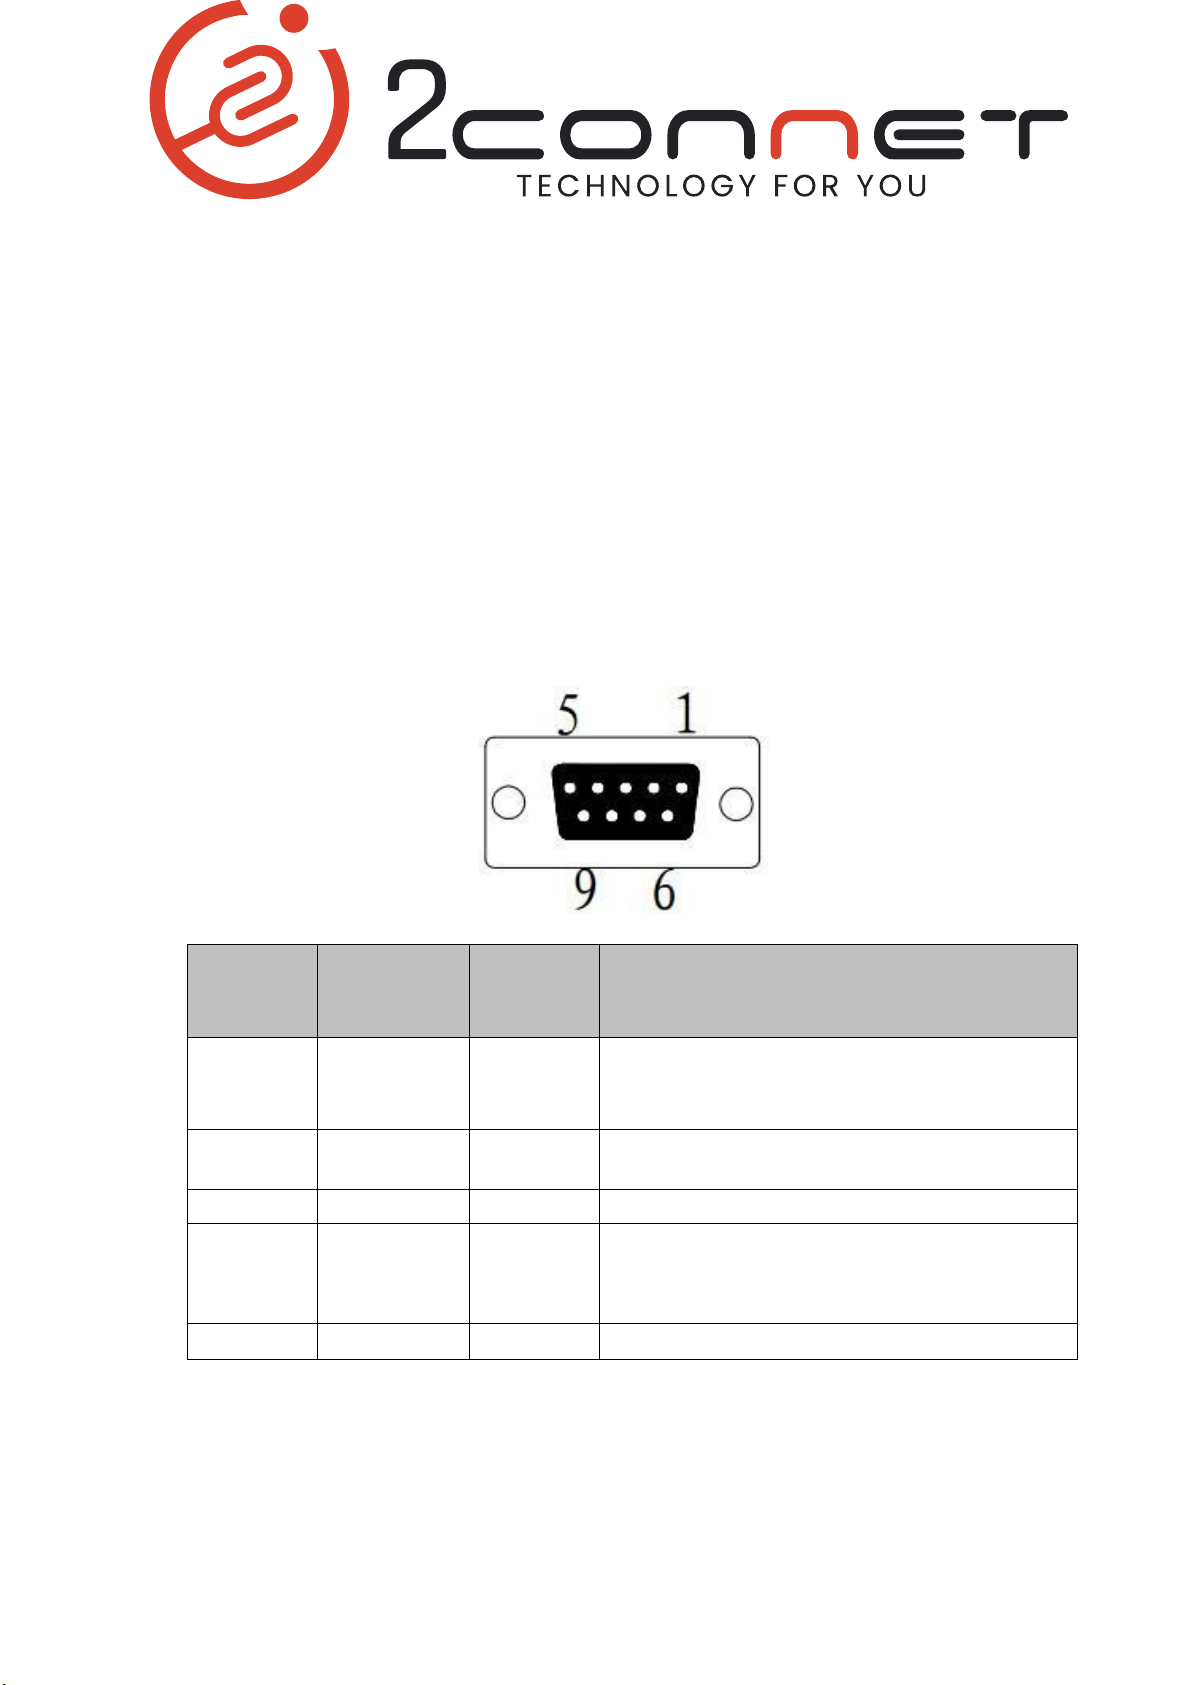
2.3.1
Serial Interface .................................................................................................................................. 6
2.3.2
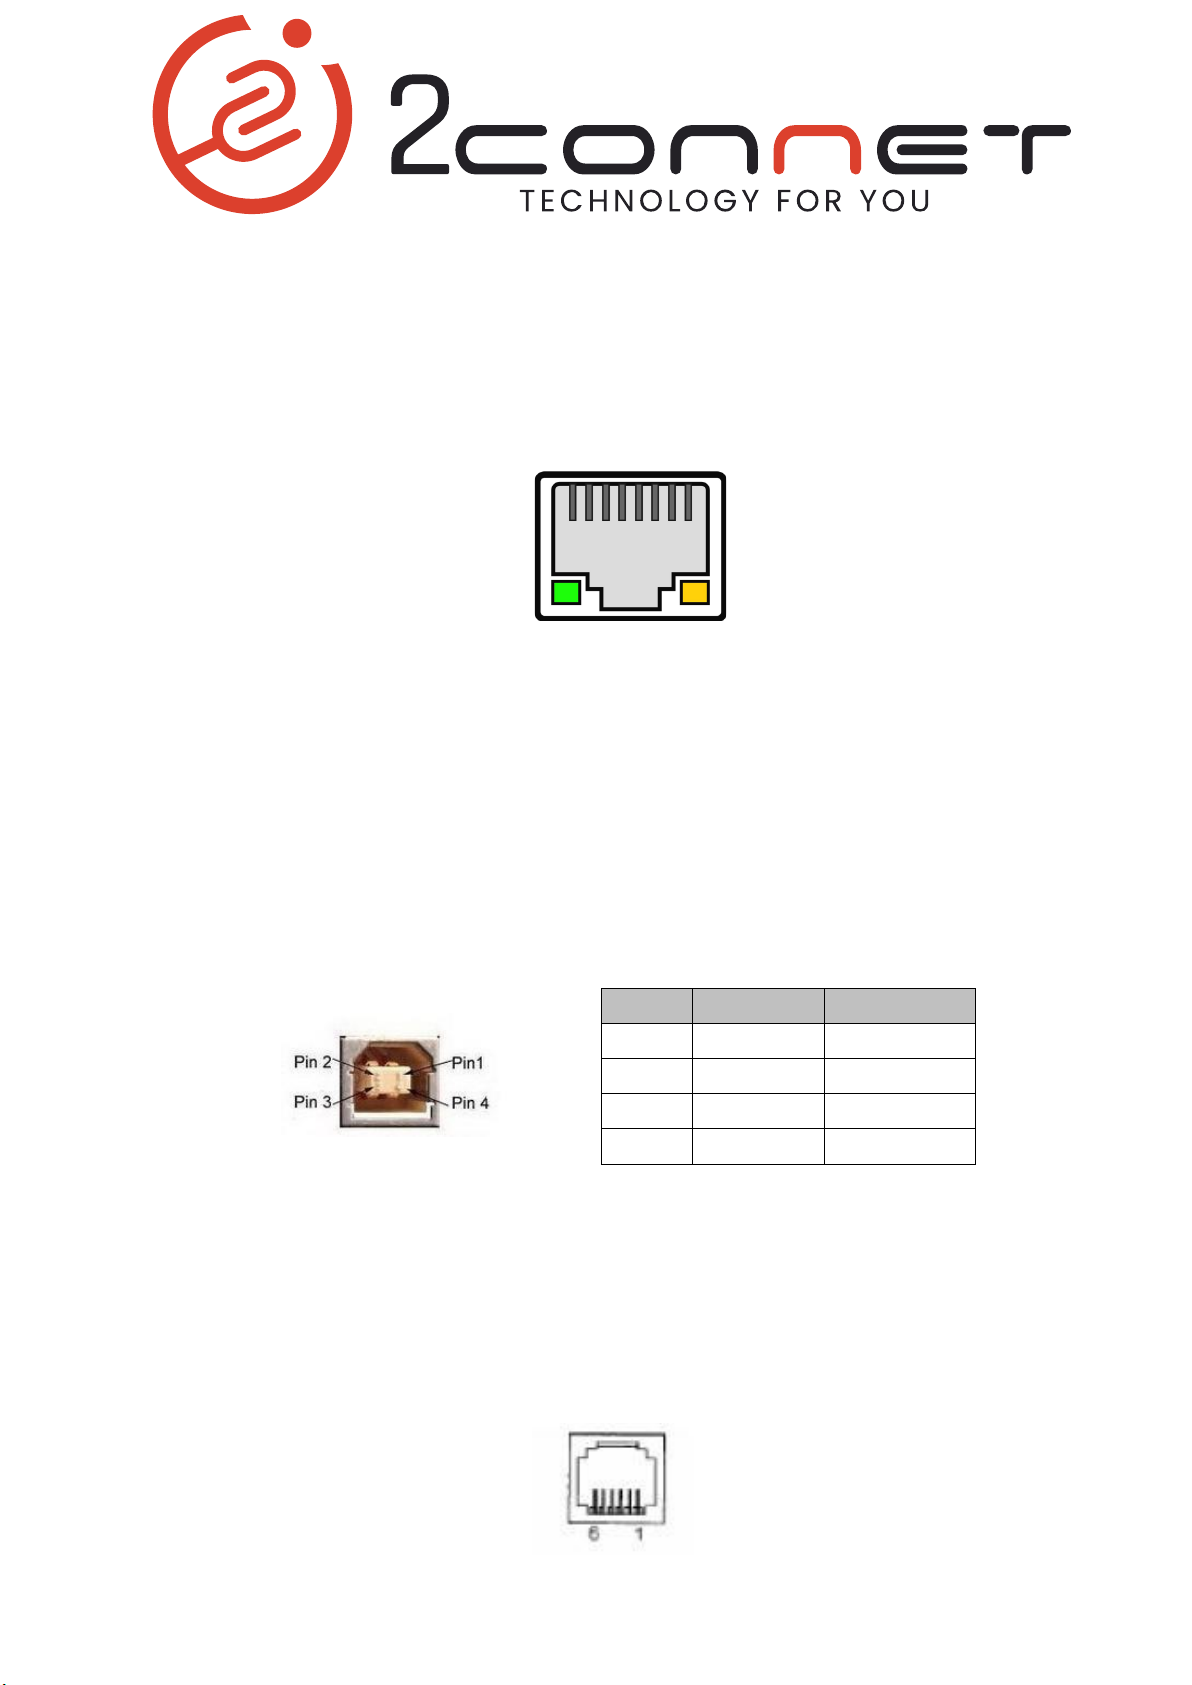
Ethernet Interface ............................................................................................................................. 7
2.3.3
USB Interface.................................................................................................................................... 7
2.3.4
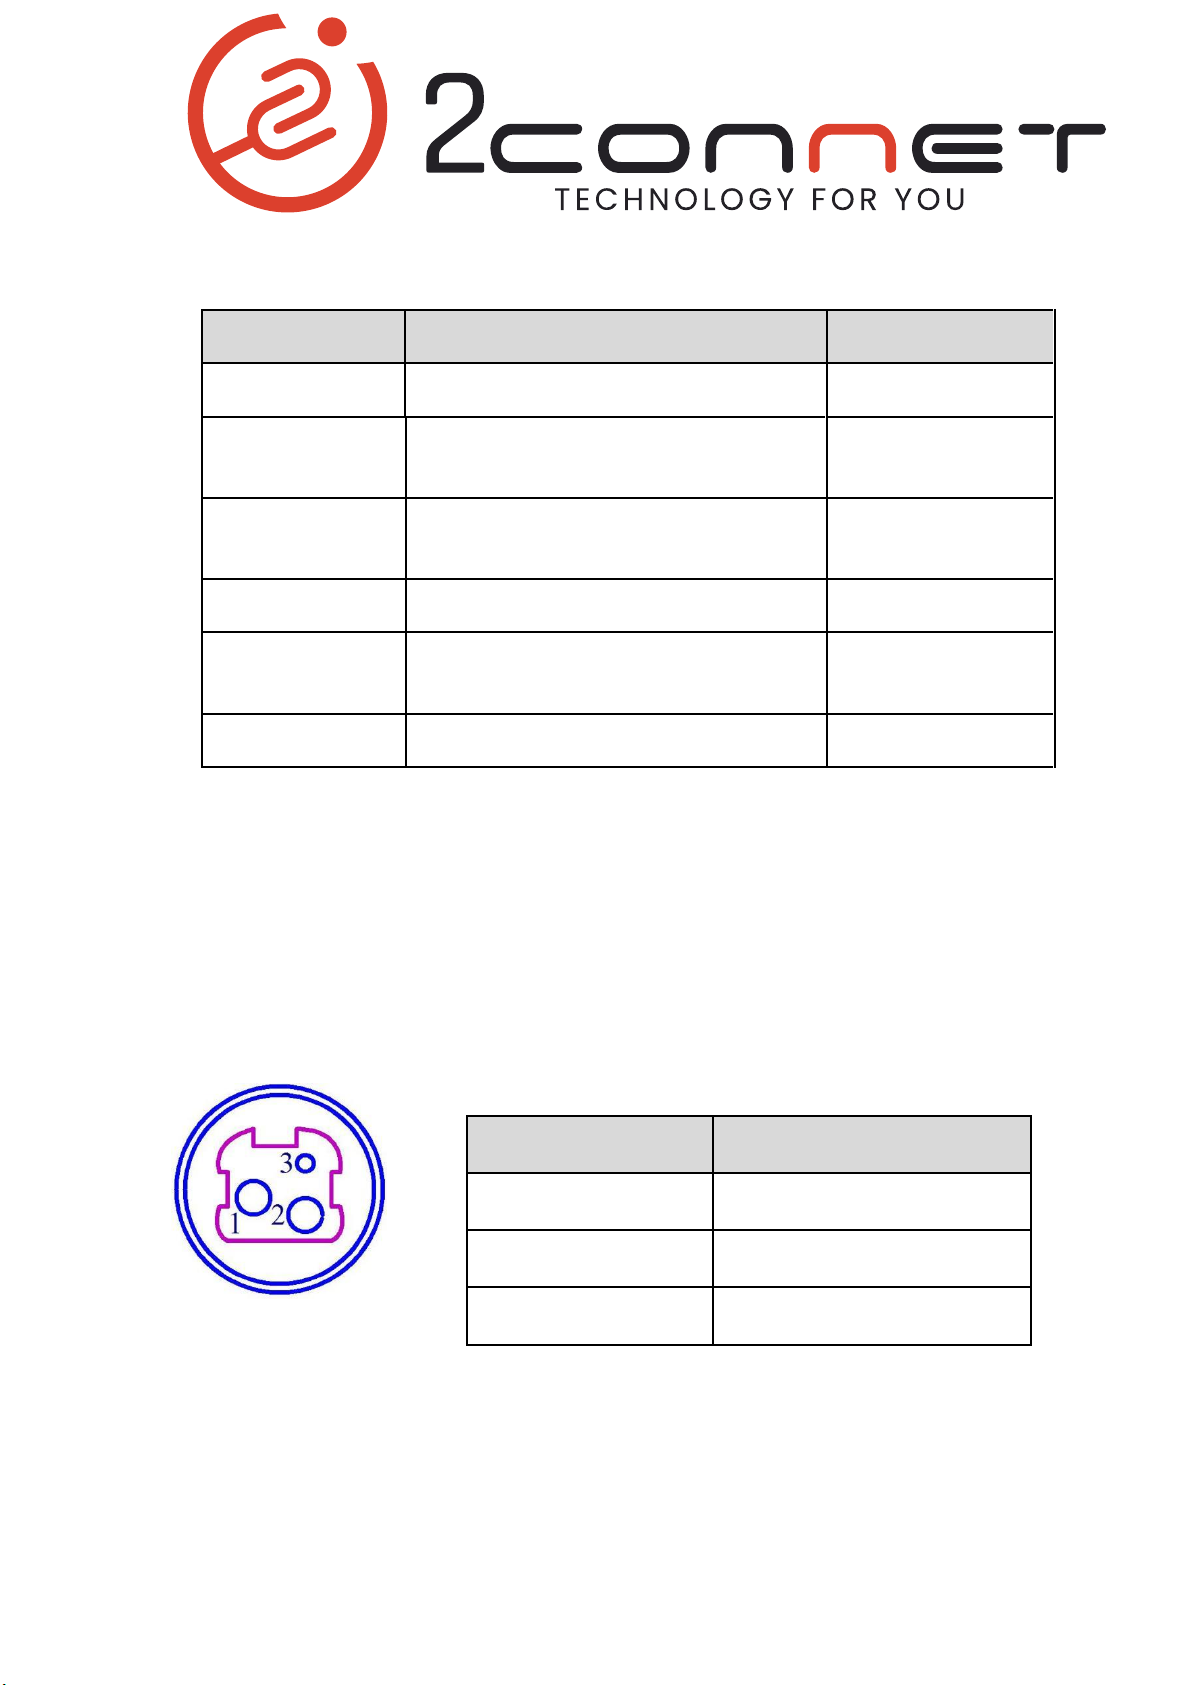
Cash Drawer Interface..................................................................................................................... 7
2.3.5
Power Connection ............................................................................................................................ 8
2.4
Buttons and Indicators................................................................................................................................. 8
2.5
Power on status.......................................................................................................................................... 11
2.6
Self-test........................................................................................................................................................ 11
2.7
Hexadecimal Printing................................................................................................................................. 12
2.8
Parameter Setting ...................................................................................................................................... 13
2.9
Enter the program upgrade mode............................................................................................................ 13
Appendix A......................................................................................................................................................... 14