
Zzipp ZZSNOWJET Manuel utilisateur
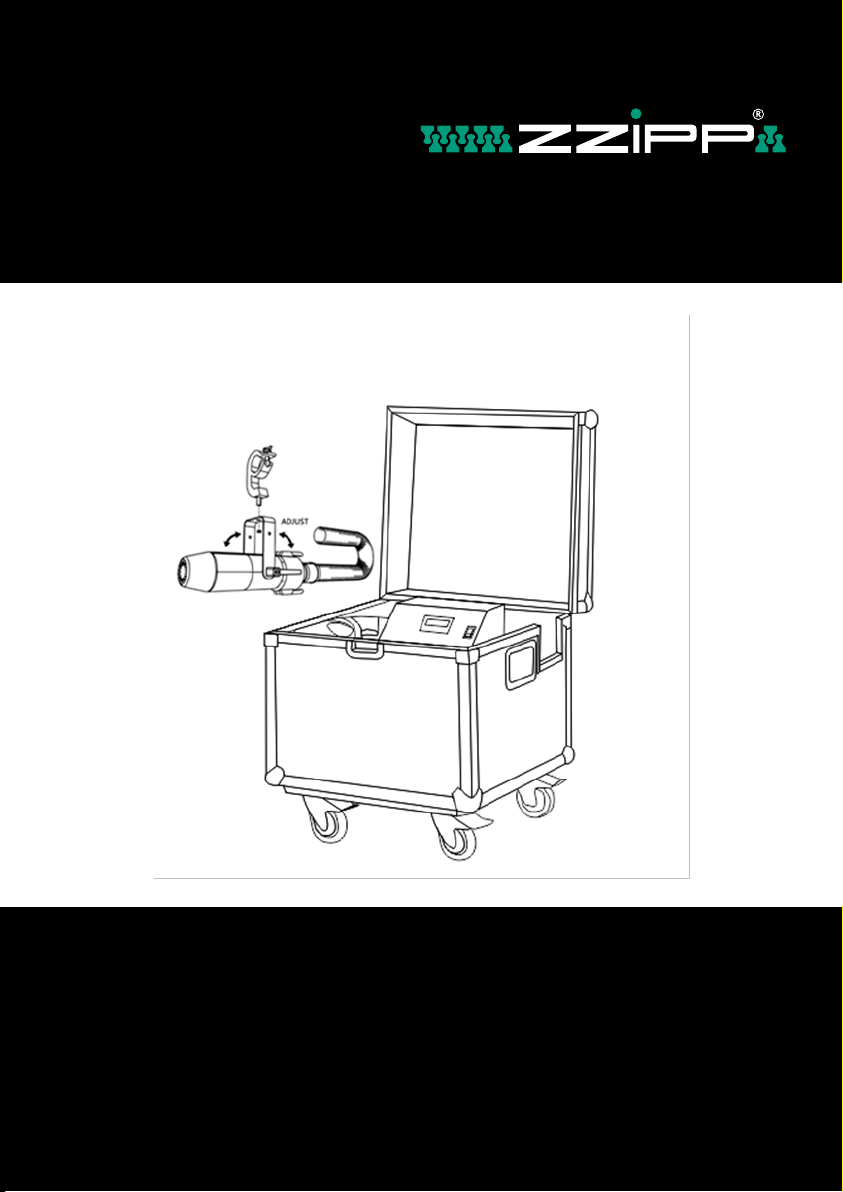
USER MANUAL
MANUALE D’USO
MANUAL DE USUSARIO
ZZSNOWJET
BIG SNOW MACHINE
ENGLISH ITALIANO ESPANOL
2
Transport the product only using the handles. Don’t shake it.
To avoid the risk of fire or shock do not expose the product to rain or direct and excessive
humidity. If the environment is much colder than the temperature of this product, wait for
it to adjust to room temperature before turning it on. Do not use the product for permanent
installations. Only connect the product to circuits grounded and protected.
Always disconnect it from the power supply before cleaning it or replacing the fuse.
Replace the fuse with another of the same type and the same rated voltage.
Do not clean the product with solvents or aggressive detergents. Use a soft, clean cloth.
Before connecting the product to a power supply, make sure the cable is not damaged.
Make sure that the voltage of the electrical outlet is within the range indicated on the
product (on the housing or on a sticker).
Never disconnect the product from the socket by pulling the cord.
Always make sure that the product is used in a location with adequate ventilation with
at least 50 cm of space from adjacent surfaces. Make sure that none of the ventilation
openings are obstructed.
Do not use the product at temperatures above 104 ° F / 40 ° C.
Keep flammable materials away from the product during use.
Do not touch the product when it is switched on or immediately after switching off. The
product and its housing can reach high temperatures.
If you experience serious problems while using the product, stop using it immediately.
Do not open the product housing. Contains parts that cannot be repaired by the user and
such opening would void the warranty.
Thanks for purchasing this ZZIPP product, please read this instruction carefully to
understand how to operate the product correctly. Please store this instruction in a safe
place after reading as a reference in the future.
To reduce the risk of electric shock, do not remove the cover or the side.
Always contact qualified personnel for repairs.
To reduce the risk of fire and electric shock, do not expose the appliance to moisture and
direct contact with liquids.
SAFETY INSTRUCTIONS
ENGLISHITALIANOESPANOL
3
• ZZSNOWJET
• 1 x power cord
• 1 x User manual
• 1 x Fluid Reservoir Supply Hose
• 1 x 20 liter fluid reservoir
• 1 x 10 meter air hose
• Place the machine on a flat surface and in a suitably large area with at least 50 cm
open space around the machine.
• Fill the fluid tank with ZZIPP approved fluid.
• Connect the machine to a suitably rated power supply. To determine the power
requirement for the machine refer to the label on the back of the machine.
• Always connect the machine to a protected circuit and ensure it is properly
grounded.
• Turn on the machine, press the [SNOW]/[DOWN] button on the control panel to start
making snow.
• To turn off the machine, press the [STOP] button and put the power switch to the
OFF position.
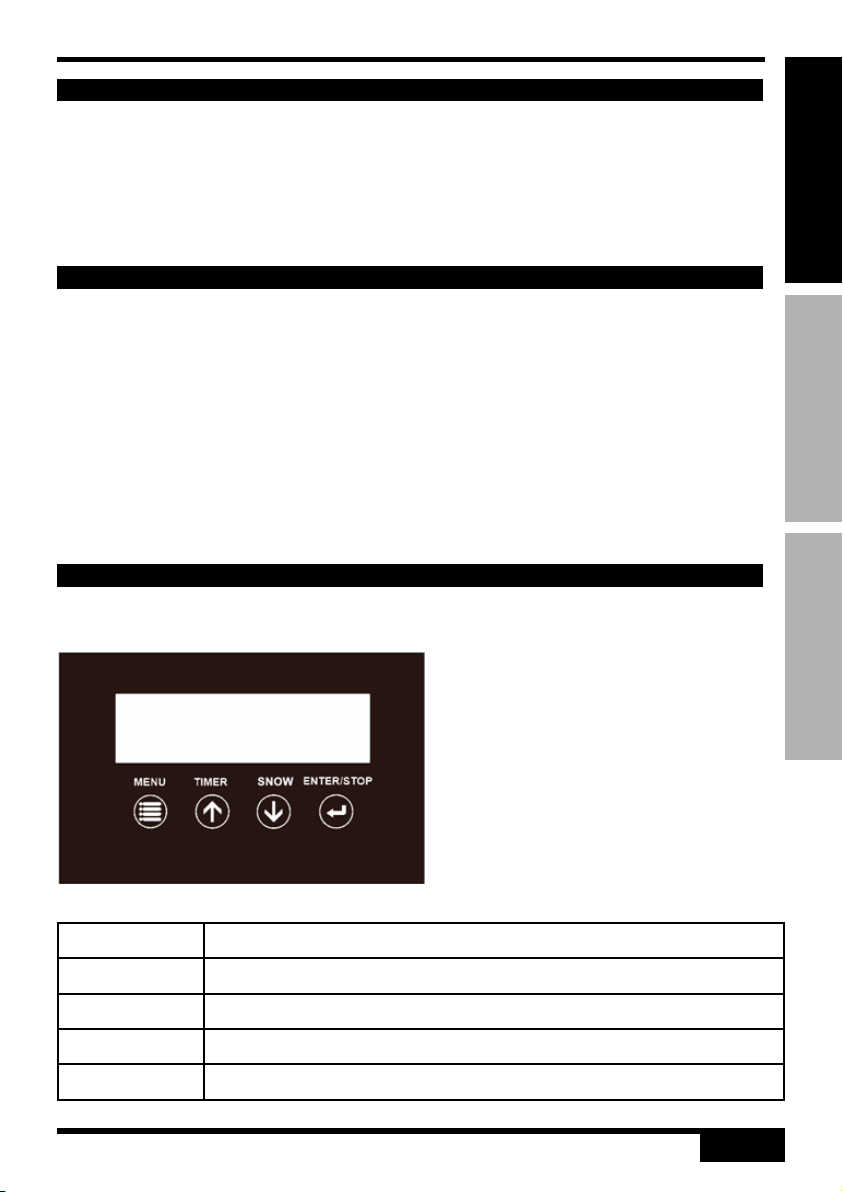
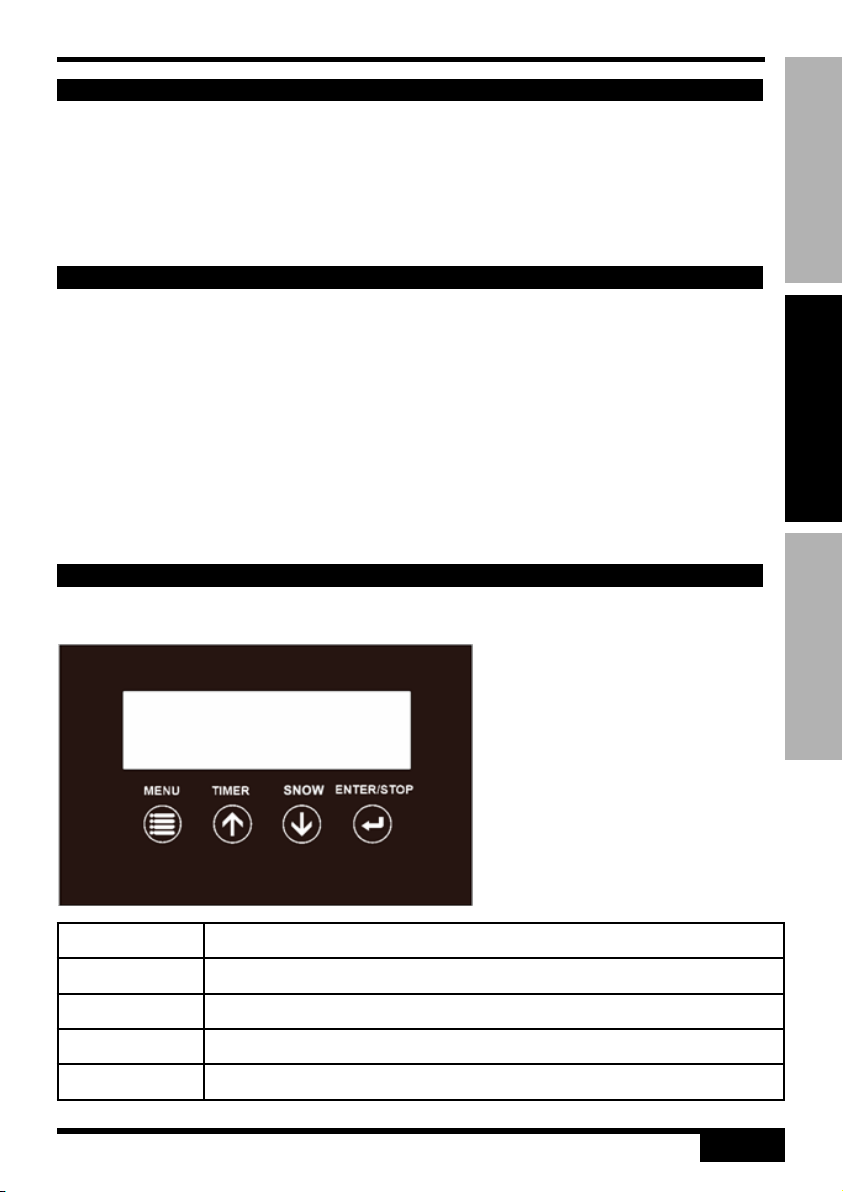
The machine can be operated with onboard digital control interface
CHECK THE CONTENTS
SETTING UP
OPERATION
Button Function
[MENU] Scroll through setting menu
[UP][TIMER] Up/Activate Timer function
[DOWN][SNOW] Down/Activate Volume function
[ENTER][STOP] Deactivate Timer/Snow function, Escape from menu
ENGLISH ITALIANO ESPANOL
4
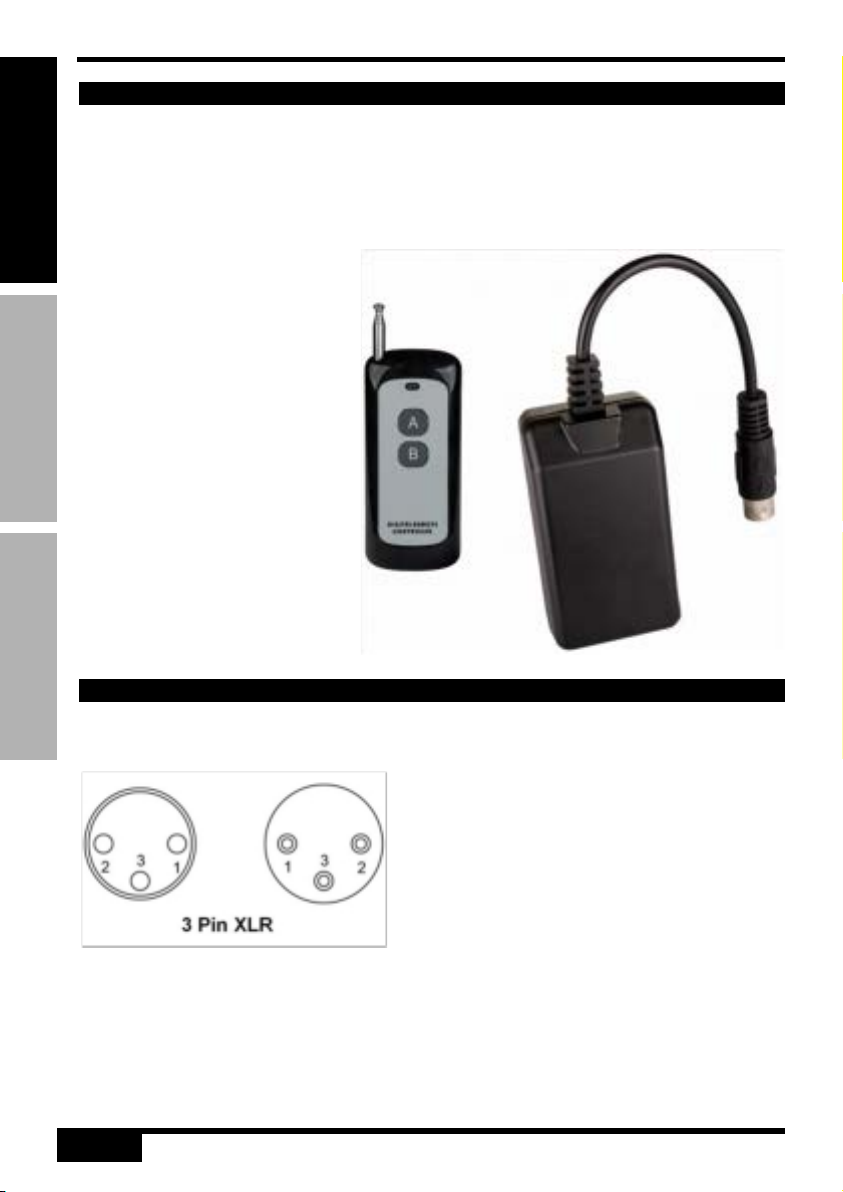
The machine provides a 3- pin XLR connector for DMX connection. The diagram below
indicates pin assignment information.
DMX Connection – Connect the machine to a DMX controller or to one of the
machines in the DMX chain. The machine uses a 3-pin XLR connector for DMX con-
nection, the connector is located on the rear of the machine.
Address Setup – Use control menu to set DMX address. The machine uses 2 control
channels. The starting address is defined as the first channel from which the machine
will respond to the controller. Always double check to make sure there are no overlap-
ping channels in order to control the machine correctly.
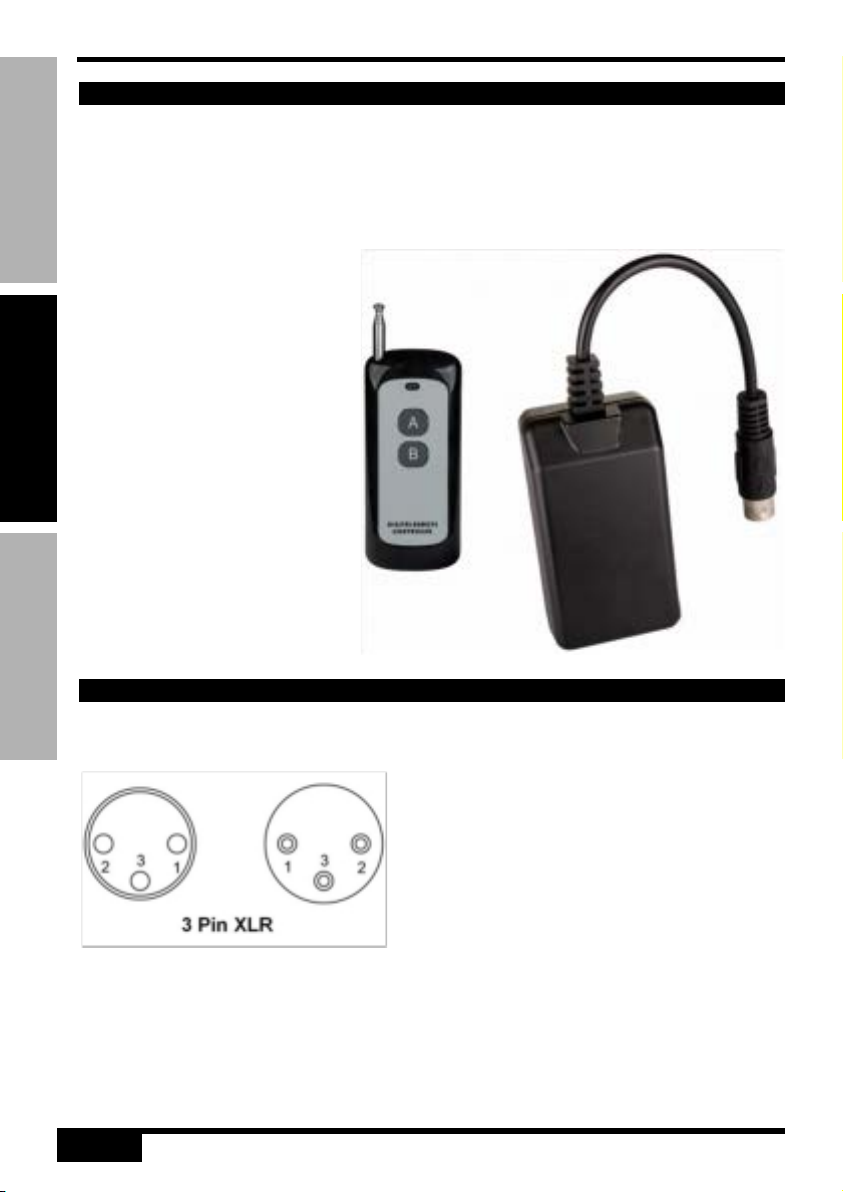
1. Connect the special 5pin connector of the wireless remote receiver to the
[WIRELESS CONTROLLER] input on the back of the snow machine.
2. Fix the remote receiver with its magnetic surface to the snow machine.
3. Pull out the antenna of the wireless remote controller and press any of the A
buttons to produce snow, B button to stop snow.
DMX OPERATION
USE WITH WIRELESS REMOTE
ENGLISHITALIANOESPANOL
5
1. Use the supplied mounting bracket or rigging clamp to install nozzle.
2. Make sure installation location, fastening, and rigging hardware can hold at least 10
times the weight of the nozzle.
3. Make sure no combustible or flammable materials are nearby.
4. Secure the nozzle with an approved safety cable that can hold at least 10 times the
weight of the nozzle.
5. Make sure thenozzle is installed in a well ventilated area.
6. Consider nozzle replacement and routine maintenance access when selecting the
installation location.
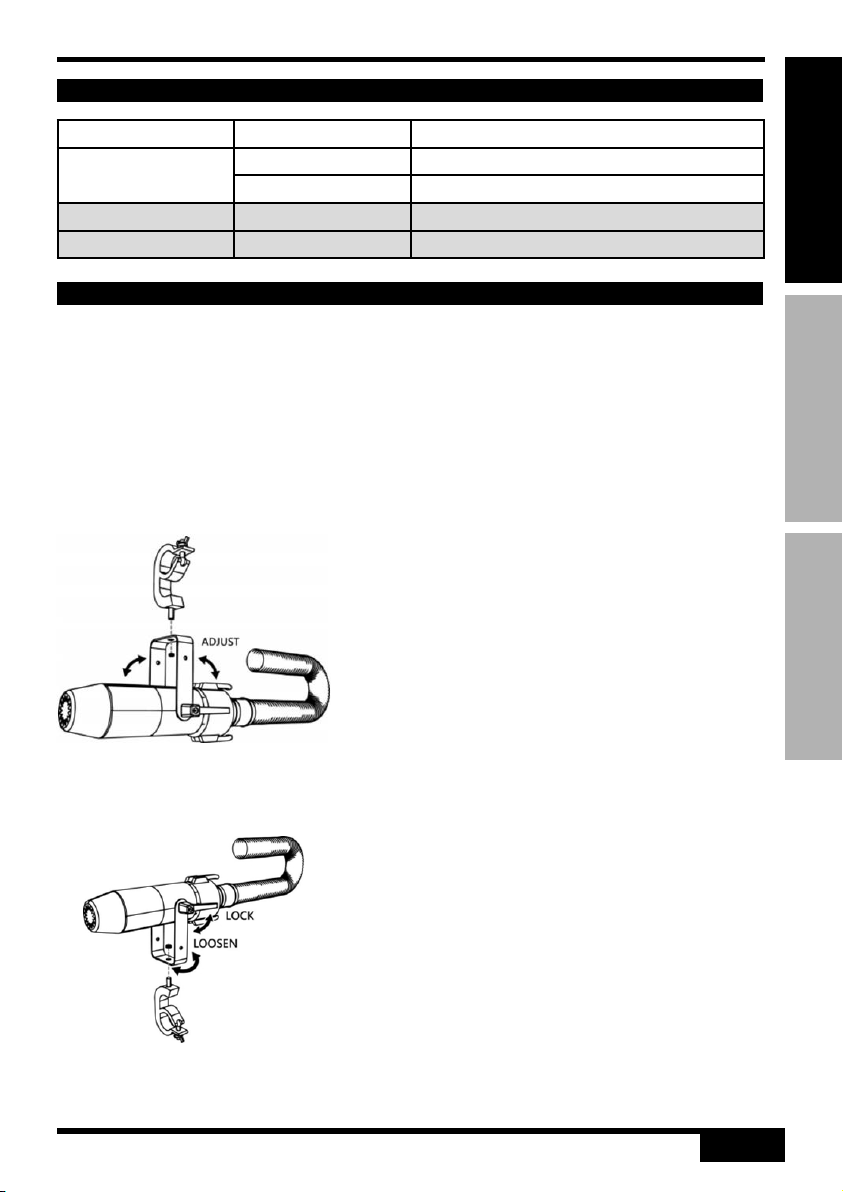
Adjust mounting bracket by loosening screws, set the nozzle to the desired angle and
tighten the screw to finish adjustment. Illustration below demonstrates how to adjust
mounting bracket.
Use screws for surface mounting or clamps for truss mounting.
INSTALLATION
CHANNEL DMX
CHANNEL VALUE FUNCTION
CH01 000-009 FAN OFF
010-255 FAN OUTPUT 1-100%
CH02 000-009 SNOW OFF
010-255 SNOW 1-100%

ENGLISH ITALIANO ESPANOL
6
TECHNICAL SPECIFICATIONS
SERVICE AND MAINTENANCE
Input Voltage 220-240 V, 50/60 Hz 3.8A
Rated Power 900W
Fluid Consumption 400m/min
Fluid tank capacity 20 liters
Ambient Temperature 5°C-40°C (41°F-104F)
Control Manual, Timer, DMX 512, Wireless
DMX Channels 2 channels
Dimension 590 x 550 x 650 mm
Weight 37kg
Only use professional high quality snow liquid for the ZZSNOWJET. The
machine is tested and calibrated with snow liquid only to get the best output
performance. Warranty will be void if any other type of liquid is used, improper use of
liquid may lead to machine failure and malfunction.
1. Do not allow the machine to become contaminated.
2. Remove dust from air vents with air compressor, vacuum or a soft brush.
3. Only use a damp cloth to clean the case.
4. Before storing run distilled water through the system to help avoid malfunctions of
the pump or heater.
5. It is recommended to run the machine on a monthly basis in order to achieve best
performance and output condition.
6. Excessive dust, liquid and dirt built up will degrade performance and cause
overheating.
7. Before storing after operation, pump pure water through the system for at least 1 to
2 minutes. This will help clean out the remaining snow fluid and prevent pump from
malfunction on next usage.
ENGLISHITALIANOESPANOL
7
imported and distributed by:
ZZIPP Group S.p.A.
Via Caldevigo 23/d, 35042 Este (PD)
0429 617 888
info@zzippgroup.com
zzippgroup.com
ESPANOL
8
ITALIANOENGLISH
Trasportare il prodotto solo usando le maniglie. Non scuoterlo.
Per evitare il rischio di incendio o shock non esporre il prodotto alla pioggia o all’umidità
diretta ed eccessiva. Se l’ambiente è molto più freddo della temperatura di questo
prodotto, attendere che si adatti alla temperatura ambiente prima di accenderlo. Non
utilizzare il prodotto per installazioni permanenti. Collegare il prodotto solo a circuiti messi
a terra e protetti. Scollegarlo sempre dall’alimentazione prima di pulirlo o sostituire il
fusibile. Sostituire il fusibile con un altro dello stesso tipo e della stessa tensione nominale.
Non pulire il prodotto con solventi o detergenti aggressivi. Usare un panno morbido
e pulito. Prima di collegare il prodotto all’alimentazione, assicurarsi che il cavo
dell’alimentazione non sia danneggiato.
Assicurarsi che il voltaggio della presa elettrica rientri nella gamma indicata sul prodotto
(sulla custodia o su un adesivo).
Non scollegare mai il prodotto dalla presa tirando il cavo.
Assicurarsi sempre che il prodotto sia usato in un luogo con adeguata ventilazione con
almeno 50 cm di spazio dalle superfici adiacenti. Assicurarsi che nessuna delle aperture di
ventilazione sia ostruita.
Non usare il prodotto a temperature superiori a 104 ° F / 40 ° C.
Tenere i materiali infiammabili lontano dal prodotto durante l’uso.
Non toccare il prodotto quando è acceso o immediatamente dopo lo spegnimento. Il
prodotto e il suo alloggiamento possono raggiungere temperature elevate.
Se si verificano gravi problemi durante l’uso del prodotto, smettere di usarlo
immediatamente.
Non aprire l’alloggiamento del prodotto. Contiene parti che non possono essere riparate
dall’utente e tale apertura renderebbe nulla la garanzia.
Grazie per aver acquistato questo prodotto ZZIPP, si prega di leggere attentamente que-
ste istruzioni per capire come utilizzare correttamente il prodotto. Si prega di conservare
queste istruzioni in un luogo sicuro dopo averle lette come riferimento per il futuro.
Per ridurre il rischio di scosse elettriche, non rimuovere il coperchio o il lato.
Contattare sempre personale qualificato per le riparazioni.
Per ridurre il rischio di incendio e di scosse elettriche, non esporre l’apparecchio all’u-
midità e al contatto diretto con i liquidi.
ISTRUZIONI DI SICUREZZA
ESPANOL
9
ITALIANO ENGLISH
• ZZSNOWJET
• 1 x cavo di alimentazione
• 1 x Manuale utente
• 1 x tubo per il serbatoio del fluido
• 1 serbatoio del fluido da 20 litri
• 1 x tubo dell’aria 10 metri
• Posizionare la macchina su una superficie piana con almeno 50 cm di spazio libero intorno.
• Riempire il serbatoio del fluido con fluido approvato ZZIPP.
• Collegare la macchina a un’alimentazione di potenza adeguata. Per determinare la
potenza richiesta, fare riferimento alle caratteristiche tecniche.
• Collegare sempre la macchina a un circuito protetto e assicurarsi che sia
adeguatamente messa a terra per evitare il rischio di folgorazione.
• Accendere la macchina, premere il pulsante [SNOW]/[DOWN] sul pannello di
controllo per iniziare a fare la neve.
• Per spegnere la macchina, premere il pulsante [STOP] e portare l’interruttore di
alimentazione in posizione OFF.
La macchina può essere azionata con l’interfaccia di controllo digitale a bordo
CONTENUTO
IMPOSTAZIONI
FUNZIONAMENTO
Pulsante Funzione
[MENU] Scorre il menu delle impostazioni
[UP][TIMER] Funzione Up/Attiva Timer
[DOWN][SNOW] Funzione Giù/Attiva volume
[ENTER][STOP] Disattiva la funzione Timer/Snow, Esce dal menu
ESPANOL
10
ITALIANOENGLISH
La macchina fornisce un connettore XLR a 3 pin per il collegamento DMX. Il diagramma
seguente indica le informazioni sull’assegnazione dei pin.
Effettuare la connessione DMX – Collegare la macchina a un controller DMX o a una
delle macchine della catena DMX. ZZSNOWJET utilizza un connettore XLR a 3 pin per il
collegamento che si trova sul retro della macchina.
Utilizzare il menu di controllo per impostare l’indirizzo DMX. La macchina occupa
2 canali. L’indirizzo iniziale è definito come il primo canale dal quale ZZSNOWJET
risponderà al controller. Controllare sempre due volte per assicurarsi che non vi siano
canali sovrapposti per il controllo ottimale della macchina.
1. Collegare lo speciale connettore a 5 pin del ricevitore remoto wireless all’ingresso
[WIRELESS CONTROLLER] sul retro della macchina.
2. Fissare il ricevitore remoto con la sua superficie magnetica alla macchina.
3. Estrarre l’antenna del telecomando senza fili e premere il pulsante A per produrre
neve, e il pulsante B per fermarla.
FUNZIONAMENTO DMX
UTILIZZO CON TELECOMANDO WIRELESS
Table des matières
Langues :
Autres manuels Zzipp Matériel de DJ


Manuels Matériel de DJ populaires d'autres marques


thomann
thomann Stairville DJ Lase 40-G MK-III Manuel utilisateur

Eagletone
Eagletone 6 Eyes Flower Manuel utilisateur

EuroLite
EuroLite FLD-1508 Manuel utilisateur

Technical Pro
Technical Pro LG8xSEA Manuel utilisateur

JB Systems
JB Systems Lounge Laser DMX Manuel utilisateur

Lightmaxx
Lightmaxx Vega Halo 90 Manuel utilisateur

Elation
Elation FUZE WASH Z350 Manuel utilisateur

Maverick
Maverick MK3 WASH Manuel utilisateur

Infinity
Infinity TF-260C7 Fresnel Manuel utilisateur

Chauvet
Chauvet EVE E-50Z Manuel utilisateur

Eliminator Lighting
Eliminator Lighting E 138 Manuel utilisateur

EuroLite
EuroLite Mini Multicolor LED Flashing Light SC Manuel utilisateur