ZWO ASIAIR Mini Manuel utilisateur

ASIAIR Mini
User Manual
2022.07
Quick Keyword Search
Keyword search is supported within this document. You can use the keyboard shortcut Command + F on a
Mac, or Control + F on Windows to find what you need.
Section Jump
You can quickly access sections of this document by clicking the relevant section in the contents table.
Print This Document
This is a high-resolution printable document.
Icon Usage
Symbols
Forbid Attention Tips Further Reading
Supporting Material
ZWO Provides instructional videos and the following supporting documents for ASIAIR Mini users:
1. Quick Start Guide
2. User Manual (including disclaimer and safety summary)
It is recommended that users watch the instructional video first, and then read the “Quick Start Guide” to
understand the installation and basic setup.
For detailed product information, please read the User Manual.
YouTube Videos
To watch some very useful videos: https://www.youtube.com/results?search_query=asiair
Download the ASIAIR App
Scan the QR code to download the app, iOS users can search and download the app in the App Store,

Android users will find the app in the Google Play Store.
ASIAIR app requires Android 6.0 and above, iOS 11 and above.
iOS / iPadOS requires 1GB and above: iPhone 5 and above full series, iPod sixth generation and above, iPad
third generation and above, iPad Air series, iPad Pro series.
Android devices: 4 GB or more of RAM is recommended.
Table of Contents
01.Product Overview
Introduction
Features
Preparation
Device Component
Indications
02.Initial Setup
Data Cable Connections
Power Cable Connections
Network Connection

Mount Connection via Cables
Mount Connection via Network
DSLR Camera Connection
03.ASIAIR App
Homepage
Basic Configuration
Guiding
Mount Control Panel
Additional Tools
Quick Start Guide to Imaging
Live Stacking
Autorun
04.Appendix
Export Image File
Software Updates
ASIAIR OS Restore
Security Essentials
Disclaimer
After Sale Support
Product Description
This section introduces the ASIAIR Mini.
Introduction
ASIAIR Mini is a smart Wi-Fi device. It is equipped with a power management module, ample USB
connectivity, telescope mounting foot and ASIAIR App's rich feature set. ASIAIR Mini is the third generation
of ASIAIR since its first release in July 2018.
Features
The ASIAIR Mini case is constructed of CNC milled aviation aluminum. The case is finished in a rugged and
pleasing anodized finish. The case measures 100*70*26.5mm, which makes it excellent in size and weight,
and easily mounted on almost any telescope.
A laser engraved star maps of the Ursa Major and Ursa Major Polaris adorn the front of the unit. M4 and 1⁄
4-inch threads in the bottom and sides, combined with the supplied dovetail plate, make for easy installation
and removal .

The built-in power management module makes cable management easy. A variety of USB ports makes
connecting equipment a simple task. In addition to the USB ports, it also provides a shutter release port
for SLR cameras, which supports exposure over 30s.
LED status lights provide indications to the operator which are easily viewable.
Preparation
When shipped from the factory, the SD card, and the side dovetail plate on which the system is mounted
are preinstalled. Before first use please ensure the SD Card is correctly and the dovetail is tight as they may
have moved in shipping.
Do not use excessive force when tightening the dovetail bolts as these may become damaged.
Product certifications
“ FCC ID: 2A7R3-ASIAIRMINI”
“IC: 28392-ASIAIRMINI”
“This device complies with Part 15 of FCC Rules. Operation is Subject to following two conditions:
(1) This device may not cause harmful interference, and
(2) This device must accept any interference received including interference that cause undesired operation.”
Device Component

1. DSLR Camera Shutter Release Port (2.5mm)
2. DC 5.5x2.1mm Power Output x4
3. Type-C Port
4. External Hinged WiFi Dual-band Antenna
5. Wi-Fi Status Indicator
6. System Status Indicator
7. Power Status Indicator
8. Reset
9. DC 12V Input
10. USB 2.0 x4
Indications

Issues with Wi-Fi can be corrected by pressing the RESET button and releasing it after the light flashes. The
Wi-Fi hotspot, password and the details for station mode will be reset after 5 seconds.
Initial Setup
This section describes the initial setup and connects to ASIAIR Mini.
Connections
Data Cable Connections
Connect the main camera and memory stick to USB 2.0 port.
Connect guide camera and telescope mount to USB 2.0 port.
EFW/EAF connect via the main camera hub.
DC 12V@3A~5A power adapter is required for cool cameras.
Power Cable Connections

ASIAIR Mini requires 12V@5A power supply.
ASIAIR Mini power outlets can provide power to connected equipment such as the main camera cooling,
EAF, EFW and dew heaters.
Pay attention to cable management to avoid entanglement when the equatorial mount rotates.
Network Connection

Step 1: After electrify and wait for the ASIAIR to beep once.
Step 2: Connect your mobile device to ASIAIR network using 12345678 as the password then open the
ASIAIR app.
Step 3: Start your journey into astrophotography!
Mount Connection via Cables
1. Connecting RS-232
Most equatorial mounts have a hand controller used to manage mount settings and control. Common ones
are ARGO VAVIS, GTOCP series, StarGo, NexStar series, SynScan V 3 / V4 series, Pulsar2 GoTo, Go2Nova
series, Gemini series, AutoStar Series, AudioStar series, PMC-8 and Electronic FS-2 commonly used by DIY
telescope builders.
Many mounts now support direct USB connection, but you can also use the included RS232-USB adapter
to connect to your mount.
SynScan V5 needs to use a USB Type B ‒ Type A printer data cable. If the connection type or baud rate is
incorrect, it will fail to connect in the app.
2. Direct USB Connection to the mount

Many equatorial mounts now have their control system built into the equatorial mount body and allow
direct USB connection. The equatorial mount is connected to ASIAIR Mini by direct USB connection.
To confirm whether your mount is supported by ASIAIR Mini or not, you may need to check the documents
of the mount first.
3.EQMod with EQDir cable
For the EQMOD system, use an EQDir cable and connect your mount with ASIAIR Mini. Select [EQMod
Mount] or [EQMod with SkySafari] in the app.
Supported EQMod Mounts:
EQ3-2
NEQ3
HEQ3
SkyView Pro EQ
EQ4
EQ5
HEQ5
EQ6
EQ6 Pro
NEQ6
EQ6-R PRO
AZ-EQ5GT
AZ-EQ6GT
EQ8
EQM-35 Pro
AZ-GTi*
M-Uno Fast Reverse Single Fork Arm EQ
Linear Fast Reverse EQ
Vixen GPDX/ Vixen SP fitted with SynScan Upgrade kit (EQ5)
EQMod baud are 9600,except ZEQ5 which is 115200.
For AZ-GT via network connection the correct baud rate is 11880and UDP protocol.
Mount Connection via Network
1. Connecting via WiFi
Some mounts now have built-in Wi-Fi modules or provide an external Wi-Fi accessory, such as AZ-GTi with
SynScan WiFi module, StarFi Wi-Fi Adapter, SkyPortal Wi-Fi Module, StarGo Wi-Fi mode, PMC-8 Wi-Fi mode
etc.
For a detailed description of ASIAIR Mini connections, please refer to the relevant documents on the support
page of ZWO official website.
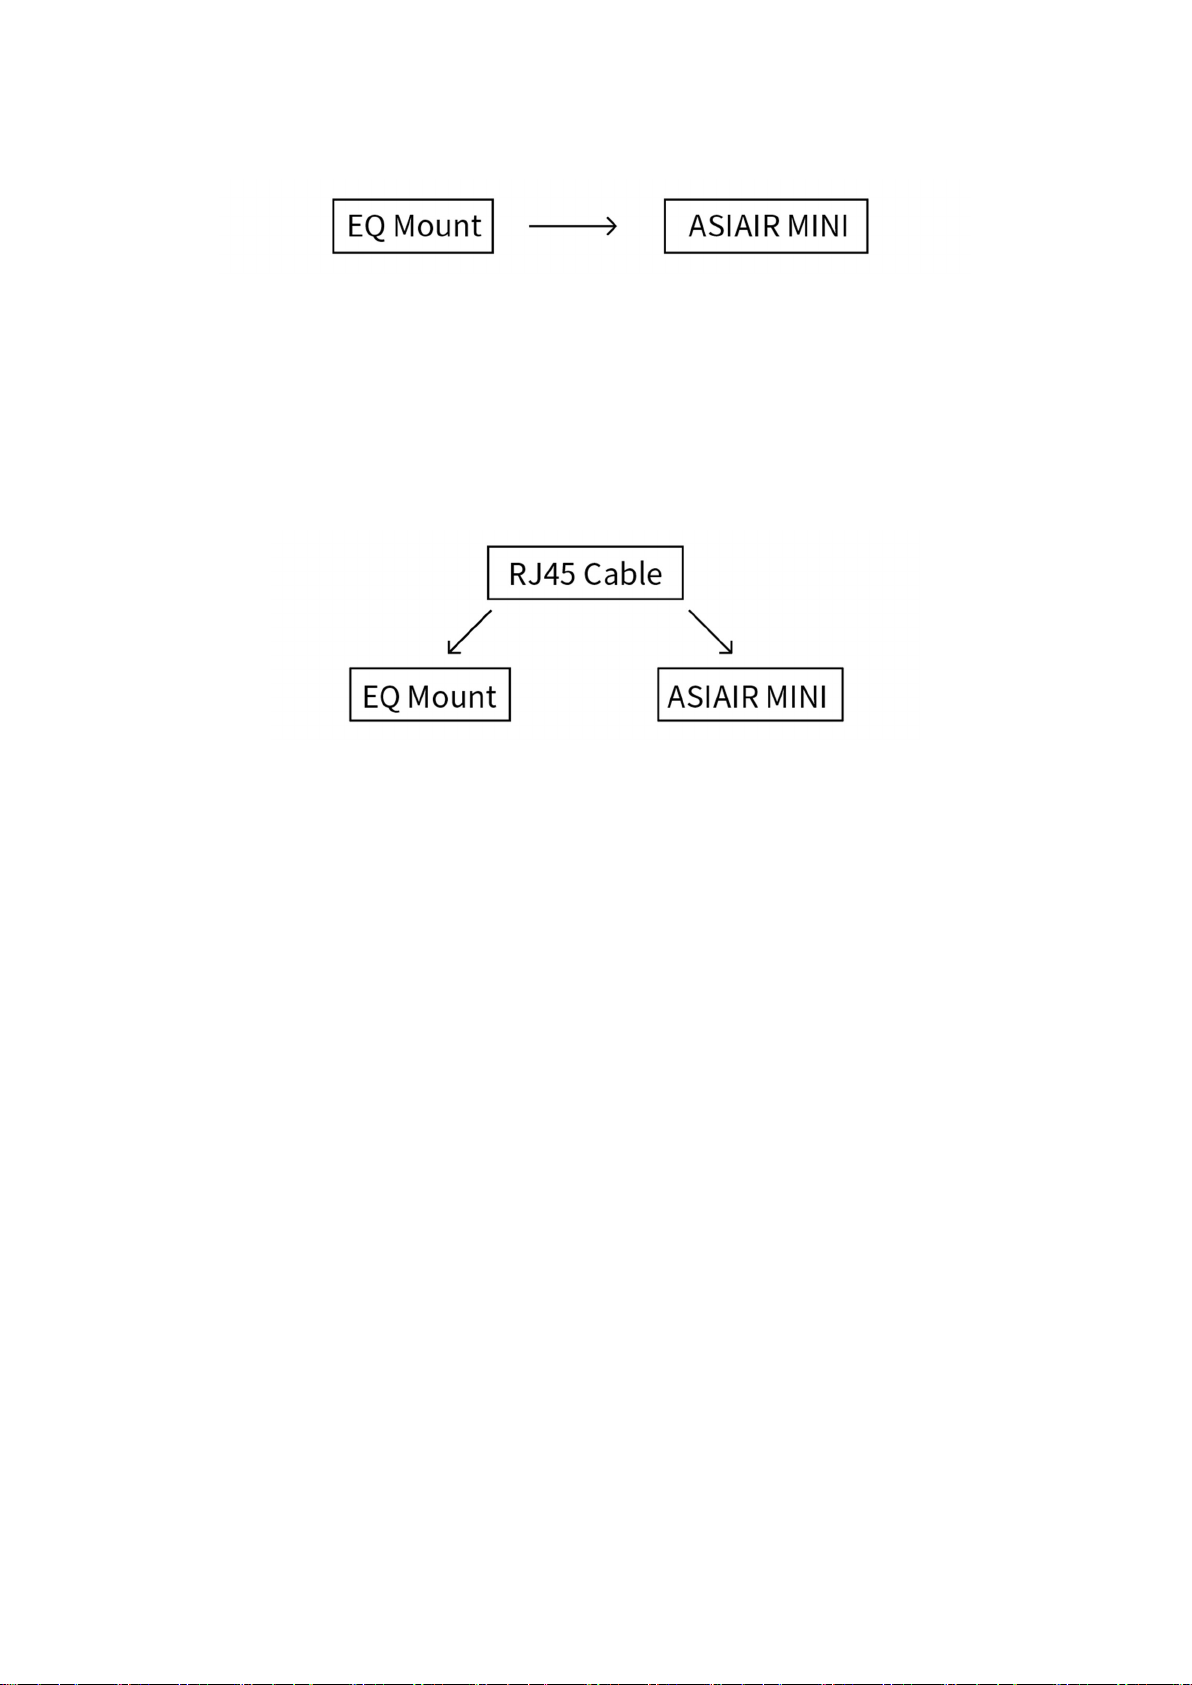
2. Network Cable Connection
This method is mainly aimed at Vixen's StarBook series control system, including StarBook, StarBook One,
StarBook-S, StarBook Ten, etc. Specific steps are as follows:
① Power on the StarBook control system.
② Directly connect the ASIAIR Mini and StarBook control systems via an RJ45 standard (Crystal connector
is also in A or B mode).
③ Open the ASIAIR App, select wired ethernet on the connection settings page to automatically obtain an
IP address.
④ Select the corresponding StarBook control system option and fill in the StarBook control system IP in the
IP input box (obtained at "Menu-About LAN"), for example, 169.254.0.1, port 80.
If the ASIAIR prompts that the connection failed reconfirm on the ‘About LAN’ page in the StarBook, that it
obtained an IP address.
DSLR Camera Connection
Table des matières
Autres manuels ZWO Accessoires


