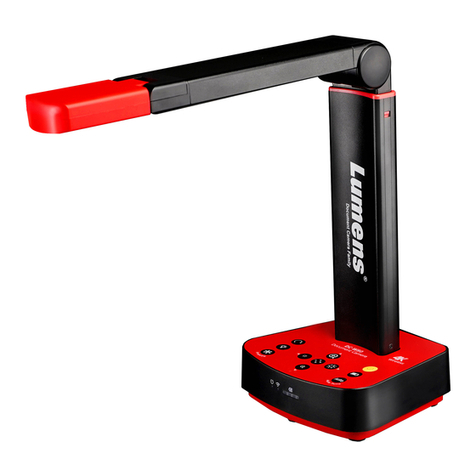
WolfVision Visualizer VZ-15 Manuel utilisateur

INSTRUCTIONS
ENGLISH
VZ-15
R

Make sure that sufficient air circulation for cooling the unit is possible (ventilation slots on the
left and right side of the unit)
If the Visualizer is not used for a long time turn off the main power switch (#34)!
If there is any abnormality (abnormal noise, smell, smoke etc.) turn the power off immediately
and contact your Visualizer dealer!
USE THIS MACHINE ONLY WITH THE CORRECT VOLTAGE AS
SHOWN ON THE TYPLABEL !
Do not use a damaged power cord. This may cause short circuits or electrical shocks!
Do not modify the Visualizer or operate it without the cover panel firmly in place, to prevent danger!
DO NOT EXPOSE THE UNIT TO EXTREME HEAT OR MOISTURE !
Do not expose the Visualizer to water, metallic objects or any flammable material.
Do not place liquids or wet objects on the working surface! Put them in front of or behind the
unit and use it as a camera. If you work with wet hands, cover the remote control with plastic wrap!
DO NOT CARRY THE VISUALIZER HOLDING IT ONLY BY ITS
MIRROR ARM (#1) !
DURING TRANSPORTATION PROTECT THE UNIT FROM EXCESSIVE
SHOCKS !
Avoid installing the Visualizer in environments where there are radiations.
Avoid installing the Visualizer in locations exposed to strong magnetic fields or electrical
currents. This could cause monitor image distortion or even damage to the CCD camera.
PRECAUTIONS
2

Contents:
Precautions
Description of the Wolfvision Visualizer
How the Visualizer works
Basic preparations
Working with the Wolfvision Visualizer
Working on the working surface
Working outside the working surface / Scanning slides
Autoiris / Manual Iris
Reflections / Glare
Lighting
Preset functions
Switchable outputs
Read-in device for computers
Connecting a number of monitors
Lightboxes (Bottom light)
Using a video printer
Video recording
Switching to playback of a video recorder
Scanning slides
Lamp changer
Maintenance
Exchanging lamps
Thermostat
Exchanging a fuse
Infrared remote control
Changing the frequency of the IR-control
Transportation
Maintenance / Mirror cleaning
Specifications
Connections
Troubleshooting
Genlock operation (general view on page 15)
Copyright: Wolf Vision GmbH & Co KG,Vlbg. Wirtschaftspark, A-6840 Götzis,
Austria, Tel. ++43/5523/52250-0, Fax. ++43/5523/52249
The Wolfvision Visualizer VZ-15 E/U/UE/N was developed and designed by
WOLFVISION in Austria. It is "MADE IN AUSTRIA"
Patents (examples): US 5027219, FRG 3833908, CH 678576
Printed in Austria Design and specifications subject to change! September 1996
ENGLISH
3
Page 2
Page 4-5
Page 5
Page 5
Page 6-10
Page 6
Page 6
Page 6
Page 7 IMPORTANT !
Page 7
Page 7
Page 8
Page 8
Page 8
Page 8
Page 9
Page 9
Page 9
Page 10
Page 10
Page 10-11
Page 10
Page 11
Page 11
Page 11
Page 12
Page 12 IMPORTANT !
Page 12 IMPORTANT !
Page 13
Page 14
Page 14-15
Special instructions manual

#1 Arm with pneumatic damper
#2 Mirror system
#3 Control panel
#4 Connections (on the back)
#5 Working plate (black/white)
#6 Air extraction
#7 Ventilation
#8 Lamp changer (see page 10)
#9 Lamp exchange cover
#10 Reflector head
#11 Release button for the arm
#13 Sensor for infrared remote control
#14 Infrared remote control
#15 ZOOM tele
#16 ZOOM wide
#17 FOKUS +
#18 FOKUS -
#19 Manual IRIS dark
#20 Manual IRIS bright
#21 IMAGE (=switchable outputs) off
#22 IMAGE (=switchable outputs) on
#23 LIGHT off
#24 LIGHT on
#25 PRESET 1 (see page7)
#26 PRESET 2 (see page 7)
#27 POWER off
#28 POWER on
#29 LED light for Power off (red)
#30 LED light for Power on (green)
#31 Preview video output
#32 Composite video output (switchable)
#33 External Sync Input
(see spezial instruction manual)
#34 Main power switch
#35 Fuse (see page 11)
#36 Power connection
#37 Y/C (S-VHS) output (switchable)
#38 Serial port for controlling the VZ-15
#39 Parallel port for controlling the VZ-15
1
23
5
6
78
9
10
11
14
13
4
ZOOM
FOCUS
IRIS
IMAGE
LIGHT
PRESET
POWER
off
off
21
off
on
on
on
R
Serial
Parallel
Preview Composite Y/C
Mains
Fuse
Sync in
31 37
34
35
36
38
39
32
33 CONNECTIONS
CONTROL PANEL
15 16
17
19
21
23
25
27
24
26
28 30
29
22
20
18
4

HOW THE VISUALIZER WORKS
b
a
A light projector (b) inside the Wolfvision Visualizer projects
the light via a mirror inside the unit and a mirror on the reflector
head onto the working surface. The video camera (a) inside the
unit scans the picture where the light falls.
The optics of the camera and the light projector are synchronized.
This means that when the size of recording area is increased or
decreased with the ZOOM-keys (#15,#16), the size of the
illuminated area on the working surface is also increased or
decreased.
Thus the illuminated area on the working surface always indicates
where the camera scans the picture. (In fact, the scanned area is
fractionally smaller than the light field.)
1. Press the release
button 2. Pull arm
upwards
BASIC PREPARATIONS
1. Press the release for the arm (#11) and simultaneously pull the arm upward. Make sure that the arm is
extended to its full length.
2. Connect the power cable to the unit (#36) and plug it in.
3. Connect a control monitor (if required) to the Preview video output (#31).
4. Connect a large viewing monitor or a video projector to the Composite video output (#32), the Y/C output
(#37) or the RGBS output (#40). These outputs can be switched on and off with the IMAGE keys (#21,#22)
of the control panel.
For live image projection we highly reccomend using the Y/C output (#37). The picture quality (especially
the resolution) is much better than with the Composite video output (#32).
5. Turn the main power switch (#34, on the back of the unit) to "I". The red power indicator (#29) on the
control panel indicates that power is supplied.
6. Press the POWER on key (#28) on the control panel. The Visualizer now runs the "factory setup"
(=automatic focusing of an A5 format on the working surface) during which the green LED light (#30)
is flashing. As soon as the green LED light stays illuminated you can start working with the Visualizer.
5

WORKING ON THE WORKING SURFACE
1. Place your subject material on the working surface. For background use either the white side or the black
side of the working plate. For some objects the best presentation can be made with colored background.
2. Tilt the reflector head (#10) so that the object is illuminated.
TV-Monitor Video projector
DO NOT TOUCH THE MIRROR,
AS FINGERPRINTS CAUSE
BRIGHT AND HAZY SPOTS
ON THE PICTURE ! ALWAYS
KEEP THE MIRROR CLEAN !
CAUTION: SENSITIVE FRONT
COATED MIRROR!
3. Select the enlargement required with the ZOOM keys (#15,#16) on the control panel or the
infrared remote control.
4. Adjust the sharpness with the FOCUS keys (#17,#18) on the control panel or the infrared remote control.
For showing 3-dimensional objects with the Wolfvision-Visualizer, just place them on the working surface
and adjust ZOOM and FOCUS (as mentioned). Due to a special Wolfvision lens the object can be up to 9.7"
(25 cm) in height. If the object is to big for the working surface or if you want to show it from the side just
place it behind or in front of the unit and tilt the reflector head.
WORKING OUTSIDE THE WORKING SURFACE
In this way it is also possible to make recordings
of subjects in the room or surrounding area, as
with a video camera by just tilting the reflector
head.
Due to the great focal range it is possible to
show details even from a great distance to
the unit.
If you want to record people you should turn off the light with the LIGHT off key (#23), so that they are not
dazzled.
AUTOIRIS / MANUAL IRIS
The Wolfvision Visualizer is equipped with autoiris. That means that the brightness of the camera image adjusts
automatically. Using the IRIS keys (#19,#20) on the control panel or the remote control the autoiris function is
switched off. In this mode the Iris can be adjusted manually.
When using the ZOOM keys (#15,#16) on the control panel or the remote control the autoiris function is
switched on again 6

REFLECTIONS / GLARE IMPORTANT
Reflections can appear only in the bottom half of the working surface, where the light is reflected directly into the
camera. In this case, move the object upwards and tilt the reflector head slightly.
If this is not possbile (e.g. with very big objects), pull the working plate to the front of the unit (as shown below)
and tilt the reflector head accordingly. As the working plate is magnetic, it will stick to the unit.
Reflection: No reflection: No reflection:
Working plate (#5)
Light reflected directly
into camera Light reflected to
the outside Light reflected to
the outside
Please make sure that reflections are not caused by room light !
LIGHTING
The lighting system is fixed for working on the working surface. Because of the oblique mounting of the
camera and the light projector of the Visualizer the light-field shifts to the left when the distance between the
Visualizer and the scanned object is increased. This means that the light field no longer exactly shows the
recorded area. The edges of the light field may also be unsharp. In this case switch off the Visualizers light
with the LIGHT off key (#23) and work with room light.
PRESET FUNCTION
PRESET
21
The Wolfvision Visualizer VZ-15 offers the possibility of programming two presets for the functions Zoom,
Focus, Iris, Light and Image. They can be recalled with the PRESET 1 (#25) and PRESET 2 (#26) key.
This function is very useful for example if a user requires one preset for papers on the working surface and
one preset for an object placed in front of the unit. During his presentation the user just has to press the
PRESET 1 or PRESET 2 key when he changes from one object to the other.
While the VZ-15 is adjusting the preset position the green LED light (#28) is flashing.
For programming a preset just adjust Zoom, Focus, Iris, Light and Image as required and simultaneously
press the PRESET 1 or the PRESET 2 key together with the Image on key (#22)).
PLEASE NOTE: Always press the Image on key before the PRESET key!
Factory setup:
When using the POWER on key (#28) the unit is adjusting the "Factory Setup" (=Zoom and Focus on an A5
format on the working surface)
Image on Image on
Preset 1 Preset 2
++
or:
7

SWITCHABLE OUTPUTS
IMAGE
off on
The Composite video output (#32) and the Y/C output (#37) of the Visualizer are switchable. Use the IMAGE
keys (#21,#22) on the control panel or the remote control to switch the signal supplied from these outputs on
and off.
Independently a video signal is always supplied to the Preview video output (#31). This output can be used for
a control monitor. A constant sync signal is supplied to all switchable outputs (even in the image off mode)
eliminating monitor image distortions when switching.
READ-IN DEVICE FOR COMPUTERS
The Wolfvision Visualizer is perfectly suited for working as
a 3-D scanner for computers equipped with a Grabber Card.
A Grabber Card can be used to digitize a video signal, in order
to store and process single pictures on a computer.
Therefore just connect the Composite video output
(#32) or the Y/C output (#37) of the Visualizer to the
according input of your computers Grabber Card.
CONNECTING A NUMBER OF MONITORS
out
in
in
in
in
out
out
out
Connect a control monitor to the Preview video output (#31) of the Wolfvision Visualizer. Connect
additional monitors to the Composite video output (#32) or the Y/C output (#37) of the Visualizer by
looping them through the inputs and outputs of each monitor (as shown above).
In this way a number of monitors can be connected. However if the signal is looped through a lot of monitors
a video signal amplifier should be used in order to achieve equivalent picture quality on all monitors. The
number of monitors throught which the signal can be looped without a signal amplifier depends on the
type of monitor and on the cable lenght.
8
OPTIONAL LIGHTBOXES (Bottom light)
Switch off the light of the Visualizer with the Light off key (#23) and switch on the light of the lightbox.
Optional lightboxes are available from Wolfvisionin 3 different sizes.
These lightboxes improve the quality of transparencies, X-rays and slides.
While working with one of Wolfvisions optional
lightboxes, the light of the Visualizer has to be
switched off - in order to prevent reflections !!!

The Wolfvision Visualizer can also be used for image capture with a video printer. In this manner single
pictures of papers and objects can be made quickly. The lighting and focus problems are eliminated by the
Visualizers superb light and scan system. Just connect the Composite video output (#32) or the Y/C output
(#37) of the Visualizer to the according video input of the video printer.
Connect a control monitor to the video output of the video printer and (if required) a second control
monitor to the Preview video output (#31) of the Visualizer.
USING A VIDEO PRINTER
VIDEO RECORDING
video / Y/C out
video / Y/C in
VCR "stop"
video / Y/C in
video / Y/C out
A video recorder can be connected to the Wolfvision
Visualizer, so that recordings on video tape can be made.
Simply connect the Composite video output (#32) or the
Y/C output (#37) of the Visualizer to the according input
of your video recorder. When using a S-VHS or Hi-8
video recorder use the Y/C output in order to archive the
best picture quality
Connect a control monitor to the output of the video recorder
SWITCHING TO PLAYBACK OF A VIDEO RECORDER
If you want to mix your presentation with the Wolfvision Visualizer with playback of a video tape, connect the
Visualizer, the video recorder and the monitor (or video projector) as follows:
Connect the Composite video output (#32) or the Y/C output (#37) of the Visualizer to the according
input of the video recorder. Connect the video or Y/C output of the video recorder with the audiences
monitor or video projector.
Adjust the video recorder so that the picture of the Visualizer will be shown. When the video recorder
is switched to play the Visualizers picture will be interrupted by the picture of the video recorder.
Switch the video recorder to stop and the picture of the Visualizer will reappear on the monitor or
video projector.
9

SCANNING SLIDES
Visualizer
Slide projector
The Wolfvision Visualizer together with one or more
slide projectors allows easy scanning of individual slides
or even whole slide shows (with cross fading).
Just project the slides onto a screen (or another white
surface), switch off the Visualizers light with theLIGHT
off key (#23) and tilt the reflector head to scan the slides
(as shown on the left). In this way it is also possible to
zoom in on details in a slide
LAMP CHANGER
The Wolfvision Visualizer is fitted with a lamp changer.
If one lamp fails, there is no need to replace it immediately.
Just turn the switch of the lamp changer (#8) on the front
side of the machine to the locked position.
The spare lamp is now employed.
Thus there is no need to exchange a lamp during a presentation. The red light above the lamp changer switch
illuminates to indicate that the spare lamp (=the left lamp) is employed.
This acts as a reminder to exchange the other lamp (=the right lamp) for a new one when next convenient.
EXCHANGING LAMPS
left lamp
1. Press to the
right
2. Tilt forwards
right lamp
A
B
Viewed from above:
1. Disconnect the power cord!
2. Remove the working plate (#5)
3. Remove the lamp exchange cover (#9)
4. Press the retaining spring (A) on the
right side and tilt the black metal plate (B)
5. Tilt the lamp holder
6. Change the lamp
Before changing the lamp allow it to cool or use
a cloth to avoid finger burning! When pressing a
new lamp into the socket use a cloth to prevent
fingerprints on the lamp!
Only use 24 V/150 W halogen lamps (cap: G 6,35), types: Philips 7158, Osram 64640 Ansi FCS etc.
7. Return the metal plate and the lamp holder to their original positions
8. Close the lamp exchange slot
9. Reconnect the power cord and turn the main power switch (#34) to "I"
10.Turn the lamp changer switch (#8) to the left so that the right lamp is used. If the lamp changer is
turned to the right the red warning light for the spare lamp illuminates even with a new spare lamp.
10
8
Table des matières
Autres manuels WolfVision Caméra de documents

WolfVision
WolfVision SCB-12 Guide d'installation

WolfVision
WolfVision VZ-C122 Manuel utilisateur

WolfVision
WolfVision VZ-8plus4 Manuel utilisateur

WolfVision
WolfVision VZ-8plus3 Manuel utilisateur

WolfVision
WolfVision vSolution Cam Manuel utilisateur

WolfVision
WolfVision VZ-8light Manuel utilisateur

WolfVision
WolfVision VZ-17 Manuel utilisateur

WolfVision
WolfVision VZ-27plus Manuel utilisateur

WolfVision
WolfVision VZ-C11 Manuel utilisateur

WolfVision
WolfVision VZ-15b Manuel utilisateur