Vogtec 3190IB Manuel utilisateur


3190IB VoIP Phone User Manual Short_V2.0 2
Content
1.BEFOREUSINGTHEPHONE...........................................................................................................3
1‐1.PACKAGECONTENTS...........................................................................................................3
1‐2.INSTALLATION....................................................................................................................4
2.PHONEOPERATIONS.....................................................................................................................6
2‐1.TOMAKEACALL................................................................................................................6
2‐2.PHONEBOOKMANAGEMENT.............................................................................................7
2‐3.HOLD,MUTEANDVOLUMEADJUSTMENT..........................................................................7
2‐4.REJECTACALL....................................................................................................................8
2‐5.CALLTRANSFER..................................................................................................................8
2‐6.THREEPARTYCONFERENCE................................................................................................9
2‐7.CALLFORWARD.................................................................................................................9
3.CONFIGURATIONTHROUGHPHONEINTERFACE...........................................................................10
3‐1.TIMEANDDATE...............................................................................................................10
3‐2.DISPLAYCONTRAST..........................................................................................................10
3‐3.BACKLIGHTINTENSITY......................................................................................................10
3‐4.RINGTYPE.......................................................................................................................11
3‐5.LCDDISPLAYLANGUAGE..................................................................................................11
4.QUICKSTARTFORWEBCONFIGURATION.....................................................................................12
4‐1.LOGONWEB....................................................................................................................12
4‐2.VOIPSETTINGS.................................................................................................................12
5.RESETYOURPHONE....................................................................................................................14
SAFETYNOTICES.............................................................................................................................15

3190IB VoIP Phone User Manual Short_V2.0 3
1.Before Using the Phone
1-1.Package Contents
• 3190IB VoIP phone base unit.
• Handset
• Coiled handset connecting cord
• One straight Ethernet cable
• One power supply
• User Guide
• 2 wall mount brackets
• 1 table bracket
3190IB VoIP Phone User Manual Short_V2.0 4
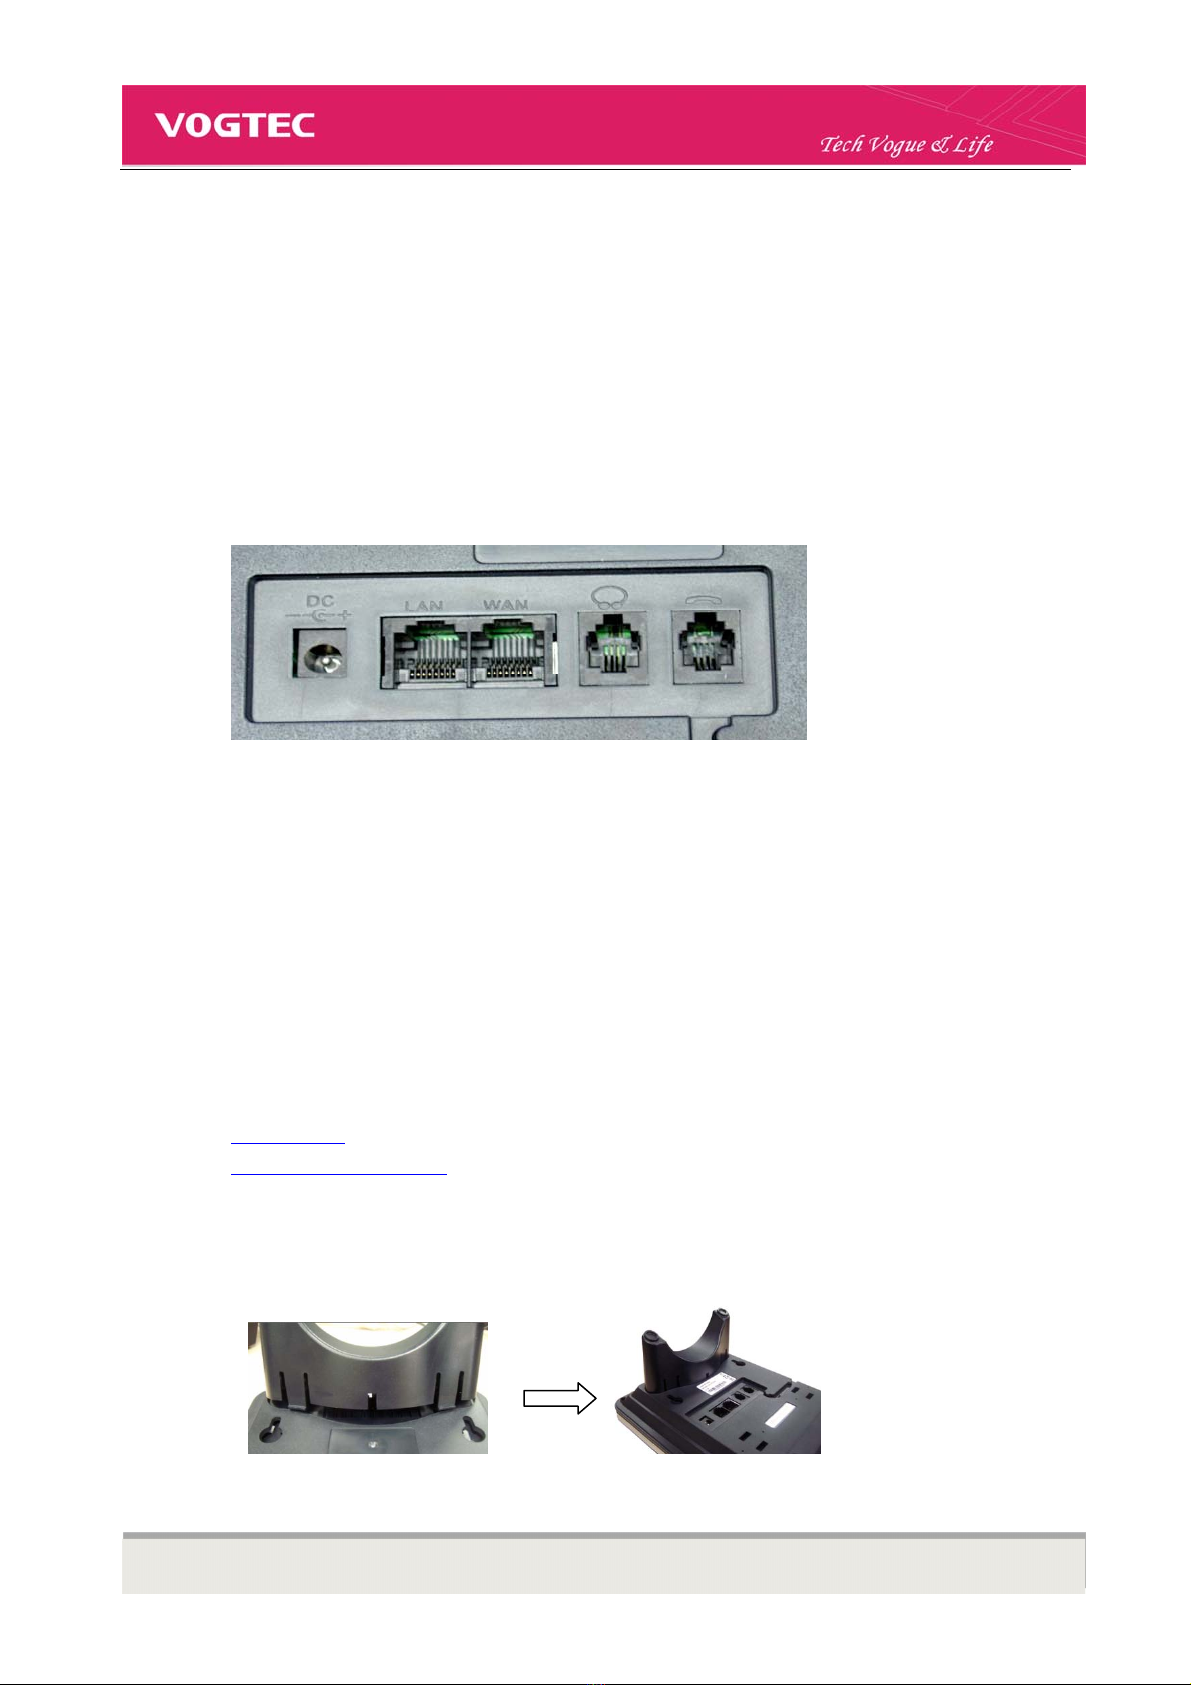
1-2.Installation
Connecting Network and Power Supply
Connect WAN port of 3190IB to router.
Connect LAN port of the phone to your PC with Ethernet cable
Plug in attached power adapter to the phone’s power jack -- ”DC”.
Connecting Handset and Headset(optional)
Connect the handset to the phone with attached coiled cord through handset jacks(one jack on the back
of the phone and another on the handset)
Connect headset to the headset jack on the back of the phone(Optional. Only if you have a headset and
need to use it).
Assembly Base and Brackets
You could choose one of below two ways to install 3190IB VoIP phone
• As a desktop
• As a wall mounting phone
Desktop installation
Assembly table bracket to base unit as shown below
Wall Mounting Installation

3190IB VoIP Phone User Manual Short_V2.0 5
To install the phone on the wall, you need to put two pothooks on the wall first. Then assemble two wall
mount brackets to the phone. In this way, the phone could be hung on the wall. The two supporting frames
could balance the bottom of the phone
.
Assembly the wedge
The wedge could be inserted as below two ways
InsertwithnarrowsidedownasWayNo.1
InsertwithnarrowsideupasWayNo.2
Wedge WayNo.1 WayNo.2
It is advisable to choose Way No.2 when you assemble the phone with wall mount brackets.

3190IB VoIP Phone User Manual Short_V2.0 6
2.Phone Operations
2-1. To Make a Call
Point to Point Call
Pick up handset, or press 【 】in handsfree mode, or 【 】in headset mode.
Choose【】or【 】 as your call out ID,then input “#Phone IP address#” .
For example:The IP phone of the other side is:192.168.0.11. You should input:#192*168*0*11**5060#,
Star * indicates Dot .
Two-SIP account and line
3190IB supports 2 independent SIP accounts. The accounts can support SIP server, user name and NAT
configuration independently.
Line button 【】、【 】 are matched to sole SIP account.
Picked up the handset, press a free line (【】or【 】), you would hear the dial tone. In this state, press
UP / Down keys to cut between two lines.
Choose a SIP account and you could make a call as below
In on-hook,
Input the number, press 【】or corresponding soft key(LCD displays Dial) to dial out the number. Then you
could choose to pick up the handset or use Hands Free function by not picking up the handset.
In off-hook
Pick up the handset, input number, press 【】or corresponding soft key(LCD displays Dial) to dial out the
number.
Dial out a number from Memory Keys M1-M5
To dial out the stored number in M1 (or other memory key)s, press M1 (or other memory keys), then pick up the
handset, or press corresponding soft key(LCD displays Dial) to dial out
Dial out a number from Phonebook
Press【】to enter phonebook, choose your desired number following LCD indication, then press 【 】
or pick up the handset to dial out

3190IB VoIP Phone User Manual Short_V2.0 7
Dial out a number from CallLog
In on-hook, press corresponding soft key(LCD displays CallLog) to enter CallLog, choose your desired number
from Missed Call/Incoming Call/Outgoing Call following LCD indication, then press 【 】or pick up the
handset to dial out
2-2. Phonebook Management
To add new item
In on-hook, press【】to enter phonebook, press corresponding soft key(LCD displays Add) to enter edit
menu, edit according to LCD indication, then press corresponding soft key(LCD displays Save) to save the
number
To edit saved number
In on-hook, press【】
→corresponding soft key(LCD displays Enter) to enter phonebook Menu
→choose the number that you want to edit with【】or【】, then press corresponding soft key(LCD
displays Enter) to enter number menu
→press corresponding soft key(LCD displays Enter) to enter edit menu
→edit as you desired
→press corresponding soft key(LCD displays Save or Quit) to save or quit
2-3. Hold, Mute and Volume Adjustment
During a call
Press【 】to keep line, press it again to release
Press 【】to enable Mute function, press it again to disable
Press 【】or【 】to adjust speaker volume

3190IB VoIP Phone User Manual Short_V2.0 8
2-4. Reject a Call
During an incoming call, press corresponding soft key (LCD displays Reject) to reject
2-5. Call Transfer
During a call, there are three ways to transfer
Blind Transfer
1). During a call, press corresponding Transfer soft key.
2). Do one of the following steps:
— Input the number which you want to transfer the call to.
— Press transfer soft key, then press【】. Get access to your desired number as LCD indicates,
then press【】to transfer.
— Press transfer soft key, then press【 】 . Select the appropriate list, to get access to your desired
number, then press【】.
Half Attended Transfer
1). During a call, press 【 】.
2). Do one of the following steps:
— Enter the number to which you want to transfer the call.
— Press transfer soft key, then press【】. Get access to your desired number as LCD indicates,
then press 【 】to transfer
— Press transfer soft key, then press【】. Select the appropriate list to get access to your desired
number, then press【】.
3). Press transfer soft key after you hear the back ring
Attended Transfer
1). During a call, press 【】.
2). Do one of the following steps:

3190IB VoIP Phone User Manual Short_V2.0 9
— Input the number which you want to transfer the call to.
— Press transfer soft key, then press【】. Use to access the number, and then press 【 】.
— Press transfer soft key, and then press【 】 . Select the appropriate list to get access to your
desired number, then press【】.
3). Before completing the transfer, you could talk with the party you are transferring to, to get transfer
permission
4). Press Transfer soft key if you get the permission. Otherwise, hang up the phone
2-6. Three Party Conference
Duringconversation,press corresponding soft key <Conf> as LCD display,
then dial another number plus # button, while line connected
press corresponding soft key<Conf> to make conference call
2-7. Call Forward
Press【 】ÆOption ÆCall Forward ÆChoose Line or Line number as you desired ÆEdit ÆPress
【】or【 】to choose Always/Busy/No answer as you desiredÆPress Save soft key to enable
Follow above procedures and choose Off to disable forward

3190IB VoIP Phone User Manual Short_V2.0 10
3.Configuration Through Phone Interface
3-1. Time and Date
To configure the time and date:
Press【】.
Select Configuration ÆDate/Time ÆEdit.
The inputting form: MM.DD.YYYY.HH.MM.SS. Substitute * for
Note: This is not a necessary setting. Since the displayed date and time would synchronize that of the Internet
after web configuration. Details refer to Web Configuration
3-2. Display Contrast
To adjust the contrast on display to a comfortable level:
Press【】.
Select ConfigurationÆScreen SetÆContrastÆEdit
Press【】or 【 】 to increase or decrease the display contrast.
Press corresponding soft key to SAVE the settings
Press Quit to return. Or press【】to get back to idle status
3-3. Backlight Intensity
To modify the backlight intensity:
Press【】.
Select Configuration>Screen Set>Brightness>Edit
Table des matières
Autres manuels Vogtec Téléphone IP


