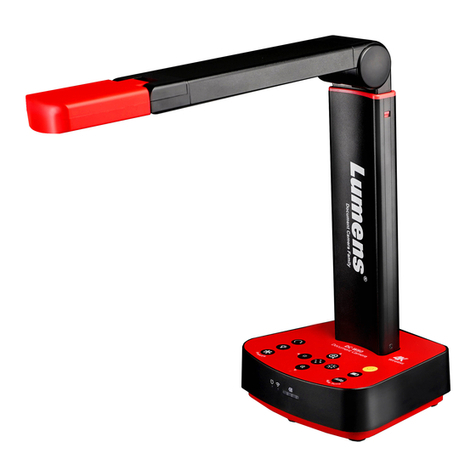
VideoLabs DocCam Pro Manuel d'utilisation

READ AND RETAIN
THIS MANUAL FOR
FUTURE REFERENCE
®
Integrated Document Camera
Installation & User Guide
DocCam Pro™ Digital

2
DocCam Pro Digital Keypad Co trols
XGA
brightness
in camera
out lights
ZOOM POWER
XGA
S itches graphics
output to 1024x768
ZOOM
Zooms
video
image in
POWER
Turns
camera
on/off
SVGA
S itches graphics output to 800x600
VGA
S itches graphics
output to 640x480
ZOOM
Zooms video
image out
LIGHTS
Turns
IllumaFlex™
lights on/off
••
•••
•••
SVGA
VGA
BRIGHTNESS
Increments graphics output brightness
bet een ten (10) levels
VIDEO GRAPHICS
OUTPUT USB CONNECTION TO
COMPUTER
▼
▼
▼
▼
▼
XGA
L R
Audio Out
Composite
Video
Power In
DC 12V
S-Video
USB
RIGHT AUDIO
OUT
COMPOSITE
VIDEO OUT
LEFT AUDIO
OUT
S-VIDEO OUT 12V CENTER
POSITIVE
POWER IN
•
•
•••
DocCam Pro Digital Backplate
••

NOTE:
Be sure that you pull
out the arm to its maxi-
mum extension. The
camera is calibrated to
accurately focus only
hen the telescoping
arm is completely
extended.
CAUTION
Do ot move the
telescopi g arm
i or out whe it is
i the horizo tal
(flat) positio .
Setting Up Your DocCam Pro Digital
Integrated Document Camera
1.) Carefully remove camera and parts from
foam packing material. For ease of shipping
the camera is packed ith its telescoping arm
flat.
2.) Set the unit on a flat, solid surface. Unpack
and identify the other parts:
• Po er supply
• Connecting cables for the DocCam Pro Digital
– S-VHS video cable
– Video and stereo audio cable (3-
plug to 3-plug; yello is video,
red and hite are audio cables)
– VGA monitor cable
– USB cable
• Remote control unit
• T o (2) AAA batteries
• USB soft are disk*
3.) To move the telescoping arm to its normal
upright position (see cover photo), pull the
spring pin at the base and raise it. The pin ill
click into three (3) different positions: flat, 45
degrees and straight up. Then loosen the
knurled compression ring on the arm’s midpoint
and extend the arm until it stops. Tighten the
compression ring.
Figure 1 – Loose i g a d tighte i g the
compressio ri g.
*To install software disk, please refer to the manual included on the CD-ROM.
3

Connect the Cables and Power Suppl
1.) First connect the po er supply to the jack
on the base of the camera. Then connect the
all plug cable to the po er supply brick. Plug
into a all outlet. The camera should po er
up immediately.
NOTE:
Use both hands hen-
ever adjusting the
neck of the camera;
this ill avoid any un-
necessary strain on
the camera’s base
and ill keep the
camera from tipping
over unexpectedly.
4.) Un rap the t o IllumaFlex™ light units and
insert in the connectors on each side of the
camera’s base.
5.) Position camera head. The head rotates
for ard and back and spins in its bracket to
allo use as a document camera or as an aux-
Figure 2 – U screwi g
the camera’s le s.
Figure 3 – The DocCam Pro Digital’s backplate.
iliary camera for presentation vie ing.
• For document viewin , spin the camera
head so the arro is pointing do n and pivot
the camera head do n to face the document.
4
The lens ill focus auto-
matically.
• For use as an auxiliary
camera, spin the camera
head so the arro is
pointing up. Then pivot the
head to face the subject.
Unscre the close-up
lens and store it in the
receptacle on the
camera’s base.
VIDEO GRAPHICS
OUTPUT
LEFT AUDIO OUT
RIGHT AUDIO OUT
COMPOSITE
VIDEO OUT
S-VIDEO OUT USB CONNECTION TO
COMPUTER
12V CENTER
POSITIVE POWER IN
•
•
•
••
••
••
••
•
•
•

NOTE:
The audio connection
is optional and not
required for video use.
2.) Connect the S-VHS cable to the “S-Video”
jack. The other end of this cable ill connect
to the “S-Video In” jack on any S-VHS-capable
VCR or TV.
• If the TV or VCR is not S-VHS capable,
connect the composite video (yello ) cable in-
stead, using the “Composite Video” jack.
3.) If you ill be using audio: Connect the red
and hite audio cable to the (R) and (L) “Audio
Out” jacks.
Remote Control
1.) Insert the t o (2) AAA batteries by pulling
up the battery cover tab, removing the tab and
installing the batteries.
2.) Make sure the battery +/– terminal symbols
line up ith the corresponding +/– symbols in-
side the battery compartment.
3.) Replace the battery cover.
Install the USB Video Capture Software
The USB interface gives you the ability to vie
and capture video from the camera on a
computer. To install the soft are, please refer
to the instructions provided on the enclosed
CD-ROM disk.
Turning the Camera On
1.) After you’ve made all the proper connec-
tions, press the “Po er” button on the camera
keypad or the remote control unit. (If the cam-
era has not po ered up on its o n.)
2.) Allo a fe seconds after you’ve pressed
the button for the camera to arm up and
reset itself. If you can’t see an image, or the
image is not in focus, refer to the
Troubleshooti g section of this manual.
5

NOTE:
The camera video ap-
erture ration is set up
for normal presenta-
tion vie ing, hich is
“landscape mode” – or
horizontal orientation.
When vie ing a docu-
ment in “portrait”
mode, hich is verti-
cal, you may cut out
the extreme top or
bottom of the image.
To get an extra 1-1/2
inch of the document
on-screen, remove
the close-up lens.
(Ho ever, this makes
it impossible to focus
correctly during some
“Zoom” functions.)
6
Operating Your DocCam Pro Digital
Camera
Setting up for Operation
The DocCam Pro Digital is designed to be used
ith a variety of equipment, including LCD
projectors, computers and other video display
devices. You may use your DocCam Pro as a
document camera or as an auxiliary camera.
Set up your camera according to your
particular application.
Using the Ke pad Controls (see pages 2 & 7)
Zoom
The DocCam Pro Digital is capable of zooming
to a 16X magnification factor – allo ing you to
quickly and easily focus in on an object or
document ith the document close-up lens
provided.
1.) Press and hold the corresponding “Zoom”
Docume t Camera – Spin the camera head
so the arro is pointing do n and pivot the cam-
era head do n to face the document. (Be sure
telescoping neck is extended to its farthest point
to ensure accurate focus.)
Auxiliary Camera – Spin the camera head so
the arro is pointing up. Then pivot the head
to face the subject. Unscre the close-up lens
and store it in the receptacle on the camera’s
base.
Figure 4 – Horizo tal,
la dscape mode.
Figure 5 – Vertical, portrait
mode.
1234567890123456789
1
23456789012345678
9
1
23456789012345678
9
1
23456789012345678
9
1
23456789012345678
9
1
23456789012345678
9
1
23456789012345678
9
1
23456789012345678
9
1
23456789012345678
9
1
23456789012345678
9
1
23456789012345678
9
1
23456789012345678
9
1
23456789012345678
9
1
23456789012345678
9
1
23456789012345678
9
1
23456789012345678
9
1
23456789012345678
9
1
23456789012345678
9
1
23456789012345678
9
1
23456789012345678
9
1
23456789012345678
9
1
23456789012345678
9
1
23456789012345678
9
1234567890123456789
head so the arro is pointing
do n and pivot
the camera head do n to
face the document.
The lens ill focus
automatically.
• For use as an auxiliary
camera, spin the camera
head so the arro is
pointing up. Then pivot the
head to face the subject.
Unscre the close-up lens
and store it in the
receptacle on the camera’s
base.
123456789012345678901234
123456789012345678901234
123456789012345678901234
123456789012345678901234
123456789012345678901234
123456789012345678901234
123456789012345678901234
123456789012345678901234
123456789012345678901234
123456789012345678901234
123456789012345678901234
123456789012345678901234
123456789012345678901234
123456789012345678901234
123456789012345678901234
123456789012345678901234
123456789012345678901234
123456789012345678901234
123456789012345678901234
head so the arro is pointing do n
and pivot the camera head do n to
face the document.
The lens ill focus automatically.
• For use as an auxiliary camera,
spin the camera head so the arro
is pointing up. Then pivot the head
to face the subject.
Unscre the close-up lens and store
it in the receptacle on the camera’s
base.

Lights
To turn the lights on, press the “Lights” button
on the keypad or remote control.
Bright ess (For XGA/VGA O ly)
The camera starts up ith a standard
brightness level. To make it brighter, press the
“Brightness” button on the keypad. Each time
you press the button, the brightness level
increases one increment up to a maximum of
ten (10) levels. After you’ve reached the
highest level, the control cycles do n to the
lo est level.
Outputs: VGA, SVGA, XGA
The DocCam Pro Digital Camera provides
direct high-resolution input to your LCD projec-
tor or multi-scan monitor according to the video
graphic standards belo . Select the output
mode you desire. If you are uncertain hich
mode to use, determine the age of your projec-
tor; generally, the ne er the projector, the higher
the resolution.
• VGA requires a resolution of 640x480 pixels
(lo est)
• SVGA requires a resolution of 800x600 pixels
• XGA requires a resolution of 1024x768 pixels
(highest)
NOTE:
It is not necessary to
use the IllumaFlex
lights if the room is
normally lit. The lights
are needed only hen
the room is very dim –
hen using an LCD
projector, for instance.
7
Figure 6 – DocCam Pro Digital’s keypad.
button on the keypad or remote control to zoom
in or out.
2.) Release the button hen the zoom is at the
desired level. The camera ill focus
automatically hen the zoom motion stops.
XGA
SVGA
VGA
BRIGHTNESS
ZOOM OUT
ZOOM IN
LIGHTS
POWER
•
•
•
•
•
•
•
•
•
•
•
•
•
••
•

8
Care and Cleaning of Your DocCam
Pro Digital Camera
• Do not attempt to take the camera apart.
There are no user-serviceable components
inside.
• Keep the camera a ay from food and liquid.
• Avoid touching the lens. Clear any dust ith
a blo er. For accidental smears or smudges,
ipe carefully ith a lens cleaning cloth.
• Clean exterior of camera by iping ith a
clean, damp cloth; do not use any abrasive
chemicals.
• Use both hands henever adjusting the neck
of the camera; this ill avoid any unnecessary
strain on the camera’s base and ill keep the
camera from tipping over unexpectedly.
NOTE:
In the event of static
shock to the camera,
it may be necessary to
cycle the po er by
unplugging the po er
supply and plugging it
back in.
Operating and Storage Conditions
Do not store or operate the DocCam Pro under
the follo ing conditions:
• A temperature above 104˚F (40˚C) or belo
32˚F (0˚C)
• Environments ith high humidity
• Dusty environments
• In inclement eather
• Under severe vibration

Troubleshooting
Problem
Green LED does not indicate
camera po er is turned on.
Green LED is on, but no picture
appears on the screen.
Audio is eak and/or excessive
feedback noise is heard.
The remote control doesn’t ork.
Suggestio
Make sure the po er adapter is
plugged into a all outlet and the
“po er” jack on the camera.
Check all cable connections to
verify that they are tight and fully
inserted.
Check monitor, LCD projector or
other video device to ensure it is
operating correctly.
Is the TV/VCR set to the correct
channel for live input? Refer to
your TV/VCR o ner’s manual.
Is the person speaking too far
from the base of the camera, or
in back of the camera?
The camera microphones should
be positioned behind the
speaker units. This helps elimi-
nate feedback.
Verify the “audio-out” cable from
the camera is plugged into a line-
in jack. If a mic-in jack is used,
you ill experience more feed-
back and other noise.
Verify that fresh batteries are in-
stalled and positioned correctly.
9

Glossar of Audio/Video Terms
Image Pick-up Device 1/4” CCD
Total Pixels 410,000
Number of Effective Pixels 768H x 494V
Horizontal Resolution 450 TV lines
Sensitivity 3 lux
Lens: (Horizontal angle) F1.4( )-F2.8(t) [47˚( )-3˚(t)]
Mechanical Zoom F-4 64mm; 16X
Video Output S-Video/Composite/L&R Audio
Scaler Outputs XGA/SVGA/VGA
Scaler Refresh Rate Up to 60Hz
USB Output USB Full Plug & Play
Illumination S/N (min) 46dB
White Balance Auto
Back Light Compensation Auto
Iris Auto
Shutter Auto Exposure
Focus Auto
Focal Range Infinity-1m(t)-0.01m( )
Po er 12 VDC
Current Consumption 865mA
Microphone Line Level Stereo; 1 V @ 600ohms
Control Keypad, IR Remote
Operating Temperature 0˚C to 40˚C
Weight 11lbs/5kg
Footprint (in use) 8in. x 11in. (20.3cm x 27.9cm)
Footprint (collapsed) 18in. x 11in. (40.6cm x 27.9cm)
Neck 18in. (46cm) -2 Section Telescoping
Head 6 Degrees of Freedom (mechanical)
Cable Set 6’–VGA Cable; 12’–Stereo Audio/Video
Cable; 25’ S-Video Cable; USB Cable
DocCam Pro Digital Specifications
Composite Video – Video standard in hich all video information is
contained in a single signal. Usually transmitted over coaxial cable
ith RCA or BNC connectors.
S-Video – S-VHS – Video standard here brightness (Y) and color (C)
are contained in t o separate signals. Usually transmitted over dual
coaxial cable ith 4-pin connectors at both ends.
XGA – Video graphics standard ith a resolution of 1024x768 pixels.
SVGA – Video graphics standard ith a resolution of 800x600 pixels.
VGA – Video graphics standard ith a resolution of 640x480 pixels.
USB – Universal Serial Bus. A standard of data transmission used
bet een t o or more devices.
10
Table des matières
Autres manuels VideoLabs Caméra de documents