Venturer PLV76176 Manuel utilisateur

E - 20
17” LCD TV
INSTRUCTION MANUAL
Need More Help?
DONOTRETURNTHISPRODUCTTOTHESTORE
Pleasevisitonlinehelpat
http://www.venturer.com
PLV76176
PLV76176S7_IB_UL_090723.indd 20 7/24/2009 11:52:56
E - 1
PLACEMENT INFORMATION
• Donotusethisunitinplaceswhichareextremely
hot,cold,dustyorhumid.
• Donotrestricttheairowofthisunitbyplacingit
somewherewithpoorairow,bycoveringitwith
acloth,byplacingitonbeddingorcarpeting.
SAFETY INFORMATION
• WhenconnectingordisconnectingtheACpower
cord,griptheplugandnotthecorditself.Pulling
thecordmaydamageitandcreateahazard.
• Whenyouarenotgoingtousetheunitforalong
periodoftime,disconnecttheACpowercord.
CONDENSATION INFORMATION
• Whenleftinaheatedroomwhereitiswarmand
damp,waterdropletsorcondensationmayform
insidetheequipment.Whenthereiscondensation
insidetheunit,theunitmaynotfunctionnormally.
Lettheunitstandfor1-2hoursbeforeturningthe
poweronorgraduallyheattheroomandletthe
unitdrybeforeuse.
RATING PLATE LOCATION
Theratingplateislocatedontherearofunit.
FCC STATEMENTS
This device complies with Part 15 of the FCC Rules.
Operationissubjecttothefollowingtwoconditions:(1)
This device may not cause harmful interference, and
(2)thisdevicemustacceptanyinterferencereceived,
including interference that may cause undesired
operation.
Thisunithasbeentestedandfoundtocomplywiththe
limitsforaClassBdigitaldevice,pursuanttoPart15
oftheFCCRules.Theselimitsaredesignedtoprovide
reasonableprotectionagainstharmfulinterferenceina
residential installation.This unit generates, uses and
canradiateradiofrequencyenergyand,ifnotinstalled
andusedinaccordancewiththeinstructions,maycause
harmfulinterferencetoradiocommunication.However,
thereisnotguaranteethatinterferencewillnotoccurin
aparticularinstallation.Ifthisunitdoescauseharmful
interferencetoradioortelevisionreception,whichcan
bedeterminedbyturningtheunitoffandon,theuseris
encouragedtotrytocorrecttheinterferencebyoneor
moreofthefollowingmeasures:
- Reorientorrelocatethereceivingantenna.
- Increase the separation between the unit and
receiver.
- Connecttheunitintoanoutletonacircuitdifferent
fromthattowhichthereceiverisconnected.
- Consult the dealer or an experienced radio/TV
technicianforhelp.
- Shielded cables must be used with this unit to
ensurecompliancewiththeClassBFCClimit.
- This television receiver provides display of
television closed captioning in accordance with
Section15.119oftheFCCrules.
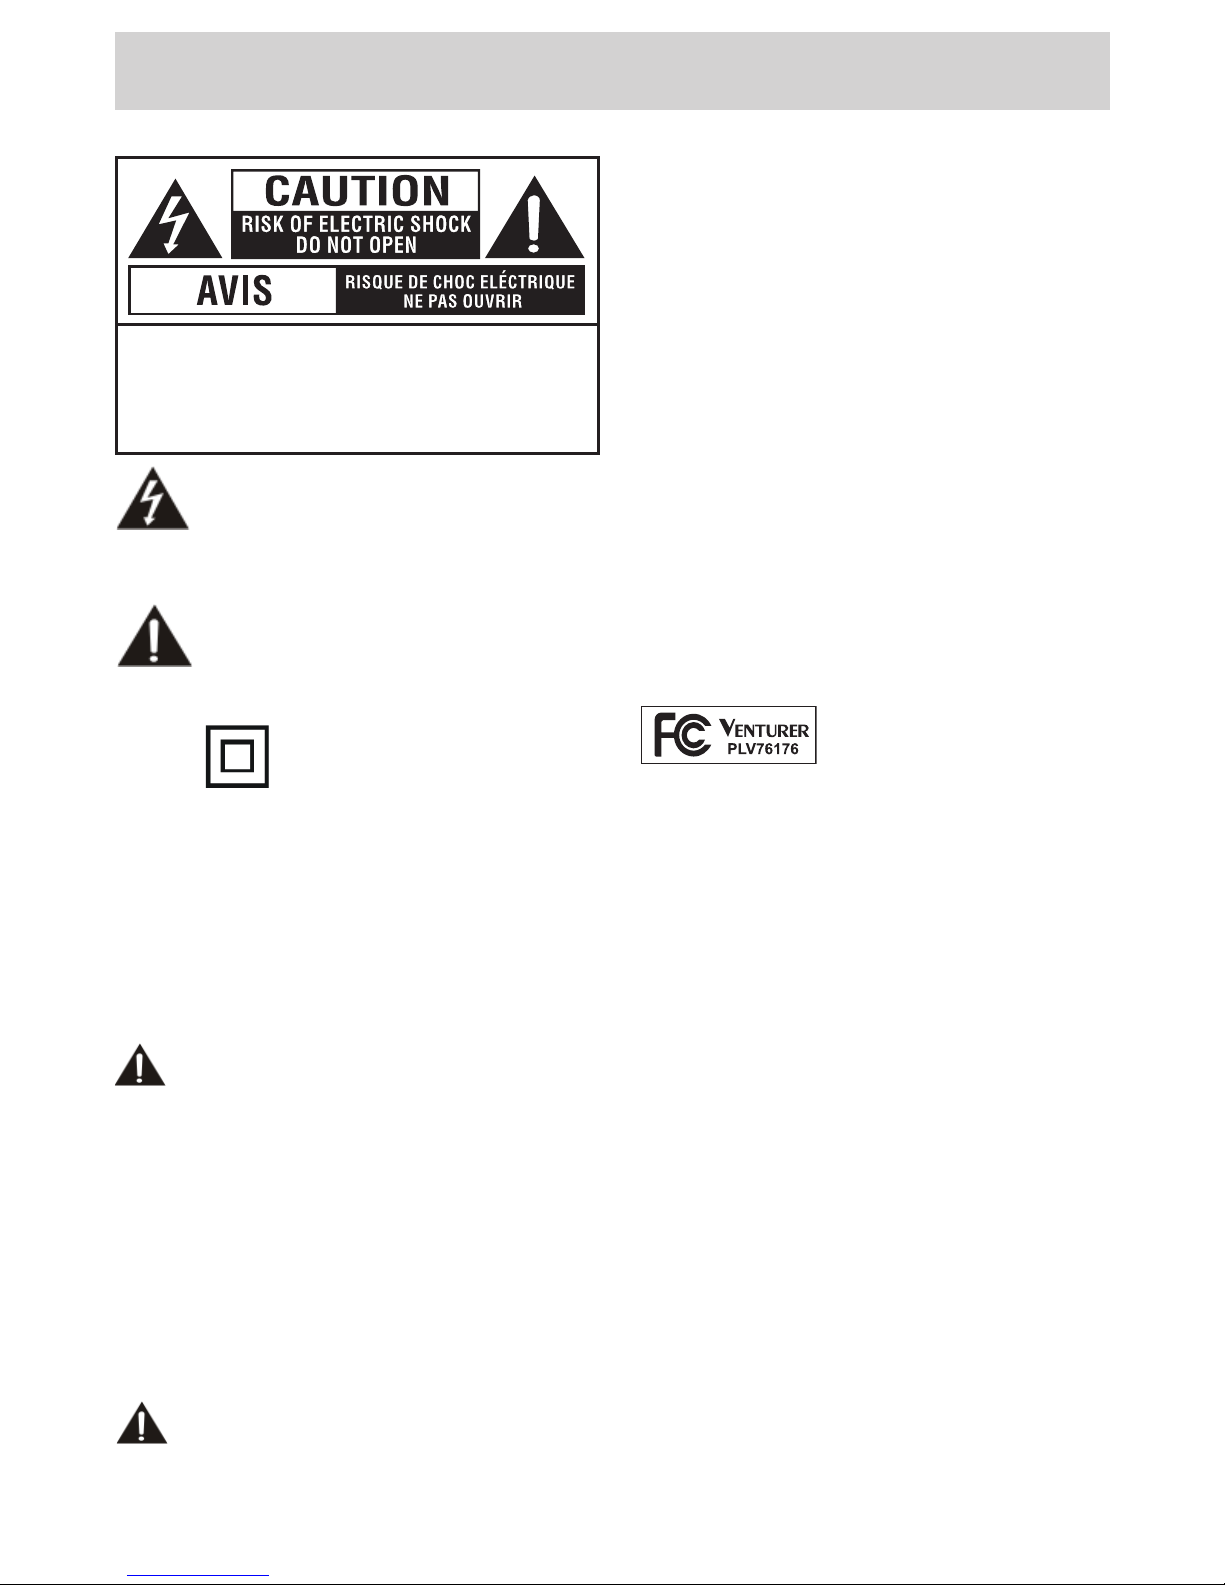
SAFETY PRECAUTIONS
Thelightningashwitharrowheadsymbol,
withinanequilateraltriangle,isintendedto
alerttheusertothepresenceofuninsulated
“dangerous voltage” within the product’s
enclosure that may be of sufcient magnitude to
constituteariskofelectricshocktopersons.
Theexclamationpointwithinanequilateral
triangle is intended to alert the user to
the presence of important operating and
maintenance(servicing)instructionsinthe
literatureaccompanyingtheappliance.
CAUTION : TO REDUCE THE RISK OF
ELECTRIC SHOCK, DO NOT REMOVE COVER
(OR BACK). NO USERSERVICEABLE PARTS
INSIDE. REFER SERVICING TO QUALIFIED
SERVICE PERSONNEL.
CAUTION
• DANGER OF EXPLOSION IF BATTERY IS
INCORRECTLY REPLACED. REPLACE ONLY
WITHTHESAMEOREQUIVALENTTYPE.
• TOPREVENTELECTRICSHOCK,MATCHWIDE
BLADE OF PLUG TO WIDE SLOT OF WALL
OUTLET, THEN FULLY INSERT.
• USE OF CONTROLS ORADJUSTMENTS OR
PERFORMANCE OF PROCEDURES OTHER
THAN THOSE SPECIFIED MAY RESULT IN
HAZARDOUSRADIATIONEXPOSURE.
The symbol for Class II
(DoubleInsulation)
WARNING:
• Toreducetheriskofreorshockhazard,donot
exposethisunittorainormoisture.
• The mains plug of apparatus should not be
obstructedORshouldbeeasilyaccessedduring
intendeduse.
• The unit shall not be exposed to dripping or
splashing and that no objects lled with liquids,
suchasvases,shallbeplacedonunit.
• In order to disconnected the unit from the
mains completely, theAC power cord should
be disconnected from the mains socket outlet
completely.
• Battery shall not be exposed to excessive heat
suchassunshine,reorthelike.
WARNING:
• Changesormodicationstothisunitnotexpressly
approved by party responsible for compliance
couldvoidtheuserauthoritytooperateunit.
Equipment tested for
complianceasacomplete
unit
PLV76176S7_IB_UL_090723.indd 1 7/24/2009 11:52:40

E - 2
IMPORTANT SAFETY INSTRUCTIONS
1) Read these instructions.
2) Keep these instructions.
3) Heed all warnings.
4) Follow all instructions.
5) Do not use this apparatus near water.
6) Clean only with dry cloth.
7) Do not block any ventilation openings. Install in accordance with the manufacturer’s
instructions.
8) Do not install near any heat sources such as radiators, heat registers, stoves, or other apparatus
(Includingampliers)thatproduceheat.
9) Do not defect the safety purpose of the polarized or grounding-type plug. A polarized plug
has two blades with one wider than the other. A grounding type plug has two blades and a
third grounding prong. The wide blade or the third prong are provided for your safety. If the
providedplugdoesnottintoyouroutlet,consultanelectricianforreplacementoftheobsolete
outlet.
10) Protect the power cord from being walked on or pinched particularly at plugs, convenience
receptacles, and the point where they exit from the apparatus.
11) Onlyusedetachments/accessoriesspeciedbythemanufacturer.
12) Useonlywiththecart,stand,tripod,bracket,ortablespeciedbythemanufacturer,
orsoldwiththeapparatus.Whenacartisused,usecautionwhenmovingthecart
/ apparatus combination to avoid injury form tip-over.
13) Unplug this apparatus during lightning storms or when unused for long periods
of time.
14) Referallservicingtoqualiedservicepersonnel.Servicingisrequiredwhentheapparatus
has been damaged in any way, such as power-supply cord or plug is damages, liquid has been
spilled or objects have fallen into the apparatus, the apparatus has been exposed to rain or
moisture, does not operate normally, or has been dropped.
PLV76176S7_IB_UL_090723.indd 2 7/24/2009 11:52:40

E - 3
Beforeturningonyourtelevisionsetforthersttime,besuretoplaceitonasolidstablesurface.Toavoid
danger,donotexposetheTVtowater,oraheatsource(e.g.lamp,candle,radiator).Donotobstructthe
ventilationgridattherearandbesuretoleavesufcientgapsaroundtheunitasshown.
QUICK INSTALLATION
1.Connect a TV antenna or a CATV cable to theAntenna
TerminalonrearofTV.
2.Connectthepowercord.
3.Pressthe / ONbuttontoturnontheunit.
4.Pressthe or buttontoselect“Yes”or“No”,thenpressthe
ENTERbuttontoconrm.
5.
The unit will enter TV setting screen. Press the button to
highlightAutoScan,thenpresstheENTERbuttontoconrm.
6.Theunitwillenterautoscansettingscreen.Pressthe button
tohighlightCableSystem, then press the or button to
choosethedesiredcablesystem(Werecommendyoupick
“AUTO”,howeveryoumightndyougetimprovedresultsusing
“STD”,“IRC”or“HRC”-thesearedifferentstandardsused
byvariousCableSystems.).Thenusethe buttontomove
thehighlightbaronStarttoScanandpressENTERbuttonto
start.Theunitwilltakeafewminutestonishautoscanand
allscannedchannelswillbestoredautomatically.
7 7/8"
2 3/8"
2 3/8"
TURNING ON THE UNIT FOR THE FIRST TIME
Thersttimeyouturnontheunit,theunitwillenterthesetupmode.Youcaneasilyfollowtheprompt
messageonthescreentocompletebasicTVsettings.
Make sure the TV antenna or CATV cable has been connected properly to the
TV ANTENNA inputjackontherearofthesystem.
Proceed with auto scan?
: SELECT "ENTER": CONFIRM
No Yes
MENU ReturnAdjustSelect
Antenna Cable
Auto Scan
Auto Scan Add CH
Channel Skip
Channel No.
Channel Label
DTV Signal :
Picture Audio Time Setup Parental TV
MENU ReturnAdjustSelect
Picture Audio Time Setup Parental TV
RF CH : 3
Found : 0
MENU ReturnAdjustSelect
Cable System AUTO
Start to Scan
Picture Audio Time Setup Parental TV
PLV76176S7_IB_UL_090723.indd 3 7/24/2009 11:52:42

E - 4
CONTENTS
SAFETY PRECAUTIONS .................................................................................... 1
IMPORTANT SAFETY INSTRUCTIONS ............................................................. 2
QUICK INSTALLATION ...................................................................................... 3
CONTENTS ......................................................................................................... 4
ACCESSORIES ................................................................................................... 5
GETTING STARTED ........................................................................................... 5
CONTROL REFERENCE GUIDE .................................................................. 6 - 7
CONNECTIONS ............................................................................................. 8 - 9
ConnectingaTVAntenna..............................................................................................8
ConnectingtootherEquipmentwithVideoOutput(VCR,Camcorder,VideoGameSystem,
Cable,Satellitesystem,etc.).........................................................................................8
ConnectingthePowerCord............................................................................................9
Connecting a PC............................................................................................ 9
USING HEADPHONES ....................................................................................... 10
INSTALLATION ................................................................................................. 11
TV SETUP .................................................................................................. 12 - 16
Picture Menu ............................................................................................................. 12
Audio Menu ...............................................................................................................12
Time Menu ............................................................................................................... 13
SetupMenu............................................................................................................13-14
ParentalMenu.............................................................................................................14-15
TV Menu ............................................................................................................ 16
TROUBLESHOOTING GUIDE .......................................................................... 17
PLV76176S7_IB_UL_090723.indd 4 7/24/2009 11:52:43

E - 5
ACCESSORIES
Pleasecheckandidentifythesuppliedaccessories.
RemoteControl(withbatteries)............................................................................................x1
GETTING STARTED
USING THE REMOTE CONTROL
• Pointtheremotecontrolattheremotesensor
locatedontheunit.
• Whenthereisastrongambientlightsource,the
performanceoftheinfraredremotesensormay
bedegraded,causingunreliableoperation.
• Therecommendedeffectivedistanceforremote
operationisabout16feet(5meters).
TO INSTALL BATTERIES
1.Openthebatterydoor.
2.Insert2“AAA”batteries.
BATTERY REPLACEMENT
Whenthebatteries become weak, the operating
distanceoftheremotecontrolisgreatlyreduced
andyouwillneedtoreplacethebatteries.
CAUTION: Danger of explosion if battery is
incorrectlyreplaced.Replaceonlywiththesame
orequivalenttype.
NOTES
• Iftheremotecontrolisnotgoingtobeusedfora
longtime,removethebatteriestoavoiddamage
causedbybatteryleakagecorrosion.
• Donotmixoldandnewbatteries.Donotmix
ALKALINE, standard (CARBON-ZINC) or
rechargeable(NICKEL-CADMIUM)batteries.
• Always remove batteries as soon as they
becomeweak.
• Weakbatteriescanleakandseverelydamage
theremotecontrol.
• WARNING:Donotdisposeofbatteriesinare.
Batteriesmayexplodeorleak.
PLV76176S7_IB_UL_090723.indd 5 7/24/2009 11:52:43

E - 6
CONTROL REFERENCE GUIDE
REMOTE CONTROL
1) MUTE Button
Presstoturnoffthesound.
2) MENU Button
Press to display the on-screen menu or switch
backtothepreviousmenuscreen.
3) CURSOR ( , , , ) Buttons
Usetohighlightselectionsonamenuscreenand
adjustcertainsettings.
ENTER Button
Conrmselectiononamenuscreen.
4) DISPLAY Button
Press to display information on the current
channel.
5) VOL + / VOL - Button
Presstoincrease/decreasethevolume.
6) LAST CH
Presstoswitchrepeatedlybetweenthelasttwo
channelsdisplayed.
7) STANDBY/ON Button
PresstoturnONtheunitorputitinSTANDBY
(OFF)mode.
8) FUNCTION Button
PresstoswitchbetweenTV/AV/PC.
9) LCD MODE Button
PresstoSelectfrompresetscreendisplaysettings
tomatchthetypeofshowyouarewatching.
10) CH / CH Buttons
Press to select the channel upward or
downward.
11) NUMERIC Buttons
Presstoenternumbersorgodirectlytoaspecic
channel.
12) •[dot]Button
Presstoenterdigitalsub-channelswiththenumeric
buttons(i.e.11.3or12.7).
PLV76176S7_IB_UL_090723.indd 6 7/24/2009 11:52:43

E - 7
CONTROL REFERENCE GUIDE
FRONT & SIDE VIEWS
1. AUDIO IN (Left/Right) / VIDEO IN
jacks
2. / ON button
Turnstheunitonandoff.
3.MENU button
Enterstheon-screenTVmenu.
4.FUNCTION button
SelectsTV/AV/PC.
5.CH / CH buttons
Press to conrm selections on the TV
menuscreenand / tochangeTV
channels.
6. VOL + / VOL - controls
Adjuststhevolumelevelandhighlights
selections(Left&Right)ontheTVmenu
screen.
7. Color LCD screen
8. Built-in speakers
9. Remote sensor
Pointtheremotecontrolhere.
Standby indicator
10. Removable stand
11. Power cord
12. MONITOR / VGA jack
13. Headphones jack
14. TV ANTENNA terminal
Connects a TV antenna or CATV
cable.
7
10
9
1413
11
2
3
6
4
5
1
8
12
PLV76176S7_IB_UL_090723.indd 7 7/24/2009 11:52:45

E - 8
TV ANTENNA
CONNECTIONS
CONNECTING A TV ANTENNA
Toviewtelevisionchannelscorrectly,asignalmustbereceivedfromoneofthefollowingsources:
- Anindoororoutdooraerialantenna
- Acablesystem
- Asatellitesystem
NOTE
Foroptimalreceptionofover-the-airTVbroadcasts,werecommendthatyouuseanexternalxedantenna.
Ifusinganindoorantenna,pleaseensurethatyoupurchaseanantennawithsufcientabilitytoreceive
signalsinyourhome.Orientationandlocationoftheantennaistypicallycriticalforbestresults–youmay
ndthatplacementoftheantennanearawindow,orinanelevatedlocation,improvesperformance.
ToTVAntenna
terminal
ToHomeAntennaterminal
CablewithoutaCATV
converterorcablebox
CombinationVHF/UHF
antenna
(ATSC/NTSCsignal)
SeparateVHForUHF
antenna
(ATSC/NTSCsignal)
CONNECTING TO A VCR / CAMCORDER / VIDEO GAME SYSTEM / CABLE / SATELLITE
SYSTEM
ConnectanAUDIO/VIDEOcable(notincluded)asshown:
MakesureyouconnectthecablefromtheAUDIO/VIDEOOUTjackoftheotherequipmenttoAUDIO/
VIDEOINjackofthisunit.
NOTE
Pleaserefertotheconnectedequipment’susermanualformoreinformation.
ToAUDIO/VIDEO
INjacks
ToAUDIO/VIDEO
OUTjacks
PLV76176S7_IB_UL_090723.indd 8 7/24/2009 11:52:46
E - 9
CONNECTIONS
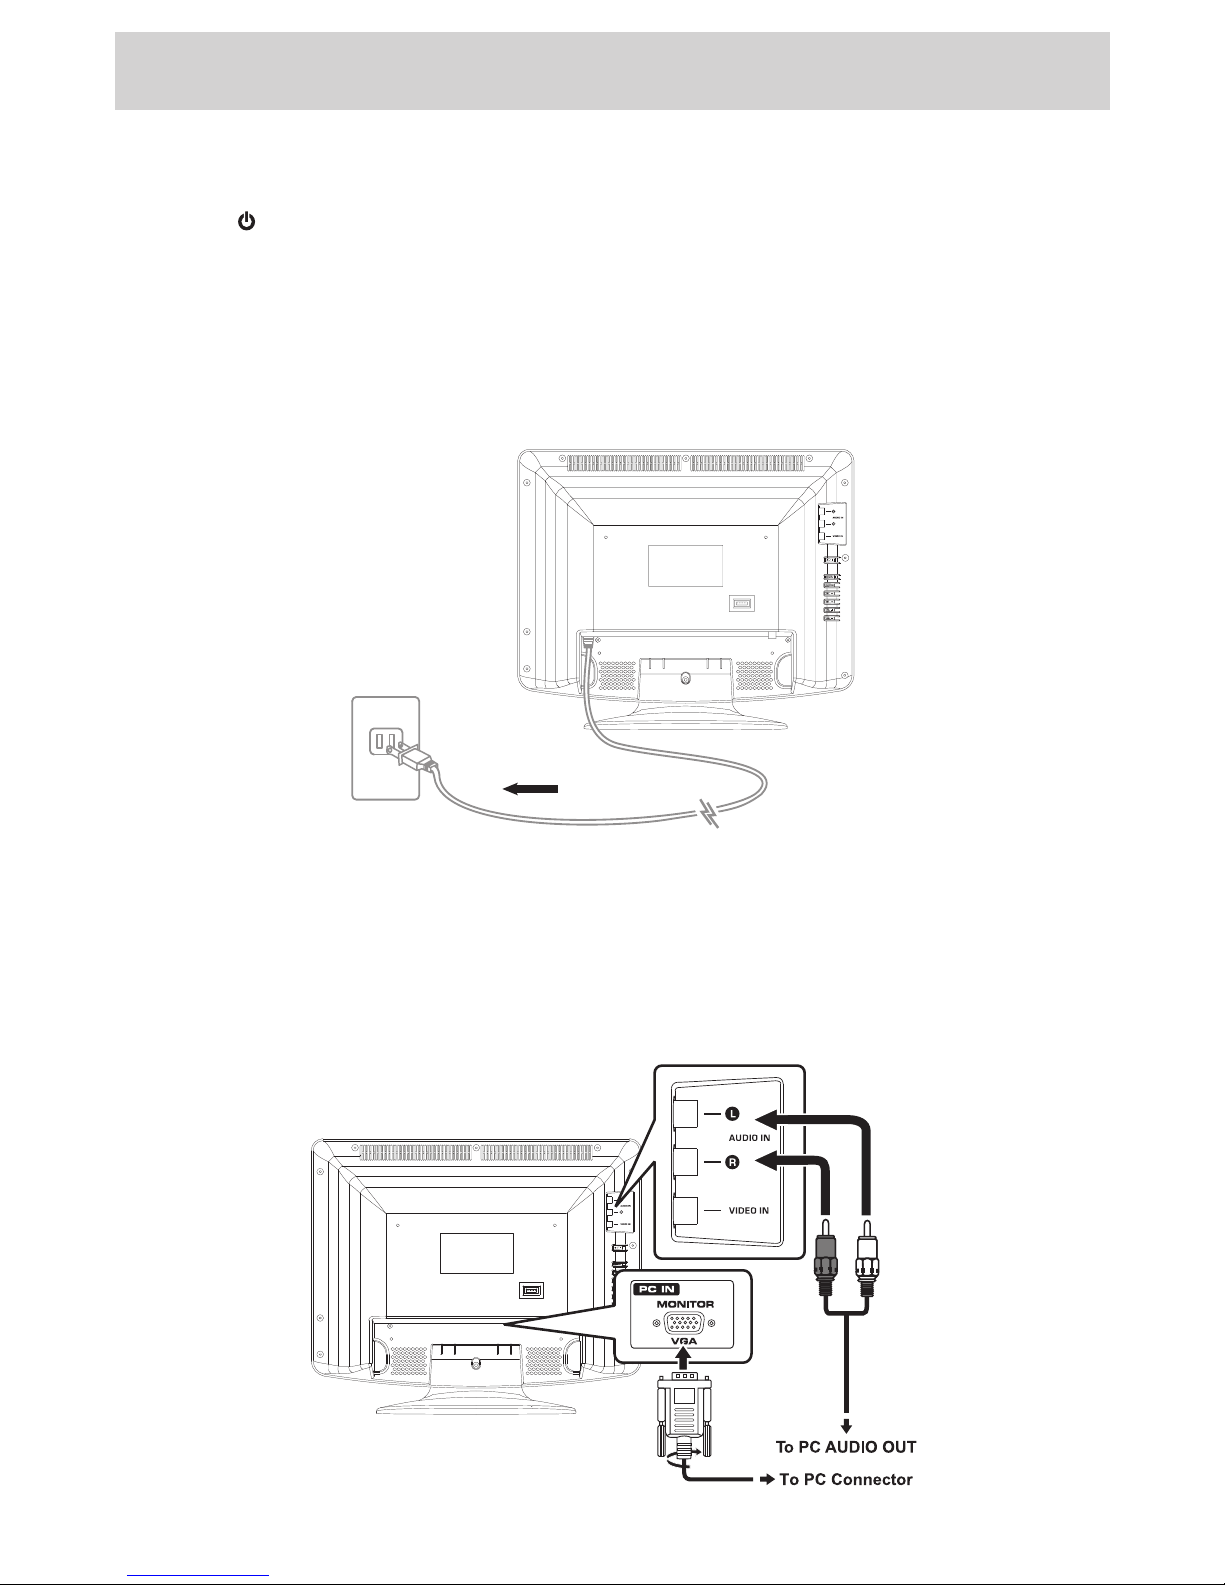
CONNECT THE POWER CORD
• ConnecttheACpowercordintoawalloutlet.
• Pressthe / I buttonontheunitorremotecontroltoturnontheunit.
NOTE
• BesuretheACpowercordisdisconnectedandallfunctionsareoffbeforemakingconnections.
• Makesurethatallthecomponentsareconnectedcorrectly.
•To prevent electrical shock, match wide blade of plug to wide slot of wall outlet, then fully
insert.
• Whenyouarenotgoingtousetheunitforalongperiodoftime,disconnectthepowercord.
CONNECT A PC
Connectthe15-pinD-SUBPC/VGAconnectorfromyourcomputertothe15-pinD-SUBPC/VGAinputon
thisunitusingamonitorcableandaudiocable(notincluded)asshown.
Makesureyouconnectthecablefromthecomputer(PCConnectorandPCAUDIO)tothisunit(PCIN
MONITOR/VGAandAUDIOIN).
To AC outlet
PLV76176S7_IB_UL_090723.indd 9 7/24/2009 11:52:47
Table des matières
Autres manuels Venturer Téléviseur LCD

Venturer
Venturer PLV76198E Manuel utilisateur

Venturer
Venturer PLV76198 Manuel utilisateur

Venturer
Venturer PLV76156 Manuel utilisateur

Venturer
Venturer 15" LCD TV PLV7615H Manuel utilisateur

Venturer
Venturer PLV16198 Manuel utilisateur

Venturer
Venturer PLV36220S1 Manuel utilisateur

Venturer
Venturer PLV1615S Manuel utilisateur

Venturer
Venturer PLV21198 Manuel utilisateur

Venturer
Venturer PLV16070 Manuel utilisateur

Venturer
Venturer PLV16100 Manuel utilisateur


