twisted electrons TherapSid MKII Manuel utilisateur
TherapSid MKII
User Manual
June 2017
1of 18
Thanks! Overview
Thank you for adopting Therapsid2,
the ultimate SID synth!
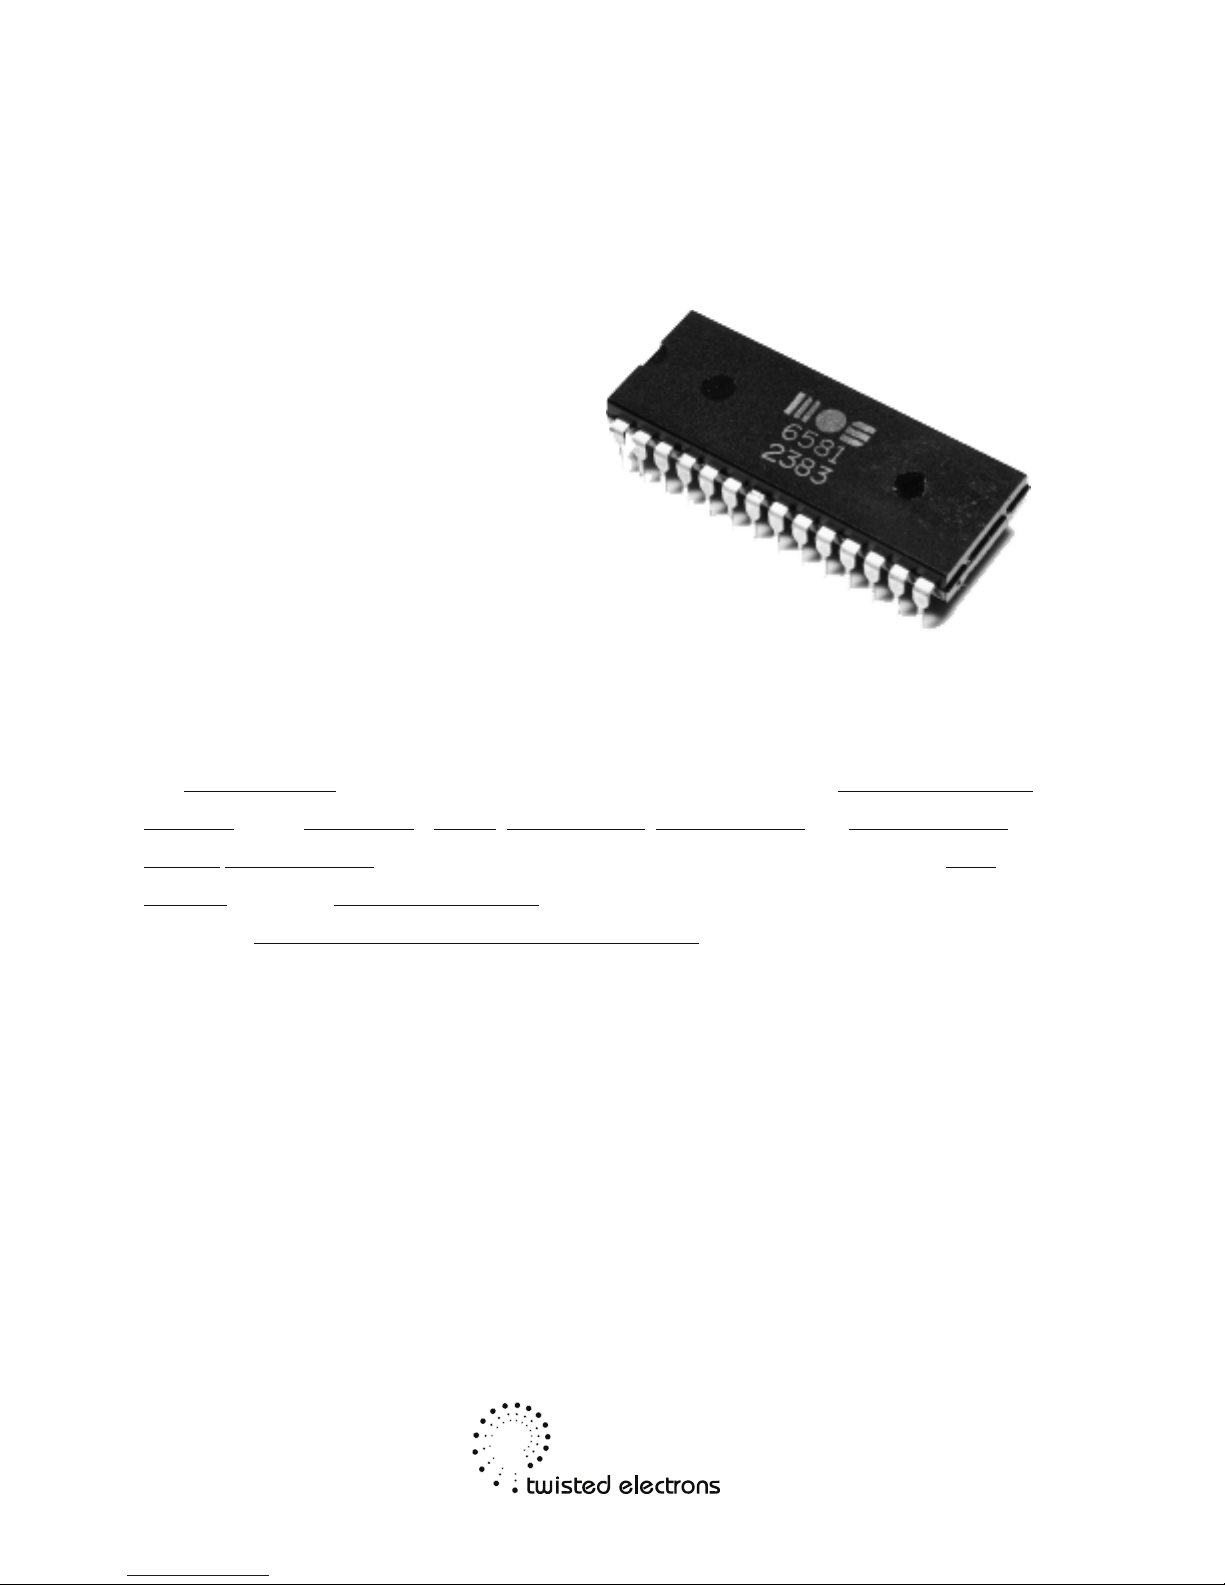
About the SID chip:
The MOS Technology 6581/8580 SID (Sound Interface Device) is the built-in Programmable Sound
Generator chip of Commodore's CBM-II, Commodore 64, Commodore 128 and Commodore MAX
Machine home computers. It was one of the first sound chips of its kind to be included in a home
computer prior to the digital sound revolution.
Read more: http://en.wikipedia.org/wiki/MOS_Technology_SID
2of 18

1- Connectivity & Power (rear view)
TherapSid features from right to left
DC input 15V
1/8” audio inputs and outputs for both chips
CV pitch input, Gate input (only active when in monophonic mode)
MIDI input & output
3 LFO override CV inputs
The Audio in enables you to run any audio signal through the SID’s filter path.
Therapsid is equipped with a bridge rectifier so can be powered by any AC
or DC voltage source of 15v, 1200mA.
2-Preset load/save
Therapsid can hold 99 presets in its EPROM.
3of 18

2-1 Load
Press the up/down buttons to scroll through the presets.
Preset number appears on the display.
2-2 Save
You can store the current sound to any preset slot:
1: Press both preset up and down buttons simultaneously activate save mode.
2: The destination slot number will flash, press preset up or down to choose a
destination slot.
3: Press both preset up and down buttons to save.
2-3 Preset reset
Press reset to return to preset 1 at any time.
2-4 Preset randomizer
Hold reset for 2sec to randomize the preset.
Therapsid comes loaded with 99 assorted presets to get you started
These presets are just to get you started, they are all re-writeable!
Note: The presets were created using the 6581 variant of the SID chip. They
could sound different on other SID variations.
4of 18
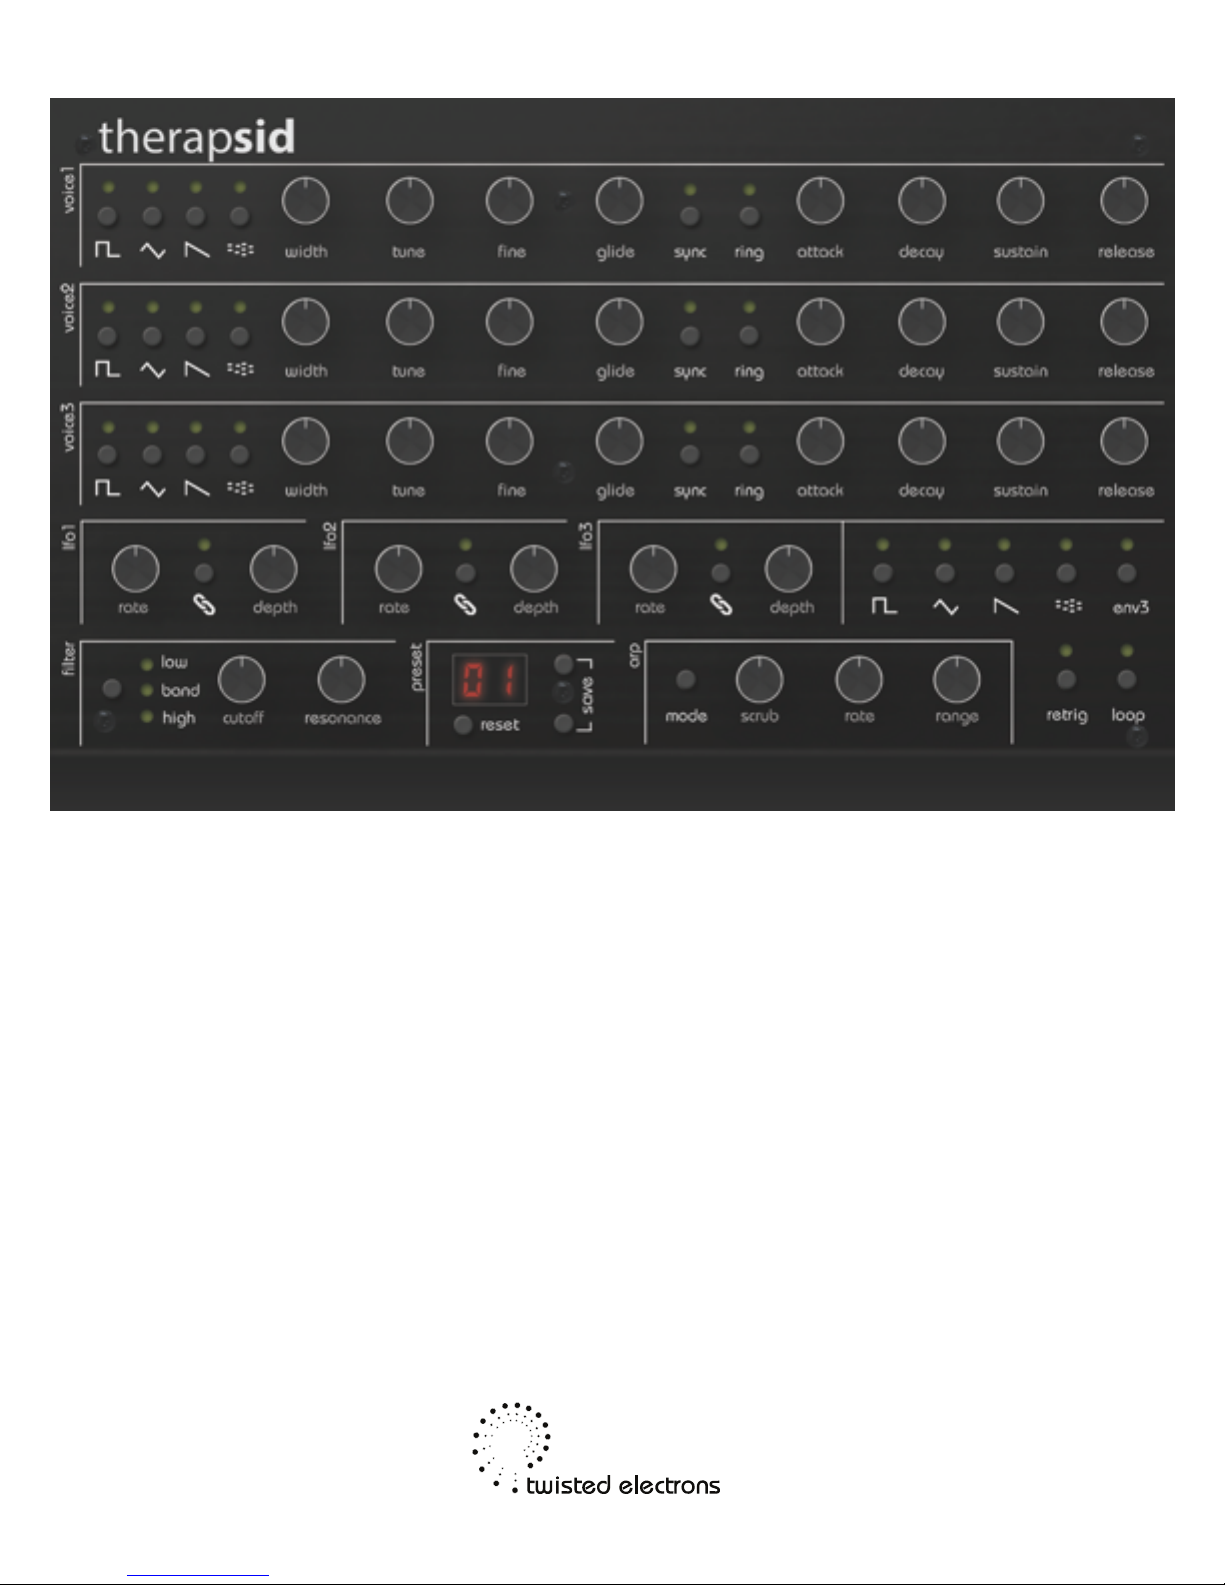
3- Voice Section
Therapsid’s 3 voices are laid out across the top half of the control panel. The 3
voice strips are identical in functionality, explained from left to right:
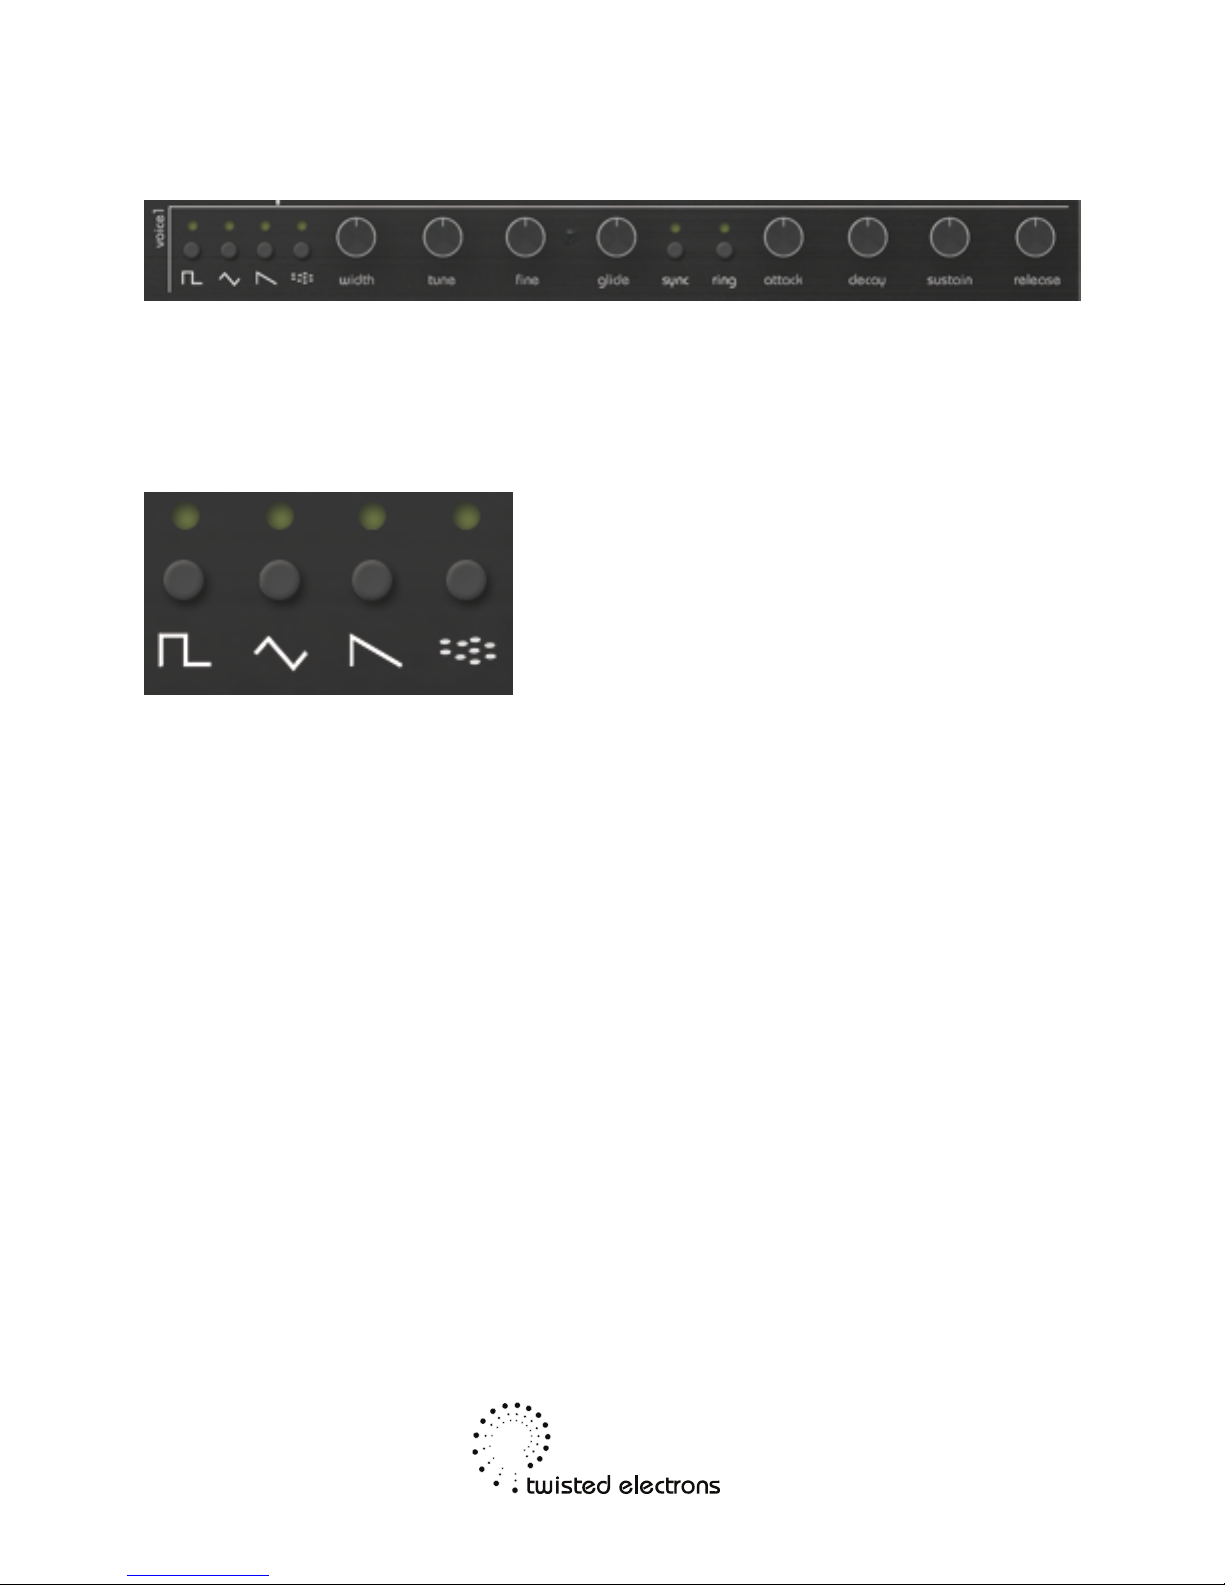
3-1 Waveforms
Each voice each consists of 4 waveforms:
Square,Triangle,Sawtooth and Noise.
Press the corresponding button to enable or disable a waveform (indicated by
LED).
Note: Multiple waveforms can be active at the same time.
3-2 Pulsewidth
The pw knob adjusts the duty cycle of the square waveform.
Note: this has no effect on the other waveforms, only square.
3-3 Tune
The tune knob transposes the voice in semitone increments. The tune ranges
from -12 to +12 semitones (2 octaves), indicated by the 7 segment LED display.
Twelve ‘o clock knob position is zero.
3-4 Fine
The fine knob fine tunes the voice (+/-1 semitone range)
Twelve ‘o clock knob position is center.
5of 18

3-5 Paraphonic Mode
You can activate paraphonic ( 3 voice) mode at any time by holding a waveform
button on voice 1 for 4 seconds. The LED displays PA indicating Paraphonic
mode. Voices 2 and 3 and now mirror the parameters of voice 1 but can also be
changed individually.
TherapSid always orders notes from voice 1 to voice 3 so you can hold a 2 note
chord with voices 1 and 2, and play a melody with voice 3 for example
Hold a waveform button on voice 1 again for 4 seconds to go back to
Monophonic Mode
3-6 Glide
Adds glide aka portamento to the synth’s pitch.
More glide=longer portamentos/slides.
3-7 Sync
When set on voice1, Synchronizes the fundamental frequency of Oscillator 1
with the fundamental frequency of Oscillator 3, producing “Hard Sync” effects.
Varying the frequency of Oscillator 1 with respect to Oscillator 3 produces a
wide range of complex harmonic structures from Voice 1 at the frequency of
Oscillator 3. In order for sync to occur Oscillator 3 must be set to some
frequency other than zero but preferably lower than the frequency of Oscillator
1. No other parameters of Voice 3 have any effect on sync.
3-8 Ring Mod
When set, replaces the Triangle waveform output of Oscillator 1 with a “Ring
Modulated” combination of Oscillators 1 and 3. Varying the frequency of
Oscillator 1 with respect to Oscillator 3 produces a wide range of non-harmonic
overtone structures for creating bell or gong sounds and for special effects. In
order for ring modulation to be audible, the Triangle waveform of Oscillator 1
must be selected and Oscillator 3 must be set to some frequency other than
zero. No other parameters of Voice 3 have any effect on ring modulation.
6of 18
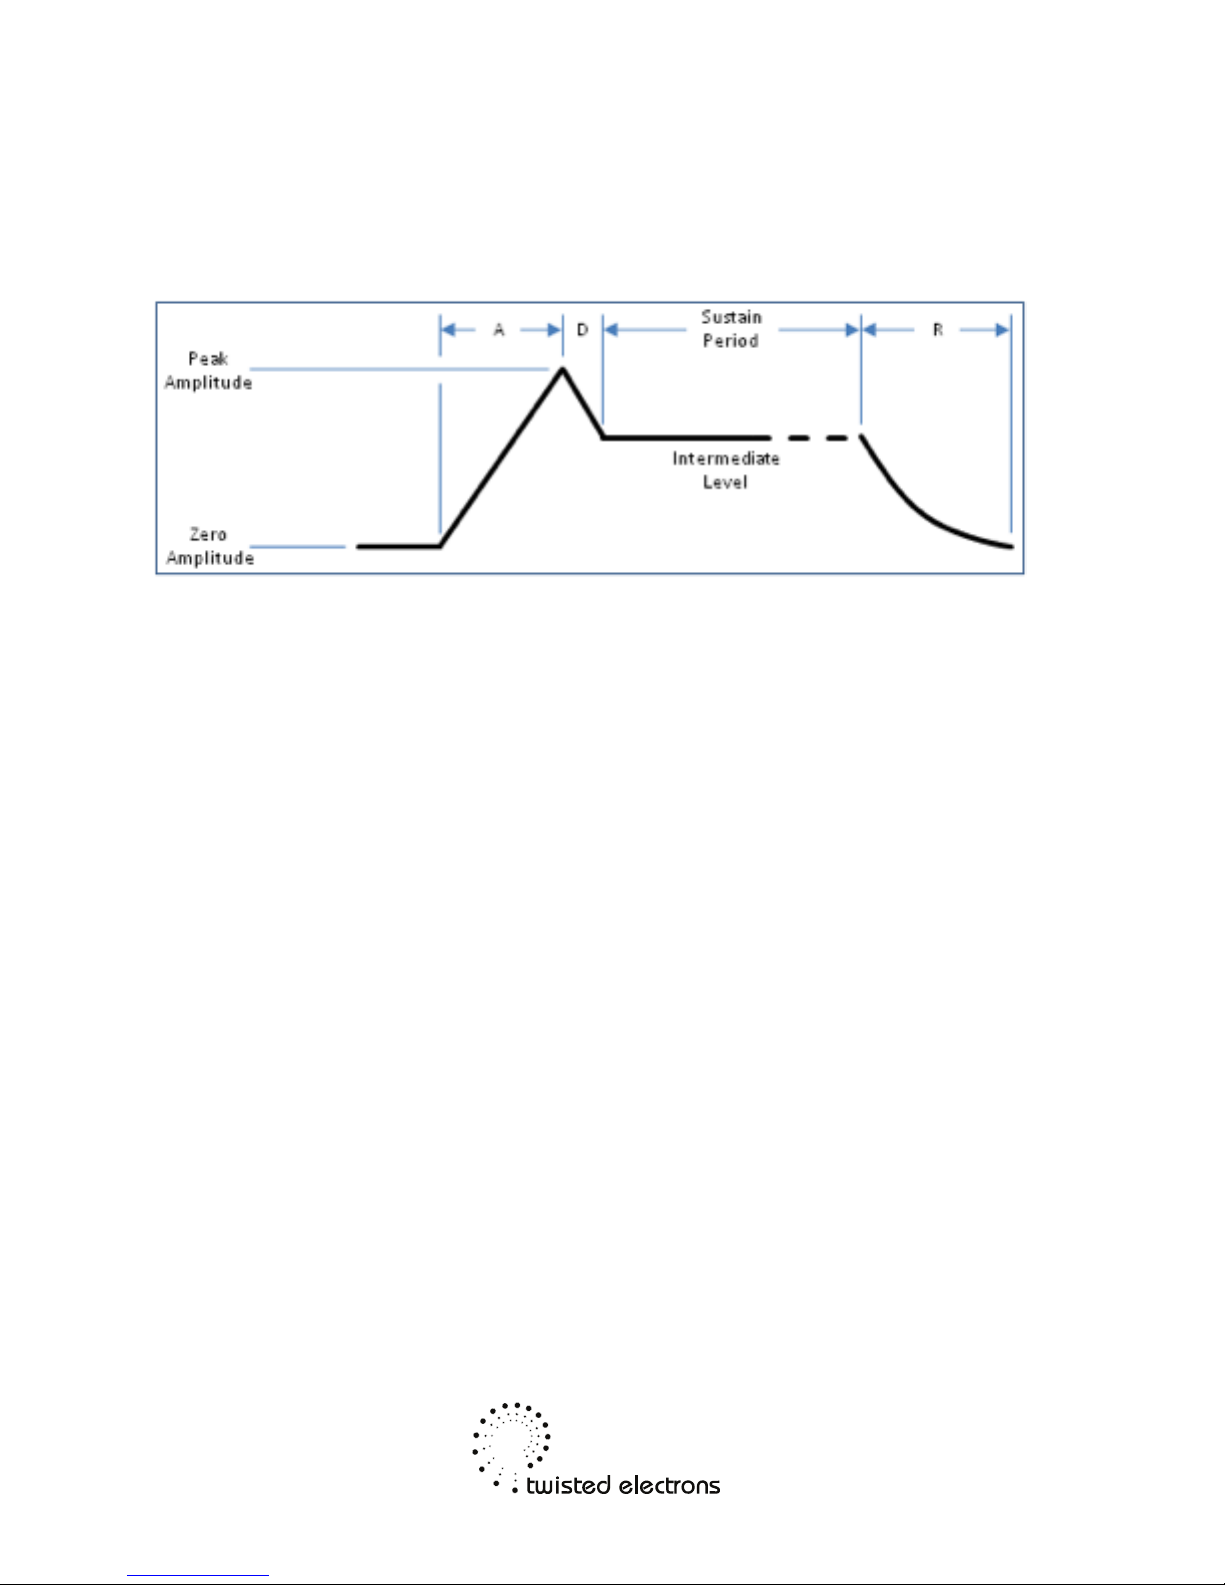
3-8 Volume Envelopes ADSR
The "attack" and "decay" of a sound have a great effect on the instrument's
sonic character. ADSR envelope is specified using four parameters:
•Attack time is the time taken for initial run-up of level from nil to
peak, beginning when the key is first pressed.
•Decay time is the time taken for the subsequent run down from the
attack level to the designated sustain level.
•Sustain level is the level during the main sequence of the sound's
duration, until the key is released.
•Release time is the time taken for the level to decay from the sustain
level to zero after the key is released.
7of 18
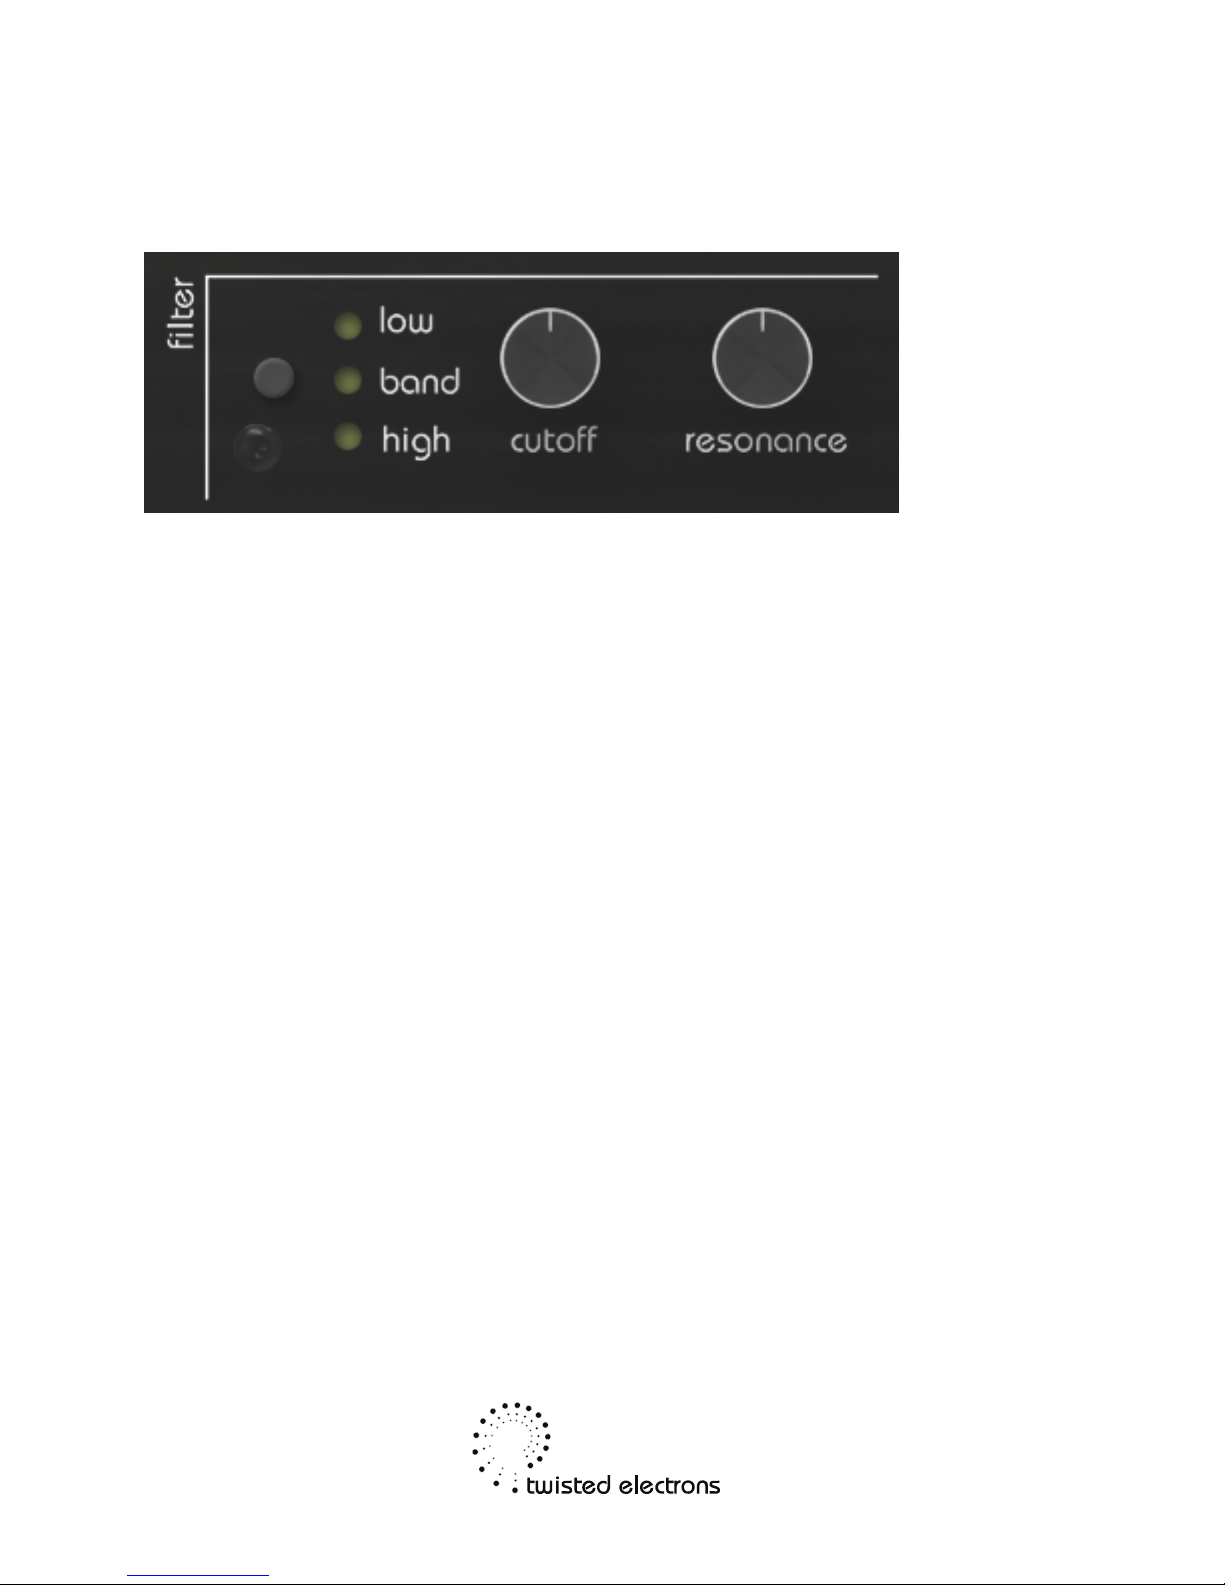
4- Filter
The SID chips are equipped with a multimode resonant filter.
The filter is the analog section of the circuit and its warm/dirty sound is what give
the SID its authentic character.
4-1 Filter Modes
Press the filter button to toggle through the 4 filter states:
Off, Low Pass, Band Pass, High Pass, Low Pass+ High Pass (notch)
4-2 Cutoff
The cut knob adjusts the filter cutoff frequency
4-3 Resonance
The res knob adjusts the filter’s resonance
Note: Depending on the type of SID chip installed, resonance can have more or
less effect.
5- LFO Modulation
8of 18

Therapsid has 3 LFOs to bring your synth to life!
Note: the LFO values are also sent as midi CCs so you can modulate other
synths with therapSid
5-1 LFO Waveforms
There are 4 LFO shapes to choose from:
Square, Triangle, Saw, Noise and Env3 (ADSR envelope of voice 3).
-Move either of the 3 LFO’s depth or rate knobs to select that LFO.
-Press the lfo shape buttons to change the selected LFO’s shape.
You can also assign no shape at all by pressing a readily lit shape.
In this case the LFO’s depth knob becomes a manual controller.
5-2 Assigning LFOs to knobs
The 3 LFOs that can be assigned (aka linked) to the following knobs:
Filter Cutoff, Filter Resonance,
Tune1, Tune2, Tune3, Fine1, Fine2, Fine3, Width1, Width2, Width3,
Lfo Depth1, Lfo Depth2, Lfo Depth3, Lfo Rate1, Lfo Rate2, Lfo Rate3,
Arpeggiator Scrub, Arpeggiator Range, Arpeggiator Rate
Assigning an LFO to a knob is very easy:
- Wiggle the target knob (choose from the above list).
- Press an LFO’s chain button to link
- The chain icon is now lit indicating that the LFO is
9of 18

linked to your target knob
To unlink the LFO, simply press the link button again.
The chain icon will go dark again.
Note: You can assign multiple knobs to the same LFO!
5-3 Re-trigger & Loop
The LFOs don’t necessarily have to loop, you can also use them as “one shot”
envelopes, useful for pitch decay of percussive sounds for example.
The LFOs can also be re-triggered on every key press.
Press the retrig button towards the bottom right of the control to toggle the re-
triggering On/Off
5-4 CV Override
The LFOs can be overridden by external control voltages. Simply plug a 1/8”
mono jack into a cv input to override that lfo. The expected CV range is 0-5v DC
6- 16 Arpeggiator
10 of 18
Autres manuels pour TherapSid MKII
1
Table des matières
Autres manuels twisted electrons Synthétiseur


