Topicon MDT750 Manuel utilisateur
All rights reserved. No part of this work may be reproduced or copied in any form or by any means (graphic, electronic, or mechanical, including photocopying,
recording, recording taping, or information and retrieval systems) without the written permission of the copyright owner
1
Quick Start Guide
Product introduction
MDT750 has optional features (WiFi, BT, GPS, 3G, RFID, LoRa, Back camera, Front camera, Video input,
GPIO, Lightsensor, Gyroscope, Accelerometer)
Highlights:
3G – pls insert the SIM card when the device if complete off
front camera – there are 6 IR LED around the camera. if you enable the flash function in front camera,
then you will see the IR LED is on. In this case, the picture will be in black and white
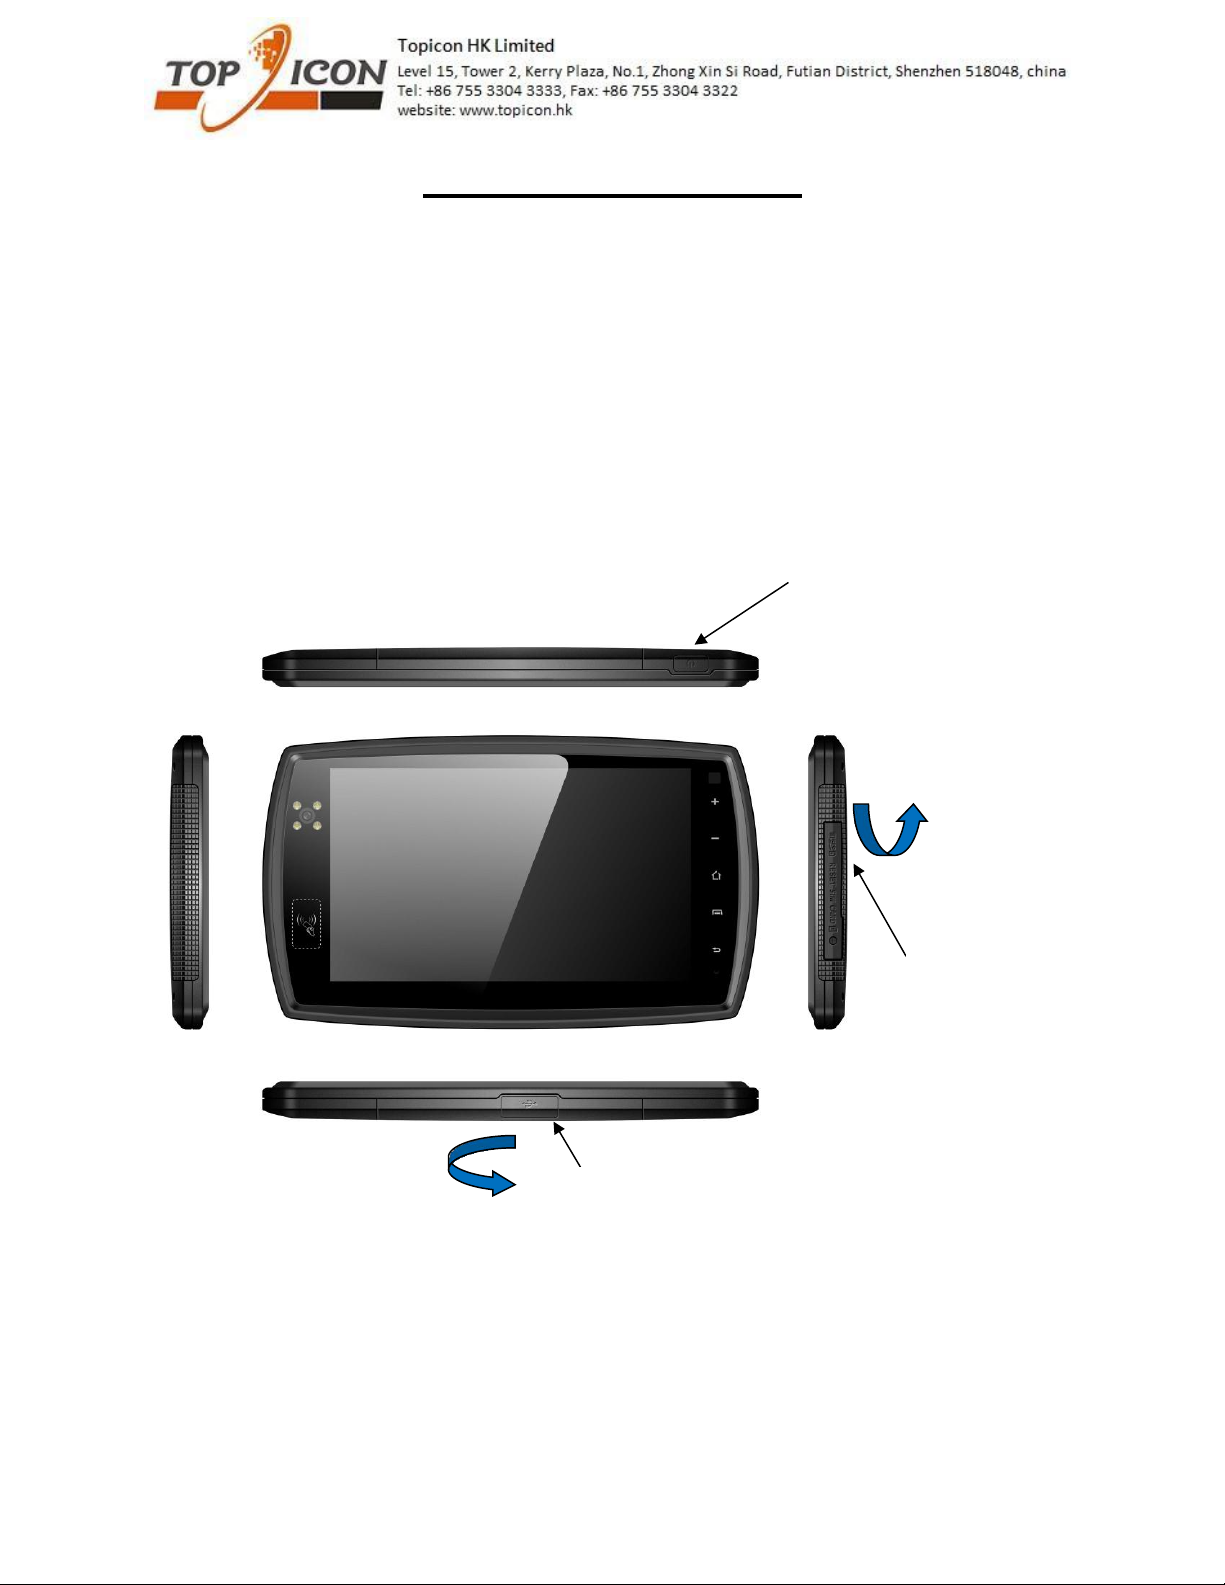
On/off button
SD card slot, SIM card slot and
reset button
Screw hole is available if you
want to lock the cover
Pls cover it well in order to
ensure the waterproof
performance
Micro usb for connecting to PC or charging
Pls cover it well in order to ensure the waterproof
performance
Pls move upward to open the
cover, you will hear “click”
sound, it is normal
Pls move right to open the
cover, you will hear “click”
sound, it is normal

All rights reserved. No part of this work may be reproduced or copied in any form or by any means (graphic, electronic, or mechanical, including photocopying,
recording, recording taping, or information and retrieval systems) without the written permission of the copyright owner
2
Direction of SIM card and SD card

All rights reserved. No part of this work may be reproduced or copied in any form or by any means (graphic, electronic, or mechanical, including photocopying,
recording, recording taping, or information and retrieval systems) without the written permission of the copyright owner
3
Interface
1. There is TTL serial port (Tx/RX) or OTG from 10 pin usb connector
pls see the above schematics of our USB connector in our PND, it is 10 pin connector.
Pin 4 and 6 can be used for USB or TTL serial interface (Rx/Tx) and Pin 8 is ID pin which is used to
distinguish for USB or serial interface.
if it is connected to GND, then the pin 4 and 6 will be Rx/Tx interface.
if it is connected to Vcc, then the pin 4 and 6 will be D- and D+.
10pin usb connector

All rights reserved. No part of this work may be reproduced or copied in any form or by any means (graphic, electronic, or mechanical, including photocopying,
recording, recording taping, or information and retrieval systems) without the written permission of the copyright owner
4
2. There are Rs232 interface and OTG from cradle.
Highlights: OTG port from device (10pin usb connector) and cradle are sharing same pins. Only 1 OTG
interface can be used.
This cable can be customized when you placed
order
For sample, it will be 12 pins connector, pls see
below or pins assignment
Usb connector for
OTG or charging

All rights reserved. No part of this work may be reproduced or copied in any form or by any means (graphic, electronic, or mechanical, including photocopying,
recording, recording taping, or information and retrieval systems) without the written permission of the copyright owner
5
Pin 1 – NOT connected
Pin 2 – GND (black)
Pin 3 – RXD (White)
Pin 4 – NOT connected
Pin 5 – NOT connected
Pin 6 – Ignition (Green), it can be wake up the device. see the software section for more details.
Pin 7 – 5V input (Pink)
Pin 8 – NOT connected
Pin 9 – GND (black)
Pin 10 – TXD (purple)
Pin 11 – car battery input (9-36V) (Red)
Pin 12 – NOT connected
Highlights: for RS232, it is master mode definition.
if you are using OTG with external device, you can only charge the device by 12V input.
Removing the cradle cable (12pin molex connector) if you don’t want to use it.
1. you can find the rubber plug in our blackbox (see below picture).
2. open the cradle casing by screw driver
3. remove the 12pin molex cable from connector
4. put the rubber plug in the hole and close the cradle casing
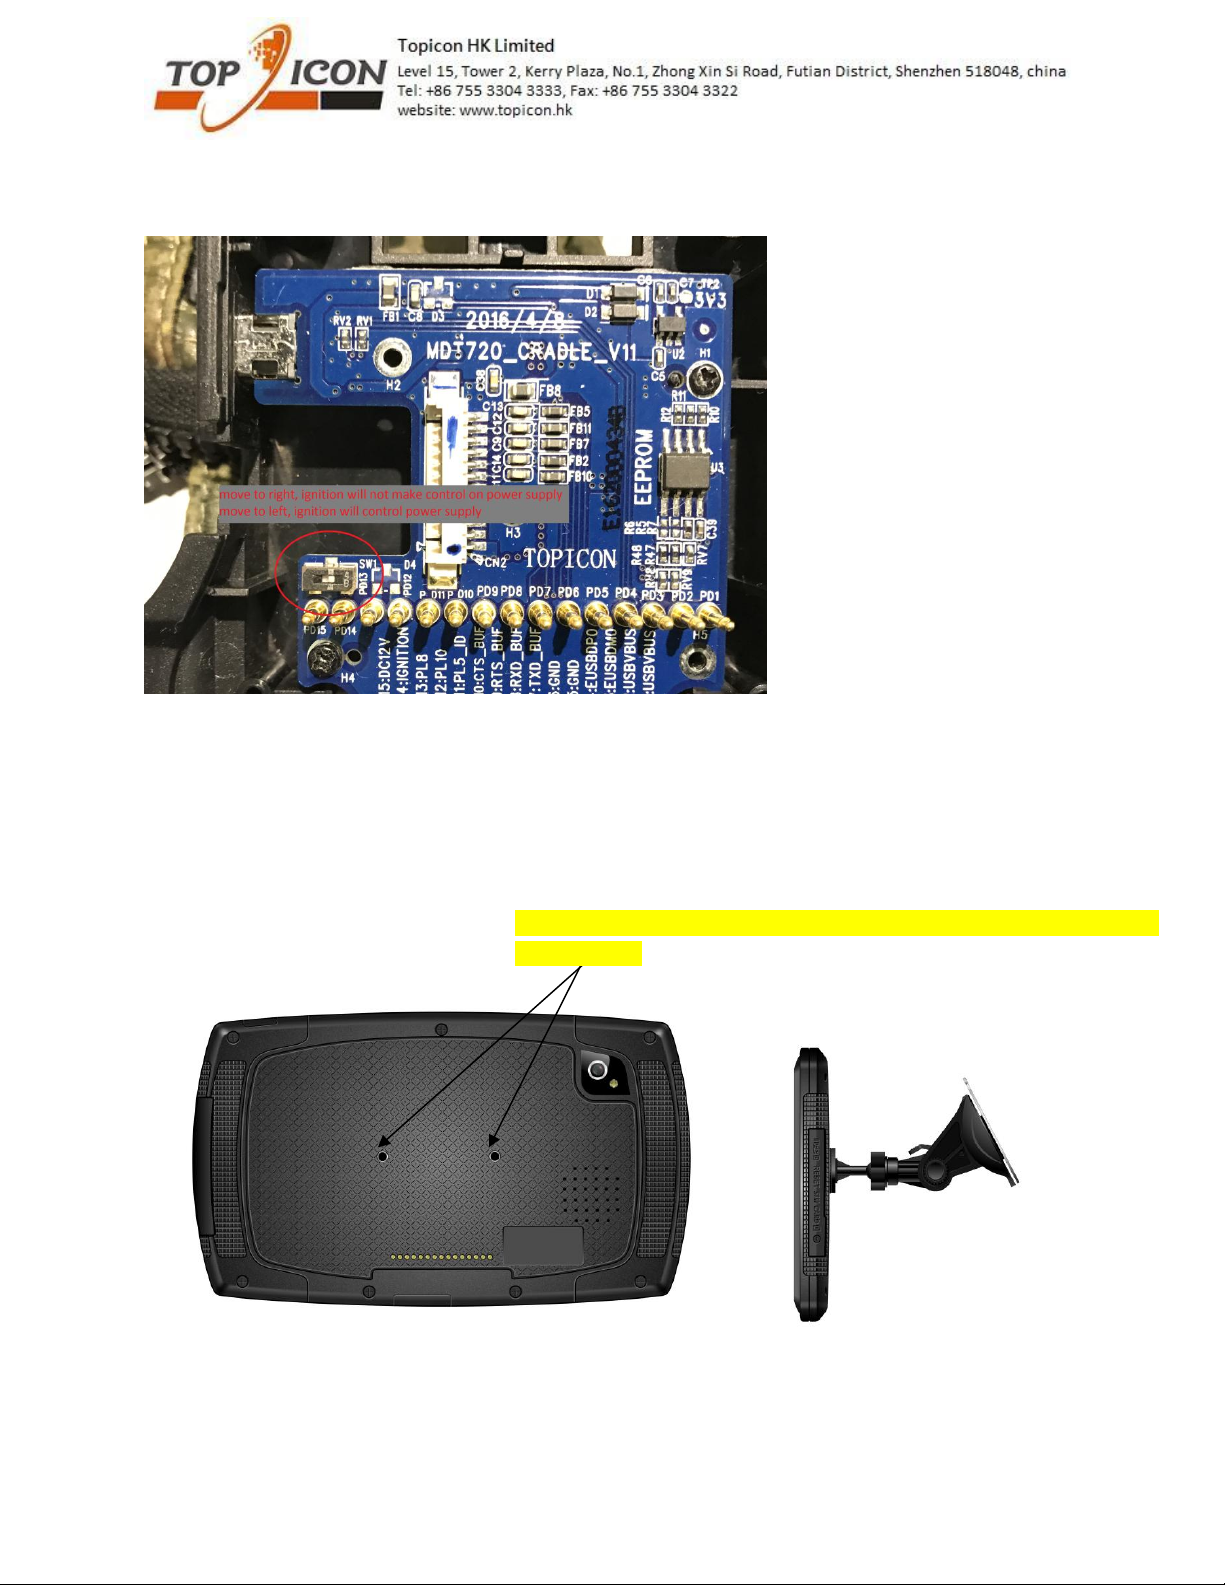
Option for ignition control the power supply
If ignition is OFF, the power supply will cut. Customer uses their application to control the device to
power off or sleep mode.
If ignition is ON, there is power supply and able to charge the device. so, when the engine is ON, the
device will power on automatically.
All rights reserved. No part of this work may be reproduced or copied in any form or by any means (graphic, electronic, or mechanical, including photocopying,
recording, recording taping, or information and retrieval systems) without the written permission of the copyright owner
6
If you want to try this feature, pls open the cradle. There are switch inside the cradle PCB. (only
production batch >1642)
Device installation
There are few options
1. Directly attach mount to device (no cradle in this case)
2 screw hole at the back
Pls use M4 15mm screw if the mount thickness is 9mm.
Pls note that the screw hole depth is only 6mm. Long screw may damge
the PCB inside

All rights reserved. No part of this work may be reproduced or copied in any form or by any means (graphic, electronic, or mechanical, including photocopying,
recording, recording taping, or information and retrieval systems) without the written permission of the copyright owner
7
2. Cradle attached to car mount with different screw length
Mount options:
There are many car mount options. You can use the 2 screw hole (black colour) or 4 screw hole (yellow
colour) to attach the different mount system. The 4 screw hole depth is 5mm long only, pls prepare
correct screw. Pls note that wrong screw length may damage the cradle.
Option 1:
2 screw hole at the back
Case 1 – if M4 18mm screw is used, the device will be removable
from cradle
Case 2 – if M4 23mm screw is used, the device will be not
removable from cradle

All rights reserved. No part of this work may be reproduced or copied in any form or by any means (graphic, electronic, or mechanical, including photocopying,
recording, recording taping, or information and retrieval systems) without the written permission of the copyright owner
8
Low cost wind shield car mount
Option 2:
Many mount option from RAM MOUNT
You can choose the mount you like from their website (www.rammount.com)
Example 1 (RAP-B-166-2U)
Example 2 (RAM-B-138-224-1U)
Example 3 (RAM-B-138U-A)

All rights reserved. No part of this work may be reproduced or copied in any form or by any means (graphic, electronic, or mechanical, including photocopying,
recording, recording taping, or information and retrieval systems) without the written permission of the copyright owner
9
Example 4 (RAP-B-138-AU)
Option 3:
You can also choose mount from HR (http://www.hr-autocomfort.de/)
There are 4 hole plate which you can lock in the cradle with 4 screw hole. then, you can choose the
mount from HR.
Example 1 (1719/0)

All rights reserved. No part of this work may be reproduced or copied in any form or by any means (graphic, electronic, or mechanical, including photocopying,
recording, recording taping, or information and retrieval systems) without the written permission of the copyright owner
10
Option 4:
Mounting solution from truck expert (ARAT)
http://www.arat-de.eu/index.php?ber_id=10&dia_id=1&lang=en
Option 5:
There are other mount which can support this 2 screw hole and 4 screw hole at the back can be used.
For my understanding, there are other mount company also use this 2 or 4 screw hole as standard.
Pls let know if you need other mounting system or solution.
Table des matières


