Todd English TEICO1N Guide rapide

Griddle Pan & Induction Cooker
Instructions & Recipes
MODEL TEICO1N

!
2!
MEET
CHEF ENGLISH
Todd English is a celebrated chef, restaurateur, author, and television
personality. He has opened innovative and award-winning restaurants around the
globe. Among his numerous accolades from the culinary world, Chef English is a
four-time James Beard Foundation Award winner and was named Bon Appetit’s
Restaurateur of the Year. He has authored four critically acclaimed cookbooks,
including his most recent, Cooking in Everyday English. Chef English has also
created the record-breaking housewares line, The Todd English Collection, and
hosted the Emmy-nominated PBS travel series Food Trip with Todd English.
Todd English Kitchen is an exceptional range of high-performance
countertop appliances. Todd’s passion for the creative process results in these
products delivering extraordinary blending, cooking, frying, mixing and ease of
use. As Todd continues pushing the limits of imagination, his attention to detail
and progressive design intrinsically allows endless possibilities that heighten the
delicious world that surrounds us.

3!
CONGRATULATIONS
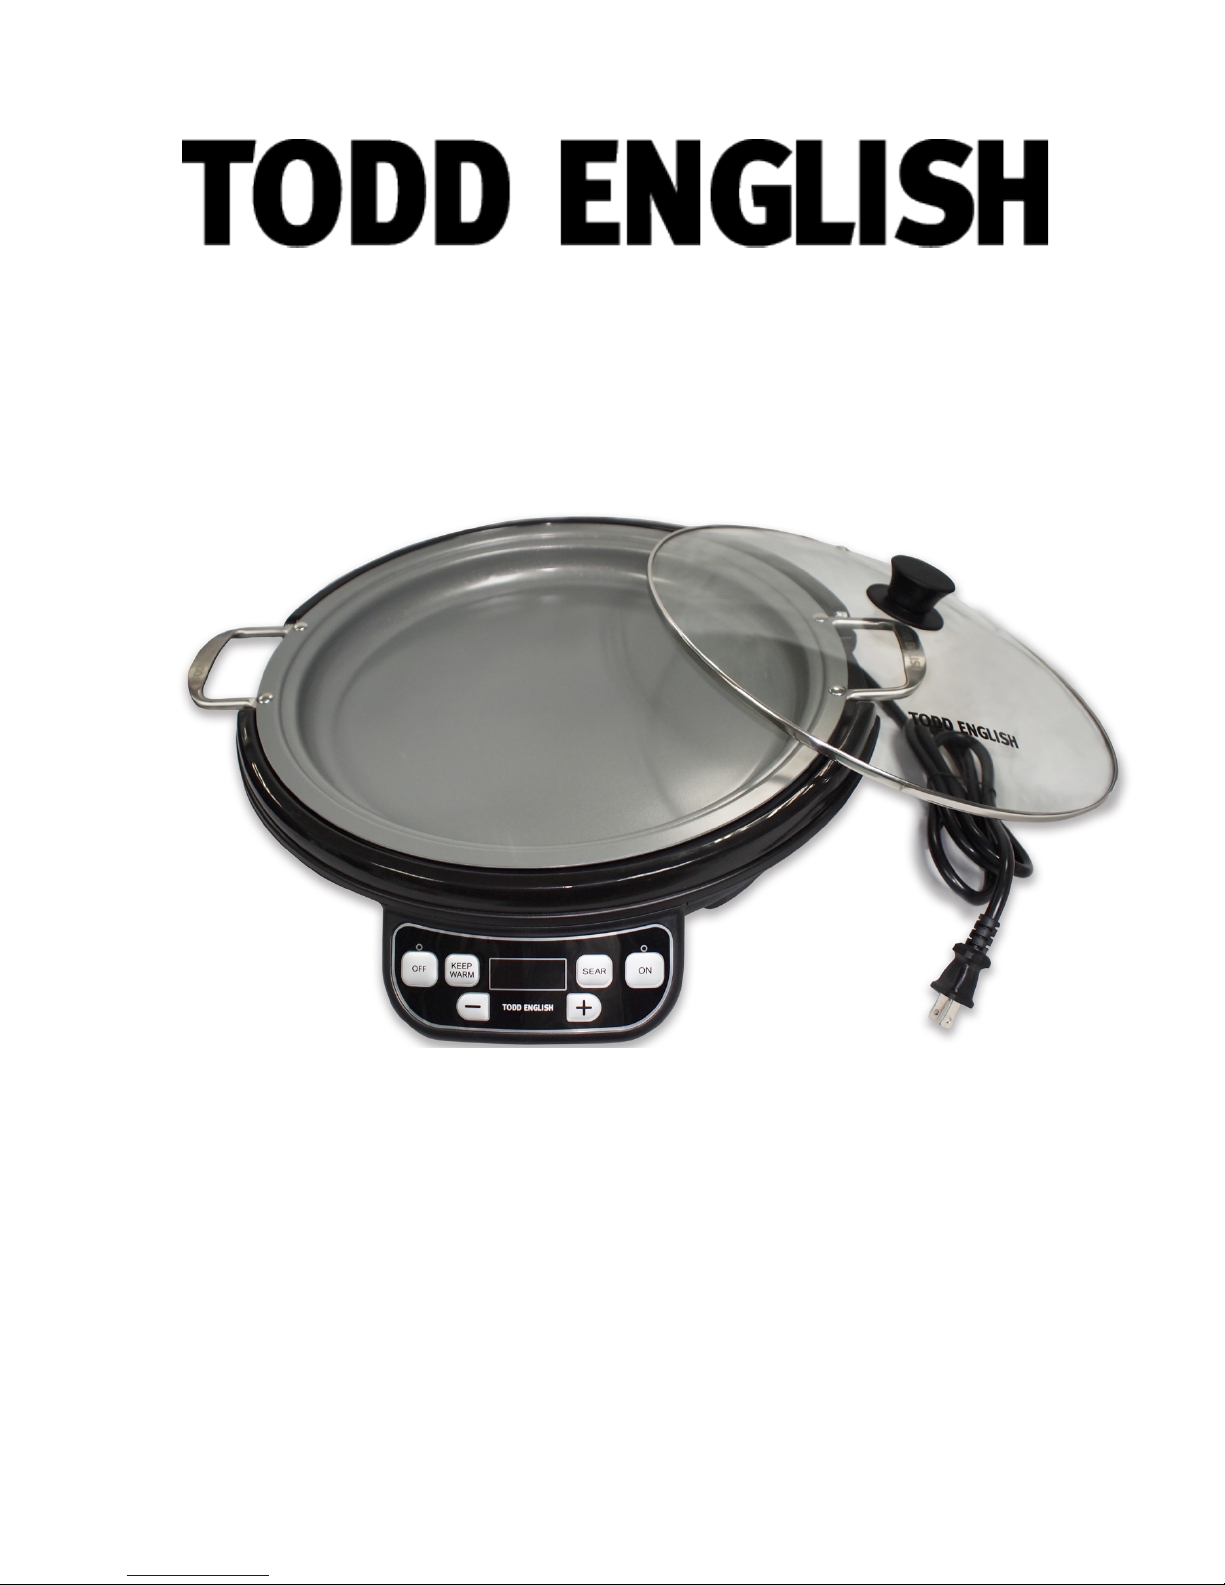
Congratulations on buying the Todd English 14” Griddle Pan &
Induction Cooker. The Todd English Induction Cooker makes cooking
quick and convenient. Induction cooking is energy efficient using only
an outlet to cook up your favorite recipes. The Todd English Induction
Cooker is abreeze to clean compared to regular stovetop cooking.
There are sixteen default temperatures to choose from (125
°
F, 150
°
F,
175
°
F, 200
°
F, 225
°
F, 250
°
F, 275
°
F, 300
°
F, 325
°
F, 350
°
F, 375
°
F, 400
°
F,
425
°
F, 450
°
F, 475
°
F, 500
°
F). Enjoy!
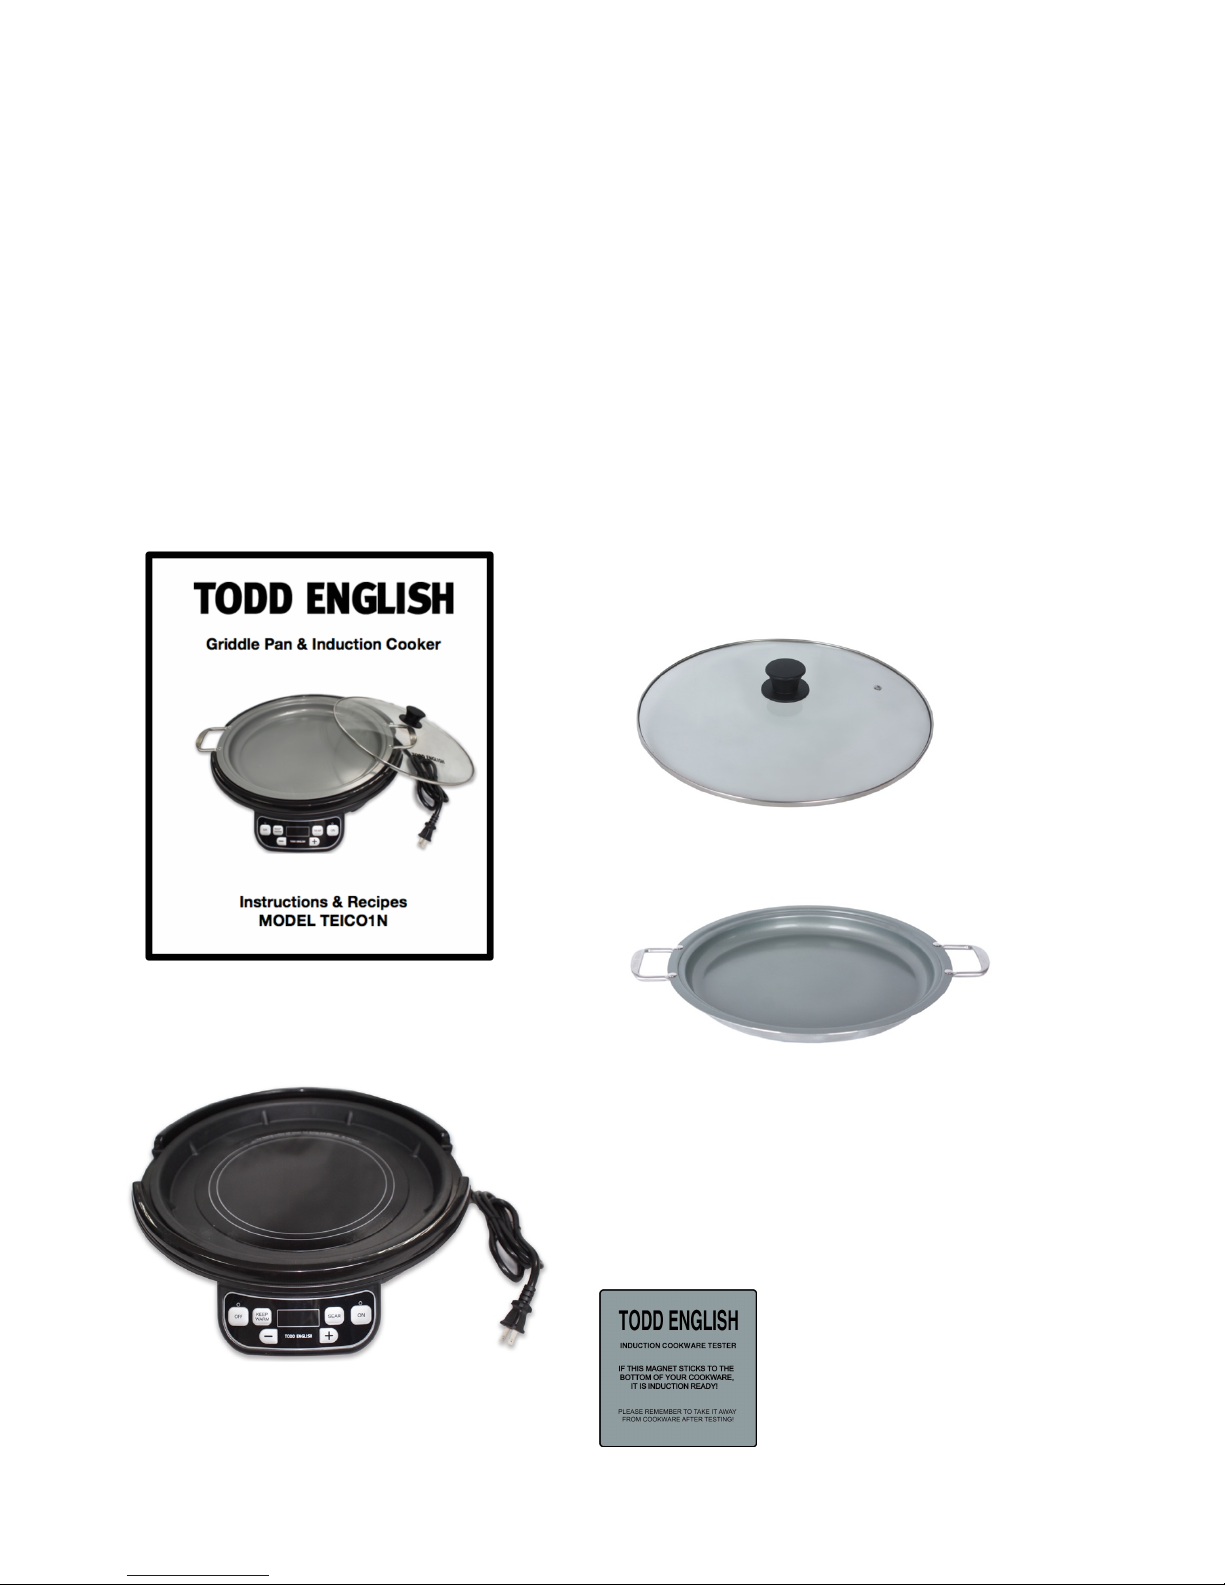
WHAT’S INCLUDED
Magnet
(see page 9onhow
to test your cookware
for induction)
Instruction Manual
& Recipes
Lid
Griddle Pan
Induction Cooker

!
4!
LID ASSEMBLY
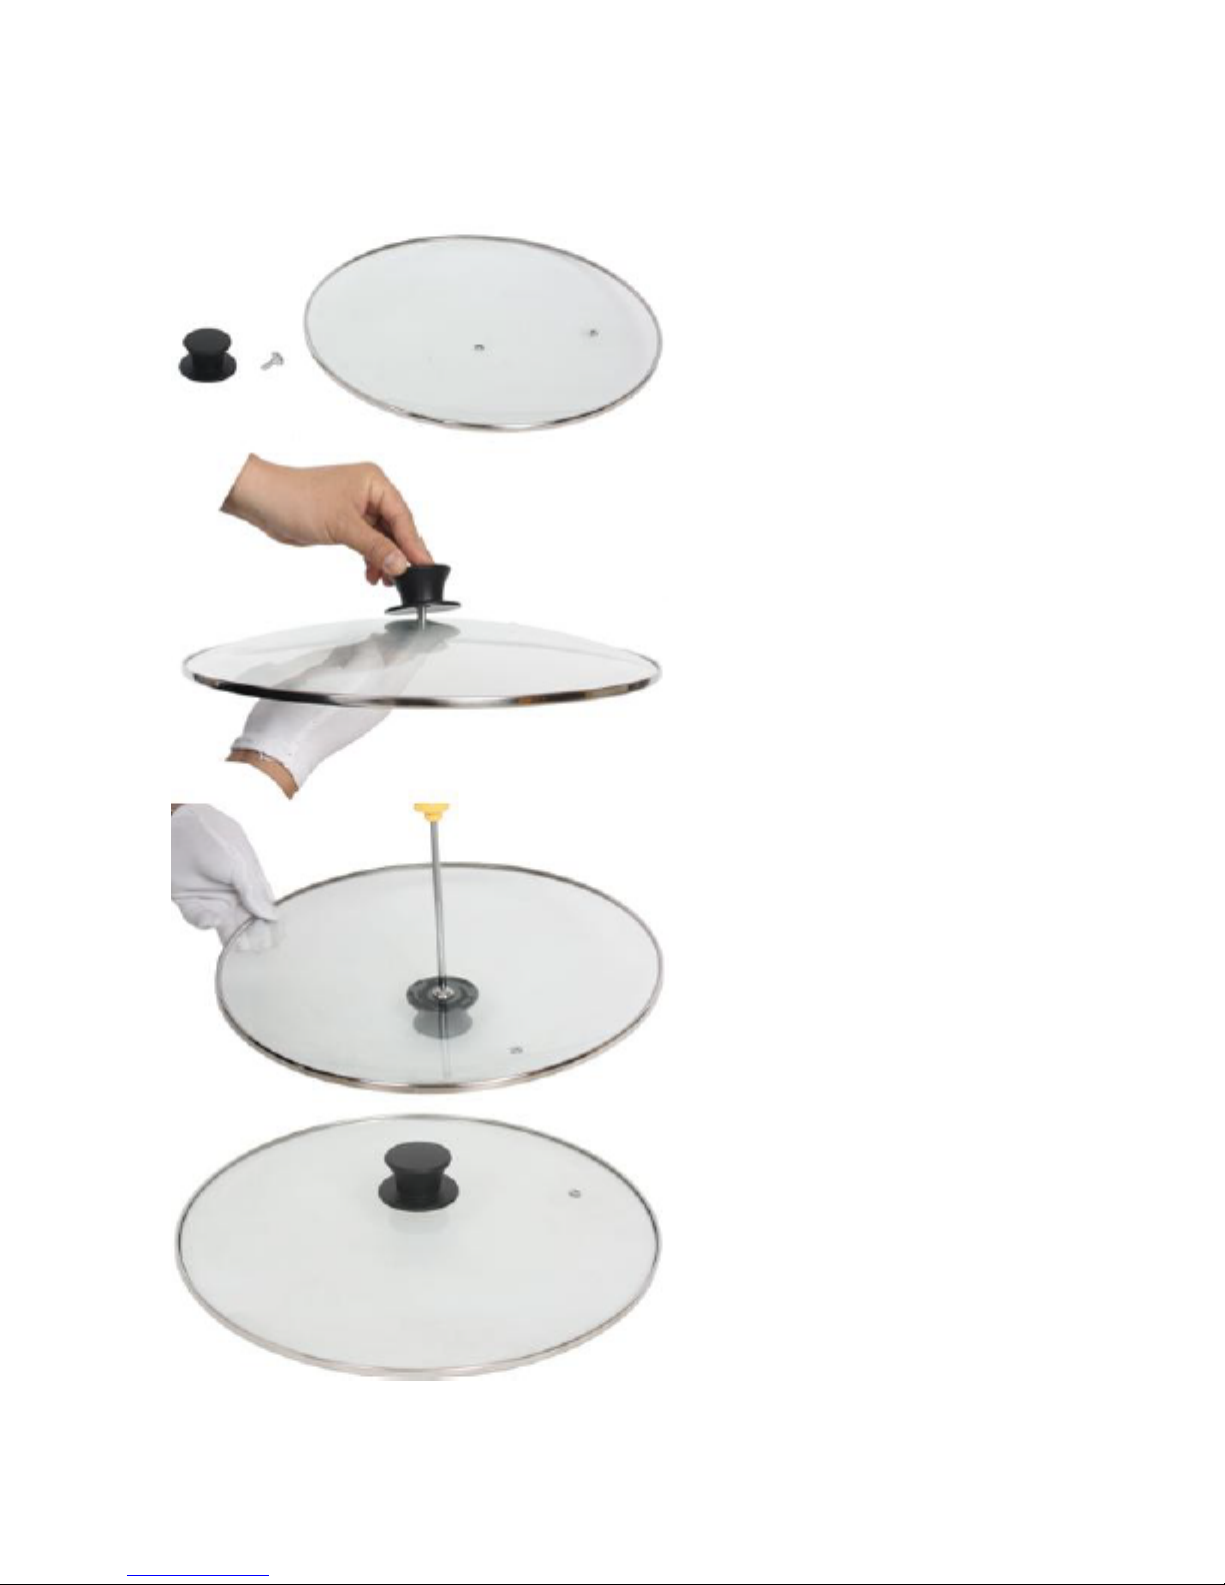
*PLEASE LOCATE KNOB
AND SCREW BEFORE
THROWING AWAY
PACKING MATERIAL.
To assemble the knob, place the
metal washer on the screw then
the silicone insert with the flat part
next to the metal washer. Then
place this screw on the underside
of the lid and the knob on the top
of the lid and tighten counter
clockwise until secure. If needed
you may tighten with a screwdriver.

5!
IMPORTANT SAFEGAURDS
•When using electrical appliances, basic safety
precautions should be followed as follows:
•Read all instructions.
•Do not use for anything other than intended use.
•Do not place the unit on or near gas or another hot
environment to avoid damages.
•Extreme caution must used when moving unit as it can
contain hot liquids.
•Do not use near open flame or cook top, use only in well
ventilated areas.
•When handling cookware on the induction cooker, it is
recommended to always use pot holders (not provided).
•During use the griddle handles will become extremely
hot, itisrecommended to always use pot holders (not
provided).
•Place the unit on alevel surface away from walls and do
not let the cord hang over the edge of atable or counter
or touch hot surfaces.
•Do not immerse the unit in liquid or allow liquid in
contact with electrical parts.
•Do not touch the plate while the unit isworking to avoid
being burned.
•Do not let children operate unit to avoid being burned.
Unit is extremely hot while in use.
•Do not use unit if cook top is broken, call warranty line
for help.
•Do not place paper, cloth or other articles under the
bottom of the pan to avoid fire.
•Do not operate unit with any empty pot/pan.
•Do not place the unit on cloth or carpet to avoid
blocking air vent.

!
6!
•!Do not touch the control panel with any sharp
instruments.
•!Do not continue to operate induction cooker more than
one hour in any two-hour period.
•!Do not block air vent with anything during cooking.
•!Unplug unit from outlet before cleaning and allow to
cool before cleaning, clean after every use.
•!Do not touch the Induction Cooker cooking surface
during or after use as it will be extremely hot.
•!Do not place removable griddle pan on a non heat proof
surface, use a trivet or place on a heat proof surface.
•!Do not use unit with an extension cord, always plug into
a wall outlet.
•!To prevent against electrical shock do not immerse
cord, plugs, or appliance in water or other liquid.
•!Do not use unit if the cord is damaged, call the warranty
line for help.
•!Do not use outdoors.
•!The use of accessory attachments not recommended by
the appliance manufacturer may cause injuries.
•!Always attach plug to appliance first then plug cord into
the wall outlet. To disconnect, turn any to control to
“off”, then remove plug from wall outlet.
•!If cooktop should break, cleaning solutions and
spillovers may penetrate the broken cook top and create
a risk of electric shock.
•!If a wet sponge or cloth is used to wipe spills on a hot
cooking area, be careful to avoid steam burn, some
cleaners can produce noxious fumes if applied to a hot
surface.
•!SAVE THESE INSTRUCTIONS.

7!
NOTE: This appliance has a polarized plug (one blade is
wider than the other). To reduce the risk of electric shock,
this plug is intended to fit into apolarized outlet only one
way. If the plug doesnot fit fully into the outlet, reverse the
plug. If it still does not fit, contact aqualified electrician. Do
not attempt to modify the plug in any way.
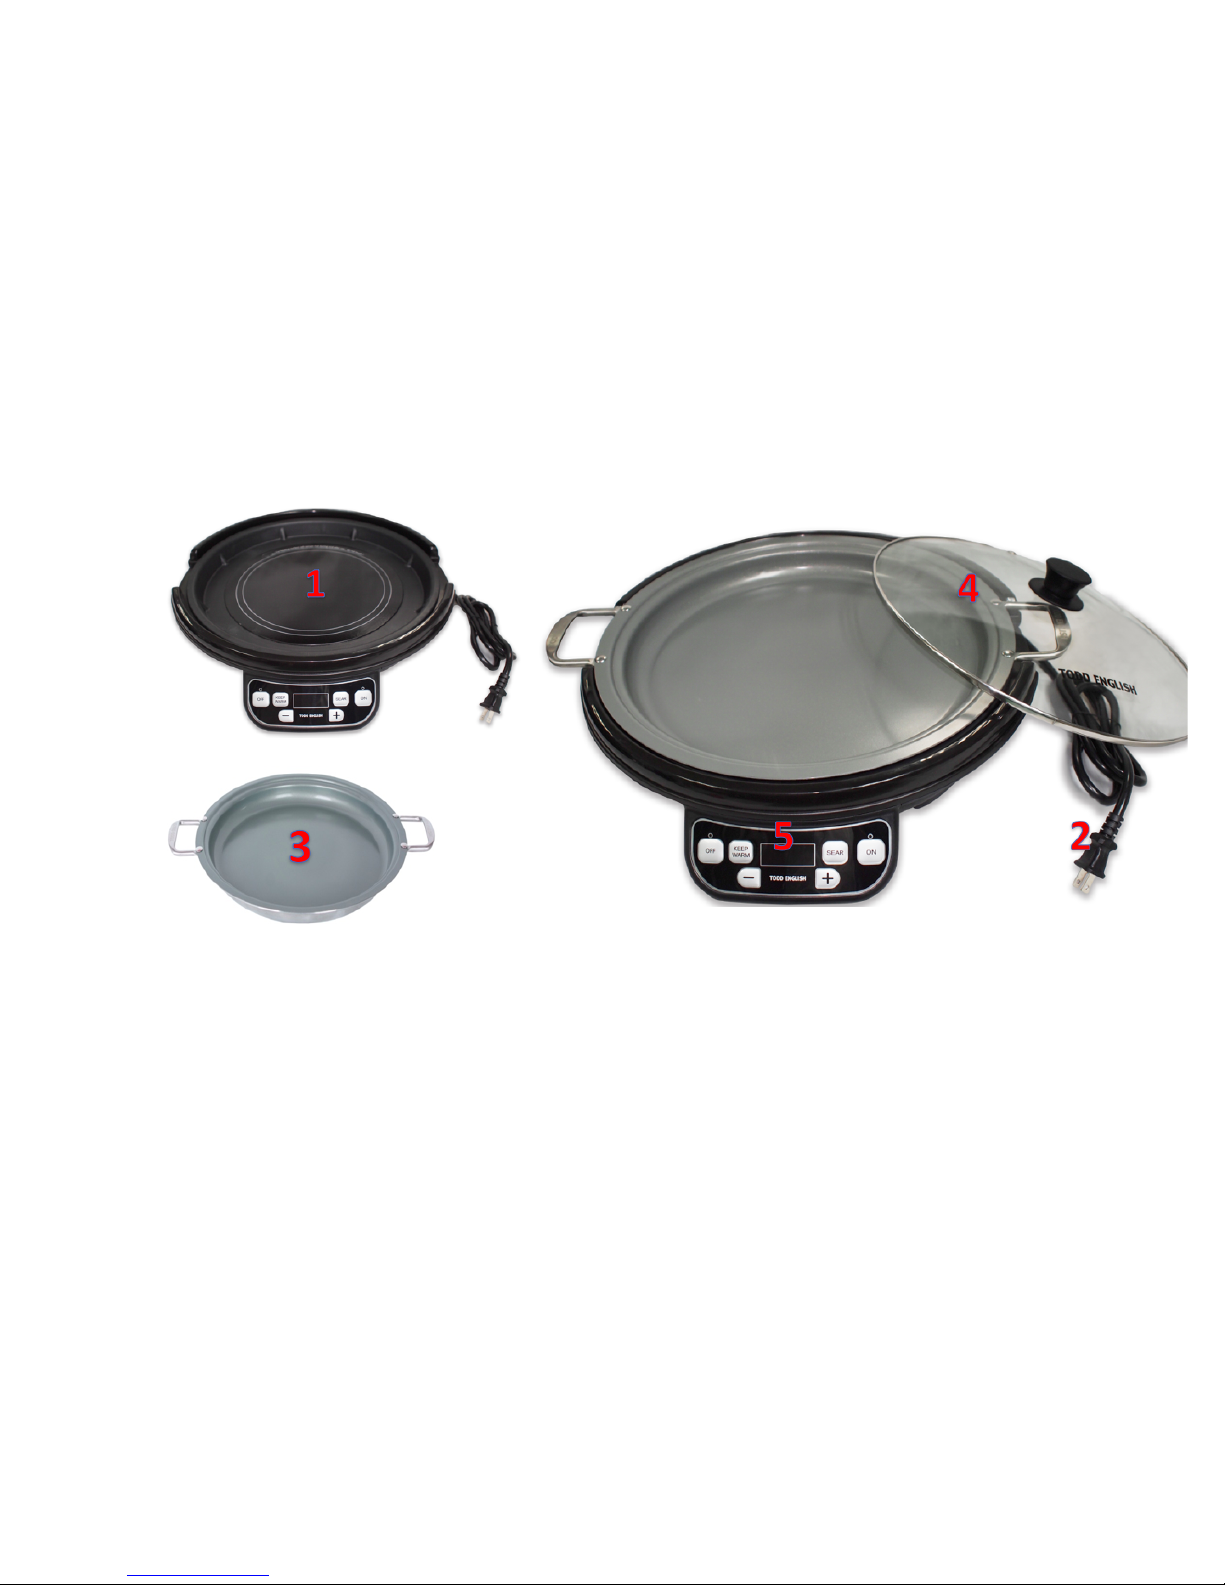
PARTS IDENTIFICATION
1. Induction Cooker cooking surface
2. Power Cord
3. 14” Griddle Pan
4. Lid
5. Control Panel

8!
CONTROL PANEL
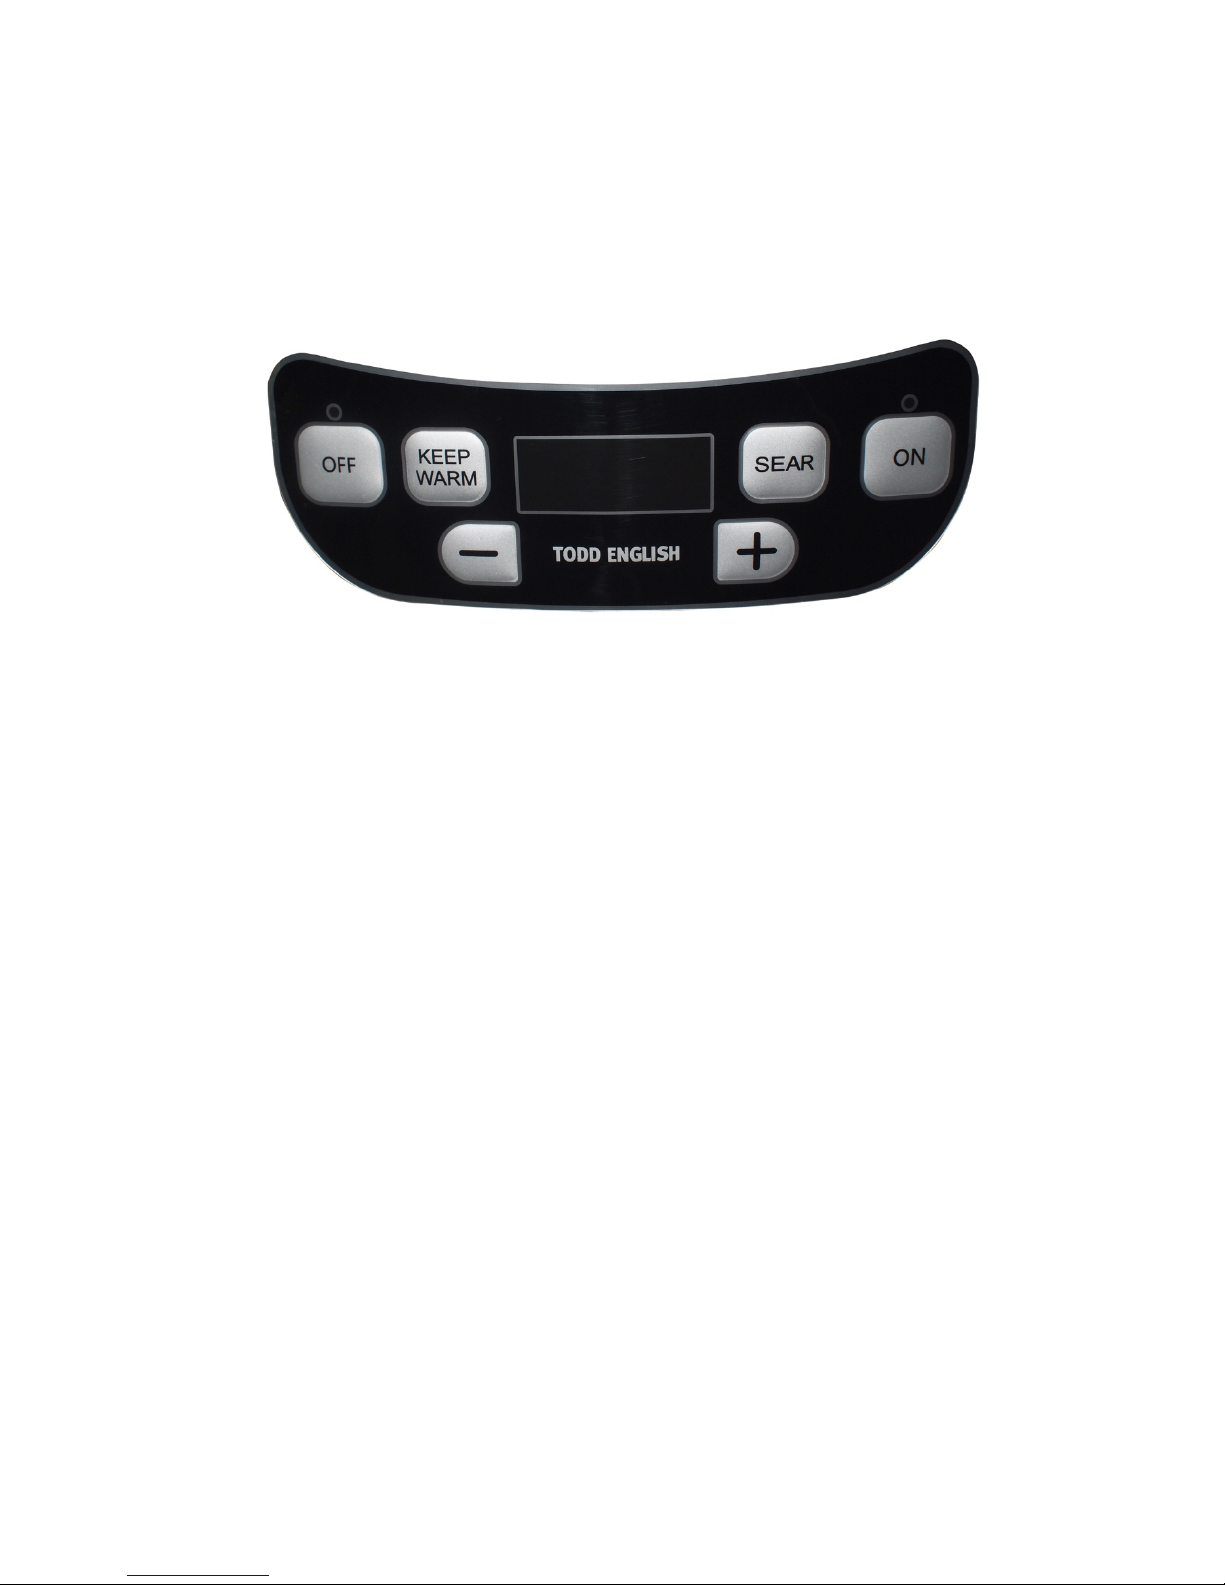
ON
Press the ON button to turn the unit on, the default
temperature is 350
°
F.
OFF
Press the OFF button to shut off the unit. Note: The fan
will delay work for one minute.
KEEP WARM
After the unit is on, press the KEEP WARM button for
the unit to go into the KEEP WARM mode, the default
temperature for this function is 150
°
F. To cancel KEEP
WARM mode press the ON /OFF button, the fan will
remain on for one minute after it is turned off.
SEAR
After the unit is on, press SEAR, this sets the induction
unit to 500
°
F.

9!
OPERATING INSTRUCTIONS
•The Induction Cooker can be used with induction
pot/pan. Please remove griddle pan if using your
own induction pot/pan.
oNote: To test if your pot/pan is induction ready
place a magnet (included with induction
cooker unit) on the bottom of the pan. If the
magnet adheres to the bottom of the pan it is
induction compatible.
•Place induction ready pot/pan or 14” griddle pan
(included with unit) on unit before pressing ON.
oNote: If there is noinduction ready pot/pan on
the unit an E1error code will appear.
•Plug unit into athree pronged wall socket. A beep
will be heard.
•Press ON to turn on the unit, the default
temperature of 350
°
F will appear on the screen. To
adjust the temperature press “-” or “+” until the
desired temperature is reached. There are sixteen
preset cooking temperatures (see page 3for
temperatures).
•To turn the unit off, press OFF. Note: The fan will
continue to cool down for about one minute.

!
10!
CLEANING GUIDE
DO NOT immerse Induction Cooker into water. To clean
the unit wipe with a damp cloth. Griddle Pan and lid are
dishwasher safe but hand washing is recommended. Do not
use abrasive sponges or liquids when cleaning Induction
Cooker and Griddle Pan.
TIP
•!Induction cookware or griddle pan included must be on
the induction cooker before turning on the unit.
Table des matières