Time2 WiFi Smart Socket Manuel utilisateur

User Guide
WiFi Smart Socket
User Manual

Contents
General Safety Instructions
Product Features
Technical Specification
Product Setup
Product Operation
Timers and Schedules
Using Amazon Alexa
FAQ’S
Support

General Safety Instructions
Please read this manual thoroughly before first use and keep it in a safe place for
future reference.
The safety precautions enclosed herein reduce the risk of fire, electric shock and injury
when correctly adhered to.
• Indoor use only
• Do not exceed the maximum power rating 13A or 3000W
• Do not expose to water, dust, chemicals and moisture
• Keep away from heat sources and direct sunlight
• Children should use this device only under the supervision of a responsible
adult to control appliances safely
• Do not operate or control heat producing devices connected to the
Wi-Fi Smart Socket when unattended.
• Do not drop or subject the device to undue shock
• Do not attempt to service or disassemble. Attempting to open or service
the unit voids all warranties. If you experience problems with the device,
discontinue use, unplug the device from the wall outlet and contact time2 Customer
Services for assistance.
• Unplug this device during lightning storms or when unused for long periods
of time

Product Features
• Manage household electrical appliances from anywhere in the world with a tap of
your Smartphone.
• Easy to setup on your existing wireless network
• Schedule the Smart Socket to automatically power appliances on and off as needed,
like setting outdoor lights to come on at sunset or turn off at sunrise.
• Control up to 150 Wi-Fi Smart Sockets using one iOS / Android device
USB port included to charge your USB devices using the Smart Socket.
Use Amazon Alexa/Echo to control anything connected to your WiFi Smart
Socket by Voice.
• Conserve energy by switching off devices remotely from anywhere in the world.
* Your Smart Socket requires a Wi-Fi network. Mobile remote control requires an iOS or Android device with Wi-Fi, 3G or
4G connection.
Technical Specifications
Power Input: AC 13A Max, 50Hz
Total load must not exceed 3000W
Working temperature: 0-50°C
Network: IEEE 801.11 b/g
Encryption Type: WEP / TKIP / AES
Product Setup
Before you can use your WiFi Smart Socket, it must be setup using your Android/iOS
device. Initial setup must be performed using your Wi-Fi network. Once it has been set
up you can control your WiFi Smart Socket via Wi-Fi or 3G/4G from anywhere in the
world.
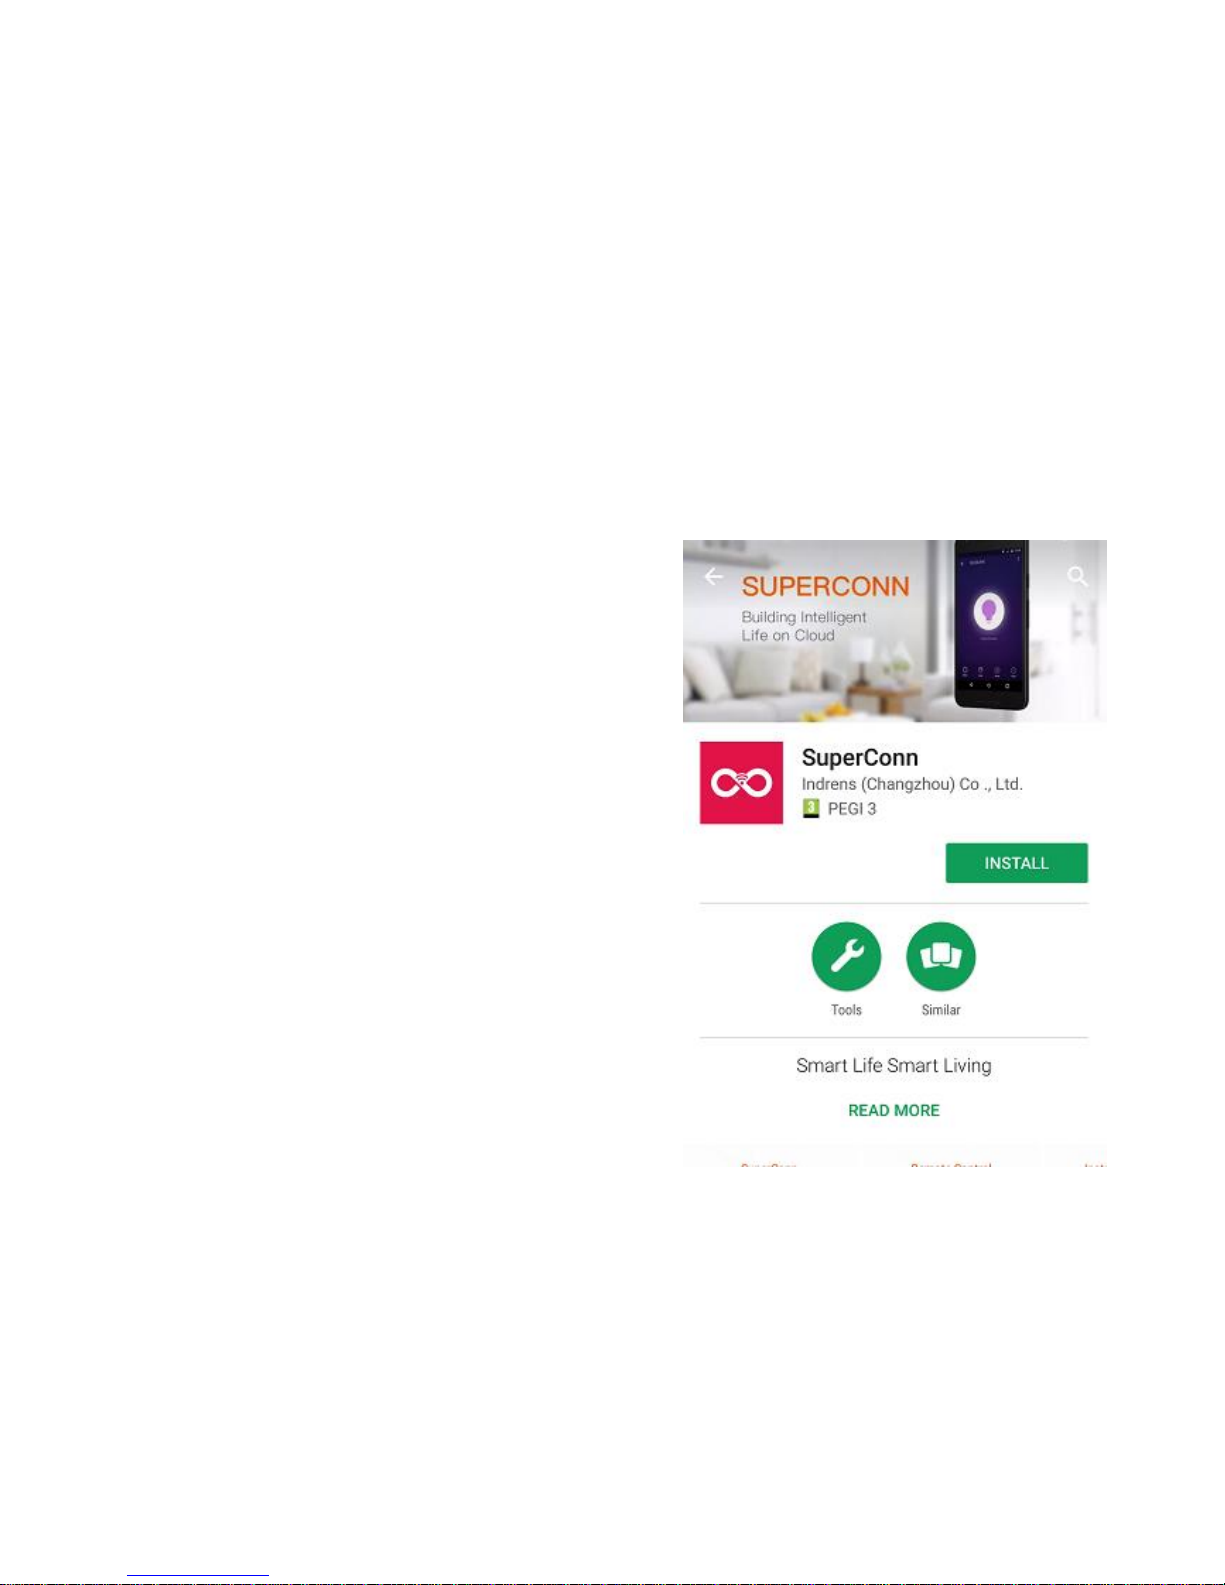
Software
The free SuperConn App is required to operate
your WiFi Smart Socket. It’s available on the
Appstore and Google Playstore for Android and
iOS devices.
1. Ensure your iOS / Android device is connected
to the internet using a Wi-Fi network.
2. Open the App store/Google Playstore on your
phone.
3. Search for “SuperConn” in the App
store/Google Playstore.
4. Download the SuperConn App to your phone.

Registration
You’ll need to register an account on your SuperConn app before you can connect your
WiFi Smart Socket.
1. Open the SuperConn App on your iOS / Android device
2. Ensure you click on ALLOW to enable you to control your WiFi Smart Socket.
3. Please register by clicking on Register in the top right corner of the App. You will
be prompted to enter your mobile number or email address to register. Note: If
you use a Mobile number you will be sent a text message with your confirmation
code to complete your account registration.
4. Once you receive your confirmation code type it in along with a password for the
SuperConn App and select confirm. You can use this to log in to SuperConn.
5. You are now ready to set up your WiFi Smart Socket.
Connecting your Smart Socket to WiFi
1. Plug your Wifi Smart Socket into an electrical socket and Switch it on.
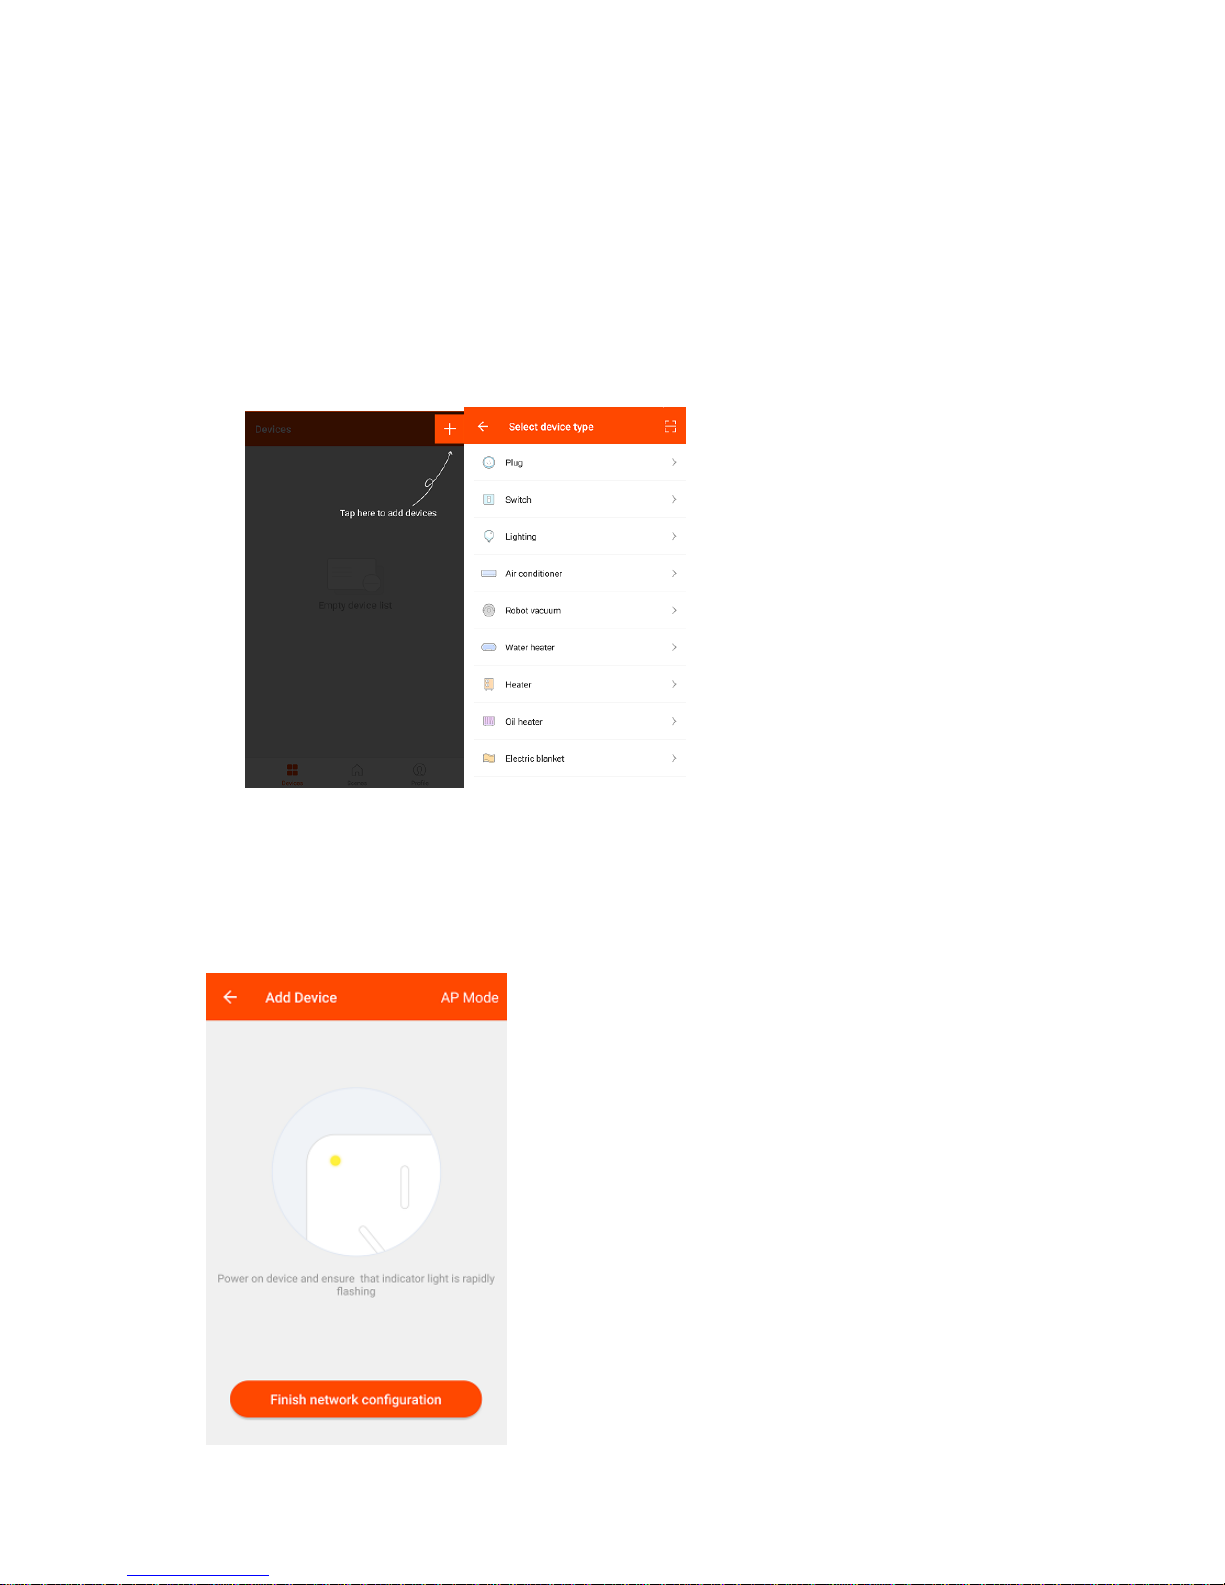
2. Open up your SuperConn app and select the + Icon on the top right of the
App to add device.
3. Select “Plug” as the Device Type. The App can also be used to control other
compatible Smart Devices.
4. To connect the Smart Socket to your WiFi
ensure the blue LED light on the Smart
Socket is flashing quickly. When the LED
light flashes quickly (twice a second) the
device is in Config mode which allows you
to connect.
Select “Finish Network Configuration” when the
blue LED is flashing quickly.
5.
If the blue LED light isn’t flashing quickly when
you’ve plugged in your Smart Socket keep the
Power button in the centre of your WiFi Smart
Socket pressed for 5 seconds to reset the device.

5. The App will automatically detect the WiFi network
you are connected to. Enter the password of the WiFi
Router you are connected to.
Before you click “Next” to connect to the Smart Socket
ensure the Blue LED light is flashing quickly every two
seconds. If it isn’t please repeat step 4.
Click “Next” when you’ve entered your WiFi password and
the blue LED light is flashing every two seconds.
6. Once paired, you will see the following screen with
the device you have successfully added.
If you do not see this message repeat from Step 1 or refer
to the FAQs at the back of the manual for more
information.
Note: The configuration process should take about 1
minute.

Rename your Wi-Fi Smart Socket
The Wi-Fi Smart Socket can be renamed to allow you to easily tell the difference
between the WiFi Smart Socket’s you have set up in your premises.
1. Open the SuperConn App and select the device you want to rename.
2. You will see the screen below. Select the 3 dots on the top right to access
settings.
Select Modify Device Name. Type in the new name of your device. Select
Confirm to change the name.
Tip: If using your WiFi Smart Socket with Amazon Alexa Voice Control we
would recommend naming the Smart Socket something that is easy for Alexa
to understand.

Product Operation
Switching On and Off
To control your WiFi Smart Socket simply follow the instructions below.
1. Open the SuperConn App, and select Devices from the main screen
2. Select the device you wish to control, then press the power button to toggle
between on and off state.
3. You can also use the Power button in the centre of your Smart Socket to control the
power manually.
The indicator light on the front of your Wi-Fi Smart Socket will be solid red when the
Smart Socket is switched on, and solid blue when it is switched off.
Table des matières
Autres manuels Time2 Domotique


