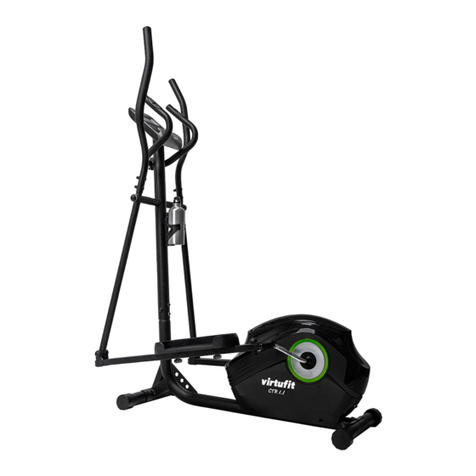
Tectrix Personal Climber Manuel utilisateur

Personal Climber
Owner’s Manual
Tectrix Fitness Equipment
68 Fairbanks
Irvine, California 92618
(800) 767-8082
(714) 380-8082

© 1997 Tectrix Fitness Equipment
Important Safety Instructions: Read and Save
1. Read all instructions before using this equipment.
2. DANGER: DISCONNECT FROM SUPPLY CIRCUIT BEFORE OPENING.
AVERTISSEMENT: DECONNECTEUR DU CIRCUIT D’ALIMENTATION AVANT D’OURVRIR.
3. Unplug all electrical appliances before cleaning and after use.
4. Close supervision is necessary when this equipment is used by or near children or disabled persons.
5. Use this equipment for the intended use as described in this manual.
6. Never operate equipment that has a damaged power cord or plug.
7. Never drop or insert any object into any opening on this equipment.
8. Do not use outdoors.
9. To disconnect, switch off power switch (just above power cord plug), then remove plug from outlet.
In the presence of power line “noise” such as fast transients, the equipment may require that power be
switched off and then back on again, to resume normal operation.
IMPORTANT GROUNDING INSTRUCTIONS
Warning:
Connect This Equipment to a Properly Grounded Outlet
ATTENTION -
BRANCHER CET EQUIPMENT UNE PRISE CORRECTEMENT RELIEÉ À LA TERRE
This equipment is for use only on a nominal 120-volt circuit and has a grounding outlet that looks like the
outlet illustrated in Figure A, below. This equipment must be grounded. No adapter should be used. It has
been supplied with a cord having an equipment grounding conductor and plug. This plug must be plugged
only into a properly installed grounded outlet. Failure to do so can result in the risk of electrical shock. Do
not modify the plug provided with this product—if it does not fit, have a qualified electrician install the
proper style outlet.
FIGURE A - Grounded Outlet
Parts of Personal Climber are covered by U.S. patent numbers: 4,938,474 and 4,949,993.
Tectrix is a registered trademark of Tectrix Fitness Equipment, Irvine California.

Personal Climber Owner’s Manual
Table of Contents
CHAPTER 1 - INTRODUCTION 1
About This Book 1
CHAPTER 2 - ASSEMBLY AND SETUP 3
Assembly Overview 3
Unpacking the Personal Climber 3
Parts List 3
Assembling the Personal Climber 5
Leveling the Personal Climber 8
Plugging in the Personal Climber 8
Setting Options 8
Drive Cable Maintenance 9
CHAPTER 3 - LET’S CLIMB 11
Overview 11
Before You Start 11
Your Workout 12
Manual Mode 12
Using the Preset Programs 13
Step and Go Operation 14
The Workout Display 15
Workout Summary 16
CHAPTER 4 - ADVANCED WORKOUTS 17
Setting a Calorie Goal 17
Solo Racing 18
Fitness Test 18
Custom Program 20
Designing a Custom Program 20
Using a Custom Program 20
CHAPTER 5 - THE HEART RATE PROGRAM 23
CHAPTER 6 - TESTING THE PERSONAL CLIMBER 25
APPENDIX A - CLIMBER LEVEL TO SPEED CONVERSION 27
APPENDIX B - SPEED AND ENERGY CONVERSIONS 29


CHAPTER 1 - INTRODUCTION
Welcome to the Tectrix Personal Climber, the perfect climber for your home. Personal Climber’s
durability, ease of use, and flexible programming make it ideal for almost everyone’s home
exercise needs.
The Personal Climber’s features include:
•Simple to Use: Personal Climber’s console leads you through the simple steps to start a
workout. Or, just step on and start climbing.
•Continuous Performance Monitoring: The convenient, easy-to-read console shows the
progress of your workout—vertical speed, calories burned, and more.
•Built-in Workout Profiles: Three standard workouts offer combinations of calorie burning,
strength training, and endurance training to satisfy almost everyone.
•Calorie Goals: Tell Personal Climber how long you want to work out and how many
calories you want to burn, and it will set the optimum speed for you.
•Programmable: If you want a specific workout profile that’s not included in the standard
set, you can create your own.
•Optional Heart Rate Program: With its optional heart rate monitor, Personal Climber can
program a workout to reach and keep you at your optimal heart rate.
•Setup Mode: You can change Personal Climber’s display to match the way you want to
operate.
So, the Personal Climber is ideal for you, whatever fitness category you fit into:
•If you’ve never used a climber before, start with manual mode, setting the speed to match
what you’re capable of.
•You can push yourself by using the standard programs to increase strength and endurance.
•If you’re an advanced athlete and know your abilities and needs, you can custom-tailor the
exact workout you want.
About This Book
This book is for you, the Personal Climber owner. It contains assembly and setup information plus
complete details on using Personal Climber for your regular workout.
Besides this introduction, this book contains:
Chapter 2 - Assembly and Setup
Everything about getting the Personal Climber ready to use, from taking it out of its shipping crate
to setting its operation options.

Page 2Chapter 1 - Introduction
Chapter 3 - Let’s Climb
How to use the Personal Climber. Starting a workout, choosing a program, the console display,
and more.
Chapter 4 - Advanced Workouts
Using the calorie goal, racing, fitness test, and custom workout features.
Chapter 5 - The Heart Rate Program
How to use the optional heart rate control program.
Chapter 6 - Testing
How to make sure your Personal Climber is operating properly.
Appendix A
How Personal Climber’s level settings translate into climbing speeds.
Appendix B
Speed and energy conversion chart.

CHAPTER 2 - ASSEMBLY AND SETUP
This chapter describes how to unpack and assemble your Personal Climber, and how to use setup
mode to configure the climber for your situation.
Assembly Overview
It’s easy to assemble the Personal Climber—it will probably take about 30 minutes. You need
these common tools:
•3/16” Allen Wrench
•7/16” wrench or socket wrench and ratchet
•1/2” wrench
Here’s an overview of the steps in the assembly:
1. Unpack the Personal Climber and make sure you have all the parts.
2. Follow the detailed instructions to assemble the Personal Climber.
3. Place the Personal Climber where it will be used and level it.
4. Plug in the power cord.
Unpacking the Personal Climber
Use the 7/16”or ½” socket or wrench to remove the clamps and screws or tie straps holding the
chassis base to the pallet. Remove all parts from the shipping carton. Make sure you have all the
parts by checking against the parts list.
CAUTION: Do not stand the display console upright tube on its end! Lay it flat instead.
Standing it on end could damage the display ribbon cable.
Parts List
Your Personal Climber includes these parts:
Description Qty Part Number Item #
Base Unit 170310W or 70310B 1
Left Foot Assembly 1 70056 2
Right Foot Assembly 1 70057 3
Front Foot Assembly 1 70058 4
Display Upright Assembly 1 70360 5
Left Handrail 161089 or 61119 6
Right Handrail 161090 or 61120 7
Configuration Kit 1varies by country --
Hardware Kit 1 70362 --

Page 4Chapter 2 - Assembly and Setup
The Hardware Kit for the Personal Climber contains:
Description Qty Part Number Item #
5/16” x 2” Screw 4 41011 8
5/16” x 2.25” Screw 3 41050 9
5/16” Split Washer 7 43042 10
5/16” Nyloc Nut 3 42033 11
5/16” x 2.5” Button Cap Screw 2 41138 --
Bracket, Handrail Clamp 1 52078 12
#10 x 3/4” Phillips-head Screw 9 41009 --
The console and related materials for the Personal Climber are packed in the Configuration Kit
included with the unit. This box contains:
Description Qty Part Number
Warranty Card 1 03006
Owner’s Manual 1 03005
Service Manual 1 03071
Power Cord 1Varies with country (14007 for USA)
Personal Climber Display
Console 1Varies with language

Personal Climber Owner’s Manual Page 5
Assembling the Personal Climber
Attach the Feet to the Base
Carefully turn the base (1) upside down. Attach the left (2) and right (3) feet using three of the
5/16” by 2.25” screws (9) and washers (10), and one 5/16” nut (11). Attach the front foot using
two of the 5/16” by 2” screws (8) and washers (10). See Figure 1. Roll the base onto its feet.
Figure 1 - Attaching the Feet

Page 6Chapter 2 - Assembly and Setup
Attach the Display Upright
Attach the display
upright (5) to the
base (1) using two
5/16” by 2” screws
(8) and washers (10)
as shown in Figure
2. Be sure the ribbon
cable goes through
the slot, as shown,
and the display
console backplate is
facing toward the
base. Finger tighten
the screws; you will
finish tightening
them with a wrench
later, after installing
the handrails.
Attach the Display Console to the Display Upright
Remove the display console from the configuration kit. Attach the display ribbon cable from the
display upright to the connector on the back of the console. Make sure it fastens securely.
Attach the display console to the console backplate using four of the #10 Phillips-head screws.
Figure 2 - Attaching the Display Upright
Table des matières
Manuels vélo elliptique populaires d'autres marques

Weslo
Weslo Momentum 4.0 Elliptical Manuel d'utilisation et d'entretien

Progear Fitness
Progear Fitness Air elliptical pro 1307 Manuel utilisateur

Torque Fitness
Torque Fitness XPLLP Manuel utilisateur

Octane Fitness
Octane Fitness PRO3700C Manuel utilisateur

Xterra
Xterra FS5.8e Manuel utilisateur

Bodyguard
Bodyguard E-40 Manuel utilisateur

Bonn Germany
Bonn Germany Concept 2.2 Manuel utilisateur

Precor
Precor Resolute RSL 620 Manuel utilisateur

NordicTrack
NordicTrack E 9.2 Elliptical Manuel utilisateur

Vision Fitness
Vision Fitness X6600iNetTV Manuel utilisateur

Matrix
Matrix MX-A5x Manuel utilisateur

SportsArt Fitness
SportsArt Fitness ECO-NATURAL Elite E874 Manuel utilisateur