
T-Fal Kaleo StoreAway Manuel utilisateur
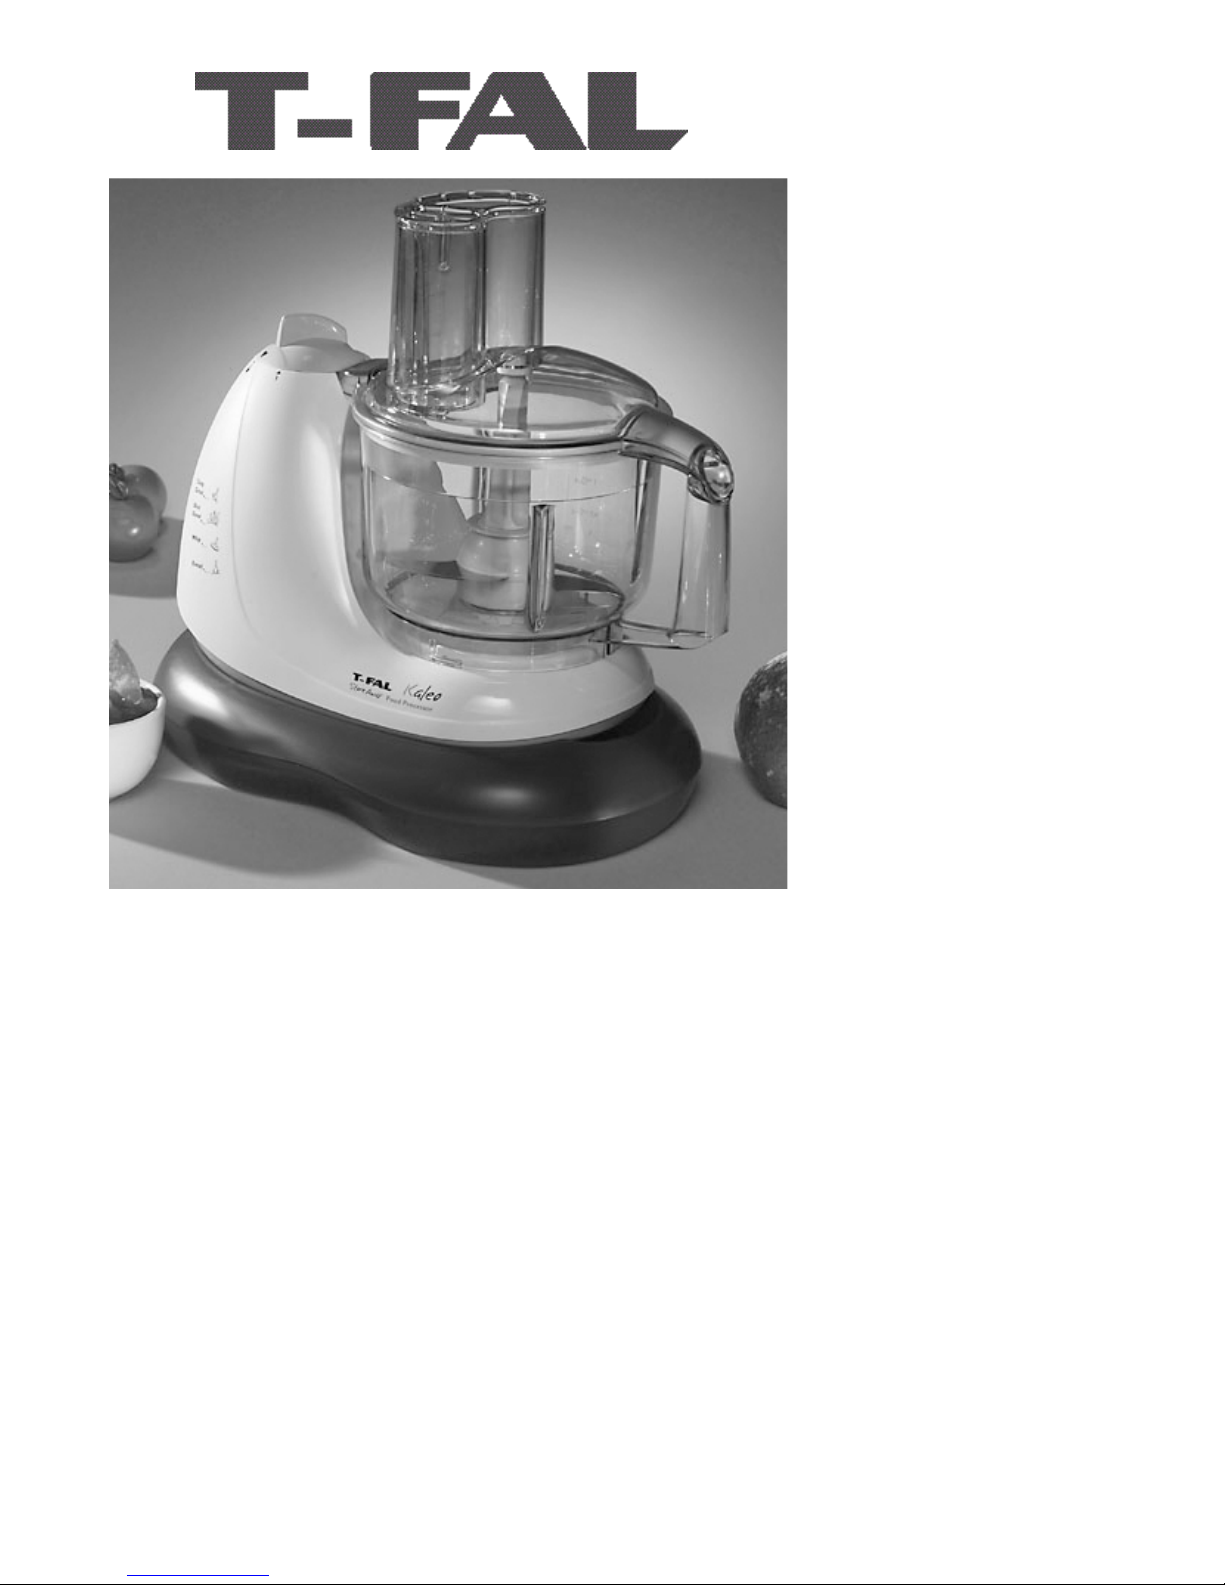
Kaleo StoreAway
Food Processor Procesador de Alimentos Robot Culinaire

Summary
■English 1 - 28
■Spanish 29 - 59
■French 60 - 89
1
2
3
5
6
7
8
9
10
11
12
13
14 4
15
18
16
17
19
20
21

1
IMPORTANT SAFEGUARDS
When using electrical appliances, basic safety precautions should always
be followed :
a) Read all instructions.
b) To protect against risk of electrical shock do not put the motor base in water or
other liquids.
c) Close supervision is necessary when any appliance is used by or near chil-
dren.
d) Unplug from outlet when not in use, before putting on or taking off parts, and
before cleaning.
e) Avoid contact with moving parts.
f) Do not operate any appliance with a damaged cord, plug, after the appliance
malfunctions, or is dropped or damaged in any manner. Return appliance to the
nearest authorized service center for examination, repair or adjustment. See war-
ranty.
g) The use of attachments not recomended or sold by the manufacturer may
cause fire, electric shock or injury.
h) Do not use outdoors
i) Do not let cord hang over the edge of the counter, table or other work surfaces.
j) Keeps hands and utensils away from moving blades or discs while processing
food to reduce the risk of injury or damage. Aspatula may be used only when the
food processor is not running.
k) Blades are sharp. Handle with care.
l) To reduce the risk of injury, never place cutting blades or discs on the base
without first locking the bowl in place.
m) Always ensure the cover is securely locked in place before operating the
appliance.
n) Never push food through the feed tube by hand. Always use the food pusher.
o) Do not attempt to tamper with the cover locking mechanism.
p)This appliance has a polarized plug (one blade is wider than the other). To
reduce the risk of electric shock. This plug will fit into a polarized outlet only one
way. If the plug does not fit fully in the outlet, reverse the plug. If it still does not fit,
contact a qualified electrician. Do not modify the plug in any way.
q) Do not exceed the maximum quantities or operating duration indicated in the
"choosing a speed" table.
r) Do not place or use this appliance on a hot surface or close to an open flame.
s) This product has been designed for domestic use only. Any professional use,
inappropriate use or failure to comply with the instructions, will void the manufac-
turer’s warranty
SAVE THESE INSTRUCTIONS

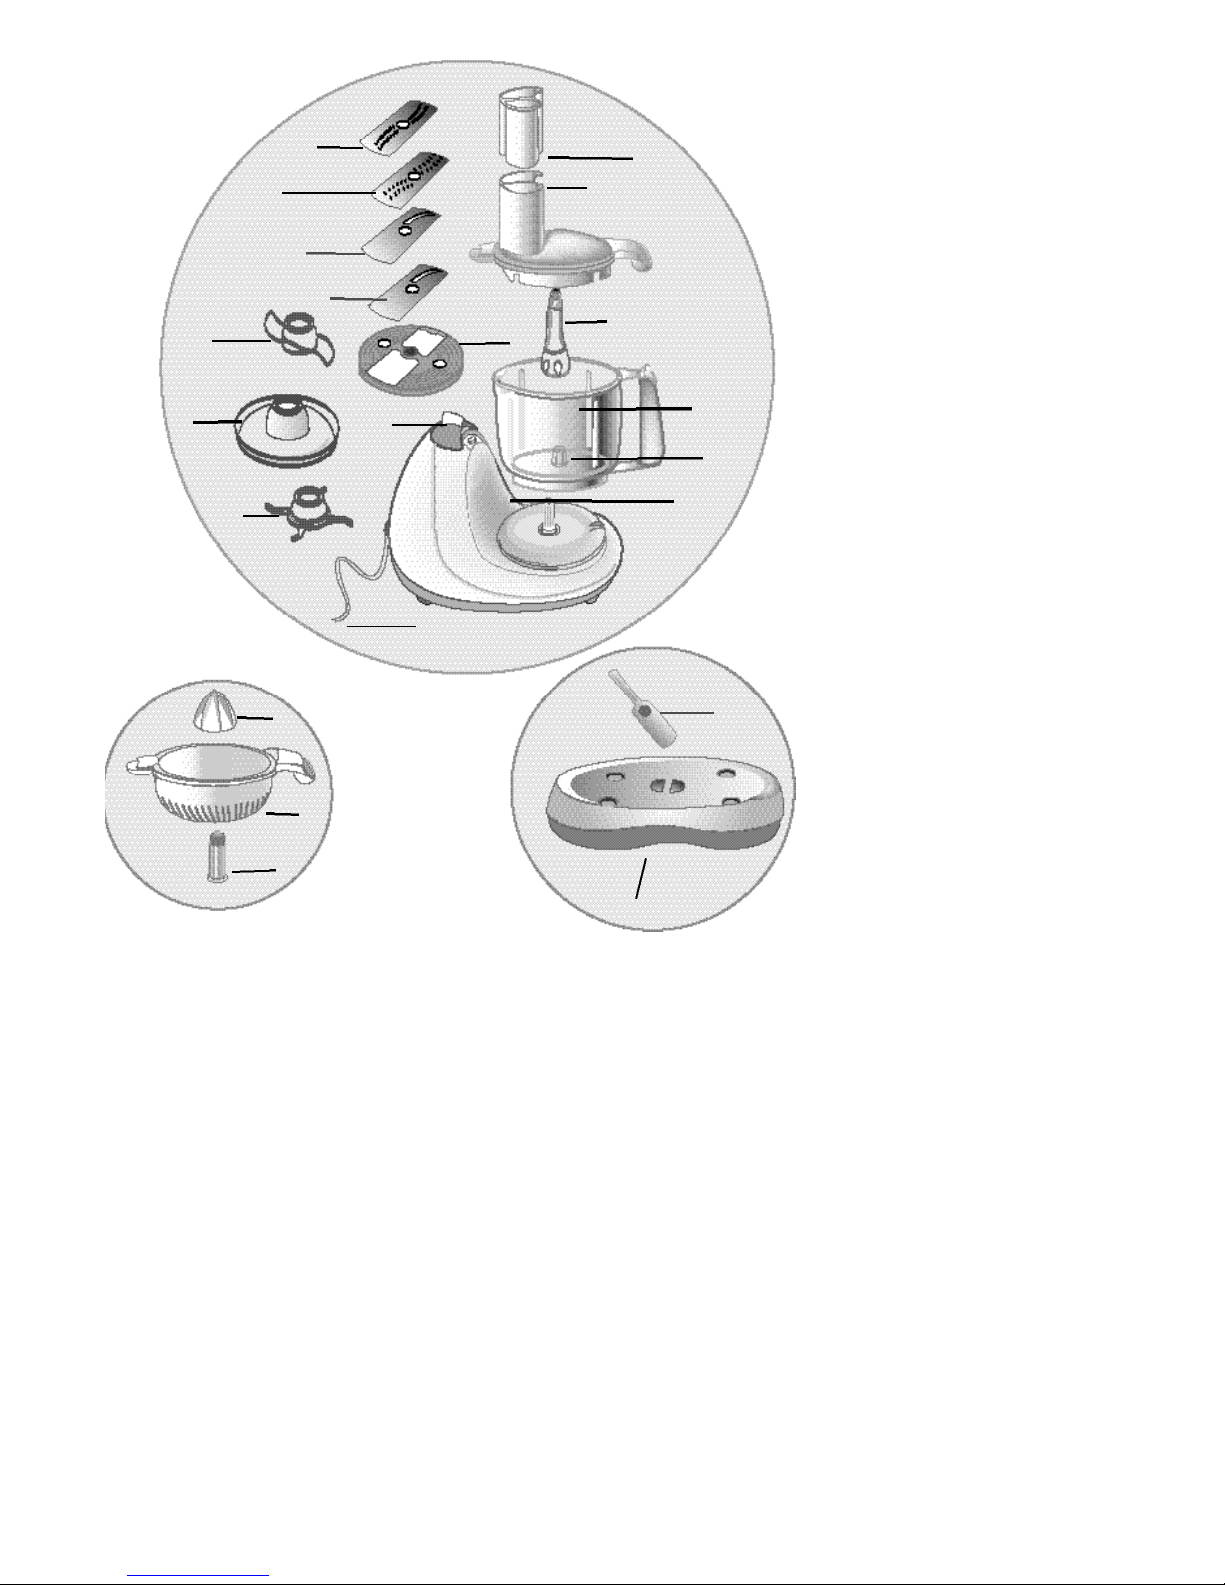
APPLIANCE DESCRIPTION
1Food pusher
2Lid with Quick Lock System ®and sealing ring
3Attachment support axis
4Bowl with exclusive pouring lip
5Bowl axis
6Motorized base
7Control button marked:- lock symbol = lid locked, P = pulse
1 and 2* (*on select models only ) = Continuous operation
8Shredding and slicing holder
9Coarse slicing attachment
10 Fine slicing attachment
11 Coarse shredding attachment
12 Fine shredding attachment
13 Kneading attachment
14 Whipping attachment
15 Stainless steel chopping blade
16 Power cord
17 StoreAway storage box
18 Spatula
19 Citrus press support (select model only)
20 Citrus press pulp sieve (select model only)
21 Citrus press cone (select model only)
Food pusher :
- Handy food measure for liquids marked in ounces, cups (1 cup = 250 ml ), ml.
6 OZ = 3/4 CUP = 175 ml
4 OZ = 1/2 CUP = 125 ml
2 OZ = 1/4 CUP = 62,5 ml
- Ideal for measuring liquid ingredients. Drip hole evenly dispenses liquid or oil; ideal when
making pastry dough and mayonnaise.
BEFORE FIRST USE
Wash the bowl and attachments in soapy water, rinse then dry.
Caution: the blades are very sharp and can cause injury. Handle with care and keep
out of the reach of children.
2
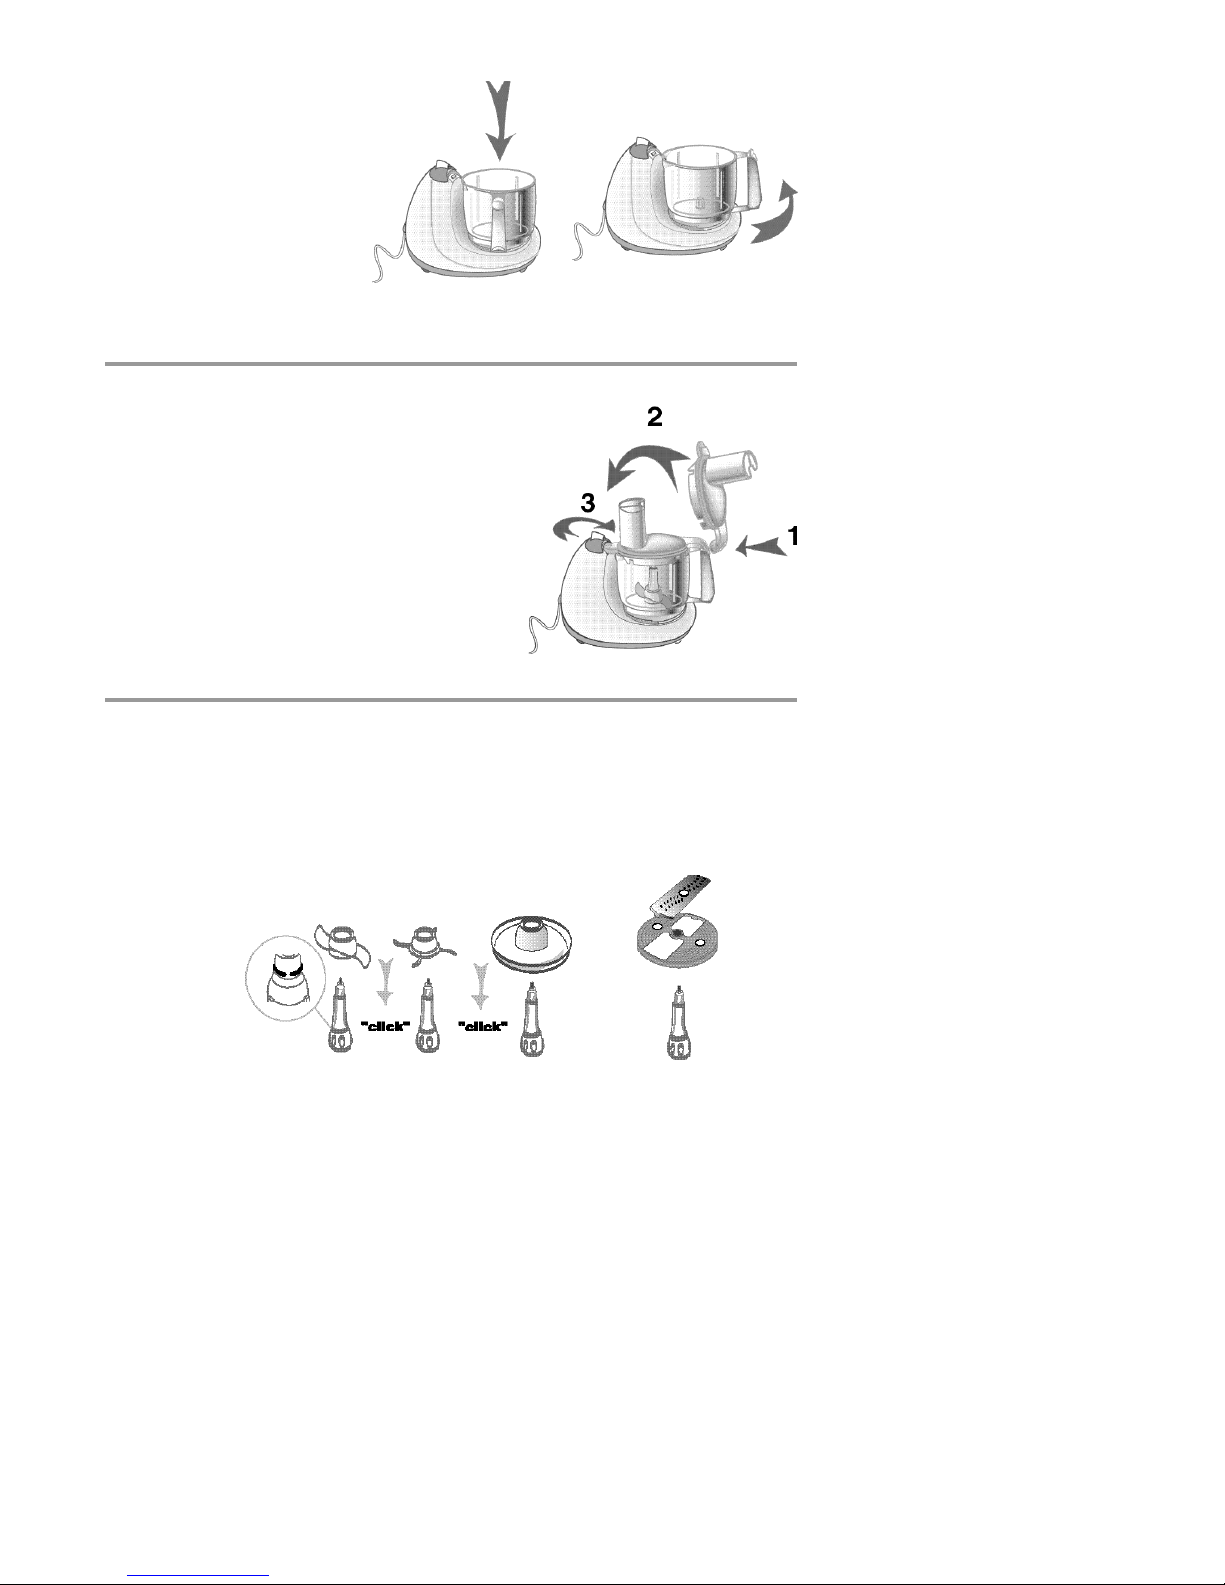
Locking the bowl onto
the base:
Place the bowl on the base with the handle facing you, then turn it counter-clockwise as far as it will go,
making sure it firmly locks in position.
Closing the lid (Quick Lock System ®)
1. Position the lid as shown in the diagram so that point 1 rests
on the handle.
2. Lower the lid down
3. The lid is now correctly positioned and ready for use.
With one hand on the feed tube press down and at the same
time turn the control knob to the locked position (lock symbol).
Start by setting the control button to pulse or speed 1 or 2*
depending on model
Note: If you cannot turn the control knob to the required setting,
the lid may not be fitted correctly. Check that the lid is firmly
pushed down so that the tab near the feed tube is engaged with
the control knob.
Removing the lid
To remove the lid, turn the control knob to the 0 position.
Using the attachments:
A) For the blade, kneading and whipping attachments:
Fit the attachment you wish to use on the support axis and push gently until you hear a "click" as it locks in
place. Handle with care.
B) For the shredding and slicing attachments:
Select the blade required and clip it on to the shredding and slicing holder
then position it on top of the attachment support (3).
HOW TO USE YOUR KALEO
3
4
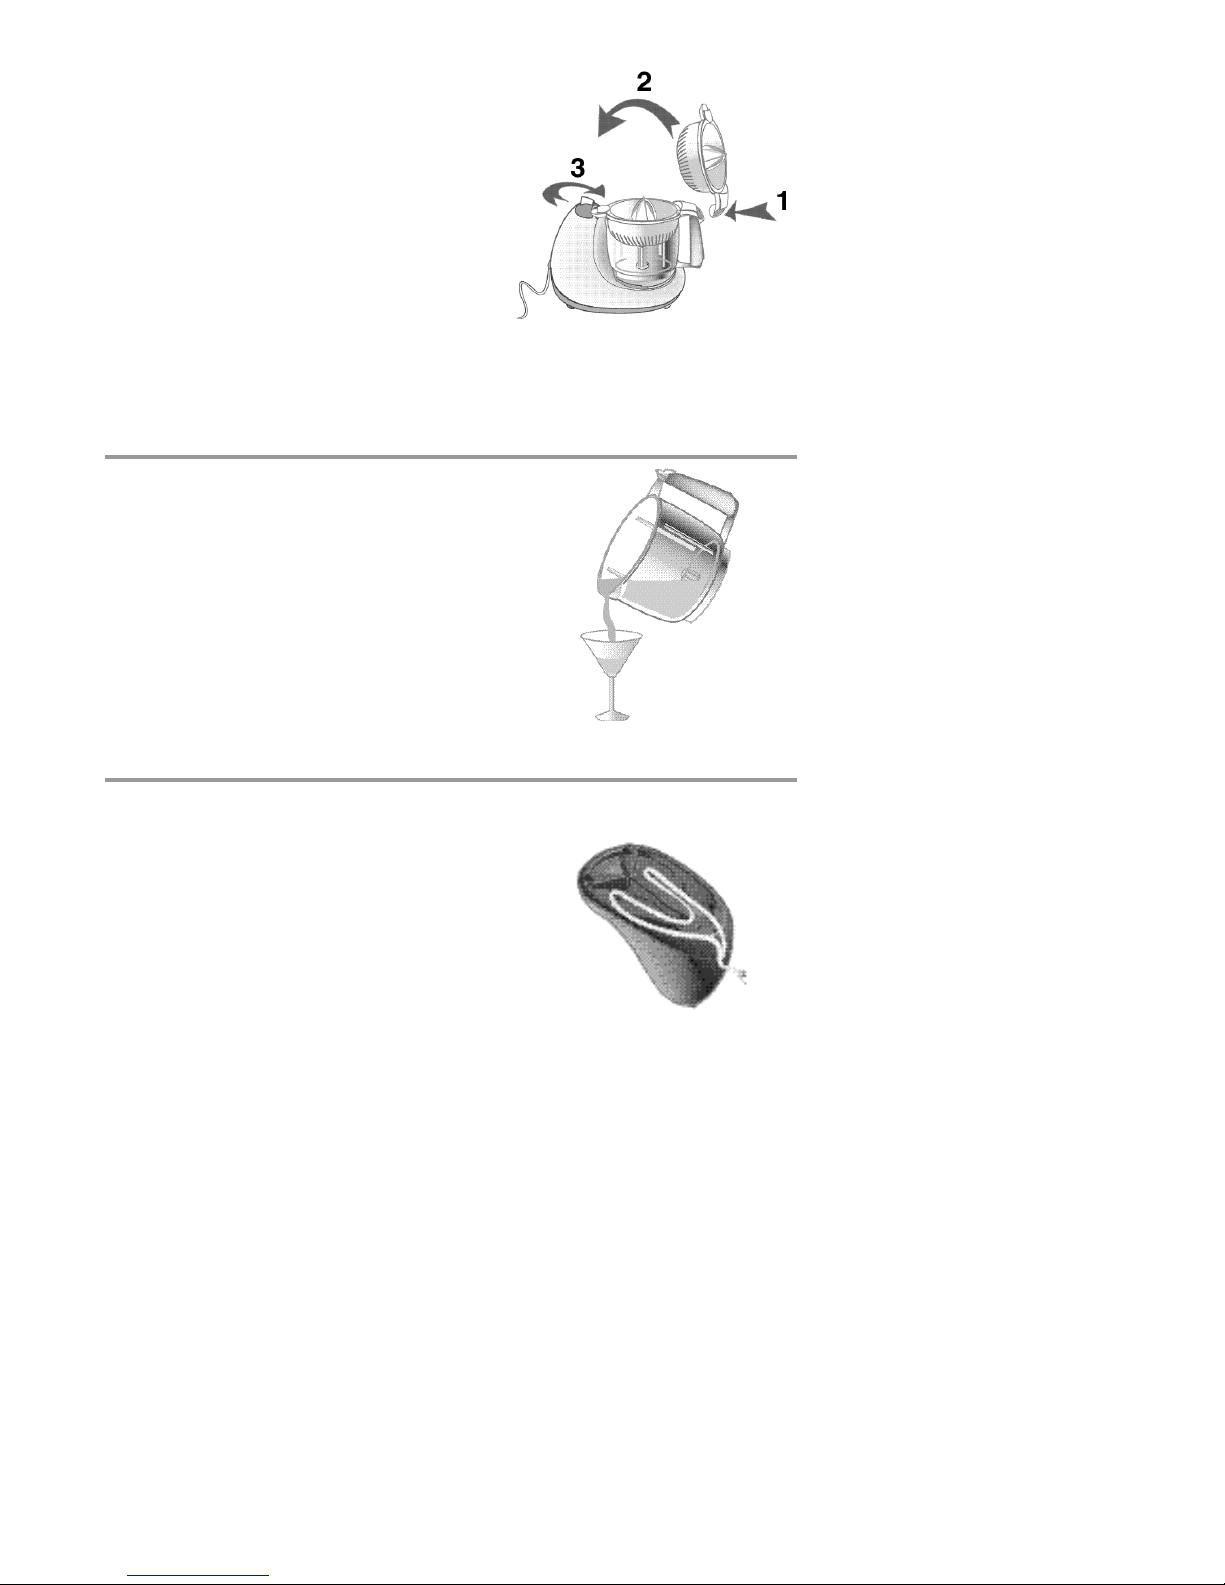
Using the citrus press :
Position the bowl on the motor unit. Place the citrus
press support of the citrus fruit press on the axis of
the bowl, then position the pulp sieve on the bowl. Fit
the cone on the axis at the centre of the pulp sieve
and lock the pulp sieve by turning the button to lock
symbol. Place half the fruit fresh down on top of the
cone and start the appliance (position 1 or pulse).
press the fruit down firmly to extract the juice.
After use:
- Unlock the pulp sieve by turning the control button.
- Remove the citrus fruit press attachment with the
bowl.
- Remove the pulp from the cone and the pulp sieve.
The bowl is equipped with a pouring lip.
Power cord storage: under the
base of the food processor.
Cleaning in the dishwasher
The bowl, lid and attachments are all dishwasher safe. Place them in the upper basket and use the
normal wash cycle.
The seal in the lid can be removed for cleaning.
Cleaning the bowl
To make cleaning of the bowl easier, you can put 2 cups of warm water and a few drops of dishsoap in
it and run the appliance for a few seconds with the blade.
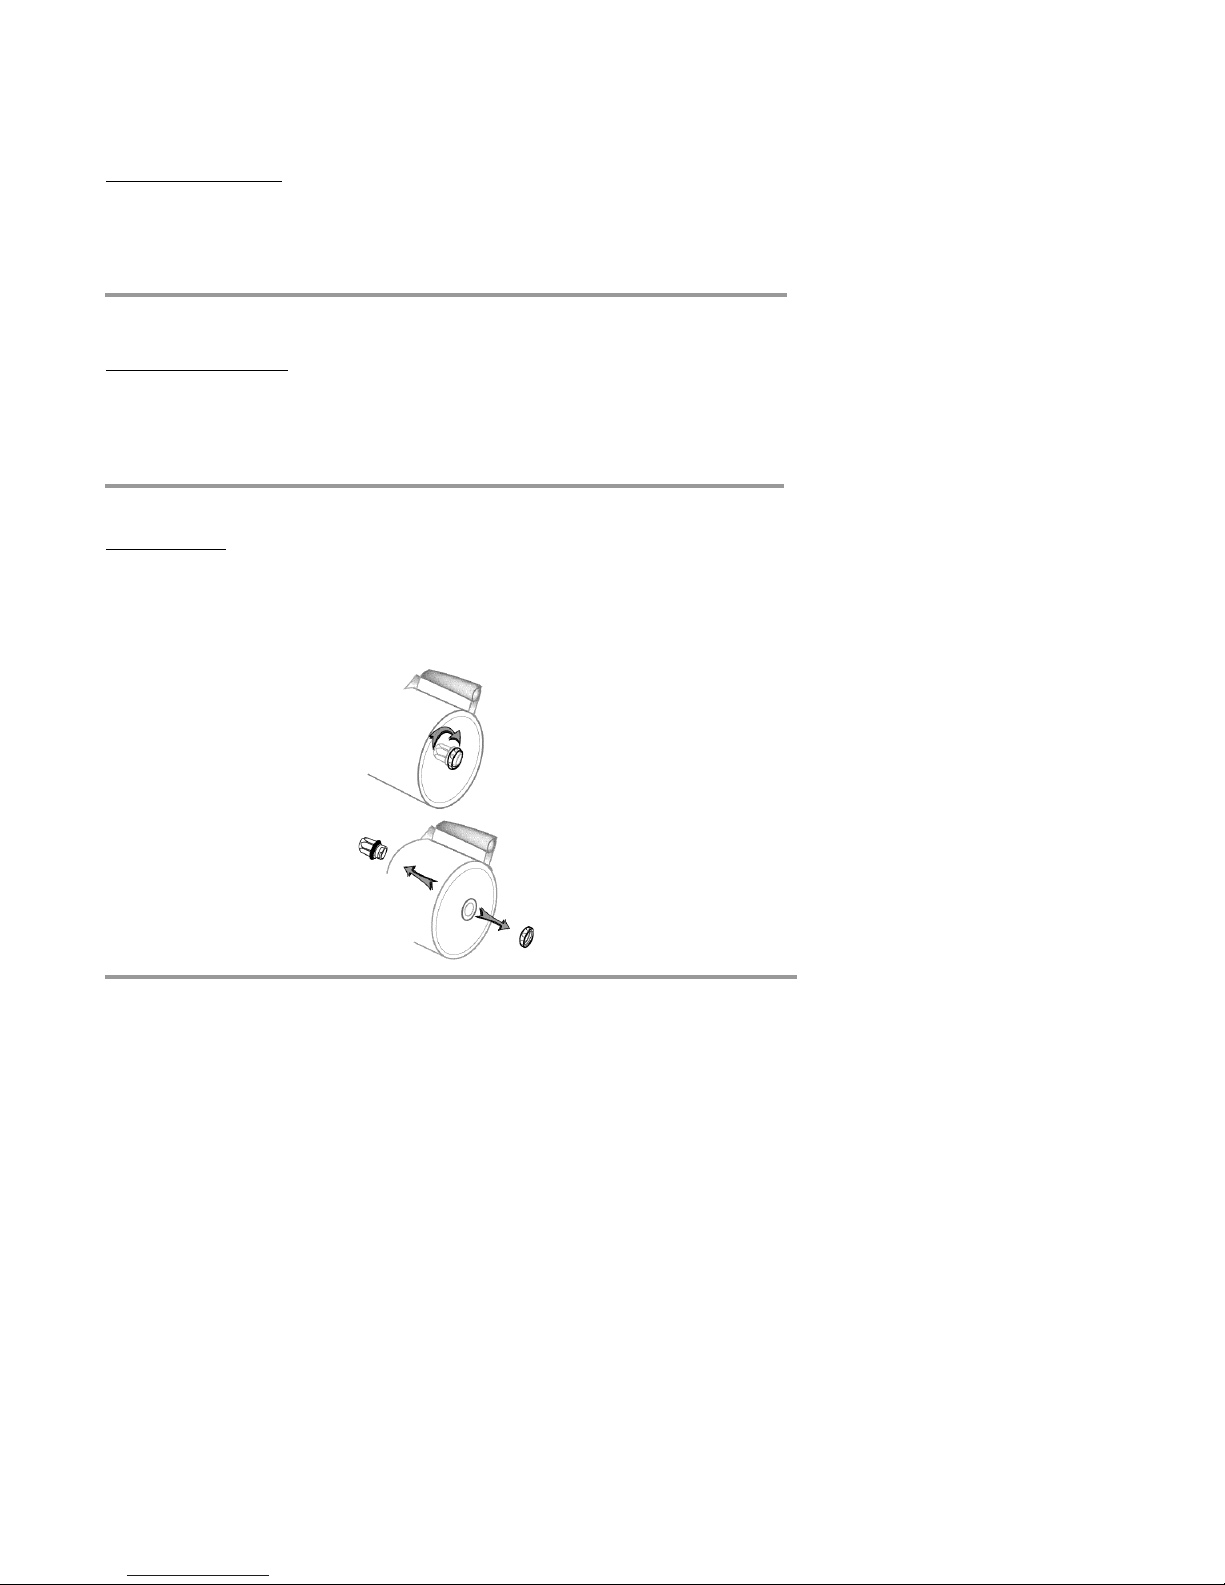
The axis of the bowl can be removed to make cleaning easier. Do not remove the seal around the
axis. Tighten fully when reassembling.
5
CLEANING
Always disconnect the plug before cleaning . You can wipe the motor unit with a damp cloth. Never
immerse the motor unit and never pour water over it.
Cleaning the attachments
Handle cutting attachments with caution as they are very sharp.
Wash attachments that have been in contact with food in hot, soapy water immediately after use.
Replace attachments in their box after use.
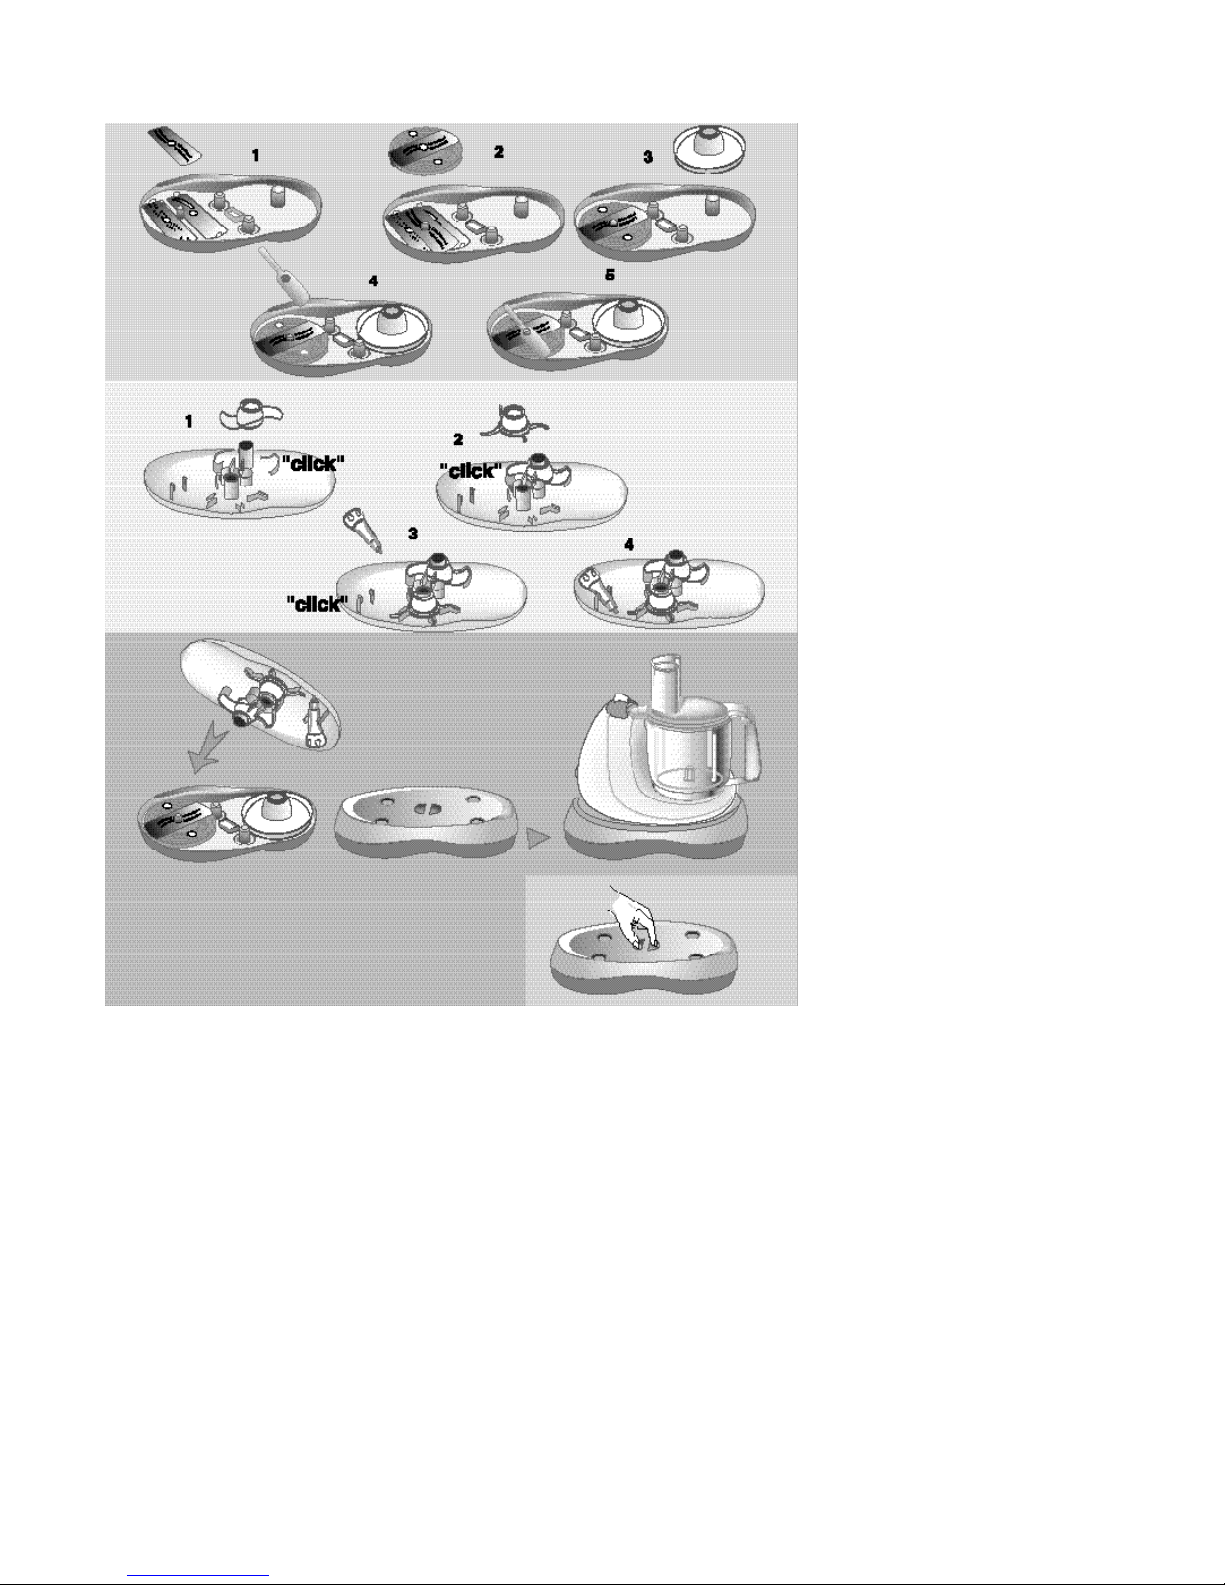
STORING ATTACHMENTS
(except citrus press attachment )
• Base of box
• Lid of box
The StoreAway storage box can be used as a base while operating the appliance or can
be stored separately. The food processor can be used with or without the base.
6

7
* Continuous Speed = speed 1 or speed 2 depending on model.
These quantities and speeds are only a guide and may need amending depending on the types of
food processed.
CHOOSING A SPEED FOR ALL FUNCTIONS
RECOMMENDED
SPEED*
Pulse
Continuous speed *
Continuous speed *
Continuous speed * or pulse
Continuous speed *
Pulse
Continuous speed *
Continuous speed *
Pulse
Continuous speed *
Continuous speed *
Continuous speed *
Continuous speed *
Continuous speed *
Continuous speed *
Continuous speed *
Continuous speed *
Continuous speed *
Continuous speed *
Continuous speed *
Pulse
Pulse
MAX. QTY
14 oz
8 oz
14 oz
14 oz
16 oz
4 oz
2 oz
42 oz
32 oz
51 oz
15 oz
4 eggs
16 oz
1 lb,12 oz
1 lb,12 oz
1 lb, 4 oz
16 oz
6
14 oz
14 oz
1 lb,12 oz
16 oz
CHOPPING / MIXING
Lean meat ( poultry)
Fatty meat ( beef)
Cooked meat or stuffing
Garlic, onion and shallots
Pie dough
Dried fruit
Herbs
Soup (cooked vegetables in broth)
Fresh stewed fruit
Light batter mix (pancakes and waffles)
Cookie dough
Hard boiled eggs
KNEADING / MIXING / BLENDING
Pie Crust
Bread and pizza dough
Cake batter
Pureed cooked apples
WHIPPING / WHISKING
Mayonnaise and sauces
4 to 6 whipped egg whites (meringue and soufflé)
Whipping cream
Light sauces
SHREDDING / SLICING
Vegetables and fruits
Cheese
Table des matières
Langues :
Autres manuels T-Fal Robot culinaire


