STM ROCKETBOX 2.0 Manuel utilisateur


POWER
Standard 110V
8 Full Load Amps
5-1/2 ft. Cord Length
SOFTWARE &
UPGRADES
HD 7" Responsive Touch Control Panel
with Data Log and Remote Access Capabilities
OPERATION Patent-Pending Pneumatic Leveling System
CYCLE
CUSTOMIZATION
Single Cycle Operation with
Customizable Run Settings
TRAINING Integrated Training Mode with Step-by-Step Tutorials
VOLUME
CAPACITY 453 Pre-Rolls Every Cycle
MATERIALS
Encased in SAE 304 Stainless Steel
Heavy Duty Caster Wheels (for transport)
Aluminum & Other Food Grade Components
WEIGHT &
DIMENSIONS
Approximately 300 lbs
Machine Dimensions 24" L x 37" H x 27" W
PAPER
COMPATIBILITY Compatible with 84, 98, and 109 mm cones
COMPLIANCE
OSHA Compliant
UL-Listed Components
100% Food-Grade
Emergency Stop System
LIFE CYCLE 10 Years
Sesh Technologies Manufacturing, Inc.
3223 North Market Street, Spokane, WA 99207
Phone: (509) 204-3164 | Web: www.stmcanna.com
USER MANUAL V1.3
ROCKETBOX 2.0
™

Table of Contents ......................................... 1
Break-In Procedure ...................................... 2
Components ................................................. 3
Adjustable Top Tray ..................................... 5
Lift Plate ........................................................ 7
Getting Started ............................................. 8
TouchScreen ................................................ 9
1
TABLE OF CONTENTS
Startup Menu .............................................. 11
Density Test Mode ..................................... 12
Density Testing ........................................... 13
Operation of Machine ................................ 15
Loading & Unloading Cones ...................... 16
Cleaning & Maintenance ............................ 17
Terms of Business ....................................... 18

Thank you for being a valuable and loyal client of
STM. Our goal is to bring our customers the very
best in product quality and customer service. We
value your feedback and use it to evaluate what to
improve and/or update in our existing product line.
Please be advised that the RocketBox™ has a direct
funneling system into your selected pre-rolls when
used properly. This means that contaminate-free
material being funneled from the Top Trays into
your pre-rolls will remain contaminate-free through
the direct filling process. The Top Tray funnels are
directly inserted into the opening of your pre-roll
cones and do not allow anything other than what is
being fed onto the Top Tray.
Even with the direct funneling system, there is a
break-in period of 400 hours before any material
passes through the "crutch" or bottom of the pre-
roll onto the bottom of the "shaker box". This
material could be reused, but should still be visually
inspected for debris. Although we inspect each and
every part before it is sent; due to the intense
vibration, the break-in period is required.
After you have set up your RocketBox™, proceed to run
multiple cycles without material (at least 5 per set of trays using
different intensity setting on the motor) with each of your tray
systems and watch for debris in-between the trays and in the
shaker box bottom.
After the un-boxing and the initial break-in, you may proceed
with use of the RocketBox™ for the first 400 hours of operation.
Until the 400 hour point has been reached, discard all materials
which have dropped inside the bottom of RocketBox™. Run
time is located on the start screen.
PLEASE ADHERE TO THE RECOMMENDED
GUIDELINES TO BREAK-IN YOUR ROCKETBOX™
After the 400 hours required for proper break-in you may
reuse the material that has been collected in the bottom of the
shaker box only after visual inspection for debris has been
made.
Visual inspection should always remain part of the operation of
your RocketBox™. Although we use food-grade materials for
direct contact surfaces, due to intense vibration and moving
parts, they may still have debris and must always be inspected.
2
BREAK-IN PROCEDURE

3
COMPONENTS
6. E-Stop Button3. 7" Touch Screen
1. Rubber Flaps
2. Guide Rod
7. Casters
4. Ports
5. Power Switch
1. Rubber Flaps - Prevents material
from falling into the base of machine.
2. Guide Rods - Used for guiding the
top and bottom trays into machine.
3. 7" Touch Screen- Used for the
operation of machine.
4. Ports- Ethernet, USB, and AUX
connectivity.
5. Power Switch- Turns the
machine on and off.
6. E-Stop Button- Turns the
machine off in case of an emergency.
7. Casters - Swiveling caster
wheels for easymobility.

8. Loading Box
9. Top Tray
10. Bottom Tray
11. Finishing Base
12. Reset Brackets
13. Riser Bolts
14. Density Beaker
8. Loading Box- Holds bottom tray to
load cones and unload top tray.
9. Top Tray- Placed on top of bottom
tray. Only used for machine operation.
10. Bottom Tray- Cone holding tray
(84, 98, or 109 mm cones).
11. Finishing Base- Holds bottom tray
for unloading cones.
12. (2) Reset Brackets- To reset the
adjustable top tray to default settings.
13. (4) Riser Bolts - Adjusts the lift plate
for 84, 98, or 109 mm cones.
14. (1) Density Beaker- 10 mL
beakers used to run density tests.
4
COMPONENTS

Loosenthe bottom nut on the Adjustment Bolt
with a 7/16" closed-end wrench. Repeat with
each of the (6) bottom nuts.
Turn the Adjustment Bolt counter-clockwise to
lower the Top Tray, or clockwise to raise the Top
Tray. Turn each bolt in 1/2 turn increments.
Repeat for all (6) Adjustment Bolts.
Tighten the Adjustment Bolt bottom nut with
7/16 closed-end wrench to secure into place.
Repeat with all (6) bottom nuts.
ADJUSTING THE TOP TRAY
RESETTING THE TOP TRAY
Add the (2) Reset Brackets to each side of the
Bottom Tray. Place Adjustable Top Tray on top.
Loosen Adjustable Bolt bottom nut with a 7/16
closed-end wrench. Repeat for all (6) bottom nuts.
Turn the top Adjustment Bolt clockwise (right) until
it touches the Bottom Tray. Tighten the bottom bolt
to lock into place. Repeat with all (6) bolts. This is
the default 1/4" setting.
Ensure all (6) Adjustment Bolts are evenly adjusted.
Tighten bottom nuts to secure into place.
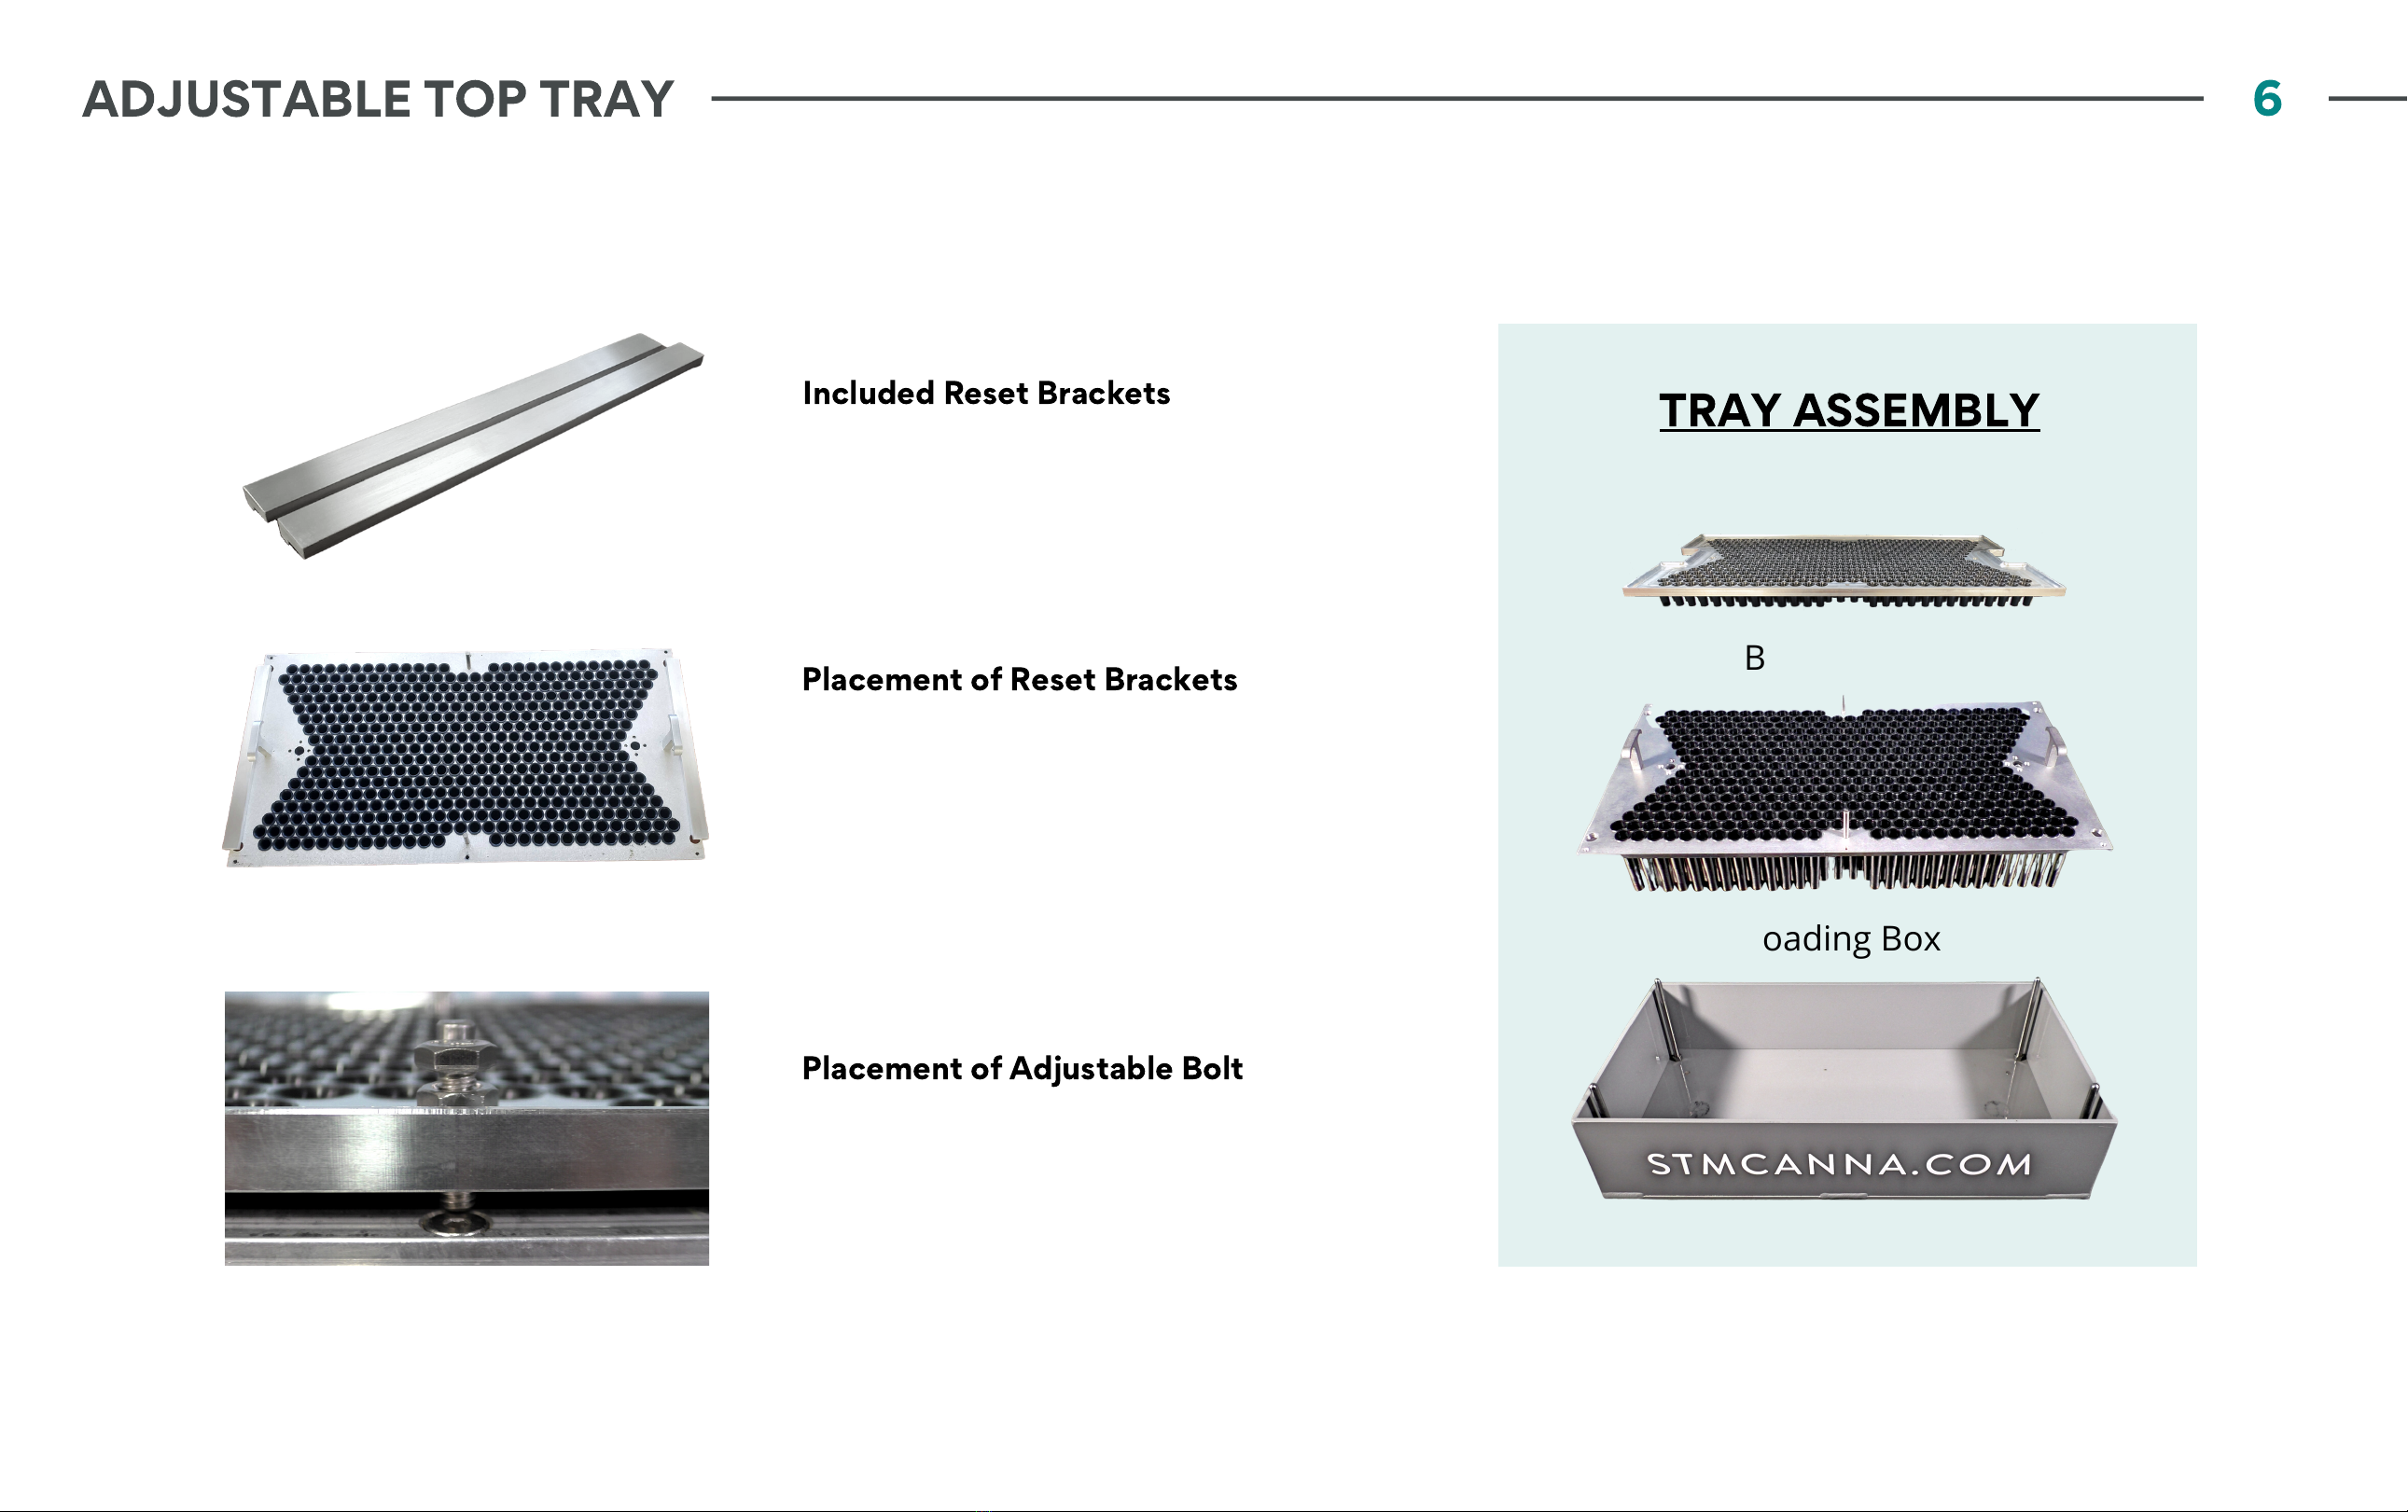
The Adjustable Top Tray gives the ability to refine and
control the weight of the pre-rolls. This tool allows
the operator to lower and raise the funnels in and out
of the paper cones, which will increase or decrease
the overall volume of the pre-rolls.
The RocketBox 2.0 is pre-installed with an Adjustable
Top Tray. The default adjustment is set at at¼", easily
adjusted with a 7/16" end wrench.
(6) ¼” Adjustment Bolts
(6) ¼” Bottom Nuts
(2) Removable Reset Brackets
ADJUSTABLE TOP TRAY IS EQUIPPED WITH:
5
ADJUSTABLE TOP TRAY
6
Bottom Tray
Top Tray
The Adjustable Bolt touches the Bottom
Tray with the default 1/4" adjustment.
Ensure all (6) bolts are adjusted evenly.
Reset Brackets fit in between the Top
and Bottom Tray. Make sure to keep the
Reset Brackets in a convenient location
for future adjustments.
The RocketBox 2.0 includes (2) removable
Reset Brackets to reset the height of the
Top Tray to the default 1/4" setting.
Included Reset Brackets
Placement of Reset Brackets
Placement of Adjustable Bolt
ADJUSTABLE TOP TRAY
Loading Box
TRAY ASSEMBLY

7
Remove the (4) flathead screws with a 5/32
Allen wrench and remove the Lift Plate
completely from the shaker box.
Install the Riser Bolts (4) onto the fixed riser
bolts on the bottom of the shaker box. The
84 mm 'B' Riser Bolts are longer, whereas
the 98 mm 'A' Riser Bolts are shorter.
Align and re-install the Lift Plate, securing in
place with the (4) flathead screws using a
5/32 Allen wrench.
ADJUSTING THE LIFT PLATE
The Lift Plate rests on the bottom of the shaker box
to help level the cones for even filling.
The Lift Plate uses (4) Riser Bolts to adjust for 84
mm, 98 mm, and 109 mm tray sizes. The Lift Plate is
set for 109 mm by default.
Please ensure the correct Riser Bolts are
installed prior to use.
'A' RISER BOLTS 'B' RISER BOLTS
Used for 98 mm cones Used for 84 mm cones
LIFT PLATE
PREPARING WORK AREA
The space required for pre-roll production varies based on
volume needed. See the suggested work areas below:
Grinding Area
Material Prep for
RocketBox™ use
RocketBox Area
For trained person(s) to
operate the RocketBox™
Loading Area
Dedicated to loading
cones into Bottom Trays
Packing Area
Dedicated to closing and
packaging cones
Scoop for Material
Shop Vac
Stainless Steel Chopsticks
Thousandths Scale
70%+ Isopropyl Alcohol
Spray Bottle
Collection Bin
Pipe Cleaners
SUGGESTED TOOLS AND ACCESSORIES
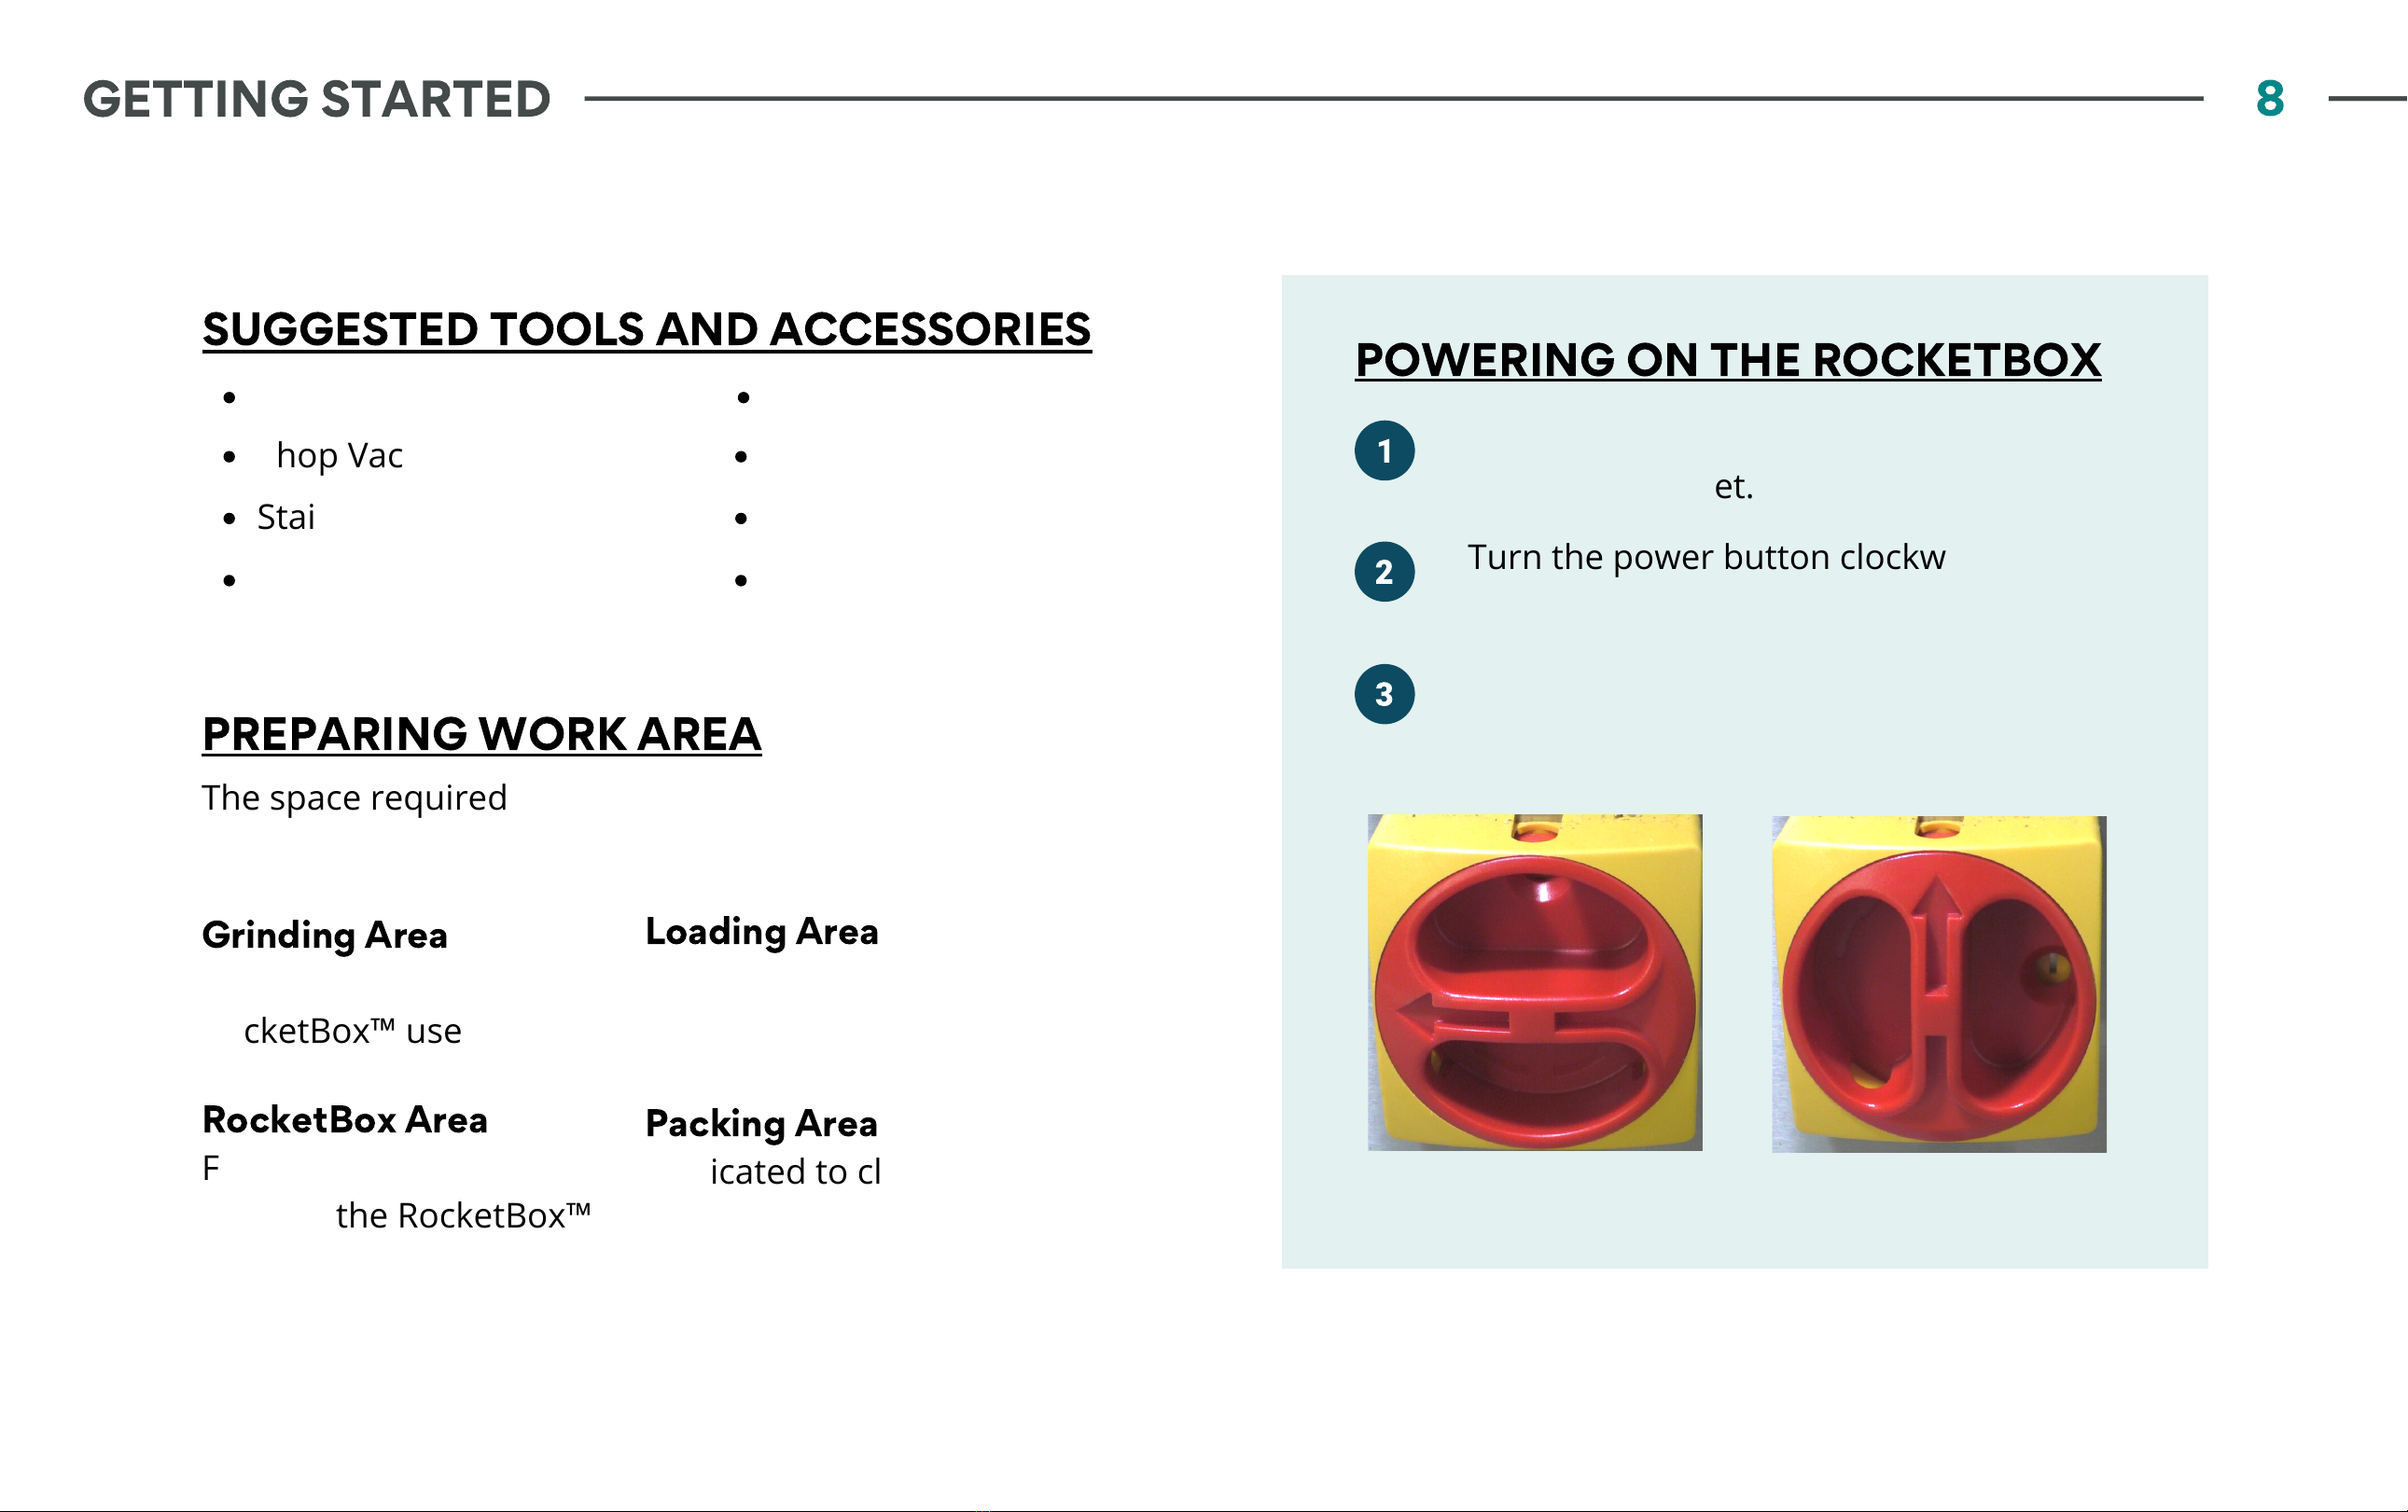
Power OFF Power ON
Power on the RocketBox by plugging it
into a 120v outlet.
Turn the power button clockwise. The
arrow will point upwards.
Once the machine is plugged in, the
touch screen will begin powering on.
POWERING ON THE ROCKETBOX
8
GETTING STARTED
Autres manuels pour ROCKETBOX 2.0
1
Table des matières


