Installation procedure
Hands free reader: L51 - R1x Variant
© STId 2010 – NI1023A04 06/07/2010 P. 7 / 13
III. Calibration
First use
•Fit the reader at the desired place
•First connect the power supply – wait until the orange led has finished blinking (auto tuning
sequence) – leave no tag in the reader field
•Present a tag to the reader
•Connect the data lines –control the communication with the host system.
Auto tuning
The reader has an automatic tuning function. This automatic calibration sequence is done at every power up.
The sequence can take up to 5 seconds with the orange led blinking
Caution: No tag or card must be in the reader field during the calibration.
Optimization
If you do not have the best performances, some simple tips could help you to get them.
•Verify the wiring
•Analyze the environment to find possible causes of perturbation
•Verify that the 0V is connected to a clean ground
•Measure the power supply. In some cases, the power supply doesn’t succeed to drive enough
current and its voltage drop. If you have less than 12V, the performance can be reduced a lot
•Try to move the reader and/or change its orientation.
Caution: It is recommended to perform the test of reading by referring to the beep of the buzzer or to
the twinkling of the orange led. In certain cases, the communication with the distant system can be
faulty, letting think that the reader is not working.
TIPS: - You can use a 12V battery to power the reader and it will be easier to move it.
- If you move the reader and get better performance on a new place, it means the initial place
was not compliant for long range 125 kHz readers.
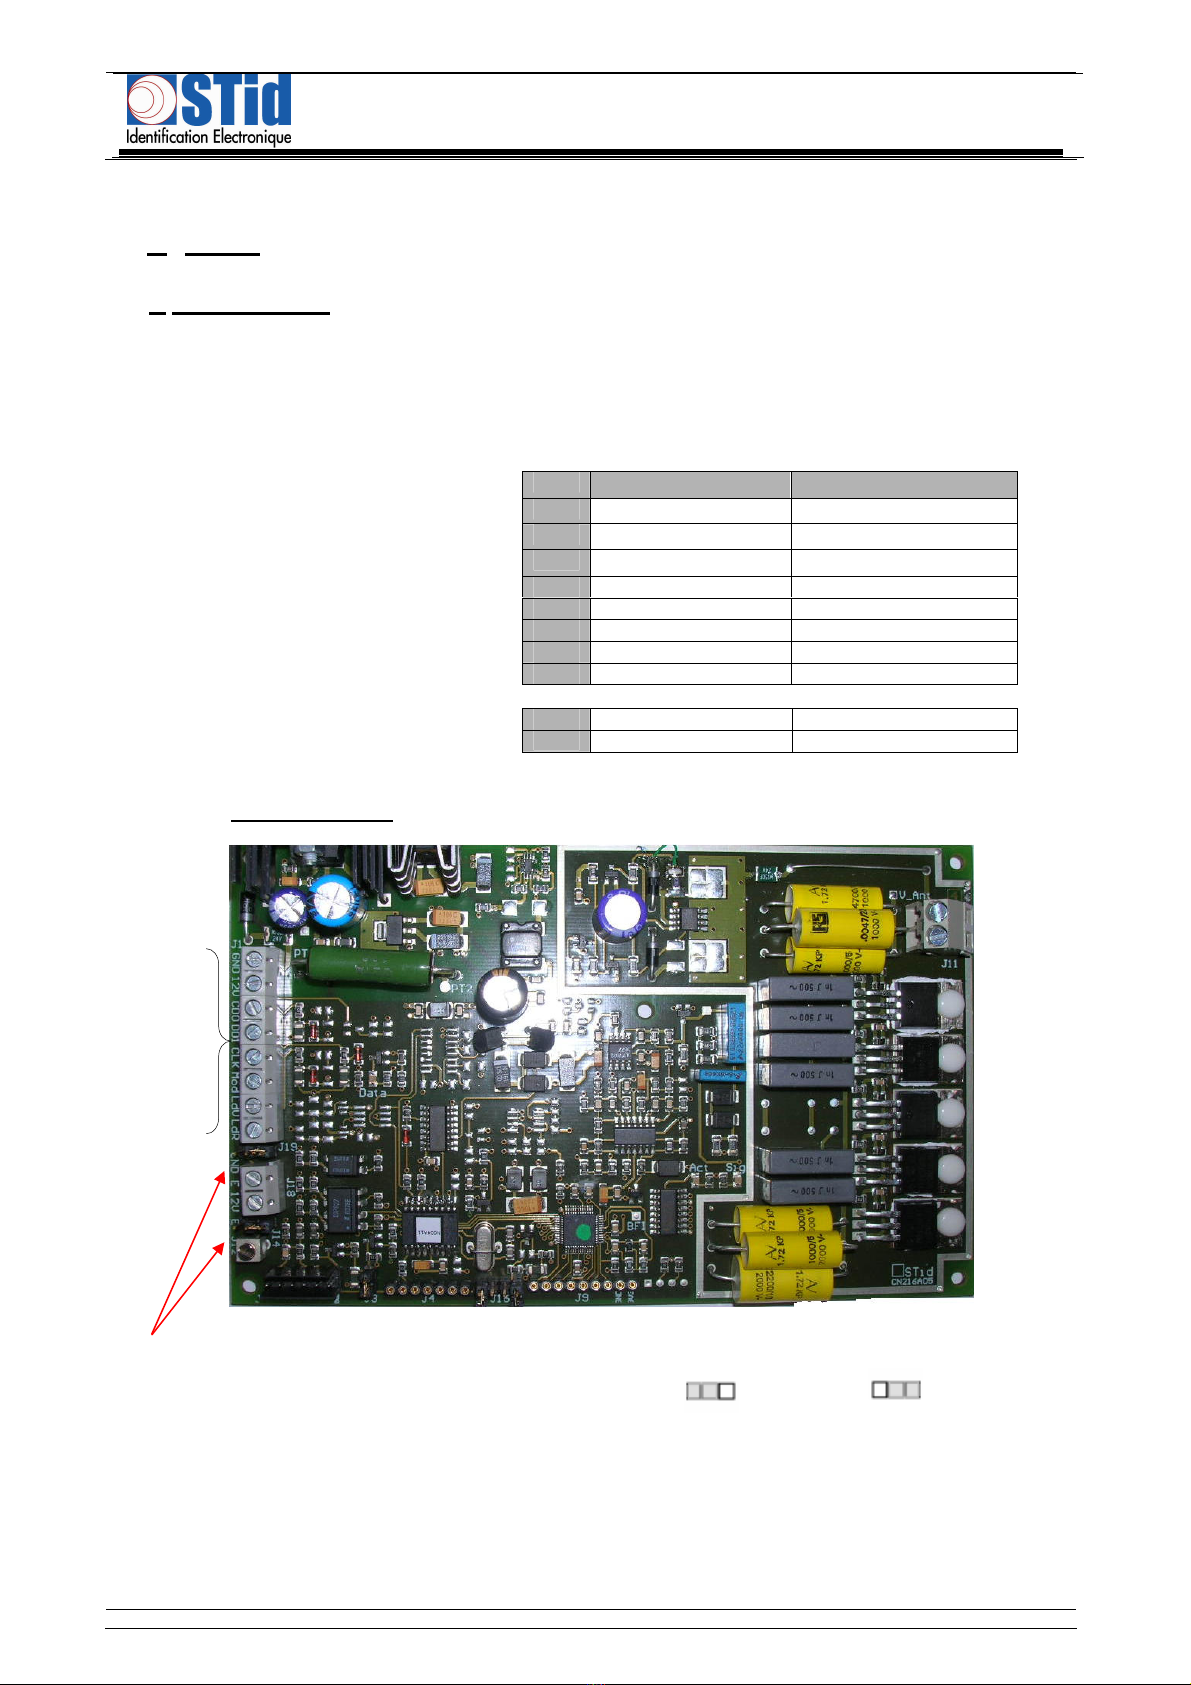
21 21
21
Those jumpers adjust the auto tuning of the reader. For reading
distances less than 50 cm with an ISO card, it is possible to
change the configuration of those jumpers to optimize the
distances. To do that, there are four possible configurations
Reset the reader after each changing of configuration.