SteelMax ARC Runner Manuel utilisateur

The tools of innovation.
15335 E. Freemont Drive, CO 80112
1–87STEELMAX, FAX 303 –690 –9172
www.steelmax.com [email protected]
OPERATOR’S MANUAL
A
AR
RC
C
R
Ru
un
nn
ne
er
r
WELDING CARRIAGE

Contents
1.GENERAL INFORMATION................................................................................................ 3
1.1. Application................................................................................................................. 3
1.2. Technical data............................................................................................................ 3
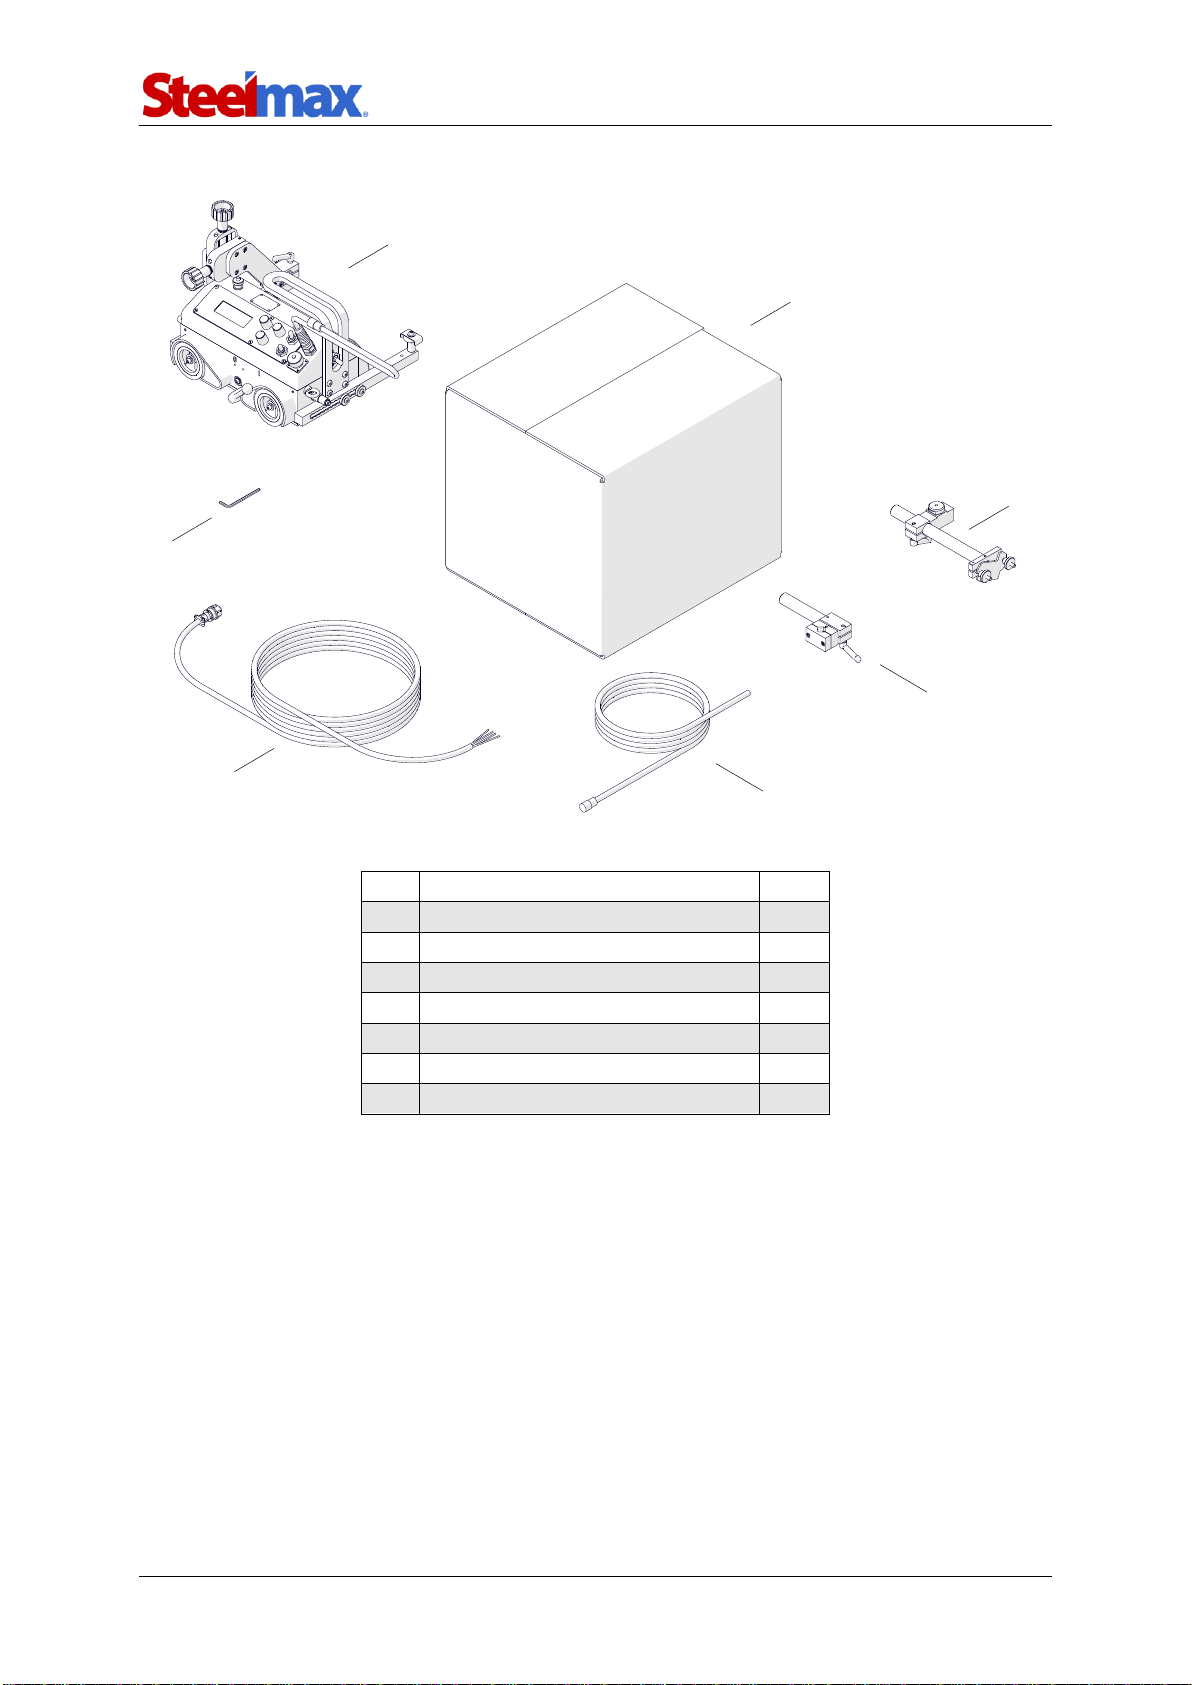
1.3. Equipment included ................................................................................................... 4
1.4. Dimensions................................................................................................................ 5
1.5. Design ....................................................................................................................... 6
2.SAFETY PRECAUTIONS.................................................................................................. 7
3.STARTUP AND OPERATION............................................................................................ 9
3.1. Preparing................................................................................................................... 9
3.2. Connecting to the welding circuits.............................................................................10
3.3. Positioning at the worksite ........................................................................................11
3.4. Starting.....................................................................................................................13
3.5. Programming............................................................................................................13
3.6. Welding procedure....................................................................................................15
3.7. Operating..................................................................................................................16
3.8. Using oscillator (option).............................................................................................17
3.9. Troubleshooting........................................................................................................20
4.MAINTENANCE ...............................................................................................................21
5.ACCESSORIES................................................................................................................22
5.1. Oscillator...................................................................................................................22
5.2. Torch clamps............................................................................................................24
5.3. Rods.........................................................................................................................25
5.4. Torch holders............................................................................................................26
5.5. Torch extension arm .................................................................................................28
5.6. Guide arms...............................................................................................................29
5.7. Dual torch mount.......................................................................................................34
5.8. Flexible guide set......................................................................................................35
5.9. Guide adjustment tool...............................................................................................37
5.10. 76 mm cross slide...................................................................................................38
5.11. Display protection shield .........................................................................................39
5.12. Fall arrester.............................................................................................................39
5.13. Stainless steel wheels.............................................................................................40
6.115–230 V EXPLODED VIEWS AND PARTS LIST..........................................................41
7.42 V EXPLODED VIEWS AND PARTS LIST....................................................................46
8.115–230 V WIRING DIAGRAM.........................................................................................51
9.42 V WIRING DIAGRAM ..................................................................................................52
10. DECLARATION OF CONFORMITY...............................................................................53
11. WARRANTY CARD........................................................................................................54

ARC Runner
ARC Runner Operator’s Manual
3
1. GENERAL INFORMATION
1.1. Application
The ARC Runner is a welding carriage designed to make butt and fillet welds that are
continuous or stitch. The carriage allows MIG/MAG torches and is clamped with
permanent magnets.
Accessories allow welding with oscillation, using torches with a larger diameter
and using two torches at the same time. They also allow the carriage to move along
outside edges, lap joints and templates, walls that are low or have holes, and on
ceilings, pipes, and tanks.
1.2. Technical data
Voltage
1~ 115–230 V, 50–60 Hz
1~ 42 V, 50–60 Hz (60 V DC)
Power
25 W
Welding position (according to
EN ISO 6947 and AWS/ASME)
Horizontal
PA/1F/1G
PB/2F
PC/2G
PD/4F
PE/4G
Vertical
PF/3F/3G (with an optional oscillator)
PG/3F/3G (with an optional oscillator)
Minimum path curve radius
1500 mm (5 ft)
Torch type
MIG/MAG
Torch diameter
16–22 mm (0.63–0.87″)
Maximum torch reach
80 mm (3.15″)
Maximum allowed cable weight
Horizontal work
12 kg (27 lbs)
Vertical work
8 kg (18 lbs)
Minimum workpiece thickness
5 mm (0.2″)
Ground clearance
5 mm (0.2″)
Horizontal pulling force
220 N (48 lbs)
Vertical pulling force
150 N (33 lbs)
Cross slide adjustment range
0–35 mm (0–1.38″)
up-down, left-right
Guide arm adjustment range
0–75 mm (2.95″)
Horizontal speed
0–120 cm/min (0–47.2 in/min)
Vertical speed
0–110 cm/min (0–43.3 in/min)
Noise level
Less than 70 dB
Weight
14 kg (31 lbs)

ARC Runner
ARC Runner Operator’s Manual
4
1.3. Equipment included
1
Carriage
1 unit
2
Cardboard box
1 unit
3
Cable anchor
1 unit
4
Short rod torch holder with clip
1 unit
5
3 m (10 ft) power cord
1 unit
6
6.5 m (21 ft) arc ignition cable
1 unit
7
4 mm hex wrench
1 unit
–
Operator’s Manual
1 unit
1
2
3
4
5
6
7

ARC Runner
ARC Runner Operator’s Manual
5
1.4. Dimensions
411 mm (16.2″)
368 mm (14.5″)
447 mm (17.6″)

ARC Runner
ARC Runner Operator’s Manual
6
1.5. Design
Lug for fall arrester
Arc ignition socket
Control panel
Cross slide
Oscillation socket
Guide arm
Power switch
Limit switch
Magnet lever
LCD display
Knob F1
Knob F2
Arc ignition switch
(TEST / O / I)
Travel direction switch
(Left / O / Right)
Speed adjustment knob

ARC Runner
ARC Runner Operator’s Manual
7
2. SAFETY PRECAUTIONS
1. Before use, read this Operator’s Manual and complete a training in occupational
safety and health.
2. Use only in applications specified in this Operator’s Manual.
3. Make sure that the carriage has all parts and they are genuine and not damaged.
4. Make sure that the specifications of the power source are the same as those
specified on the rating plate.
5. Connect the carriage to a correctly grounded power source.
6. Do not carry the carriage by the cords or arc ignition cable, and do not pull them.
This can cause damage and electric shock.
7. Keep untrained bystanders away from the carriage.
8. Before each use, ensure the correct condition of the carriage, power source,
cords, arc ignition cable, plugs, sockets, control panel, and wheels.
9. Before each use, make sure that no part is cracked or loose. Make sure to main-
tain correct conditions that can have an effect on the operation of the carriage.
10. Keep the carriage dry. Do not expose the carriage to rain, snow, or frost.
11. Keep the worksite well lit, clean, and free of obstacles.
12. Do not use near flammable materials, or in explosive environments.
13. Make sure that the rubber of the wheels is clean and not damaged.
14. Do not remove the cover of the wheels.
15. Remove objects attracted to the chassis by the magnet.
16. Transport and position the carriage by using the carrying handle and only after
you set the magnet lever to ‘O’.
17. Put the carriage so that four wheels are on the surface. Make sure that no con-
tact is between the surface and chassis.
18. Do not stay below the carriage that is put at heights.
19. Connect the cords and arc ignition cable only after you set the power switch to
‘O’.
20. Keep the sockets clean. Do not use high pressure during cleaning.
21. Install only MIG/MAG torches whose diameter matches the diameter of the torch
holder.
22. Do not put the torch more than 80 mm (3.15″) outward from the left or right side
of the carriage.

ARC Runner
ARC Runner Operator’s Manual
8
23. Keep the torch cables away from the surface. Hang the cables to decrease the
load applied on the carriage. Use only cables whose weight is not more than 12
kg (27 lbs) for horizontal work and 8 kg (18 lbs) for vertical work.
24. Do not work on curves with convex or concave radius less than 1500 mm (5 ft).
25. At heights, use a fall arrester not to let the carriage fall.
26. Use eye protection (helmet, shield, and screen), ear protection, gloves, and
protective clothing. Do not use loose clothing.
27. Do not stop the carriage by hand. To stop, set the travel direction switch to ‘O’.
28. Do the maintenance only after you unplug the carriage from the power source.
29. Repair only in a service center appointed by the seller.
30. If the carriage falls, is wet, or has any damage, stop the work and promptly send
the carriage to the service center for check and repair.
31. Do not leave the carriage unattended during work.
32. If you are not going to use the carriage, remove it from the worksite and keep in a
safe and dry place.

ARC Runner
ARC Runner Operator’s Manual
9
3. STARTUP AND OPERATION
3.1. Preparing
Use the carrying handle to transport the carriage to the worksite. Then, set to ‘O’ all
switches (power, travel direction, and arc ignition switch) and the magnet lever.
Fig. 1. View from the back side
Use the power cord to connect the carriage to the power source. Then, put the
torch into the torch holder and tighten with the knob. Put the torch cables into the
cable anchor and tighten with the knobs.
Knobs for
precise torch
adjustment
Knobs to secure the
cable in the anchor
Lever to secure the
cable anchor
Knob to secure the torch
in the holder
Levers to secure
the torch position and
angle
Screws to secure the guide arm
Carrying handle

ARC Runner
ARC Runner Operator’s Manual
10
3.2. Connecting to the welding circuits
The carriage can control two torches by using the arc ignition cable plugged into the
arc ignition socket. To do this, refer to the diagram from Fig. 2 and connect one blue-
jacketed wire to one terminal of the welding circuit. Then, connect the other blue-
jacketed wire to the other terminal of the same circuit. To control the second torch,
connect the green-jacketed wires to the terminals of the second welding circuit.
Fig. 1. Connecting the arc ignition cable to welding circuits
Make sure that the arc ignition cable is connected correctly. To do this, turn on the
power of the carriage, and then set the arc ignition switch to TEST. This should
enable the arc for a while.
blue
blue
Welding circuit 1
green
green
Welding circuit 2
Autres manuels pour ARC Runner
1
Table des matières
Autres manuels SteelMax Système de soudage
Manuels Système de soudage populaires d'autres marques

TAFA
TAFA 30*8B35 Manuel utilisateur

Lincoln Electric
Lincoln Electric INVERTEC V350-PRO CE Manuel utilisateur

ESAB
ESAB Buddy Arc 145 Manuel utilisateur

CIGWELD
CIGWELD 636804 Guide rapide

Red-D-Arc
Red-D-Arc DC-400 Manuel utilisateur

Hobart Welding Products
Hobart Welding Products Spool Gun DP 3035-10 Manuel utilisateur


