
Spracht ZuM Maestro DECT Manuel utilisateur

ZūM Maestro DECT™
Wireless Headset with up to 350' of Range
USER GUIDE
English, French, Spanish, German

Spracht®
Warranty
Spracht warrants its products against defects or malfunctions
in material and workmanship under normal use and service,
with the exceptions stated below. This warranty lasts for one
year from the original date of purchase. Coverage terminates if
you sell or otherwise transfer the product. In order to keep this
warranty in eect, the product must have been handled and used
as prescribed in the instructions accompanying the product.
Spracht shall (at its option) repair or replace a defective unit
covered by this warranty, or shall refund the product purchase
price. Repair, replacement with a new or reconditioned unit, or
refund, as provided under this warranty, is your exclusive remedy.
This warranty does not cover any damages due to accident,
misuse, abuse, or negligence. Spracht shall not be liable for any
incidental or consequential damages. Some states do not allow
limitation or exclusion of incidental or consequential damages,
so the above limitation or exclusion may not apply to you. Implied
warranties of merchantability and fitness for a particular purpose
are limited in duration to the duration of this warranty. Some
states do not allow limitations on how long an implied warranty
lasts, so the above limitation may not apply to you.
To make a warranty claim, the purchaser must obtain a return
authorization number (RA) from Spracht (serial number and
purchase date required), and then return the product to Spracht
at purchaser’s expense. A copy of the original dated receipt or
shipping document must accompany the product. To obtain a
return authorization, see Warranty on our website www.spracht.
Spracht
974 Commercial Street, Suite 108
Palo Alto, CA 94303 USA
Tel.: 650-215-7500 Fax: 650-485-2453
For repair or replacement of a failed product, allow 4 to 6 weeks
for processing and shipment. This warranty gives you specific
legal rights, and you may also have other rights which vary from
state to state.
i
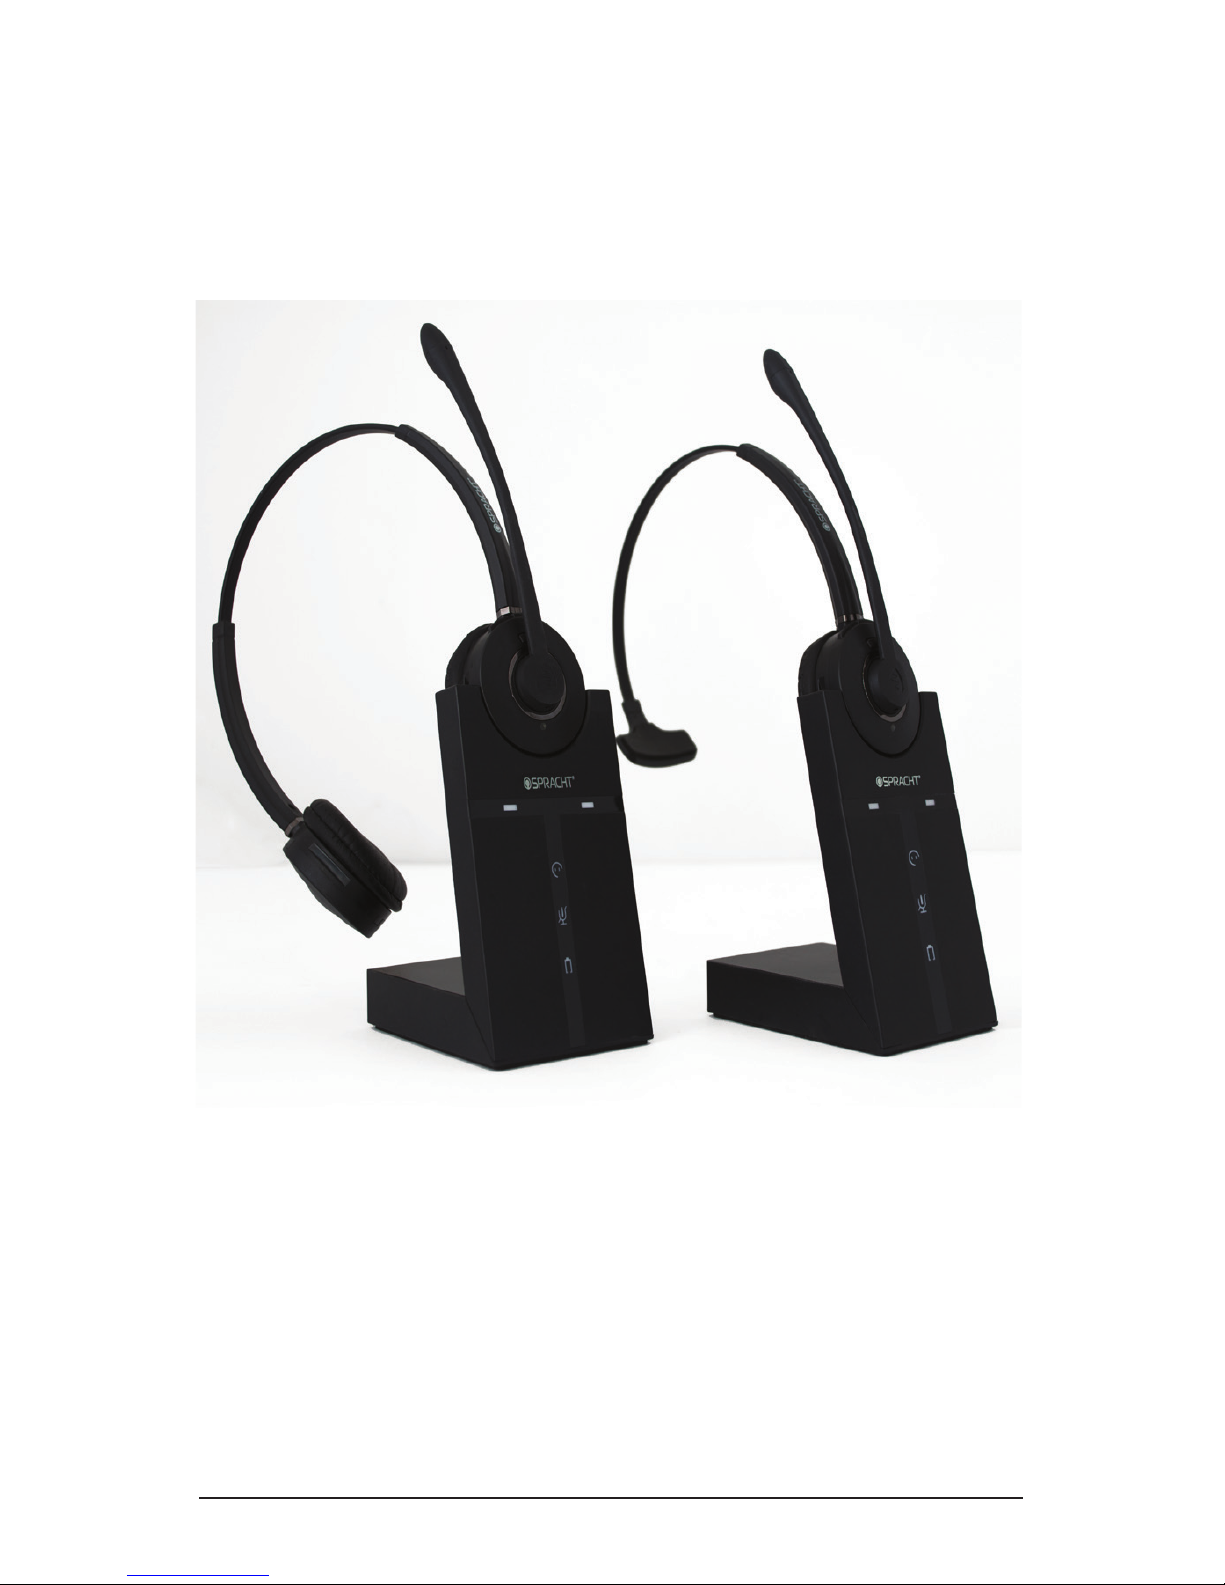
ZūM Maestro DECT™
HS-2018 (Monaural)HS-2019 (Binaural)

Spracht® ii
Contents
Warranty
Package Contents
Setup
Connecting to a Deskphone
With a Headset Port
Without a Headset Port
With a Remote Handset Lifter
With Electronic Hook Switch (EHS)
Powering the Base
Docking the Headset/Charging
Configuring the Deskphone Audio
Making Calls
On a Phone Without a Headset Port
On a Phone With a Headset Port
On a Phone With a Handset Lifter or EHS
Pairing and Unpairing
Conference Calling With Multiple Headsets
Making a Conference Call
Technical Specifications
Headset Battery
Base
Safety Instructions
FCC Declaration and Certifications
i
iii
1
1
1
1
1
2
2
2
23
3
3
34
4
4
45
5
6
6
7
7
8
ZūM Maestro DECT™ iii
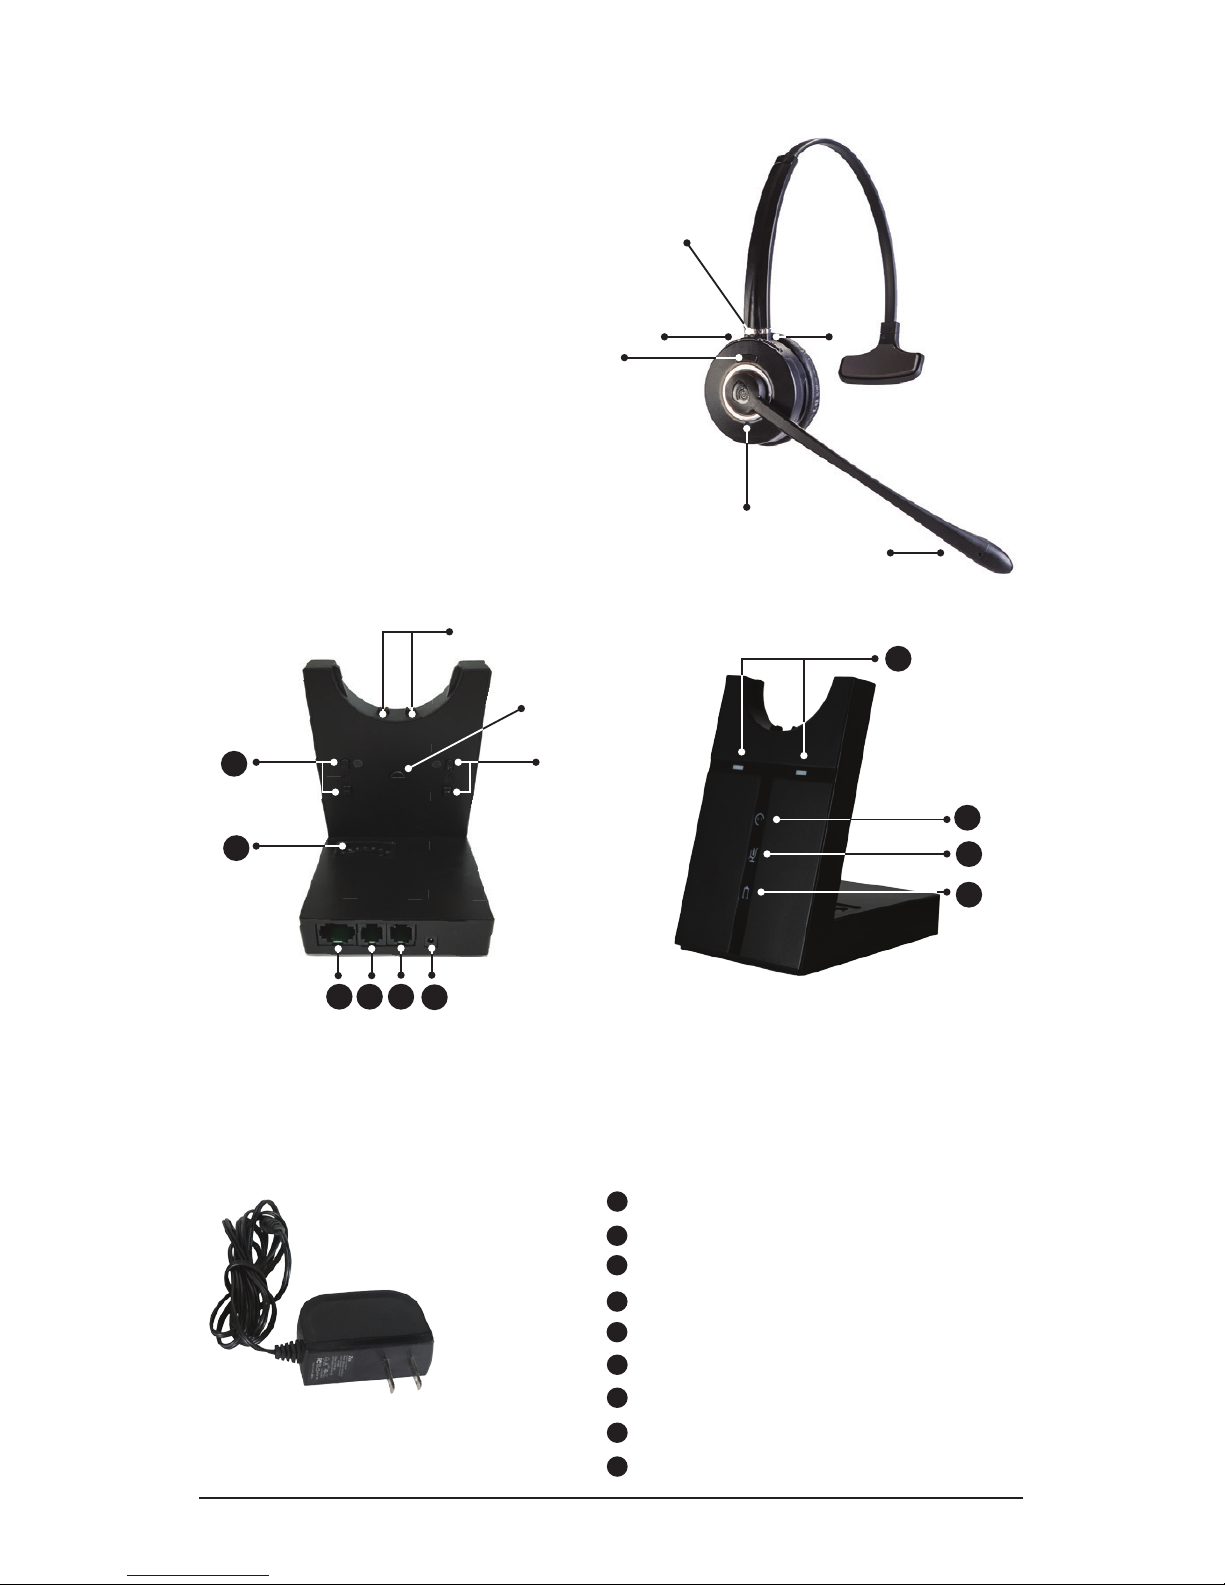
Package Contents
Headset
➊ Mic Mute
➋ Headset Volume Up
➌ Noise Canceling
Microphone
➍ Headset Status LED
➎ Multiple Function Button
➏ Headset Volume Down
Base Back and Front
➐ Charging Contacts
➑ Page Switch
➒ Mic Volume UP/DOWN
➓ Power Adapter Jack
Handset Port
Telephone Port
AUX Port
Switches
Headset Volume UP/DOWN
Online Indicator
Audio Link Indicator
Mute Indicator
Battery Status
Power Adapter
➑
➒
➐
111213
15
10
14
11
12
13
14
15
16
17
18
19
16
17
18
19
➊
➏
➎
➍
➋
➌

Spracht® 1
Setup
Connecting to a Deskphone
Phone With a Headset Port (RJ09)
Check whether your desk phone has a dedicated headset
port (usually at the back of the phone). These phones
typically have a button on the front panel for switching
between handset and headset.
1. Plug the supplied telephone cable into the port marked
on the base.
2. Connect the telephone cable to the headset port on
the desk phone.
Phone Without a Headset Port
If your desk phone does not have a dedicated headset port:
1. On the desk phone, unplug the handset cable from the
phone body.
2. Connect the handset cable to the port marked on
the base.
3. Plug the supplied telephone cable into the port
marked on the base.
4. Connect the telephone cable into the handset port on
the desk phone.
Deskphone With a Remote Handset Lifter
If you have a Handset Lifter which physically lifts the
desk phone handset to make or answer a call, check the
mounting instructions in the documentation that came
with the Handset Lifter.
1. On the desk phone, unplug the handset cable from the
phone body.
2. Connect the handset cable to the port marked on
the base.
3. Plug the supplied telephone cable into the port marked
on the base.
4. Connect the telephone cable into the handset port on
the desk phone.
5. Connect the Handset Lifter cable into the port marked
AUX on the base.

ZūM Maestro DECT™ 2
Deskphone With an Electronic Hook Switch (EHS)
An EHS adapter enables an incoming call to be answered or
ended by the headset Multi-Function button. EHS cables are
sold separately for certain phones. Please check the Spracht
website for more information.
1. Connect the EHS adapter as shown in the
documentation supplied with the EHS. On some phones
the telephone cable will also need to be connected.
2. Call your connected desk phone using another phone
to activate the EHS adapter. Wait 10 seconds before
answering the phone.
Powering the Base
1. Plug the power adapter into the DC jack marked +
on the base.
2. Connect the power adapter to a wall power outlet.
Docking the Headset/Charging
1. Press the Multiple Function button on the Headset; the
blue LED on the headset will start flashing every 3s and
the headset will be powered on.
2. Press the Multiple Function button again, or dock the
headset and re-lift it, you will see that the audio link
indicator is on, which confirms the connection between
the headset and base is set up correctly.
3. If docked correctly, the headset battery will begin
charging, if needed (the LED will flash while charging).
Charge for 20 minutes or until the battery indicator LED
shows steady green.
Configuring the Deskphone Audio
Due to the large variety of desk phone brands/models, you
will need to adjust the alignment of ZūM Maestro DECT™
to use it the first time. Adjusting the alignment will enable
the device to function correctly with your specific desk
phone. It is also important to customize the microphone
and receiver volume for your optimal sound quality.
1. Put the Headset on.
2. Get a dial tone by pressing the Headset button on the
desk phone, or by lifting the desk phone handset.

Spracht® 3
3. Adjust the alignment. Adjust the multiple switch at the
back of the Base, and then compare the dial tone after
rotating the switch from A through to G.
4. Choose the best switch position. Choose the position
with loud, clear and undistorted dial tone.
5. Make a call. Call a co-worker or friend to test your
microphone and receiver volumes. Ensure the person
you called does not adjust the volume on their end.
6. Adjust the microphone volume using the Microphone
Volume +/- buttons on the back of the Base (see item 9
on page iii), based on what the person on the other end
says about the volume.
7. Adjust the Receiver volume using the Receiver Volume
+/- buttons on the back of the Base (see item 15 on page
iii), if the volume in your headset is too loud or too low
for you.
8. After you’re done configuring your headset, end the call.
Making Calls
On a Phone Without a Headset Port
Make a call:
1. Lift the headset from the docking cradle, or press the
Multi-Function button.
2. Lift desk phone handset and set it down on your desk.
3. Dial numbers through the desk phone keypad.
Answer a call:
1. Lift the headset from the docking cradle or press the
Multi-Function button.
2. Lift desk phone handset and set it down on your desk.
End a call:
1. Hang up the handset of the desk phone.
2. Dock the headset, or press the Multi-Function button.
On a Phone With a Headset Port
Make a call:
1. Lift the headset from the docking cradle, or press the
Multi-Function button.
2. Press the headset button on the desk phone.
3. Dial numbers through the desk phone keypad.

ZūM Maestro DECT™ 4
Answer a call:
1. Lift the headset from the docking cradle or press the
Multi-Function button.
2. Press the headset button on the desk phone.
On a Phone With a Handset Lifter or EHS
Make a call:
1. Lift the headset from the docking cradle, or press the
Multi-Function button.
2. Dial numbers through the desk phone keypad.
Answer a call:
Lift the headset from the docking cradle or press the
Multi-Function button.
End a call:
Dock the headset, or press the Multi-Function button.
Pairing the Headset to the Base; Unpairing
Pairing
Press the PAGE (item 8 on page iii) switch for 5s. The
Audio Link Indicator on the front of the Base will flash
to indicate it’s searching for the headset. Next, press the
headset Mute button until the Headset Status LED flashes:
the Headset will be in pairing mode. The pairing will be
successful when the Audio Link Indicator and Headset
Status LED turn o at the same time.
Unpairing
Unplug the Base’s power adapter. Press and hold the
Mic Volume Up + at the back of the Base while plugging
the power adapter back in. When the battery charging
status light flashes 3 times, the Headset and the Base
are unpaired. The Base will then enter search mode
automatically and the Audio Indicator will be on.
Conference Calling with Multiple Headsets
The Zum Maestro DECT™ is able to pair with a total of
four Headsets for conferencing: one Master and three
Secondary Headsets.

Spracht®
Connecting the second and additional Headsets
1. Using the Master Headset which is already linked with
the Base, press the PAGE switch on the Base for 5s. The
Base starts searching for a Headset to pair to. Press the
second Headset’s Mute button until the Headset status
LED flashes, indicating the Headset is in pairing status.
Connection will be successful when the LED turns solid on.
2. Repeat the above to connect the 3rd and 4th Headsets.
Making a Conference Call
1. Tap the Multi-Function button on the primary Headset
to connect to the Base when the audio connection
indicator is on.
2. The three secondary Headsets need confirmation
from the primary Headset before entering conferencing
mode. Press the Multi-Function button on the secondary
Headsets; you will hear a “DU” tone from the primary
Headset. Press the Multi-Function button on the primary
Headset to confirm.
3. The audio will be shared between these Headsets
after getting confirmation from the primary Headset.
4. You can now make your conference call from the
Master Headset.
Ending or leaving the conference
The primary Headset user can end the conference by
hanging up on the call. The call is ended for all Headsets.
The secondary Headset users can leave a conference by
pressing the multi-function button on their headsets, or
by docking the Headset with thebase.The onference call
is still active for the other Headset(s).
5
Table des matières
Langues :
Autres manuels Spracht casque

Spracht
Spracht ZuM BT Manuel utilisateur

Spracht
Spracht ZuM DECT 6.0 HEADSET Manuel utilisateur

Spracht
Spracht ZuM BT Prestige Manuel utilisateur

Spracht
Spracht Konf-X Buds Manuel utilisateur

Spracht
Spracht ZUM UC1 Manuel utilisateur

Spracht
Spracht ZuM Maestro Combo USB/DECT Manuel utilisateur

Spracht
Spracht ZuM Maestro USB/BT Combo Manuel utilisateur

Spracht
Spracht ZuM Maestro BT Manuel utilisateur

Spracht
Spracht ZuM Maestro HS-2050 Manuel utilisateur

Spracht
Spracht ZuM eco-Set Manuel utilisateur


