Spirit system Spirit Manuel utilisateur

User Guide
Version 1.0.22
1

CONTENTS
1. Safety
2. Introduction
3. Installation
4. Wiring
5. Configuration
6. First flight
7. Problems and solutions
8. Thanks
2

1. SAFETY
R/C models such as helicopters are not toys! It is necessary to check all
instructions of the manufacturer of the model, comply with local laws, carry
out preventive checking of the model and repair all deficiencies
immediately.
Rotor blades and propellers rotate at high speed and, if used incorrectly,
can lead to serious injury to persons or damage to the model.
If you encounter any problems, contact your model shop or experienced
modelers.
Especially, pay attention to your own safety and the safety of others. Never
fly among humans, or animals, or on private property without authorized
access.
Fly only in safe places where no additional damage is possible to other
objects, because the model can become unmanageable for various
reasons, such as failure of electronics or wear parts, pilot error or
interference.
Do not try to control crashed models nor repair the damaged parts, replace
them with new ones.
Never fly the model with vibrations, it may be even uncontrollable. Also,
flight characteristics can be much worse. Find the source of the vibrations
and fix the problem.
Spirit is not an autopilot, it is necessary to have knowledge of flying R/C
models. The system is only designed to improve flight performance.
We recommend using R/C simulators designed for training before the first
flight.
User takes full responsibility for any damage or injury, because the
manufacturer is not able to guarantee correct conditions in which the unit is
being used.
3

2. INTRODUCTION
Spirit is a device for stabilizing R/C models such as flybarless helicopters,
which features an electronic paddle simulation and a rudder gyro.
Thanks to flybarless mechanics, the system improves the efficiency and
maneuverability of the helicopter, while also extending flight time.
Flight characteristics are easily customizable according to your preference
from stable flight for beginners to demanding acrobatics with maximum
agility for experts.
Because the Spirit uses the most advanced technology, the model can be
controlled very precisely even under harsh conditions such as strong wind
while maintaining a constant pirouette.
This user guide will help you to properly mount the unit on a model and carry
out configurations step by step to prepare it for the first flight. It is very
important to carefully adjust everything to make your flight as pleasant as
possible.
Please check our website spirit-system.com for downloading new firmware
and software updates.
You can also raise your questions in our forum.
4
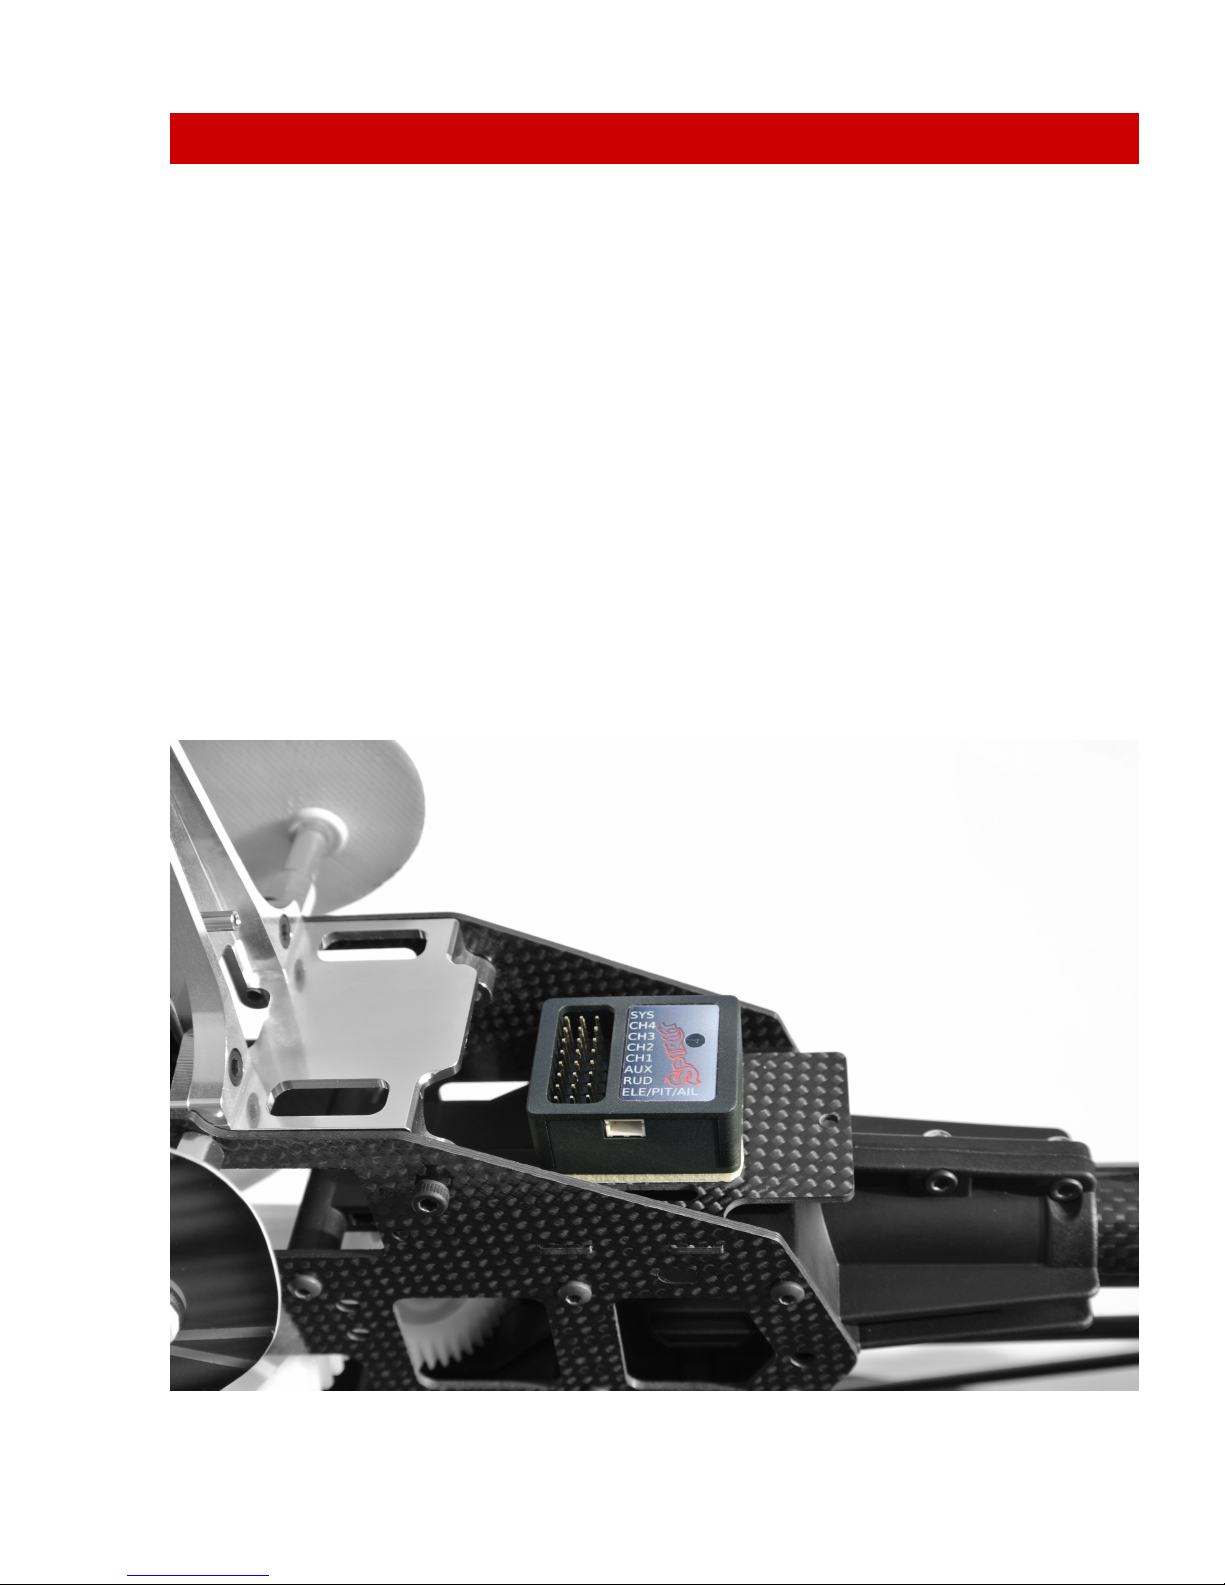
3. INSTALLATION
The mounting of Spirit plays an important role for the correct operation of
your model.
Find a suitable location where vibration is as low as possible - that location is
usually given by the manufacturer for mounting the gyro.
A very significant factor is that the unit should be positioned exactly
perpendicular to each rotational axis.
The unit can be mounted in two different positions. Depending on your
preferences it can be:
Horizontal
The unit is attached to its lower part so the connectors face upwards. It can
be rotated by 180°in yaw axis so that the connectors can be closer to the
front or rear of the model.
The unit is always positioned parallel to the longitudinal axis of the model.
5
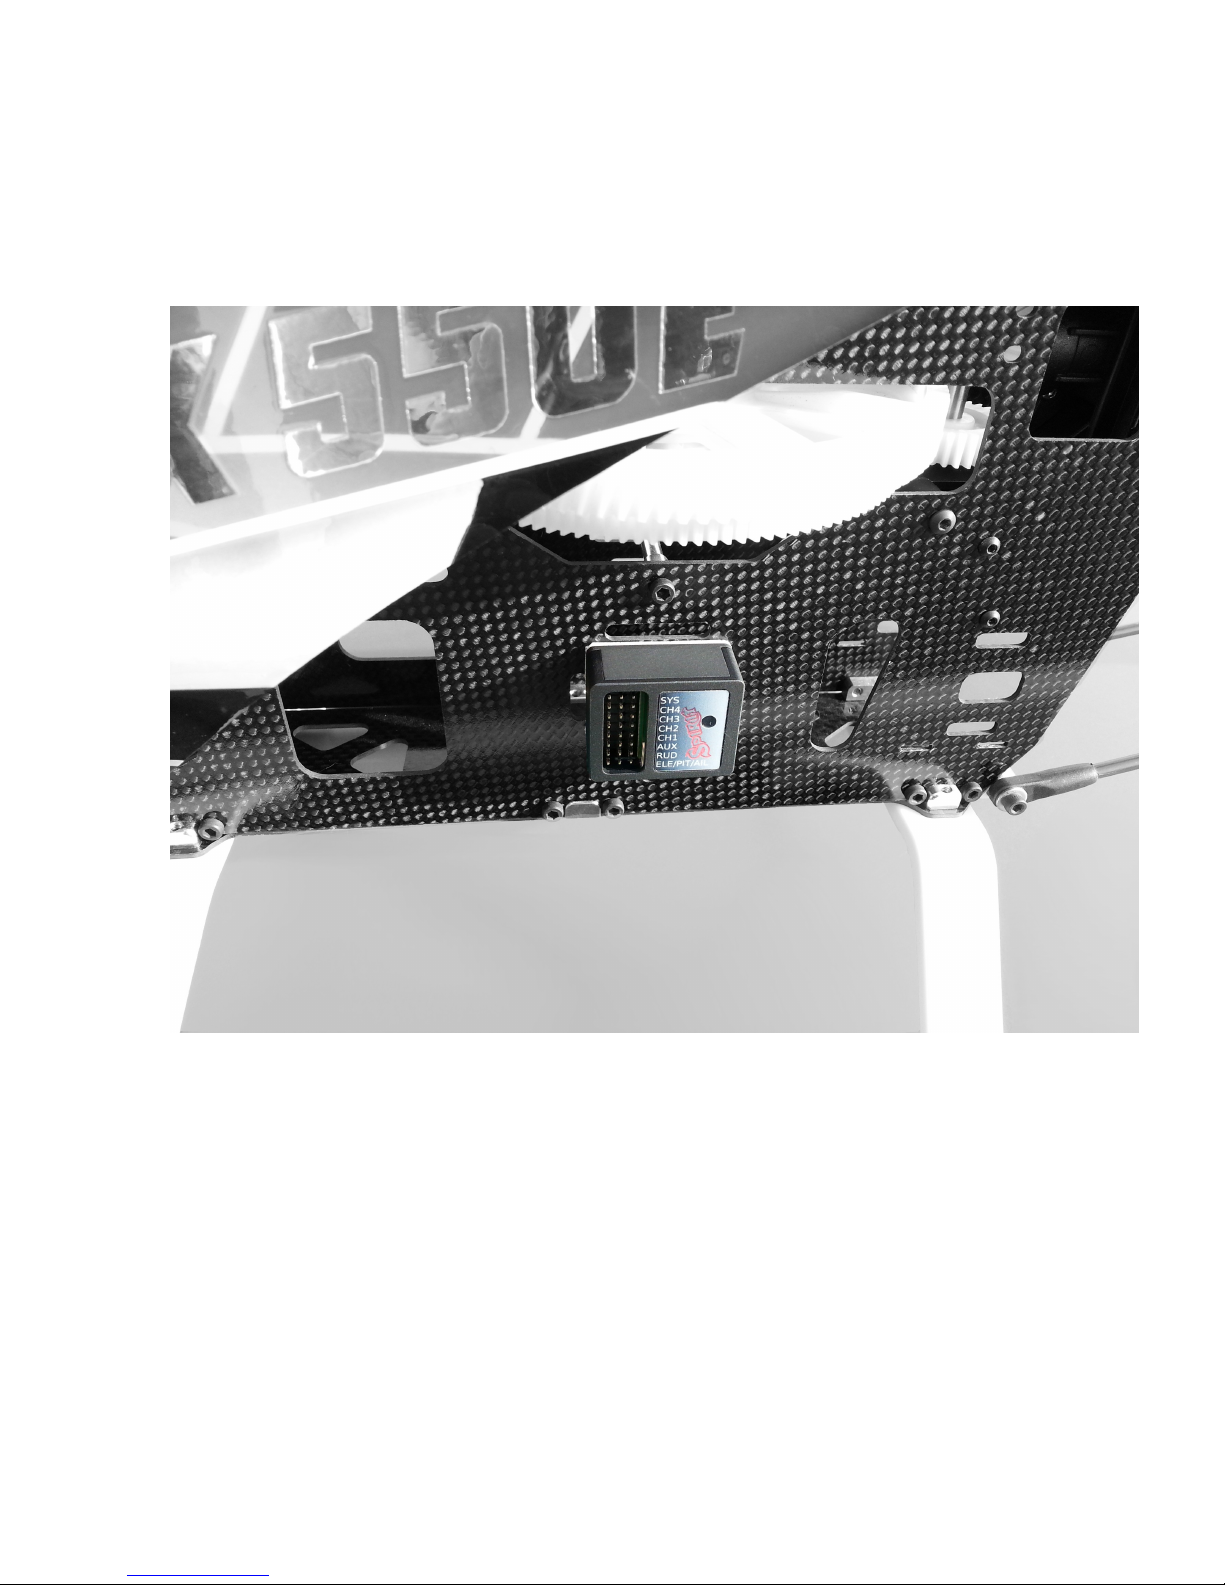
Vertical
The unit is located on the side so the connectors are also at one of the sides.
It can be rotated by 180°in yaw axis so that the connectors can be closer to
the front or rear of the model.
The unit is always parallel to the longitudinal axis of the model.
In order to better avoid vibrations on the model, it is necessary to choose the
right double-sided tape. It should prevent the transmission of vibrations from
the model, which are undesirable for the unit.
Vibrations may be not only created by incorrectly balanced blades or
propellers, but also by damaged bearings, bent shafts and other
mechanical issues.
6

4. WIRING
Wiring to the unit depends on the type of used receiver.
Spirit can be connected as a standalone tail gyro or flybarless system.
WARNING
Spirit is pre-programmed to 1520us servo neutral impulse and 50 Hz
frequency – get servo parameters from the manufacturer.
If the neutral impulse is different such as 760us, do not connect this servo yet,
it could be destroyed!
Some connectors have non-standard dimensions. They could interfere with
neighboring positions after plugging in the unit. As a solution, we
recommend to replace it for JR or Futaba connector.
Never plug a connector for powering the unit to SYS or ELE/PIT/AIL positions!
4.1. STANDALONE GYRO
Owners of a flybared helicopter can take advantage of the head-lock gyro,
which keeps the tail in the direction given by the transmitter irrespective of
effects from wind or any unwanted forces.
It is required to connect rudder servo into position CH4 of Spirit unit.
In case you use a standard receiver, you will need to connect GEAR (or AUX)
from receiver with AUX position on the unit.
Secondly, connect cable from receiver position RUD to position RUD on the
unit.
4.2. FLYBARLESS
Owners of a flybarless helicopter can take advantage of the head-lock gyro
and also cyclic stabilization. This will stabilize the model in all axes; moreover,
it should be less prone to wind, extend flight time and make the model more
agile.
Flight characteristics should be more pleasant which allows the pilot to carry
out even the most challenging maneuvers.
7

Rotor blades are directly linked to the cyclic servos, so demands for servos
are significantly higher. They should be faster and stronger to respond as
quickly as possible to any change.
Even flybarless rotor blades are different in some aspects. For better flight
characteristics it is recommended to use them.
In case you intend to use Spirit as flybarless system all servos should be
connected in the corresponding positions:
CH1 (aileron), CH2 (elevator), CH3 (aileron/pitch), CH4 (rudder).
For standard receivers it is necessary to use two normal and one special
cable. Three connectors should be plugged into the receiver and the end of
this cable to the unit.
4.3. CONNECTION OF STANDARD RECEIVER (PWM)
The unit is powered by two cables from the receiver connected to AUX and
RUD positions.
Never plug a connector for powering the unit to SYS or ELE/PIT/AIL positions!
8
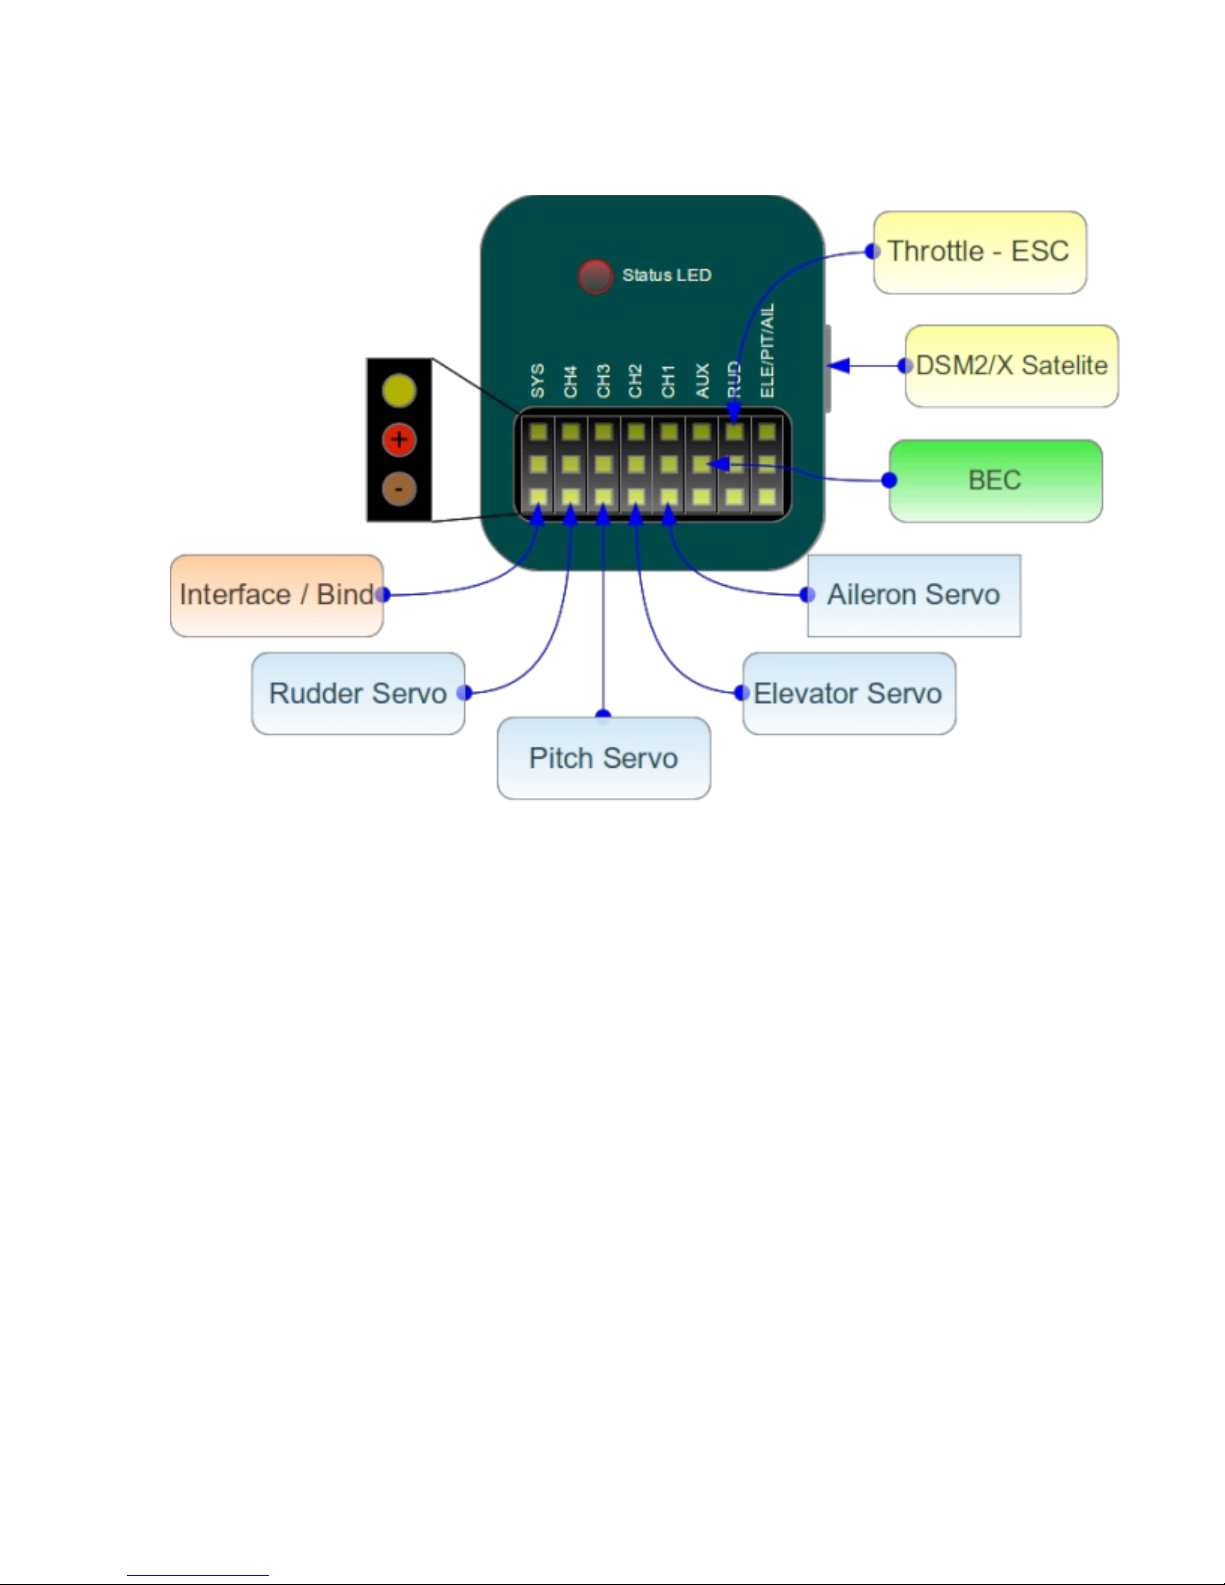
4.4. CONNECTION OF SPEKTRUM DSM2/X SATELLITE
Connection to BEC is optional. In case that the model is powered by an
external power supply (other than internal BEC) BEC must be connected to
AUX position.
Never plug a connector for powering the unit to SYS or ELE/PIT/AIL positions!
9
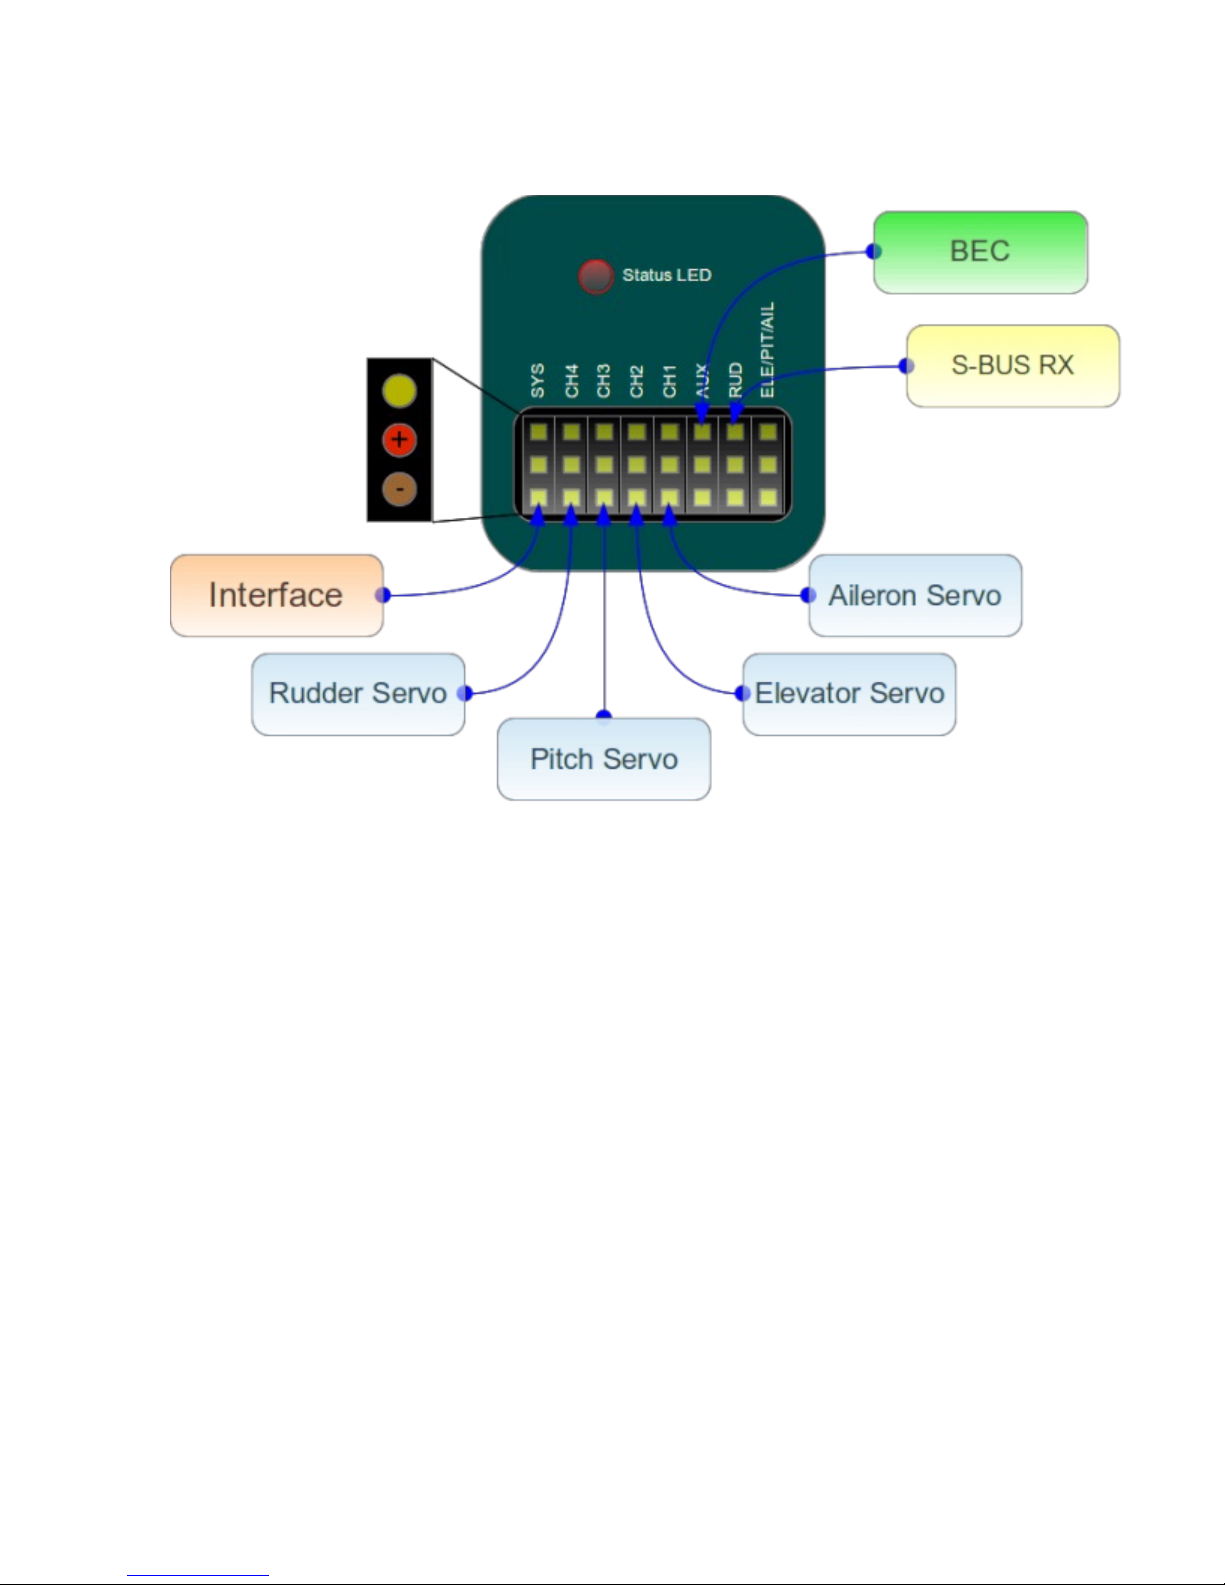
4.5. CONNECTION OF FUTABA S-BUS RECEIVER
WARNING
When using S-BUS it is necessary to have an INVERTER which can be
purchased separately. Inverter replaces cable between receiver and unit in
RUD position.
Connection to BEC is optional. For models of class 500 and larger it is
recommended to use dual power supply cables due to increased power
consumption. That means besides the inverter, additional power supply
cable should be connected to AUX position.
Never plug a connector for powering the unit to SYS or ELE/PIT/AIL positions!
4.6. UNIT
All cables connected to the unit must be oriented so that the signal wire
(orange) is closer to the connector pin labels, respectively to center of the
unit.
10
Table des matières


