Sound Sation Jukey-61 Manuel utilisateur

ELECTRONIC KEYBOARD with 61 piano keys
And AUDIO PLAYER
Please read this manual carefully and properly take care of it
USER MANUAL
Leggete questo manuale e conservatelo per future consultazioni
MANUALE UTENTE

Dear customer,
First of all thanks far purchasing a SOUNDSATION® product. Our mission is to satisfy
all possible needs of musical instrument and professional audio users oering a wide
range of products using the latest technologies.
We hope you will be satised with this item and, if you want to collaborate, we are
looking for a feedback from you about the operation of the product and possible
improvements to introduce in the next future. Go to our website www.soundsation-
music.com and send an e-mail with your opinion, this will help us to build instruments
ever closer to customer’s real requirements.
One last thing: read this manual before using the instrument, an incorrect operation
can cause damages to you and to the unit. Take care!
The SOUNDSATION Team
Gentile Cliente,
Grazie per aver scelto un prodotto SOUNDSATION®. La nostra missione è quella di
orire ai nostri utenti una vasta gamma di strumenti musicali ed apparecchiature audio
e lighting con tecnologie di ultima generazione.
Speriamo di aver soddisfatto le vostre aspettative e, se voleste collaborare, sarem-
mo lieti di ricevere un vostro feedback sulla qualità del prodotto al ne di migliorare
costantemente la nostra produzione. Visitate il nostro sito www.soundsationmusic.
com ed inviateci una mail con la vostra opinione, questo ci aiuterà a sviluppare nuovi
prodotti quanto più vicini alle vostre esigenze.
Un’ultima cosa, leggete il presente manuale al ne di evitare danni alla persona ed al
prodotto, derivanti da un utilizzo non corretto.
Il Team SOUNDSATION

3
ENGLISH
JUKEY-61 User manual
TABLE OF CONTENTS
1. INTRODUCTION..........................................................................................................................6
1.1. Unpacking.................................................................................................................................................................6
1.2. Accessories...............................................................................................................................................................6
2. OVERVIEW ...................................................................................................................................7
3. MAIN FEATURES .........................................................................................................................7
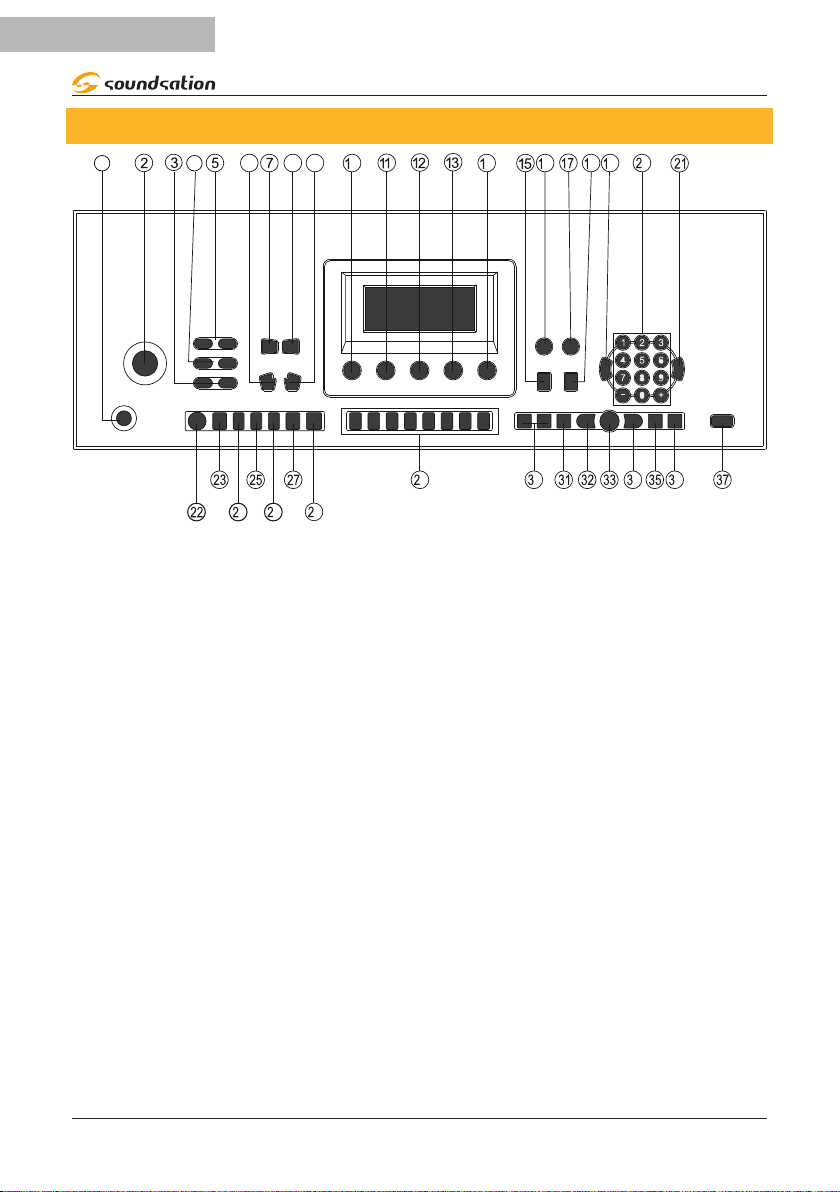
4. CONTROL PANEL ........................................................................................................................8
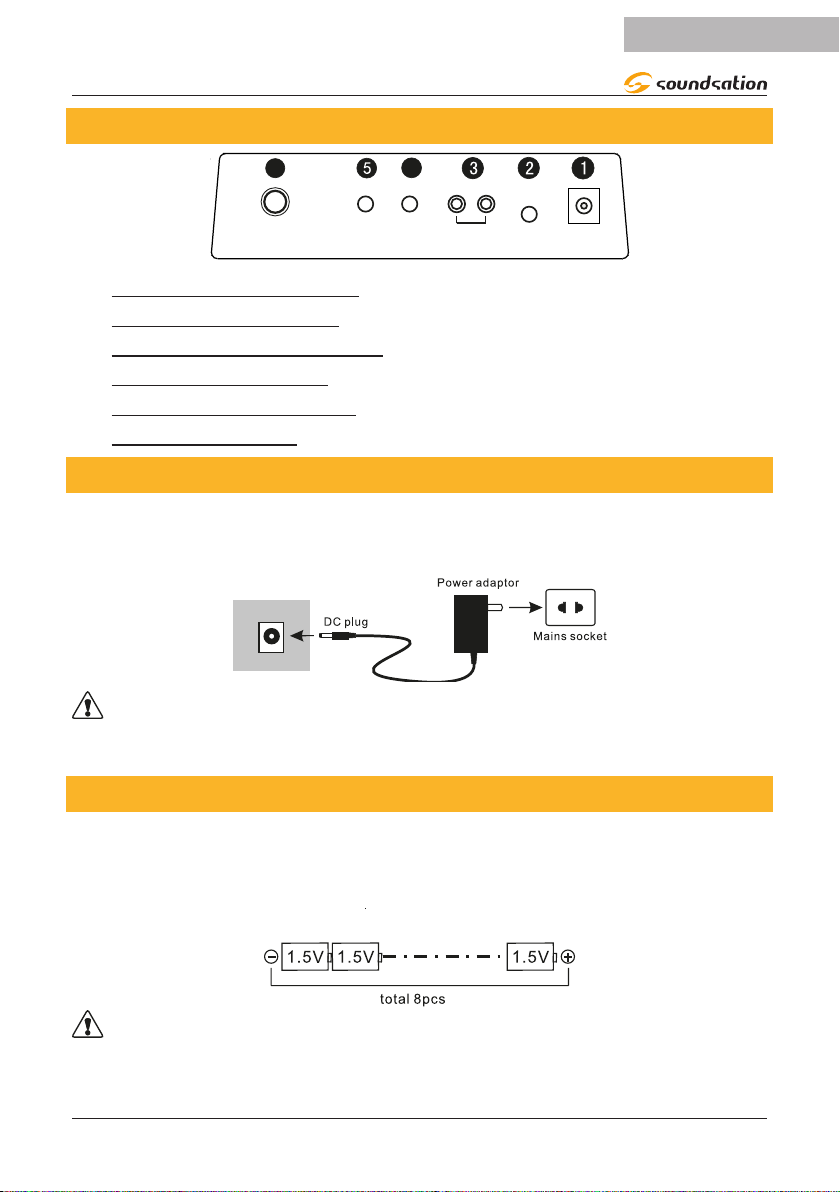
5. REAR PANEL ................................................................................................................................9
5.1. Use power adaptor................................................................................................................................................9
5.2. Use Batteries............................................................................................................................................................9
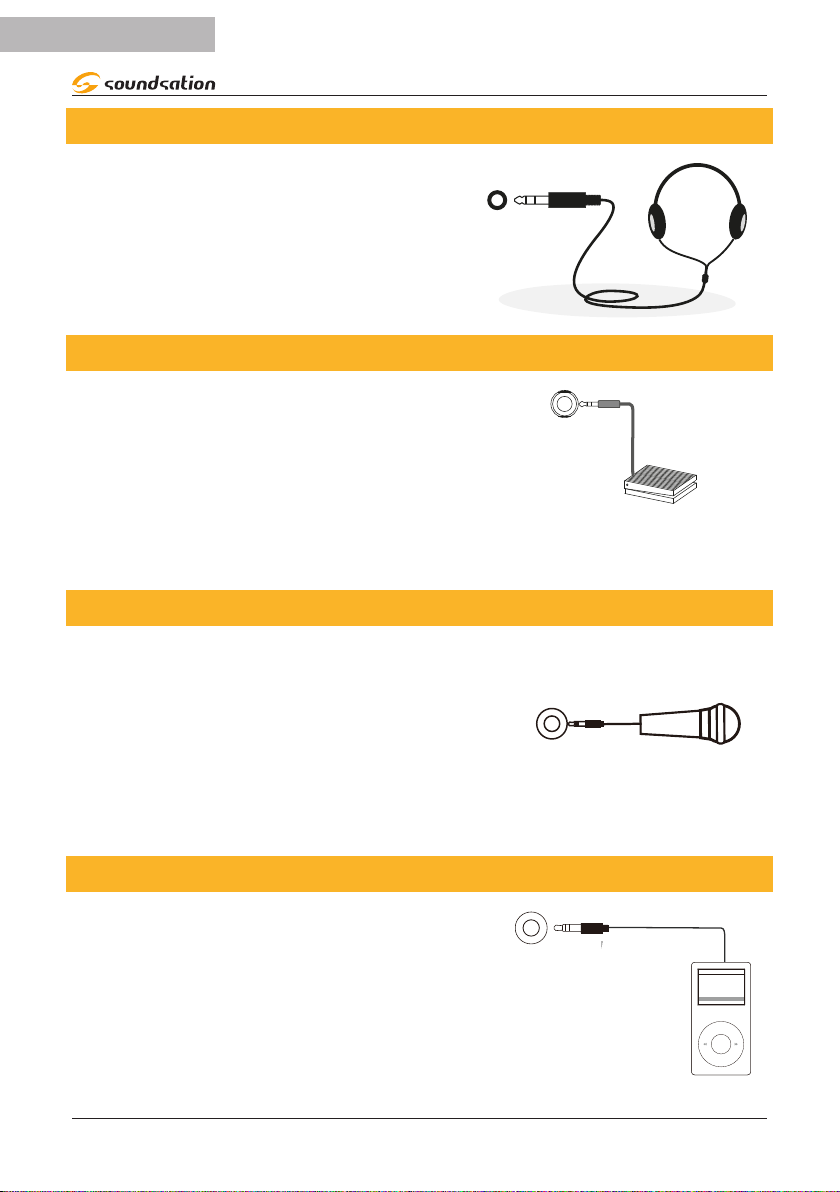
5.3. Use Headphones..................................................................................................................................................10
5.4. Sustain Pedal..........................................................................................................................................................10
5.5. Microphone Input................................................................................................................................................10
5.6. Audio Stereo Input..............................................................................................................................................10
5.7. Audio Stereo Output ..........................................................................................................................................11
5.8. USB Socket (Audio Player)................................................................................................................................11
6. BASIC OPERATION................................................................................................................... 11
6.1. Turn on Power.......................................................................................................................................................11
6.2. Master Volume adjustment..............................................................................................................................12
7. TONES ....................................................................................................................................... 12
7.1. Tones selection......................................................................................................................................................12
7.2. Lower Tone (SPLIT) ..............................................................................................................................................13
8. EFFECTS and CONTROLS......................................................................................................... 13
8.1. Sustain......................................................................................................................................................................13
8.2. Vibrato......................................................................................................................................................................14
8.3. Tempo.......................................................................................................................................................................14
8.4. Transpose ................................................................................................................................................................15
8.5. Metronome ............................................................................................................................................................15
9. MANUAL DRUM....................................................................................................................... 16
9.1. Drum Pads ..............................................................................................................................................................16
10. STYLES SELECTION .................................................................................................................. 17
11. STYLE CONTROLS .................................................................................................................... 17
11.1. Chords recognition mode ................................................................................................................................17
11.2. Start/Stop................................................................................................................................................................19
11.3. Sync ...........................................................................................................................................................................20
11.4. Intro/Ending...........................................................................................................................................................20
11.5. Fill In..........................................................................................................................................................................20
11.6. Style Variation........................................................................................................................................................21
11.7. Accompaniment Drum Volume adjustment..............................................................................................21
11.8. Chords Volume adjustment .............................................................................................................................21
12. SONGS....................................................................................................................................... 22
13. SONG LEARNING MODE ......................................................................................................... 23
14. AUDIO PLAYBACK from USB .................................................................................................. 24
14.1. Play / Pause ............................................................................................................................................................24
14.2. Volume Adjustment ............................................................................................................................................24
14.3. Loop ..........................................................................................................................................................................24
14.4. Previous Song / Next Song..............................................................................................................................25
14.5. Play Mode...............................................................................................................................................................25
14.6. Equalization Mode...............................................................................................................................................25
15. TONES LIST ............................................................................................................................... 26
16. STYLES LIST .............................................................................................................................. 32
17. DEMO SONG LIST .................................................................................................................... 35
18. SPECIFICATIONS ...................................................................................................................... 36
19. WARRANTY AND SERVICE ..................................................................................................... 37
20. WARNING................................................................................................................................. 38

4
ENGLISH
JUKEY-61 User manual
IMPORTANT SAFETY SYMBOLS
The symbol is used to indicate that some hazardous live terminals are
involved within this apparatus, even under the normal operating con-
ditions, which may be sucient to constitute the risk of electric shock
or death.
The symbol is used in the service documentation to indicate that spe-
cic component shall be replaced only by the component specied in
that documentation for safety reasons.
Protective grounding terminal
Alternating current/voltage
Hazardous live terminal
Denotes the apparatus is turned on
Denotes the apparatus is turned o
WARNING: Describes precautions that should be observed to prevent the danger
of injury or death to the operator.
CAUTION: Describes precautions that should be observed to prevent danger of
the apparatus.
To protect the environment, please try to recycle the packing material
as much as possible
Don’t throw this product away just as general trash, please deal with
the product follow the abandon electronic product regulation in your
country.
TAKING CARE OF YOUR PRODUCT
fRead these instructions
fKeep these instructions
fHeed all warning
fFollow all instructions

5
ENGLISH
JUKEY-61 User manual
1) Water / Moisture
The keyboard should be protected from moisture and rain and can not be used near
water; for example near a bathtub, a kitchen sink, a swimming pool, etc.
2) Heat
The keyboard should be located away from heat sources such as radiators, stoves or
other appliances that produce heat. Don not use it when maximum ambient tempera-
ture is higher than 40°C.
3) Object and Liquid Entry
Objects do not fall into and liquids are not spilled into the inside of the keyboard for
safety.
4) Power ADAPTER
Please use specied Adapter, otherwise fault adaptermay cause damage of your elec-
tronic keyboard. Do not place adapter or power cord near heating source such as cen-
tral heating or heat radiator. Regularly check power plug and clean surface dirt. Do not
pull out power plug with wet hands. Do not overbend wire and place heavy matters on
wire with other matters to avoid damaging wire. Unplug the keyboard from the mains
during lightning storms or when unused for long periods of time.
5) CleaninG and MAINTENANCE
To clean the body of the electronic keyboard, please use dry soft cloth. Do not use
paint, organic solvent, alcohol or chemically impregnated cloth.
6) Servicing
Do not open the case of electronic keyboard and try to disassemble any part of it or
make any change to it. Should any abnormal function occur in use, please stop operat-
ing it immediately and send the keyboard for repair by qualied service personnel only.
Only use accessories/attachments or parts recommended by the manufacturer.
NOTICE:
fSpecications are subject to change without notice
fShould any description of product function be not specied in detail or some typing
error occurs, please forgive us.
fWhat is shown on the LED display in these instructions is for explanation purposes
only and may dier from the actual display.

6
ENGLISH
JUKEY-61 User manual
1. INTRODUCTION
Thank you for purchasing our JUKEY61 keyboard. Enjoy your new equipment and make
sure to read this manual carefully before operation.
This user manual is made to provide both an overview of controls, as well as informa-
tion on how to use them.
1.1. Unpacking
Your JUKEY-61 keyboard was carefully packed to ensure safe transport. Despite this,
we recommend you to carefully examine the package and its contents for any signs of
physical damage, which can occur during transport. Each unit has the following parts:
f1 x JUKEY-61 Electronic Keyboard
f1 x Power Adapter
f1 x Music Stand
f1 x Jack adapter for Sustain Pedal or Microphone Inputs
f1 x User Manual
ATTENTION: Packaging cartons are not a toys! Keep out of reach of chil-
dren!!! Keep in a safe place the original packaging material for future use.
If anything damaged during transport, notify the shipper immediately and keep the
packing material for inspection. Again, please save the carton and all packing materials.
If the keyboard must be returned to the manufacturer, it is important that it is returned
in the original manufacturer box and packing. Please do not take any action without
rst contacting us.
1.2. Accessories
SOUNDSATION can supply a wide range of quality accessories that you can use with
your JUKEY-61 keyboard, like Audio cables, Headphones, Keyboard stands, external
speakers and a wide range of other dedicated items.
All products in our catalogue has been long tested with this device, so we recommend
you to use Genuine SOUNDSATION Accessories and Parts.
Ask your SOUNDSATION dealer or check out our website www.soundsationmusic.com
for any accessories you could need to ensure best performance of the product.

7
ENGLISH
JUKEY-61 User manual
2. OVERVIEW
The Soundsation JUKEY-61 keyboard is perfect for beginners who want to start playing.
The JUKEY-61 keyboard has 61 piano-type keys, 510 dierent sounds, 300 accompani-
ment styles, and 30 demo songs to practice playing with. A sustain pedal (not includ-
ed) can also be added for more authentic piano playing. Thanks to the wide range of
sounds and styles that this keyboard oers, you can have fun spanning various musical
genres. It can play audio tracks in dierent formats (mp3, Wav, Wma) thanks to the USB
Host connection where a USB Flash Drive can be inserted. Audio playback takes place
through two integrated 3 Watt speakers. The compactness and the possibility of battery
operation make this keyboard an instrument geared towards school use. The result of
all the features is to have a good keyboard with a great value in its market range.
3. MAIN FEATURES
f61-key piano-type keyboard
f3 x Seven Segments LED Display
fPower Supply DC 12V (Bundled Adaptor)
f510 Tones
f300 Automatic accompaniments (Styles) with relative controls
f30 Demo Songs
fManual Drum Function
fSplit Lower Function
fIntelligent self-learning system
fAudio Player (MP3, WAV and WMA)
fBattery operation
fMusic Stand included

8
ENGLISH
JUKEY-61 User manual
4. CONTROL PANEL
1 4 68 9
046
8 9
0
46 8
9
0 4 6
1. Power ON/OFF Switch 14. Exercise Lesson 3 27. Chord Mode
ONE FINGER
2. Master Volume
regulation knob 15. Sustain 28. Chord Mode
MULTI FINGER
3. Accompaniment
Volume Adjustment 16. Metronome 29. Drum PADS
4. Tempo Adjustment 17. Manual Drum 30. Volume adjustment
for Audio Player
5. Transpose Adjustment 18. Vibrato
6. Turns o Automatic
chords
19. TONES mode
selection 31. LOOP
7.
8.
Chords Volume
Adjustment
20. Numeric
Buttons(0..9) +/- 32. Previous Song
21. STYLES mode
selection
33. Play /Pause
9. SPLIT/LOWER
Function
22. START/STOP Style 34. Next Song
10. Single Demo Song
Playback 23. FILL-IN 35. Playback Mode
11. All Demo Songs
Playback 24. INTRO/ENDING 36. Equalization Mode
12. Exercise Lesson 1 25. SYNC 37. USB Audio Player
13. Exercise Lesson 2 26. STYLE VARIATION

9
ENGLISH
JUKEY-61 User manual
5. REAR PANEL
64
12VPHONES
L R
OUT
PEDAL MIC
AUDIO
INPUT
1) DC12V INPUT Socket
2) HEADPHONES JACK
3) AUDIO STEREO OUTPUT
4) MICROPHONE JACK
5) AUDIO STEREO INPUT
6) SUSTAIN PEDAL
5.1. Use power adaptor
Please use the special power adaptor that was equipped with this electronic keyboard,
Insert the DC plug of power adaptor into the DC jack of electronic keyboard, then,
insert the other end into Mains socket, nally turn on power switch.
DC 12V
CAUTION: When you don’t use this electronic keyboard, you should pull out the
plug of power adaptor from power socket safely to avoid the parts trouble or other
accidents.
5.2.Use Batteries
Open the battery lid at the bottom of electronic keyboard and load 8pcs l.5V size D
batteries,ensure the polarity of the batteries should conform to the anode and cath-
ode direction of batteries marked in battery internal slot.Cover the battery lid after the
installation.
CAUTION: Please replace all batteries at one time when them need the replace-
ment. Don’ t use dierent kinds of batteries and not mix new and old batteries at the
same time. Please take out the batteries as to avoid possible damage caused by the
batteries leakage if you don’t use the keyboard for long time.

10
ENGLISH
JUKEY-61 User manual
5.3.Use Headphones
Insert headphone plug into [PHONES] jack in
back of keyboard. The internal speaker system of
electronic keyboard cuts o automatically now.
PHONES
5.4.Sustain Pedal
An optional footswitch can be plugged into the
sustain jack and be used to switch sustain on or
o. Simply by pressing a sustain footswitch, you
will have a natural sustain as you play..
SUSTAIN
5.5.Microphone Input
By connecting a microphone to the dedicated
connector, you can sing while playing or during
song playback via the MP3 player. Before turning on
the instrument, set the master volume to minimum.
Then connect a microphone to the MIC jack and
after turning on the instrument, adjust the master
volume while singing using the microphone.
MIC
5.6.Audio Stereo Input
By connecting the audio output of an MP3 / CD
player or other audio source to the AUDIO INPUT
connector on the rear panel, the audio input signal
is mixed with the instrument signal and therefore, it
is possible to play the keyboard at the same time.
AUDIO
INPUT
Table des matières
Langues :
Autres manuels Sound Sation Clavier électronique


