Sound ID 200 Manuel utilisateur
Sound ID 200
Bluetooth™Headset
Quick Start Guide and User Manual
Please take a few moments to read this user manual.
It contains instructions for operating your Sound ID 200,
along with other important information.
Before returning this product, please call 1-866-703-7480
or visit www.soundid.com (support section)
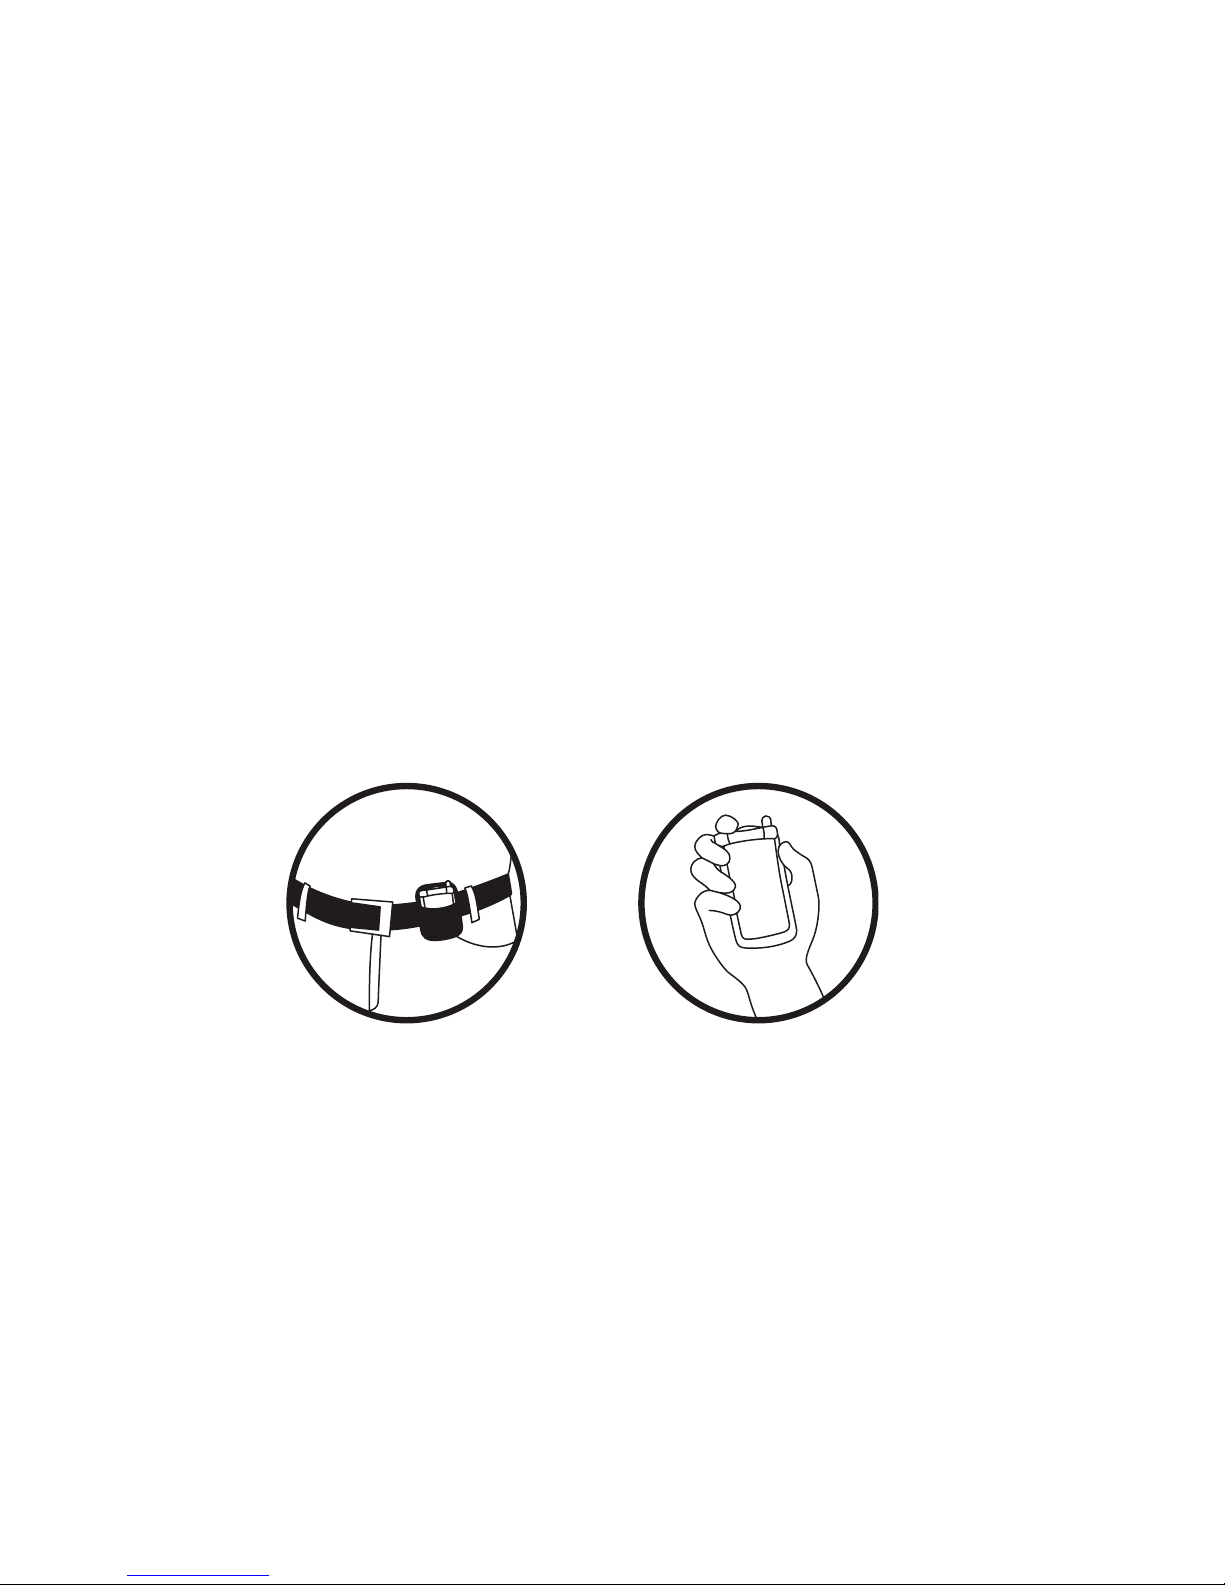
To Achieve the Best Performance
with Your Sound ID 200 Headset:
• Place the phone in a belt holder or maintain a line-of-sight.
Holding the phone in your hand reduces the wireless signals.
• Having the mobile phone on the opposite side as your
headset or behind you will reduce wireless signals. Keep
the mobile phone and headset on the same side, preferably
line-of-sight. If you experience intermittent static, reposition
the phone to find the best reception.
• As you increase the separation between your phone and your
headset the wireless signal strength will be reduced and will
produce static and/or disconnect. Reduce the distance.
• If you put your phone in a purse or briefcase, keep the
purse or briefcase on the same side as the headset.
DO DON’T

NoiseNavigation™Demonstration
You can demonstrate the effect of NoiseNavigation™by turning
it “Off” and “On” during a call. To turn all noise reduction “Off”,
press and hold the Volume button for two seconds until you
hear two beeps. To turn noise reduction back “On”, press and
hold the Volume button until you hear one beep.
Using the Sound ID Headset with Blackberry Phones
If you have a Blackberry phone, we recommend using the
following instructions to turn 'Echo Control' off.
1) Navigate to "Setup Bluetooth"
2) Highlight the "Sound ID 200"
3) Press the Menu button
4) Select "Device Properties" from the list
5) In the device properties screen, set "Echo Control" to off.
6) Press the Escape key (to the right of the trackball) and
select "Save".

Welcome.
Thank you for purchasing the Sound ID 200 Headset.
Important Notices
The volume control should be set at a reasonable sound level. Prolonged
exposure to excessive volume over time can lead to hearing impairment.
If you suspect hearing problems, consult with your physician or an
audiologist.
The Sound ID 200 enables hands-free operation of mobile phones.
Please obey mobile phone laws while driving and pay full attention to the
operation of the vehicle.
Register Your Sound ID 200 Online
Visit www.soundid.com to register your product online so we can provide
you with the best possible service and support.
Questions & Support
For a Spanish version of this manual please visit www.soundid.com.
IMPORTANT INFORMATION PRIOR TO USE:
It is important to charge your Sound ID 200 battery for a minimum of four
hours before you use the headset for the first time. Subsequent charges
take up to 2.5 hours. When the headset is charging, the light is red.
When fully charged, it is green.
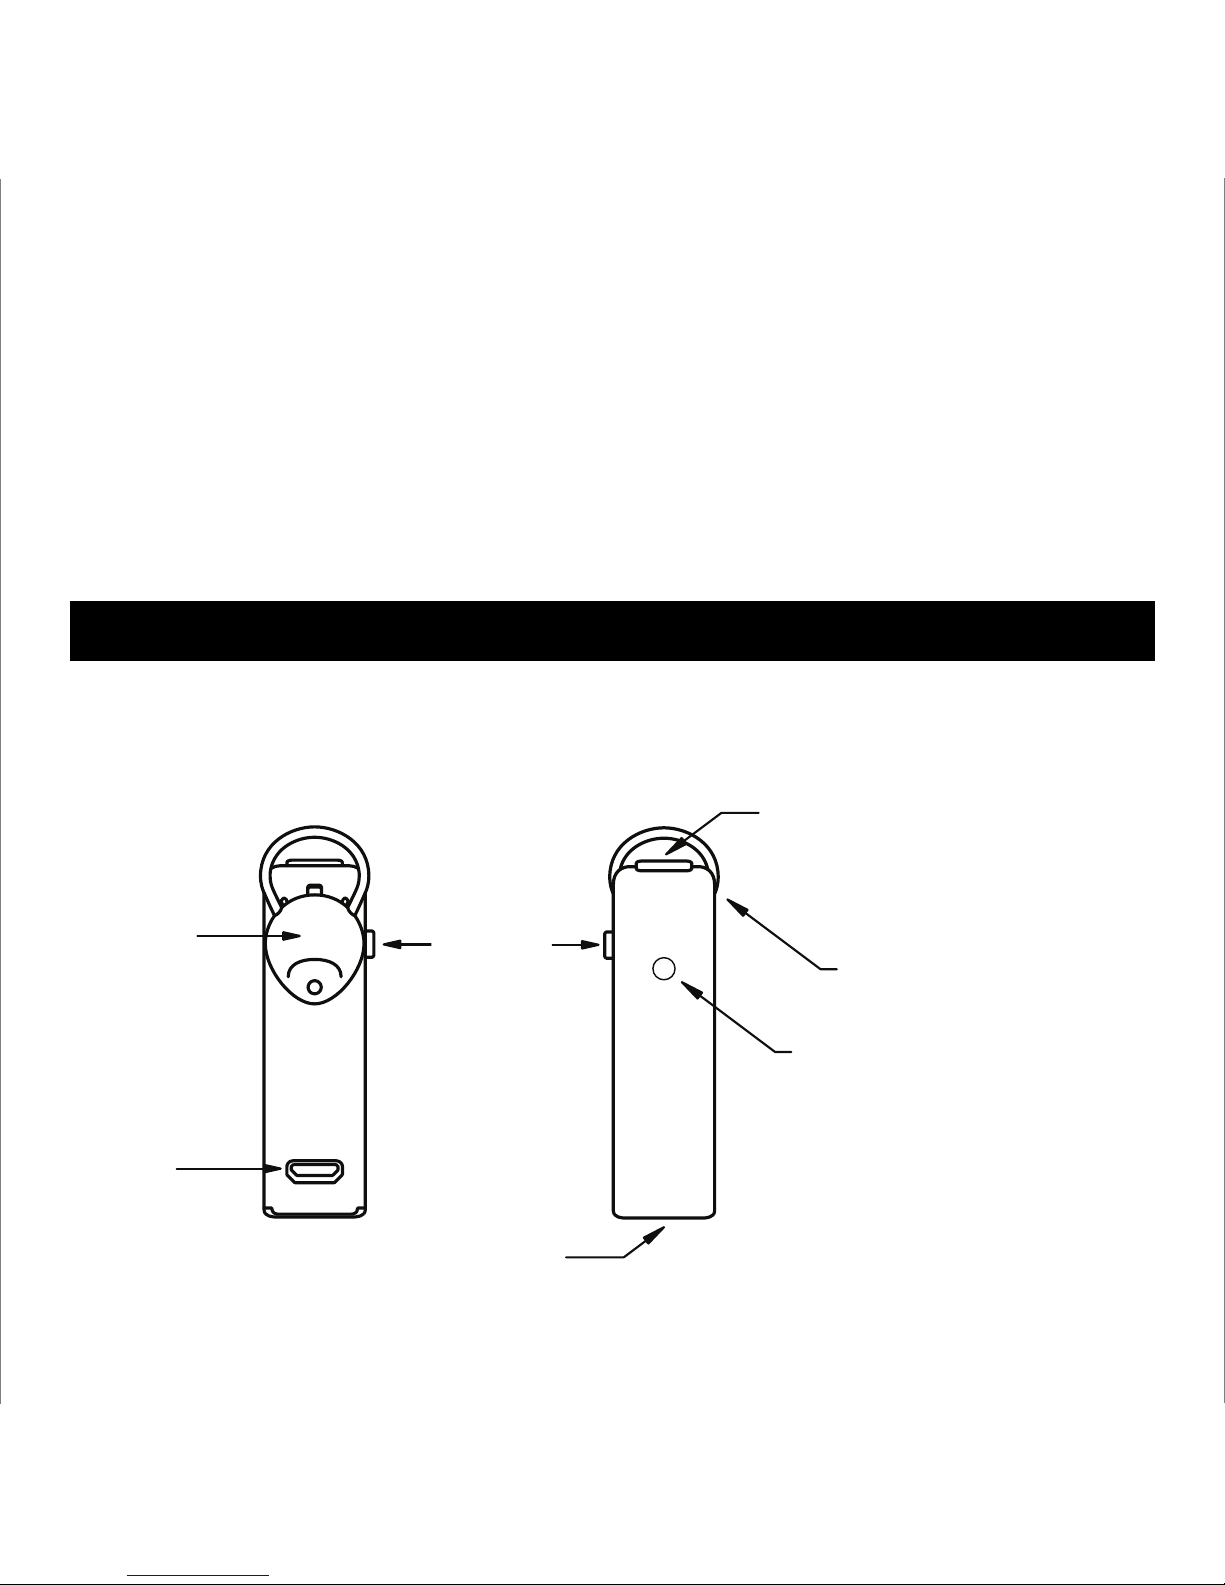
About Your Sound ID 200 Headset
BACK VIEW FRONT VIEW
RealComfort™
Ear Loop
Status Light
Main Button
Volume
Micro USB
Charging
Socket
Quick Start Guide
Microphone
Microphone
• Green - On and charged
(more than 30 min. remaining)
• Red - Powering off, or, Low
Battery
• Blinking Red-Green -
In pairing mode
• Blinking Green - Attempting
to connect with headset
1

To turn it ON: Press and hold the Main Button for approximately three
seconds. The status light will flash green when the headset is on.
To change the volume: Most handsets will allow you to change
the headset volume using the volume control on the phone. In this
case the Sound ID 200 remembers the new volume level.
The volume can also be changed on the headset. The headset has
four volume settings which can by cycled through by pressing the volume
button briefly for each step. You will hear a beep at the maximum volume
step; upon the next press, the volume goes back to lowest step.
To answer a phone call: Press the Main Button when the Sound ID
200 rings.
To end a phone call: Press the Main Button.
To make a phone call: Use the mobile phone to initiate the call. The
audio will automatically transfer to your Sound ID 200 headset.
To turn it OFF: Press and hold the Main Button for three seconds.
The status light will turn red when the headset turns off.
To turn NoiseNavigation™ON/OFF: To turn all noise reduction off,
press and hold the Volume button for two seconds until you hear two
beeps. To turn noise reduction back on, press and hold the Volume
button until you hear one beep.
How It Works
2

You must pair your headset with your mobile phone before it will work.
Consult your phone manual for pairing instructions for your specific
phone model. In general, here's how: 1) Turn OFF the headset if it is on.
Turn ON the phone and navigate to “Bluetooth Link”. 2) Press and hold
down the Main Button on the Sound ID 200 for eight seconds until the
light flashes red and green. Note: the Sound ID 200 is automatically
placed in pairing mode with the LED flashing red and green each time it
is powered on until successfully paired. 3) Select LOOK FOR DEVICES
on the mobile phone, and then select “Sound ID 200” when it appears on
the menu screen. 4) If asked to pair, select YES. 5) If asked for a pin,
passcode, or passkey, enter “0000”. 6) After successfully pairing, the
Sound ID 200 status light will stop flashing and the device will remain ON.
Having Difficulty Pairing?
Step 1: Clear the Phone
Delete any old pairings from the phone(this can sometimes be hard to
find in the menus). Turn the phone off. Remove the battery from the
phone. Wait 20 seconds then re-assemble the phone and turn it on.
Step 2: Clear the Earpiece
Put the earpiece in pairing mode. Hold both buttons until two beeps are
heard (2-4 seconds). Note: you must hold the earpiece up to your ear
while you hold the buttons down so you can hear the beeps. Turn the
earpiece off.
Step 3: Repeat the Pairing Process
Pair Your Sound ID 200 with Your Bluetooth®Mobile Phone
3
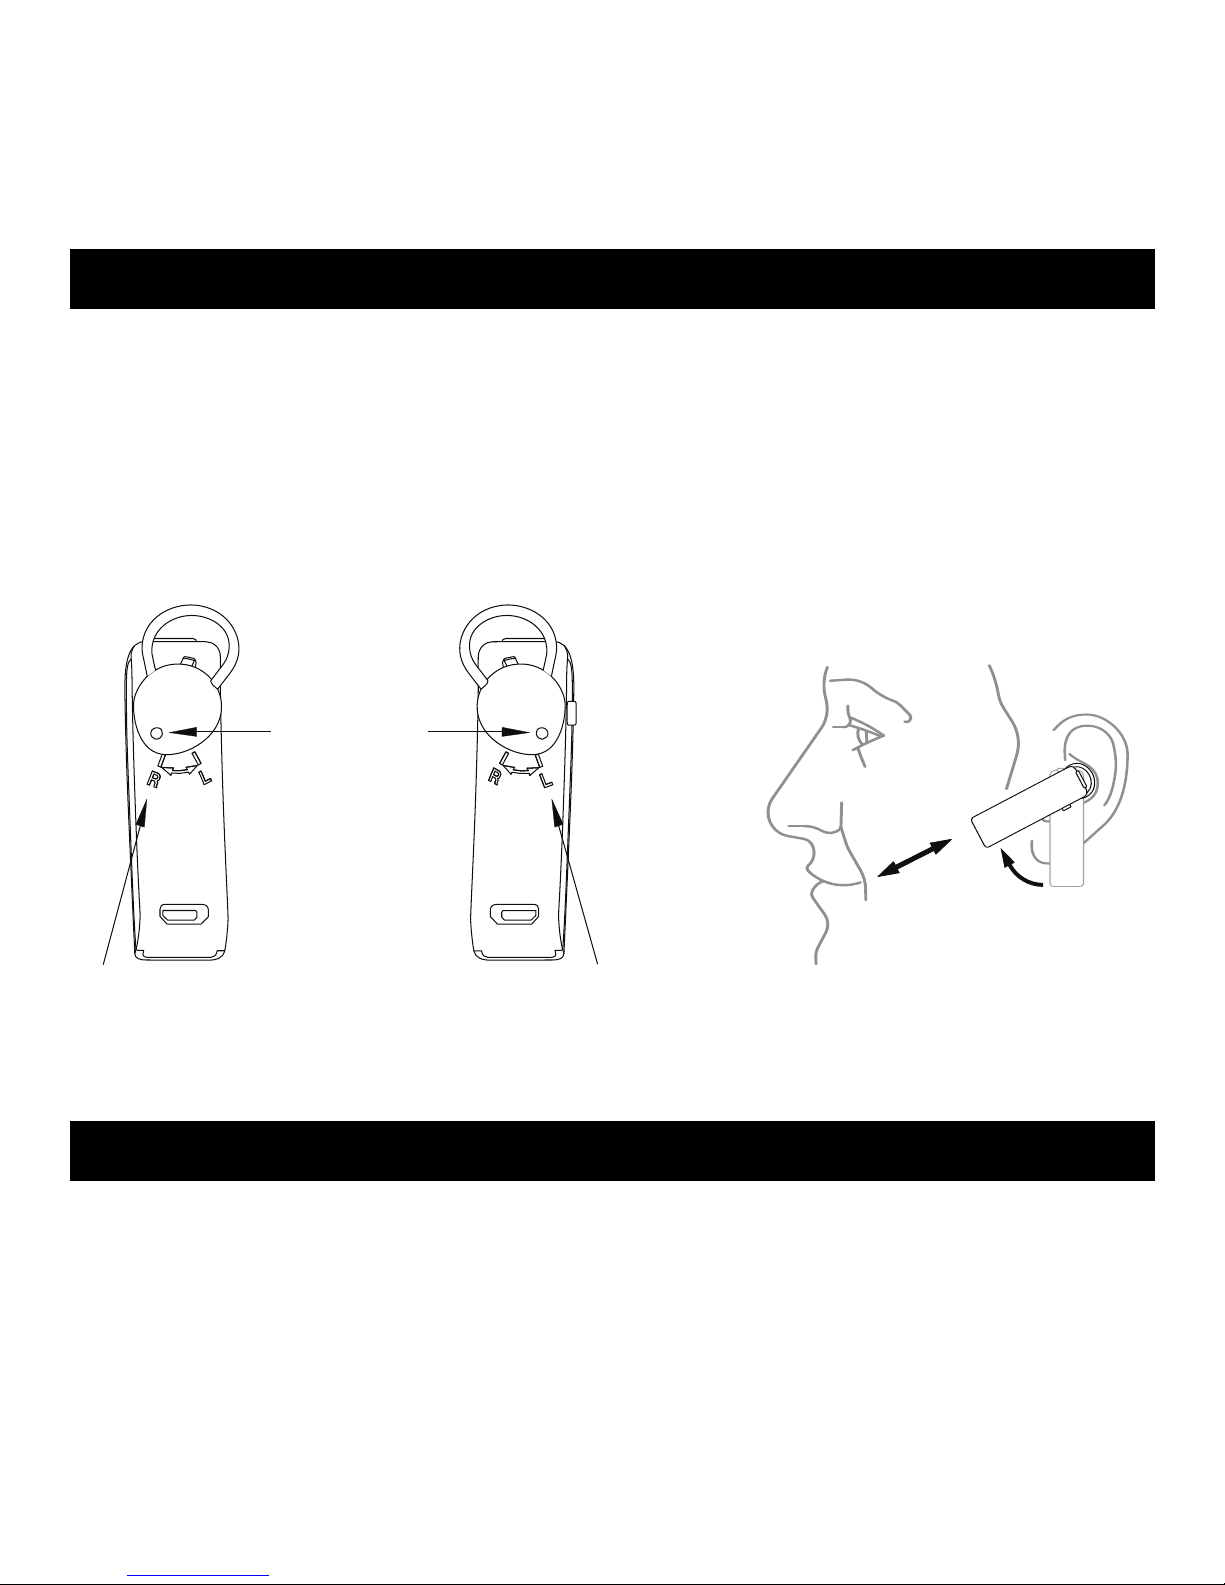
Sound ID 200 Microphones are
Positioned Towards Mouth
Left Ear Fit
Rotate Tip to Line
Up With R
Rotate Tip to Line
Up With L
(Approximately 45 degrees)
Ear Tip
Hole
Holding the Sound ID 200 vertically, gently insert the eartip into your ear.
Ensure that the Ear Loop is securely tucked into the bowl of your ear and
rotate the Sound ID 200 until it points towards your mouth and fits snug-
gly in your ear. For the right ear, rotate the headset counterclockwise; for
the left ear, clockwise. Then, align the headset toward the mouth. You
may need to use a mirror to confirm the position for the first time.
Wearing Your Sound ID 200 Headset
For additional information about this device and its features, please refer
to the user manual section of this booklet or visit our website at
www.soundid.com.
Learn More
4
Sound ID 200 User Manual
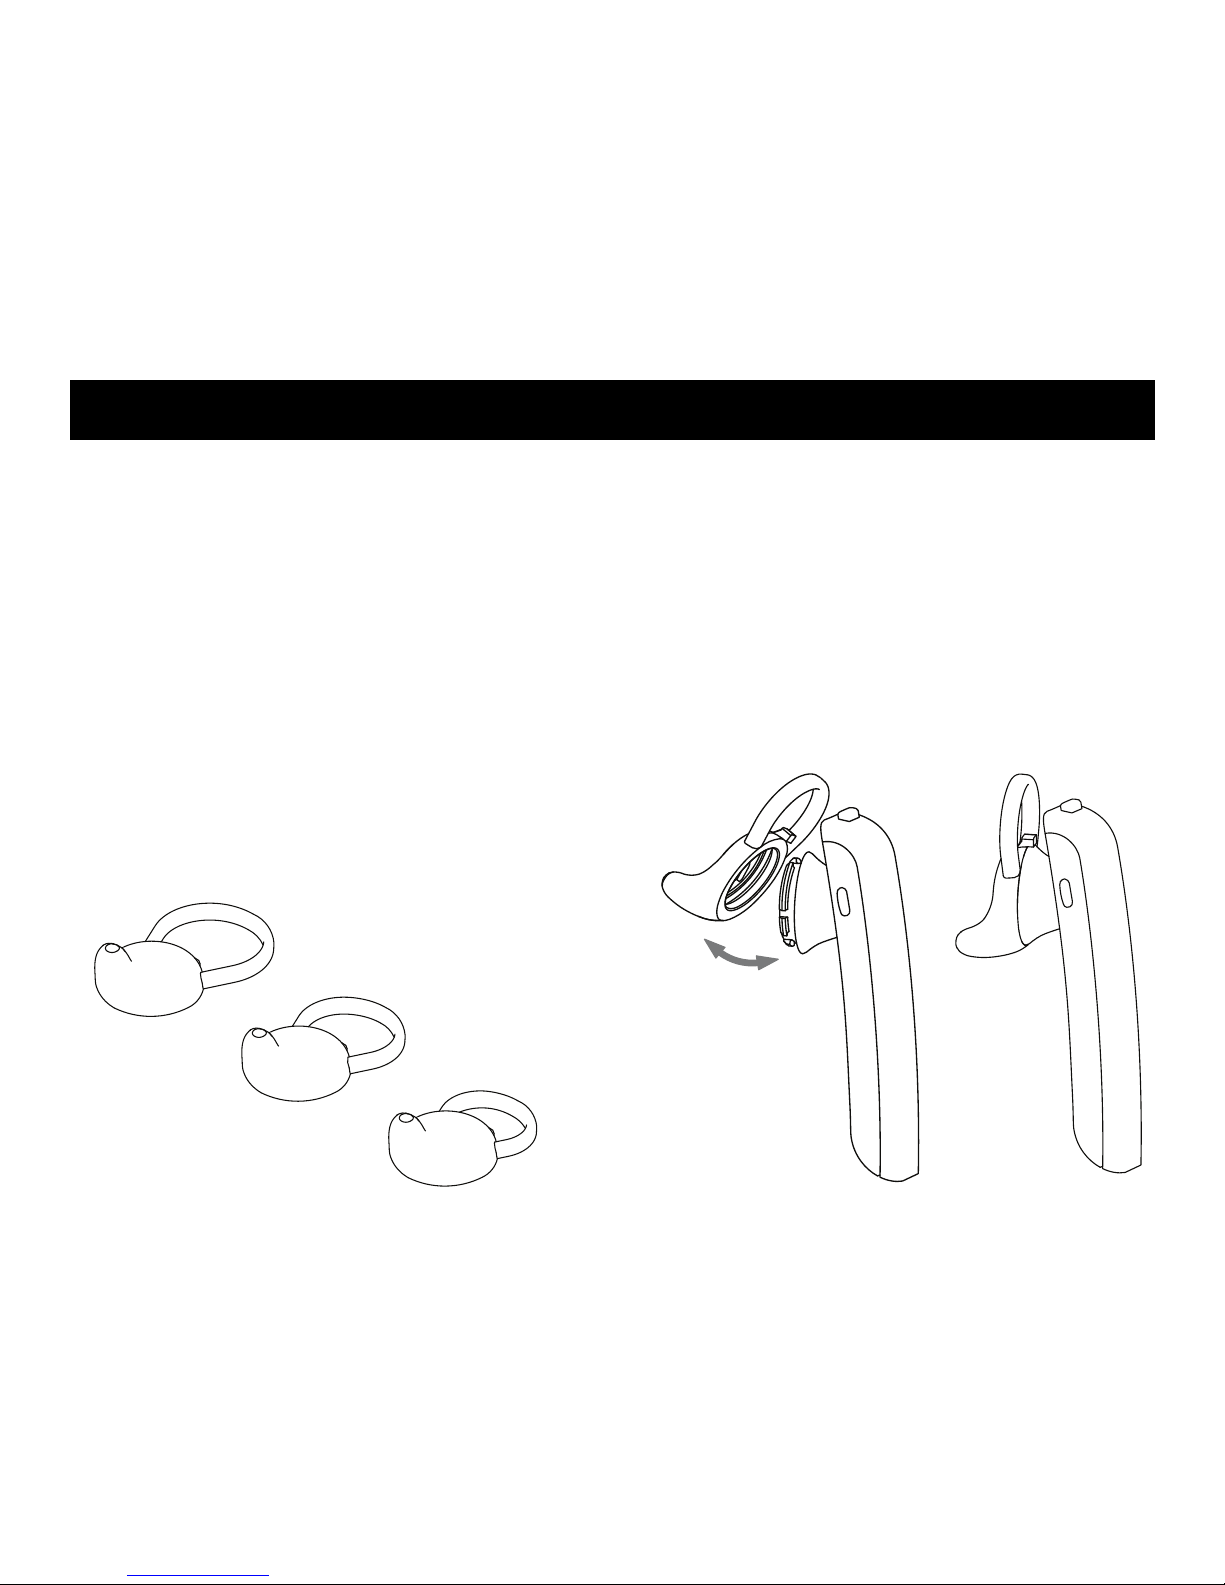
Installing the RealComfort™Ear Loop
Three ear pieces are provided each with a different size RealComfort™
Ear Loop (large, medium, and small). The ear piece with the medium Ear
Loop comes pre-installed on the headset, so check its fit first. If it’s not
comfortable, try the other two to find the best fit. If you need to change
the ear piece, gently pull it away from the headset, then snap on the
desired ear piece and line the tip up with the left or right ear preference
(as shown on the Sound ID 200 below).
Large
Medium
(Installed on Device)
Small
5
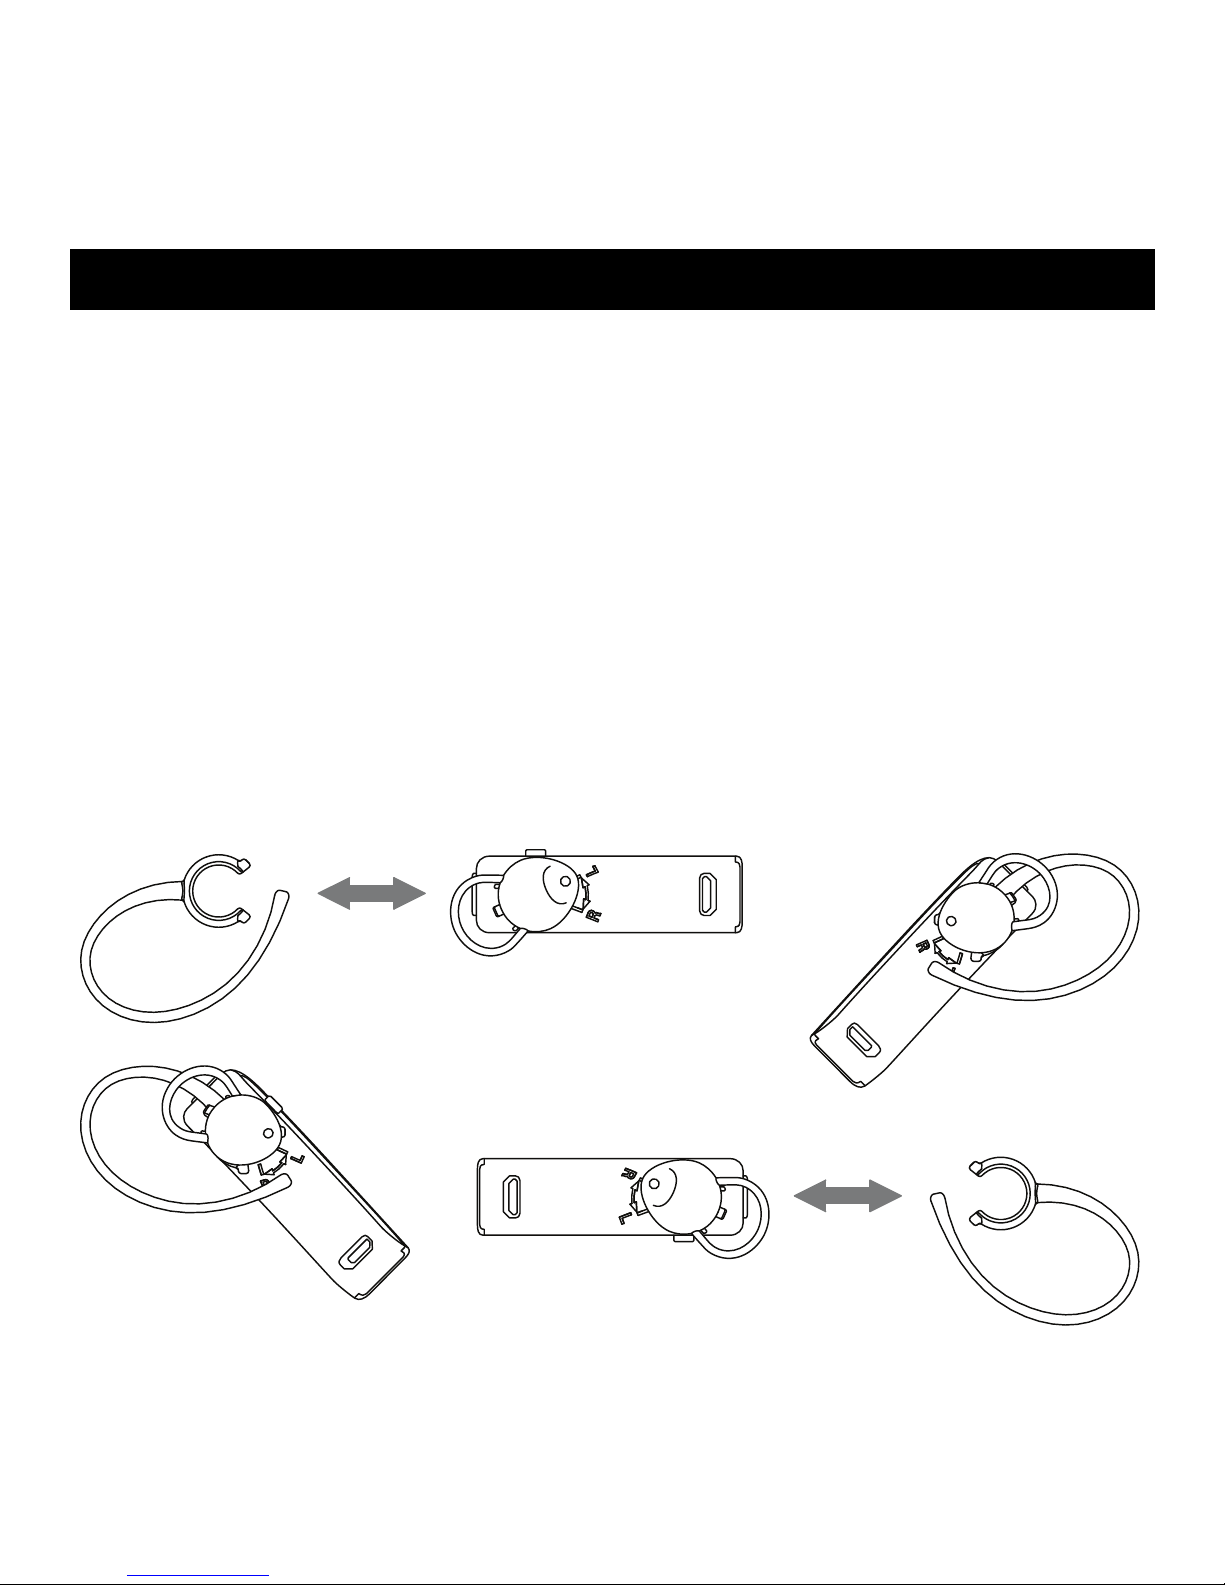
Over-the-Ear Option
The Sound ID 200 design allows an Over-the-Ear wearing style.
Simply snap the Over-the-Ear Hook to the neck of the headset
corresponding to “Left Ear” or “Right Ear” configuration as shown below.
For users who do not wish to use a RealComfort™Ear Loop an ear
cushion has been provided. In this case replace your eartip with the
ear cushion as indicated in the diagram below.
Left Ear Configuration
Attaching the Ear Hook:
Right Ear Configuration
6
Table des matières
Langues :
Autres manuels Sound ID casque


