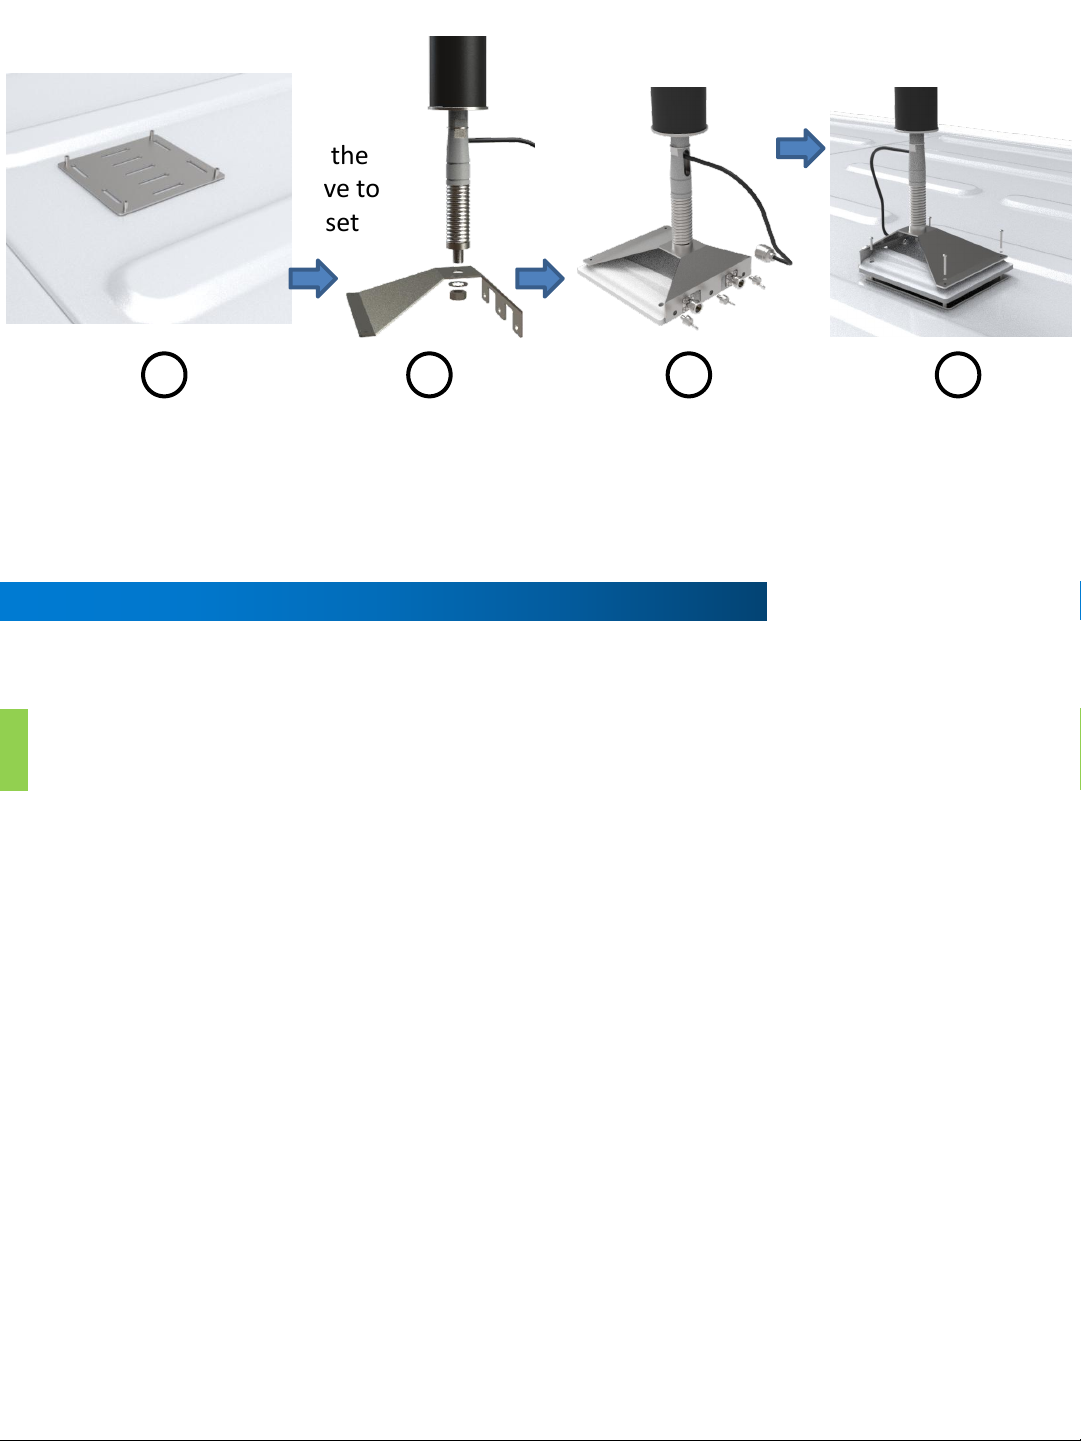
Step 2: Outdoor Antenna and Booster Installation
You should always do a “soft install” to test the performance of the booster in the position
you have chosen. For now, just securely place the outside antenna and booster in position
on the roof then continue to step three. Once you have finalized and tested the installation,
use the directions below to mount the bracket using adhesive.
1. Using a detergent or alcohol, thoroughly clean the adhesive surface of the mounting bracket and
the corresponding location on the roof of the RV. Ensure there is no grease or dirt. This is an
important step in achieving the maximum bond strength between the mount and the roof.
2. Apply at lest 30ml of adhesive (purchased separately) to the bottom surfaces of the bracket. Cover
the whole surface area. The adhesive should be thicker towards the center; it will move outwards
and overflow as downward pressure is applied.
3. Align the bottom of the bracket with the desired location on the roof of the RV. Apply light
pressure, and then slide the bracket in small circles until there is an even layer of adhesive that
completely coats the contact surfaces. Re-align the bracket to the desired location and apply firm
pressure for at least ten seconds. There should be overflow around the edges of bracket.
4. Allow the adhesive to set and solidify for at least 24 hours. Do not install the antenna/ booster or
move the frame of the bracket during this time. After 24 hours the bonding strength will be strong
enough to support the antenna/ booster, so you may continue with the installation of the booster.
Under conditions of 77F and 60% humidity, it will take 3-5 days for the adhesive to fully dry. At
colder temperatures, it will take longer for the adhesive to fully dry. Refer to the information on
the label of the adhesive.
5. The adhesive should be waterproof, UV-resistant, hot and cold weather tested, and resistant to
aging. We recommend Fuze*It Liquid Nails, Gorilla Heavy Duty Construction Adhesive, or a similar
product from your local hardware store.
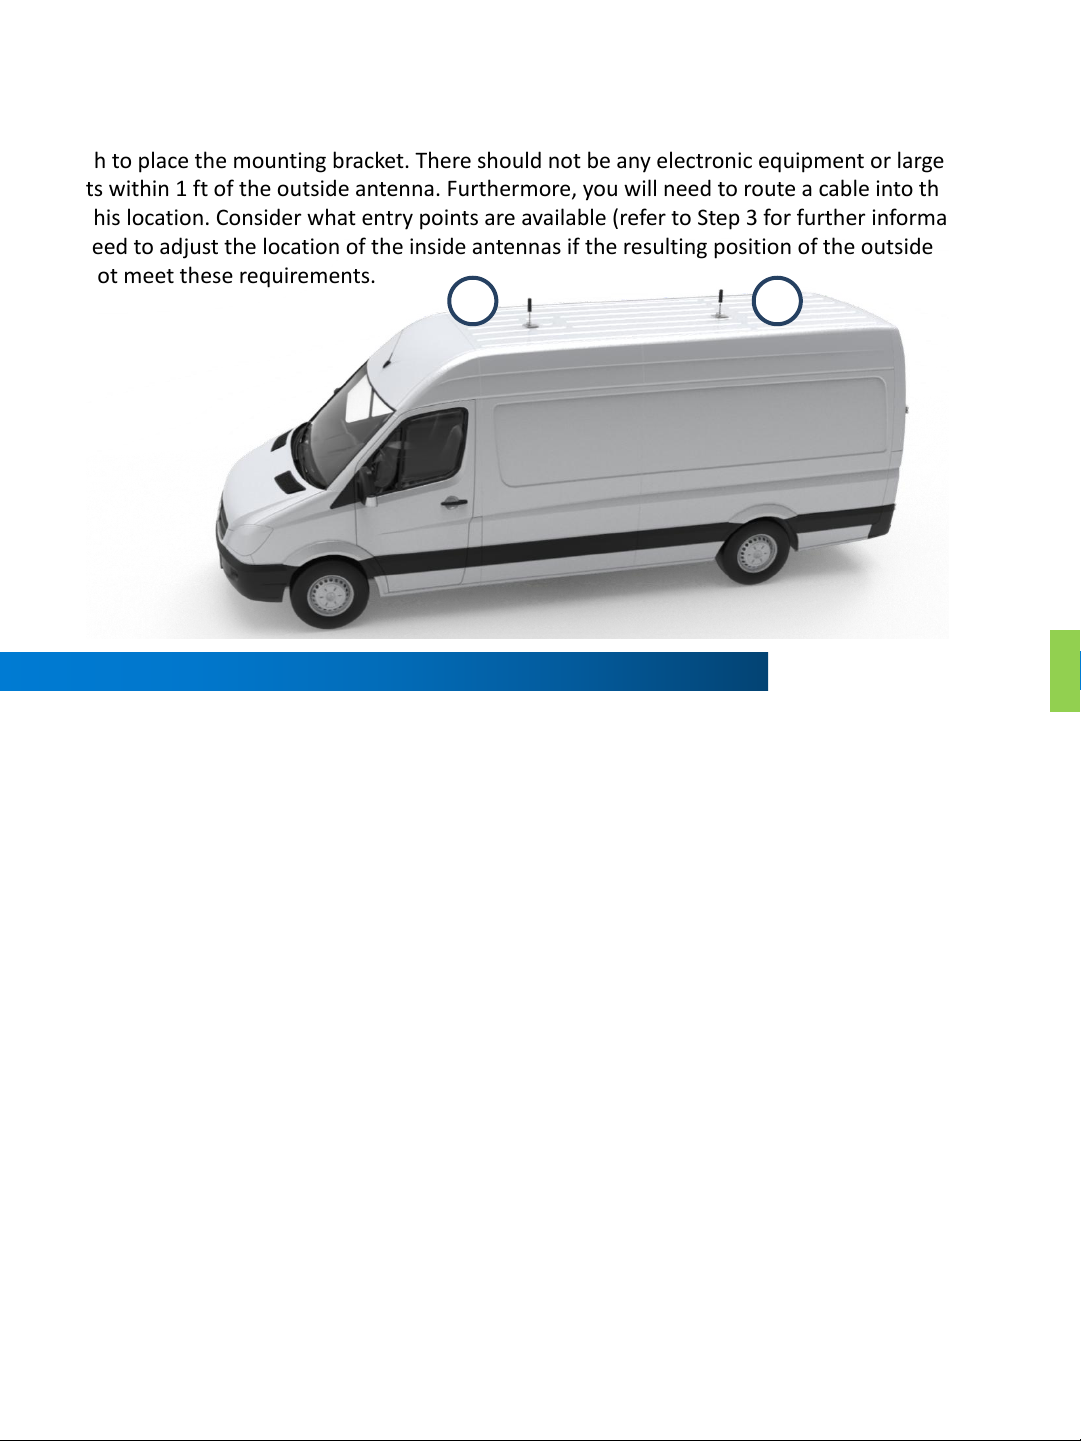
Once you have decided where you will locate the inside antennas, it’s time to move to the roof. Based
on the location you chose for the inside antennas, you should have a pretty good idea of where you
need to mount the outside antenna and amplifier– directly above the location of the main inside
antenna. Make sure that there is room available in that location. You will need a flat surface large
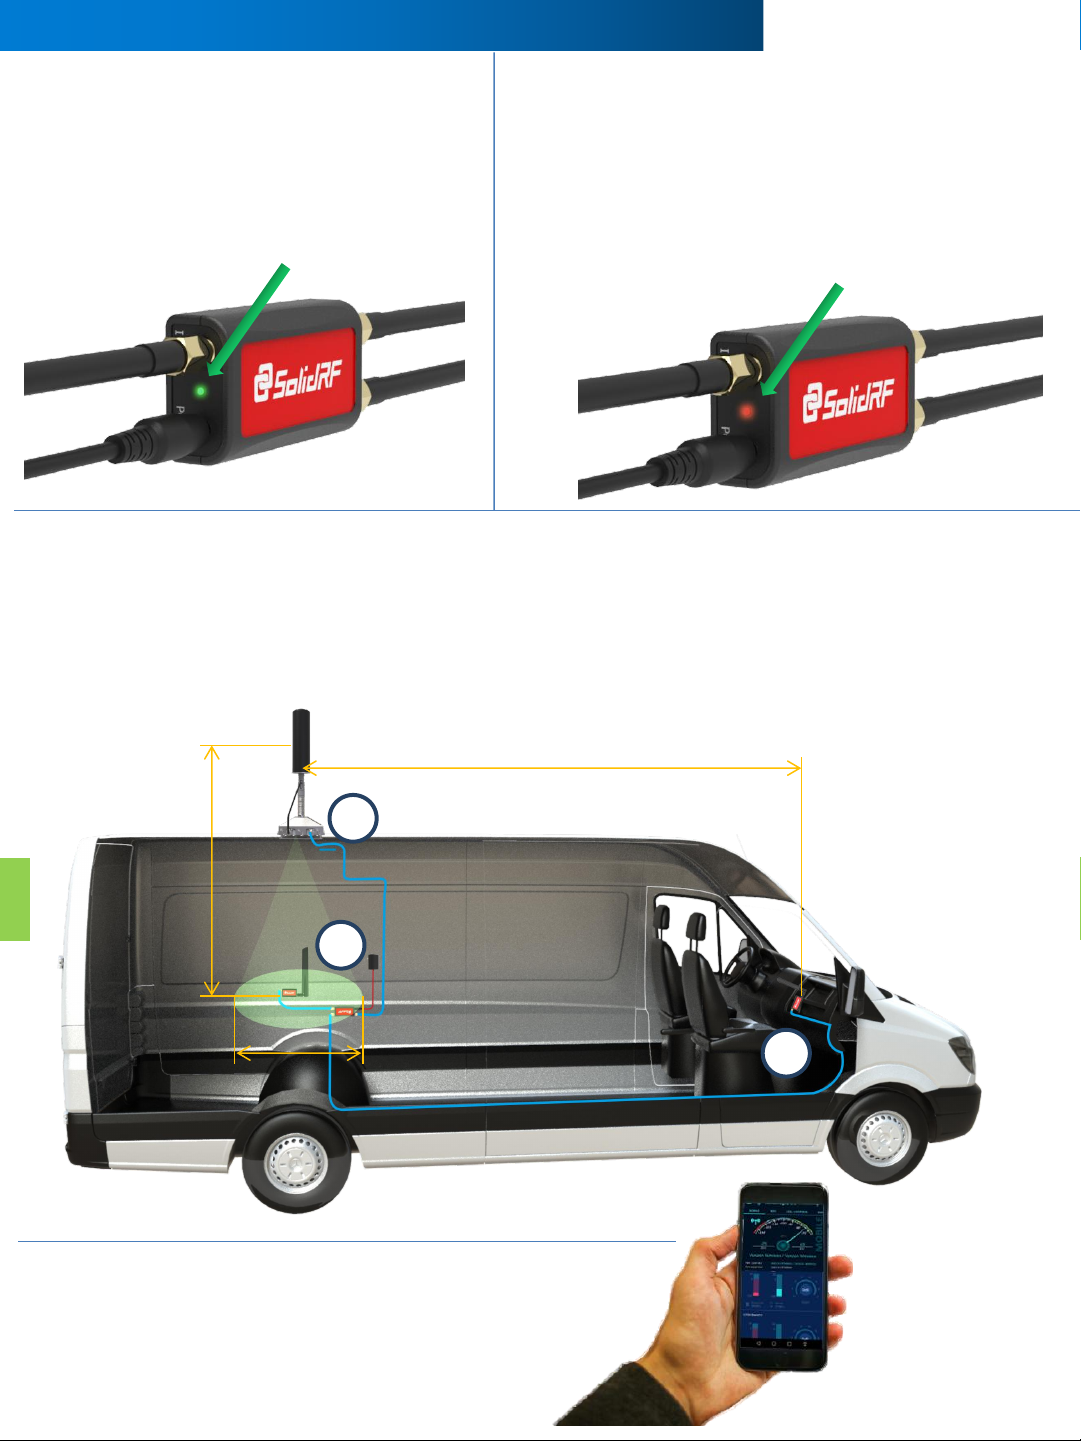
enough to place the mounting bracket. There should not be any electronic equipment or large metal
objects within 1 ft of the outside antenna. Furthermore, you will need to route a cable into the vehicle
from this location. Consider what entry points are available (refer to Step 3 for further information). You
may need to adjust the location of the inside antennas if the resulting position of the outside antenna
does not meet these requirements. A B
5