Solid Setup Blum Aventos HL Manuel utilisateur
Page 1 of 6
Solid Setup Pty Ltd
www.solidsetup.com
BLMAVHL User Guide
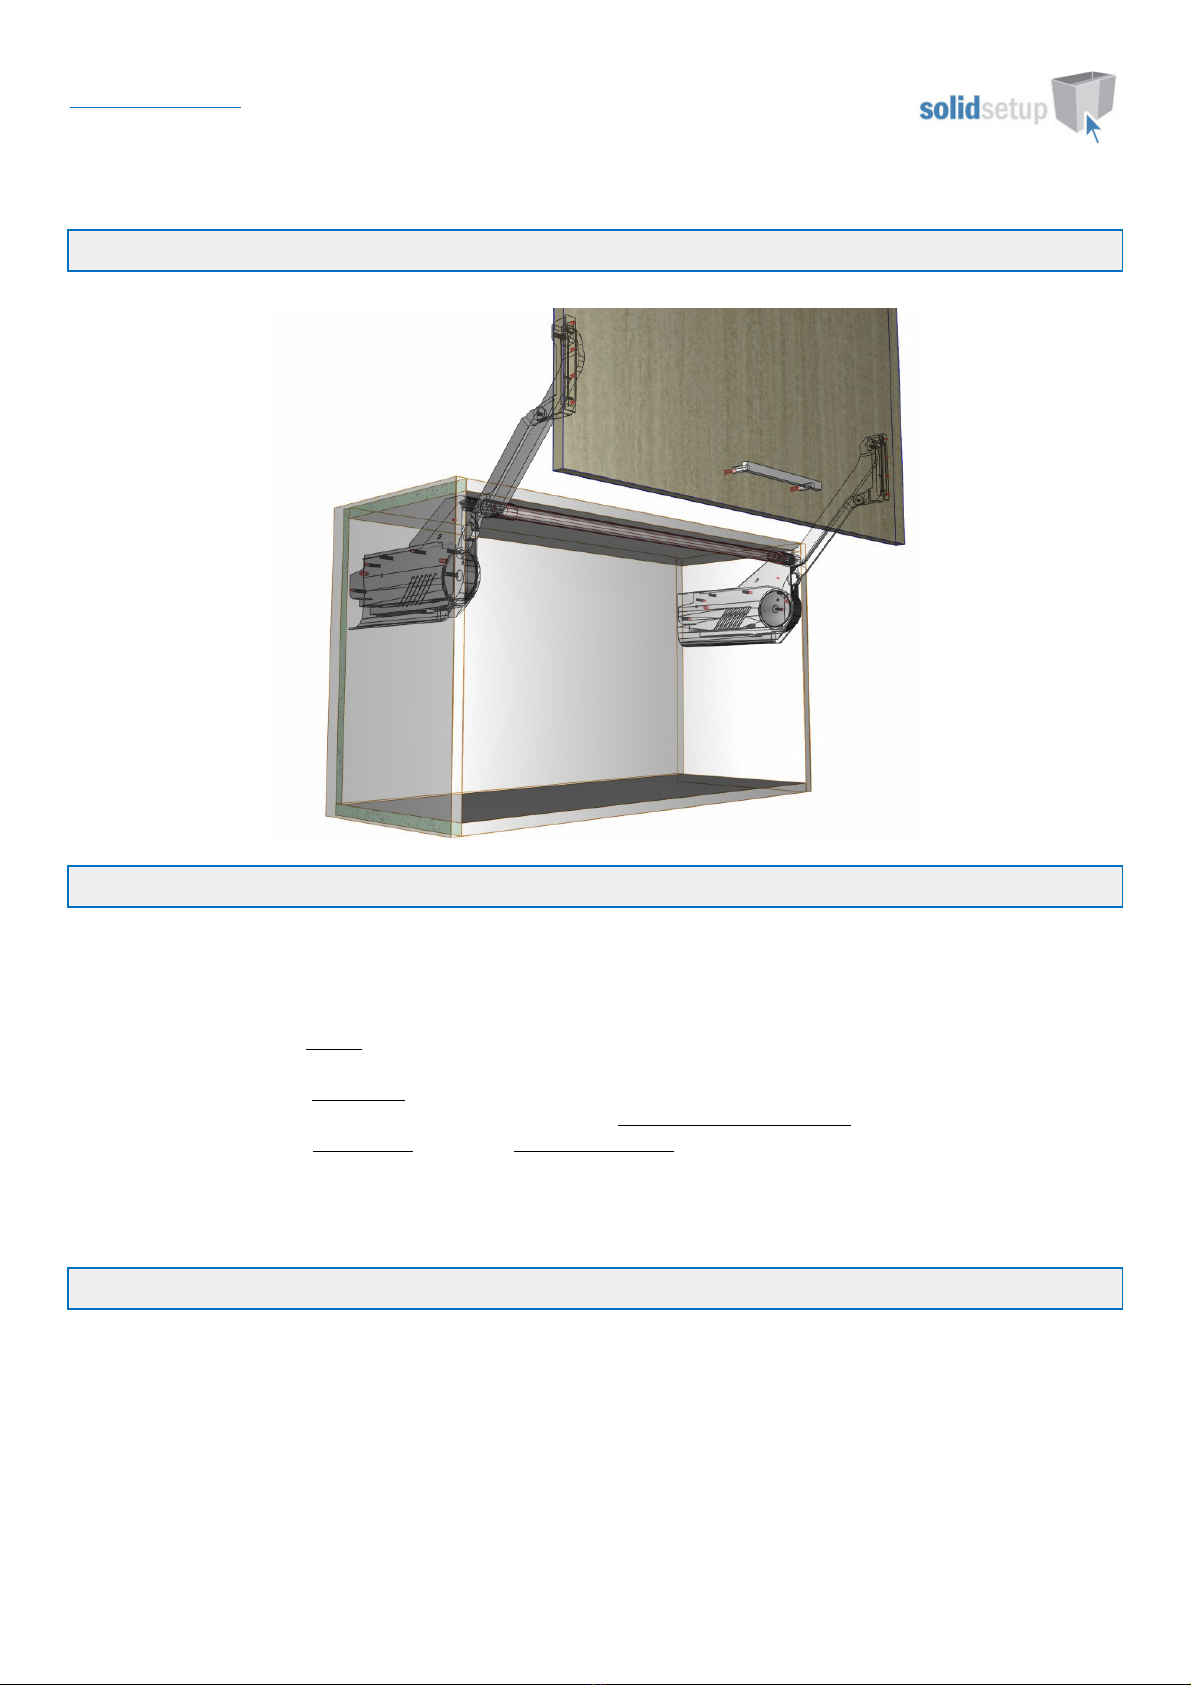
Blum Aventos ‘HL’ User Guide.
Introduction
Overview
•The Blum Aventos HL Package’ from Solid Setup adds the Blum Aventos HL door Lift system to Cabinet Vision
Solid and optional Servo drive.
•It provides drilling for the Cabinet and Door parts, for CNC output.
•(You can change the drilling diameters and depths to the tools you want to use.)
•It also adds 3d graphics for the Mechanisms and brackets etc.
•The Mechanisms and brackets etc are added as a separate parts and materials for reporting purposes.
•All material descriptions contain the Blum order number after the # symbol.
•UCS calculates weight of Door by using the density of board and handle weight.
•User can adjust density, handle weight or Total weight using attributes.
•The Total weight determines which Lift Mechanism and Arm Assembly to use, automatically.
Included in This P ck ge
User Cre ted St nd rds
The Following UCS is provided
•{ DOOR } -- Blum Aventos HL Attributes -Adds Blum Aventos HL Attributes to DOR
•{ DOOR } -- Blum Aventos HL -Adds Blum Aventos HL to DOR_OPEN
Libr ry
•CVS Blum.cvc Cabinet Vision Catalog of Blum Library parts
Page 2 of 6
Solid Setup Pty Ltd
www.solidsetup.com
BLMAVHL User Guide
P rts
•HNGDXF Hinge type part used for Mechanisms
•HNGPLT Hinge type part used for Mech Covers
•HNGSTAY Hinge type part used for Arms
•ROD Assembly type part used for Connecting Rods
•BRKT Part used for Servo bumpers
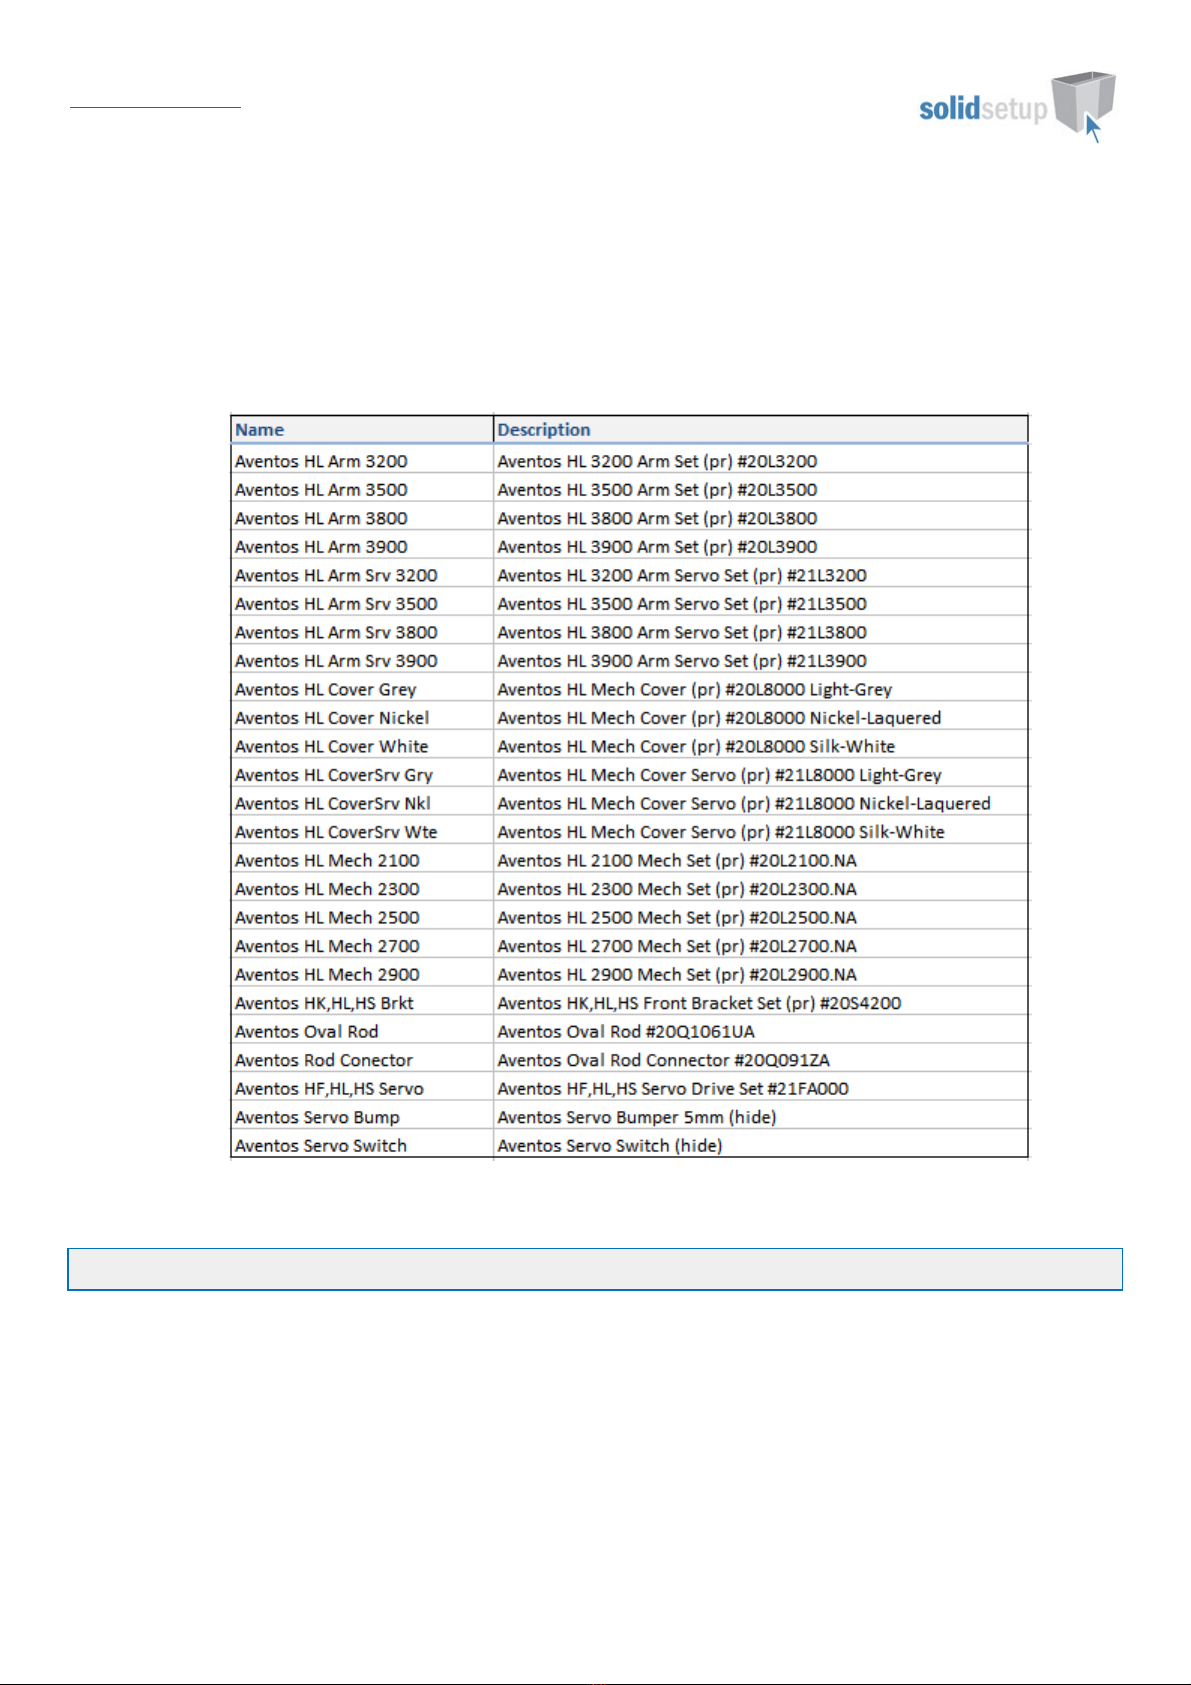
Miscell neous M teri ls:
Aventos HL Us ge
Door Requirements.
For the Aventos HL to appear on a door the following conditions must be met
•Door must be hinged at top.
•Door must have its hinge quantity set to zero.
•Door height must be in size range 300-580 High and door must be 260-1800 Wide
•The “Aventos HL?” Attribute will then appear on the Door to switch on Aventos HL.
•(You must be in the orthographic or “Smiley” views to click on the door and see the attributes)
Page 3 of 6
Solid Setup Pty Ltd
www.solidsetup.com
BLMAVHL User Guide
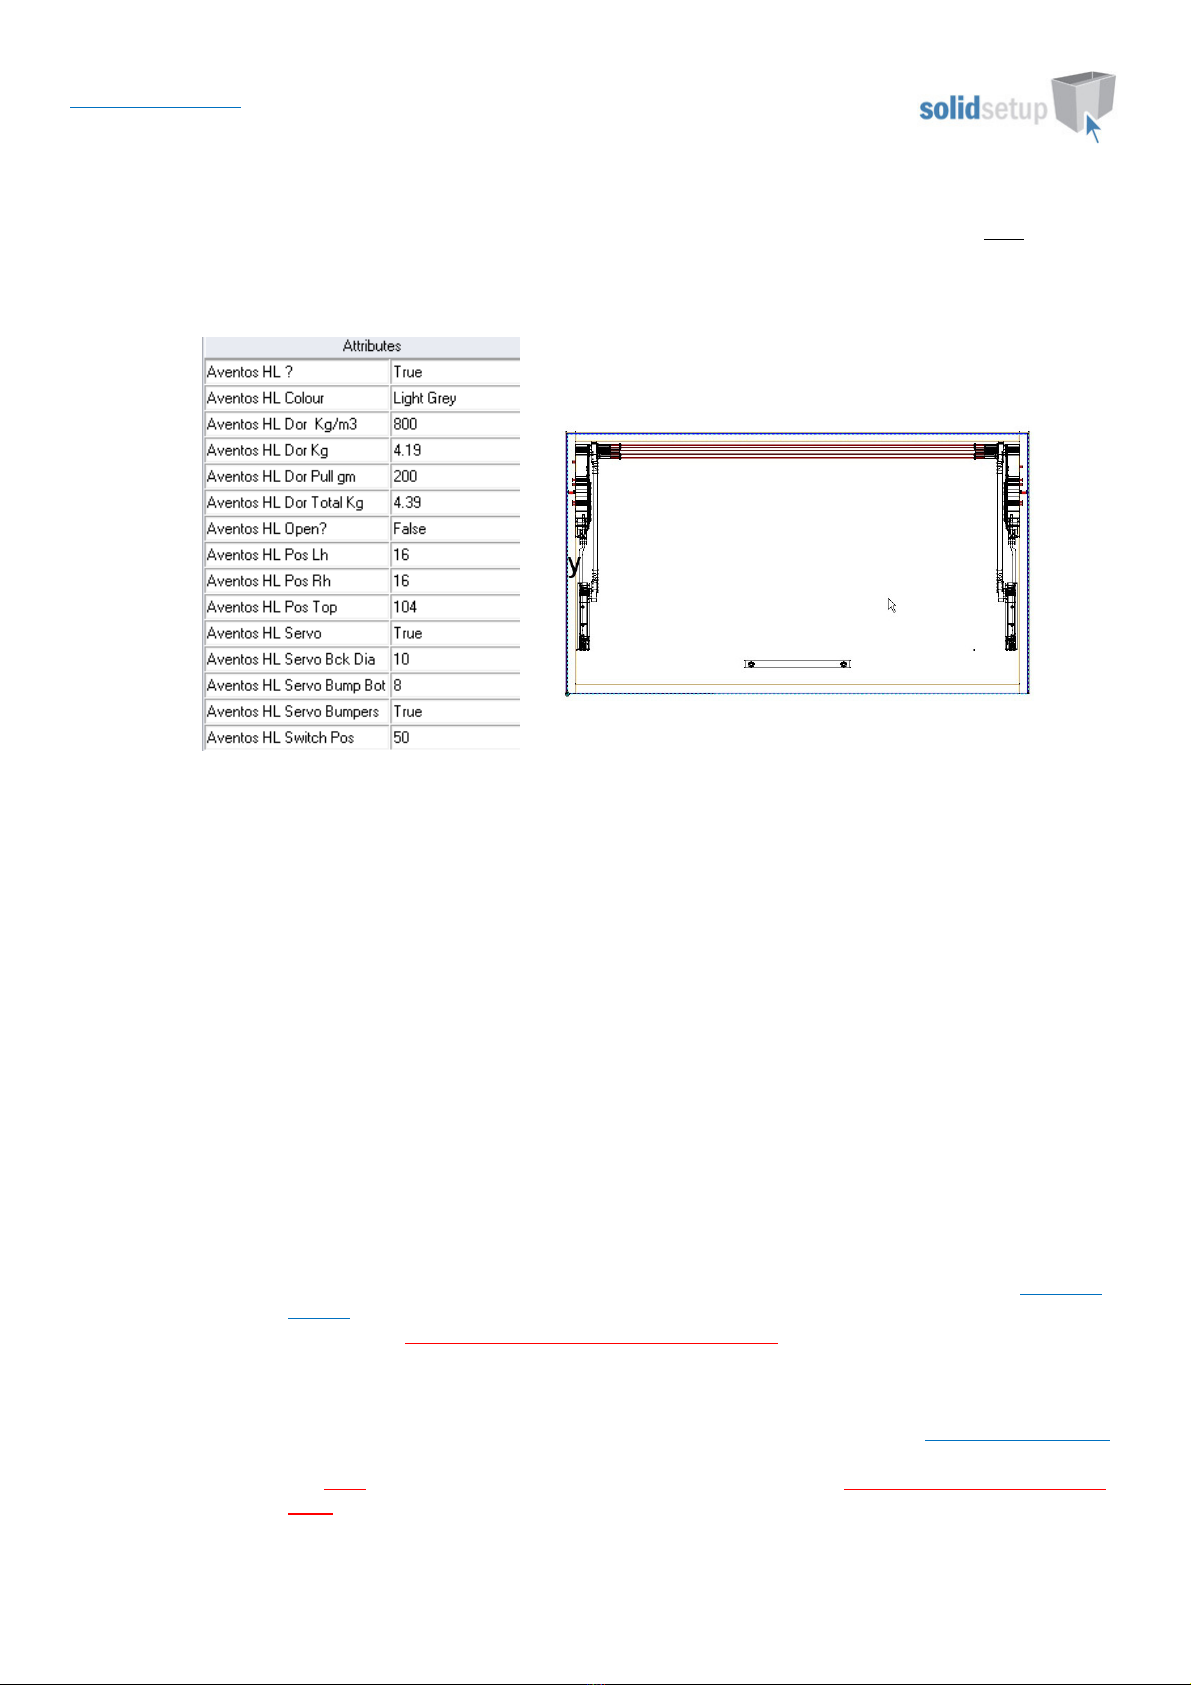
Attributes
•If the “Aventos HL?” attribute is changed to “True” the following attributes will appear on the Door, along
with the Aventos Mechanisms and Arms.
•NOTE: - If the Door is not within the above size ranges, or is too heavy for any Mechanism the Aventos HL parts
will not be added to the Door.
•Aventos HL Dor Kg/m3 This value is the density of the door measured in kilograms per cubic meter and is
used to calculate the weight of the door – change this to the density of the board you are using if known (If
you are using MDF its density varies between 680 and 830 Kg/ 3)
•Aventos HL Dor Kg -This is the weight of the door as calculated by the density value you entered
multiplied by the door size and thickness. – (If you already know the door weight you can change this value
rather than using the density calculated weight.)
•Aventos HL Dor Pull gm -This value is the weight of the handle in grams and is used to calculate the total
weight of the door plus handle – (change this to the total weight of the handle(s) you are using.)
•Aventos HL Dors Tot l Kg -This is the total weight of the door and handle added together and is used to select
the correct Lift Mechanism (If you already know the total door weight plus handle you can change this value
rather than using the density calculated weight.)
•Aventos HL Colour? -Changes the Cover Colour (Light Grey, Silk White, Nickel)
•Aventos HL Open? -Shows the door in the open position.
•Aventos HL Pos Lh -Can be used to move the x position of the left Arm.
•Aventos HL Pos Rh -Can be used to move the x position of the right Arm.
•Aventos HL Pos Top - CRITICAL DIMENSION – You must ensure this v lue is correct or the AVENTOS will
NOT WORK!!! So re d the following CAREFULLY
oWhen the top of the door is t the top of the c binet, this v lue is the dist nce from the top of the
c binet to the 5mm Lug holes in the ends.
oThe Lug holes must be 88mm below the bottom of the top!
o So, for 16mm top this v lue must be 104mm (this is our def ult v lue)
oFor 19mm top this v lue must be 107mm (88 + 19)
oWhen this door h s nother door bove it, this is then the dist nce from the center of the door g p
to the 5mm Lug holes in the ends.
oYou must djust this v lue until the 5mm Lug holes in the ends re 88mm below the bottom of the
shelf.
o
Page 4 of 6
Solid Setup Pty Ltd
www.solidsetup.com
BLMAVHL User Guide
Servo Attributes
•Aventos HL Servo -Turns on Servo Drive and following 4 attributes.
•Aventos HL Servo Bck Di -Changes Servo Back Hole diameter – set to 0 to delete hole.
•Aventos HL Bumpers -Turns off bumpers if not required.
•Aventos HL Bump Bot -Can be used to move the bottom 2 bumpers up if base is scribed up etc.
•Aventos HL Switch Pos -Can be used to move the servo switches up or down.
The following table shows which Lift Mechanism and Arm Assembly are used, for different total door weights:
Door Height Arm Assembly Lift Mech nism (for door weights including h ndle in Kg)
20L2100.NA 20L2300.NA 20L2500.NA 20L2700.NA 20L2900.NA
300 - 349 20L3200 1.25 - 4.25 3.50 - 7.25 6.50 - 12.00 11.00 - 20.00
350 - 399 20L3500 1.25 - 2.50 1.75 - 5.00 4.25 - 9.00 8.00 - 14.75 13.50 - 20.00
400 - 550 20L3800 1.75 - 3.50 2.75 - 6.75 5.75 - 11.75 10.50 - 20.00
450 - 580 20L3900 2.00 - 5.25 4.25 - 9.25 8.25 - 16.50
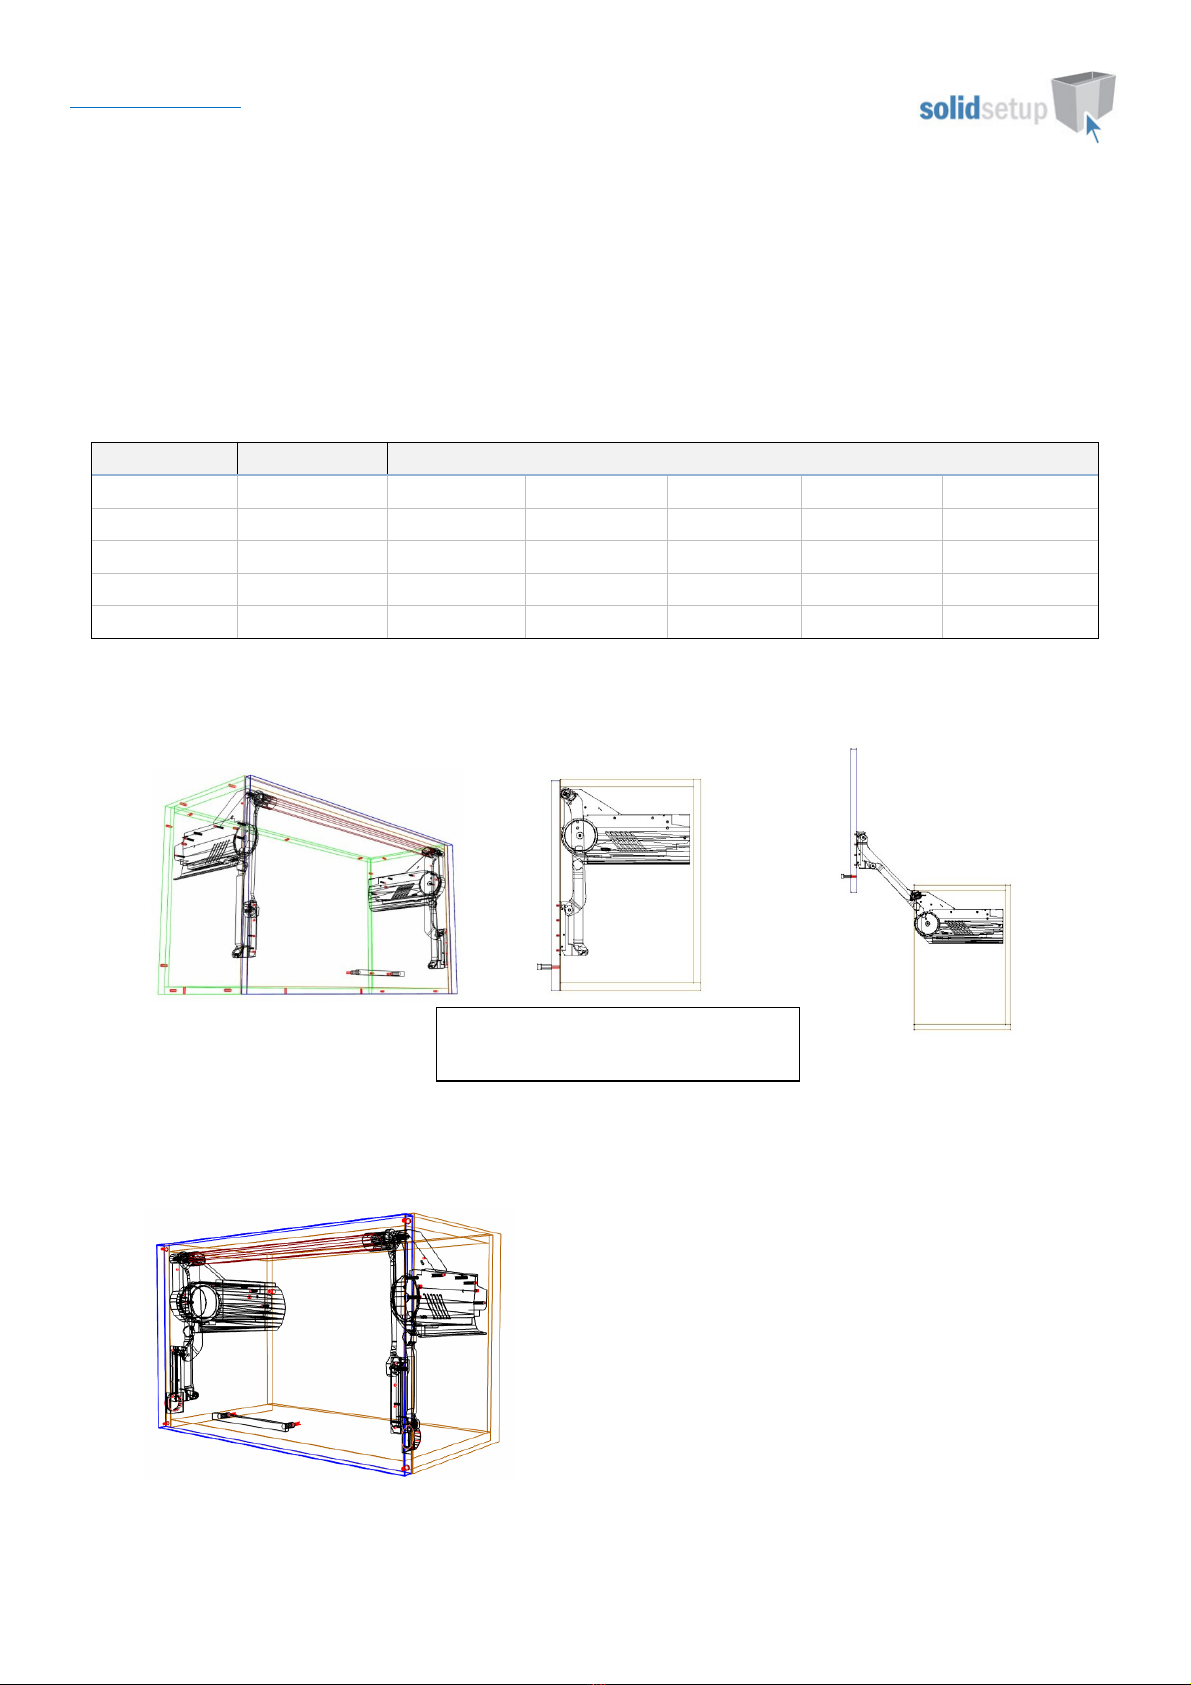
Some Ex mple Im ges:
Aventos HL with Servo Drive
A 450mm high cabinet with a Door
Weight of 5Kg.
Page 5 of 6
Solid Setup Pty Ltd
www.solidsetup.com
BLMAVHL User Guide
Drilling Setup
UCS Public V ri bles
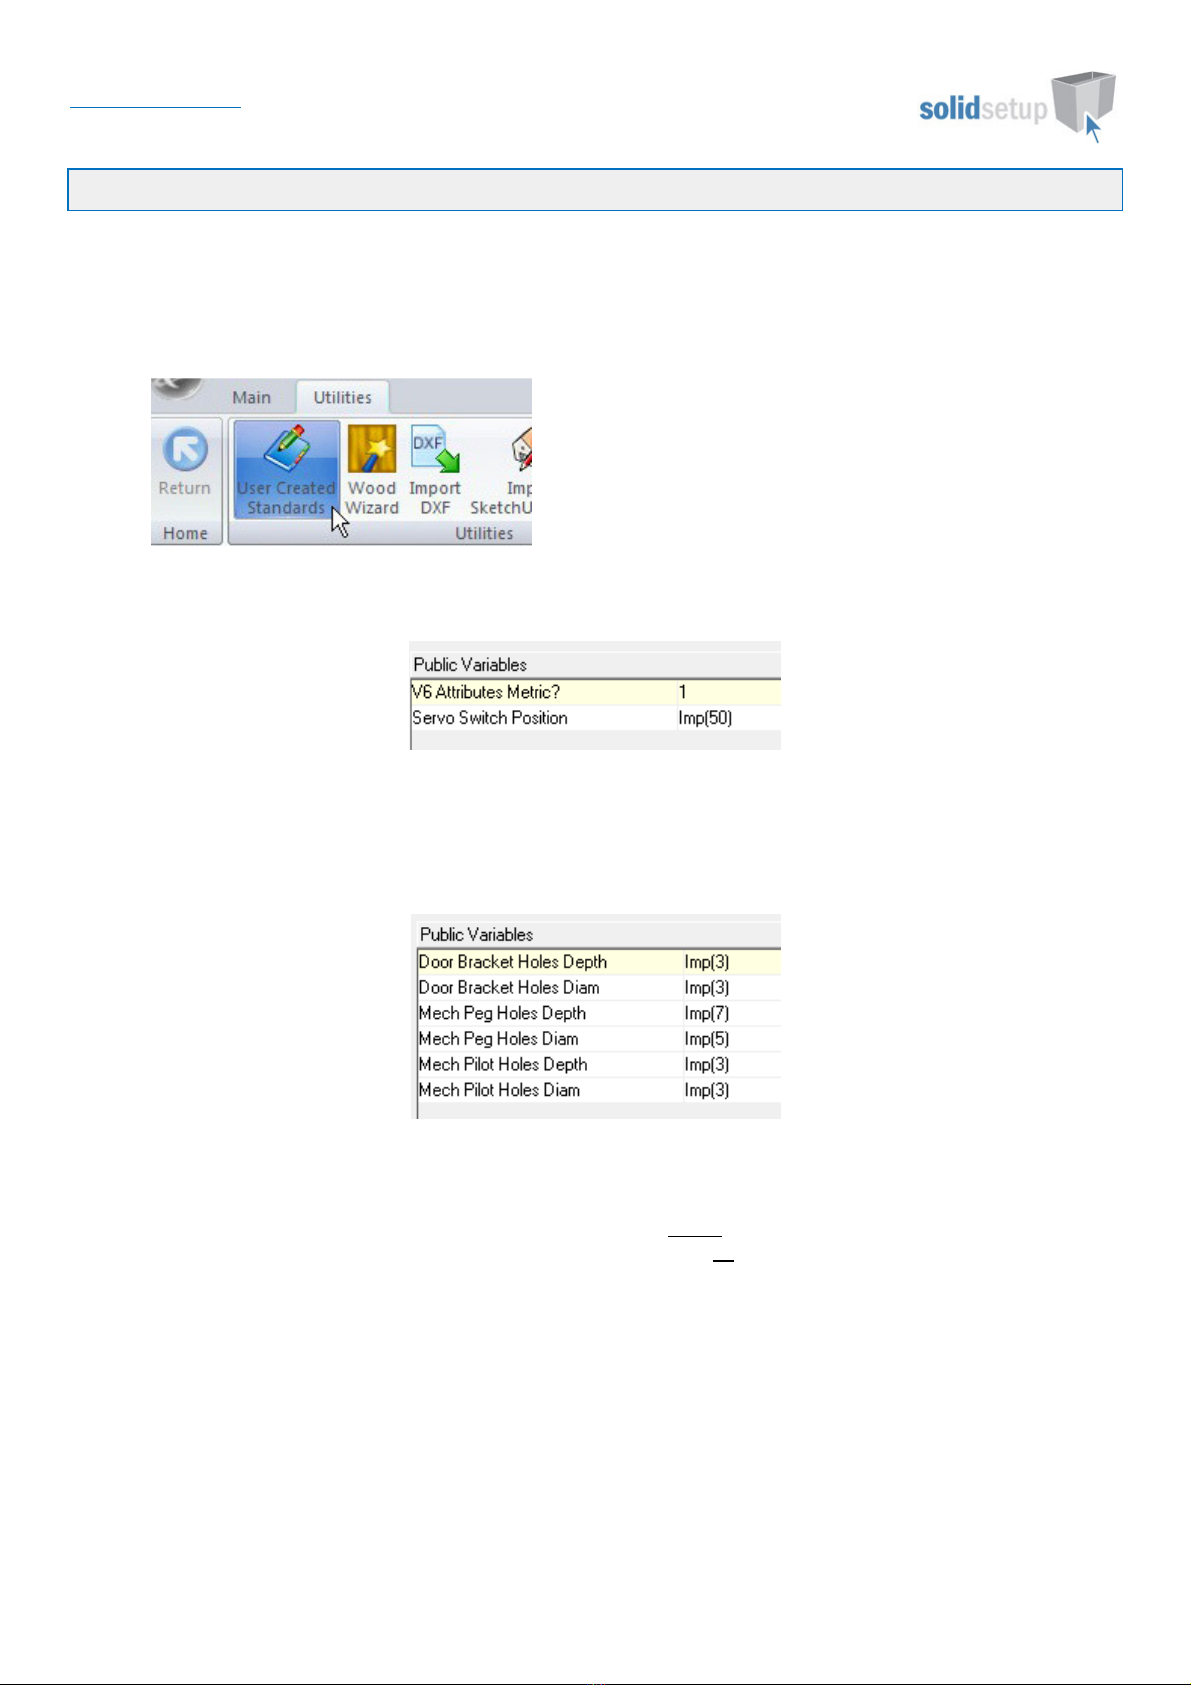
•To change these variables go to the Utilities – Edit User Created Standards from the Room Plan or Elevation
views
•Then click on the “{ DOOR } -- Blum Aventos HL Attributes“ UCS. The Public Variables are at the top right of
the screen.
•V6 ttributes metric? If you are using imperi l units the variable must be set to zero but if you are using
metric units it must be set to 1.
•Servo Switch Position This sets the default servo switch position from the bottom of the door.
•Now click on the “{ DOOR } -- Blum Aventos HL“ UCS. Here we set the various drilling sizes.
•Edit the Imp() values to the diameter and depths you require.
•If you are using imperial sizes simply replace the whole imp() with the imperial measurement instead.
•E.g.: Imp(3) might become 1/8
•Change the Mech Pilot Holes value to 0 if you normally do not want to drill the Aventos Mechanism screw
pilot holes in the cabinet ends or leave it as 1 if you normally do drill them.
•Please note the servo buffers drill at 5mm diameter and 11mm deep.
Once you have changed these values to your requirements, close the UCS editor.
Tools Required
•The drill diameters you choose in the UCS User Definable Variables above are all required for this package to
work. You must have these tool diameters in your tool catalog and in your machine.

Page 6 of 6
Solid Setup Pty Ltd
www.solidsetup.com
BLMAVHL User Guide
P ck ge Exclusions
There may be some items shown in various images contained in this document which are not included in this Package.
Any items such as cabinet screw holes, etc are part of our other packages which are sold separately.
See our website for more detailed information on these packages.
Table des matières
Autres manuels Solid Setup Mobilier d'intérieur


