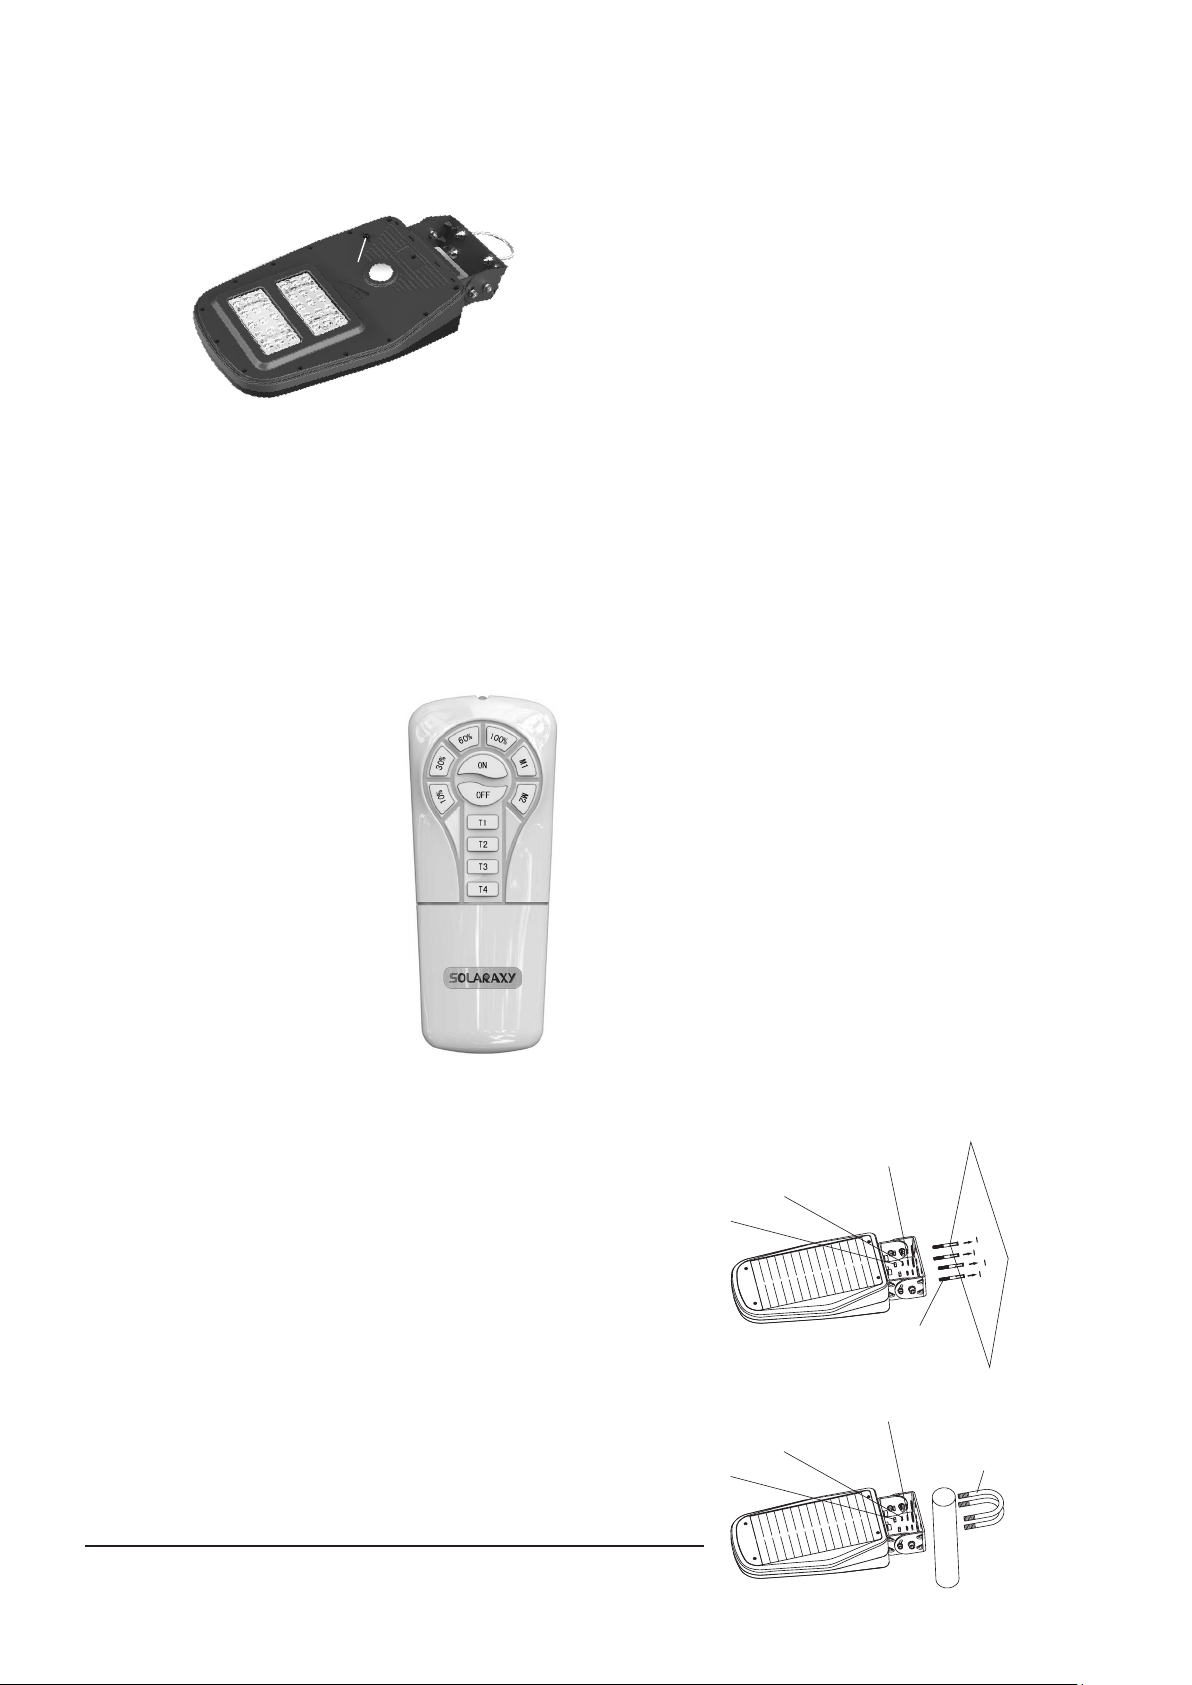
Press
button
Fig. 2
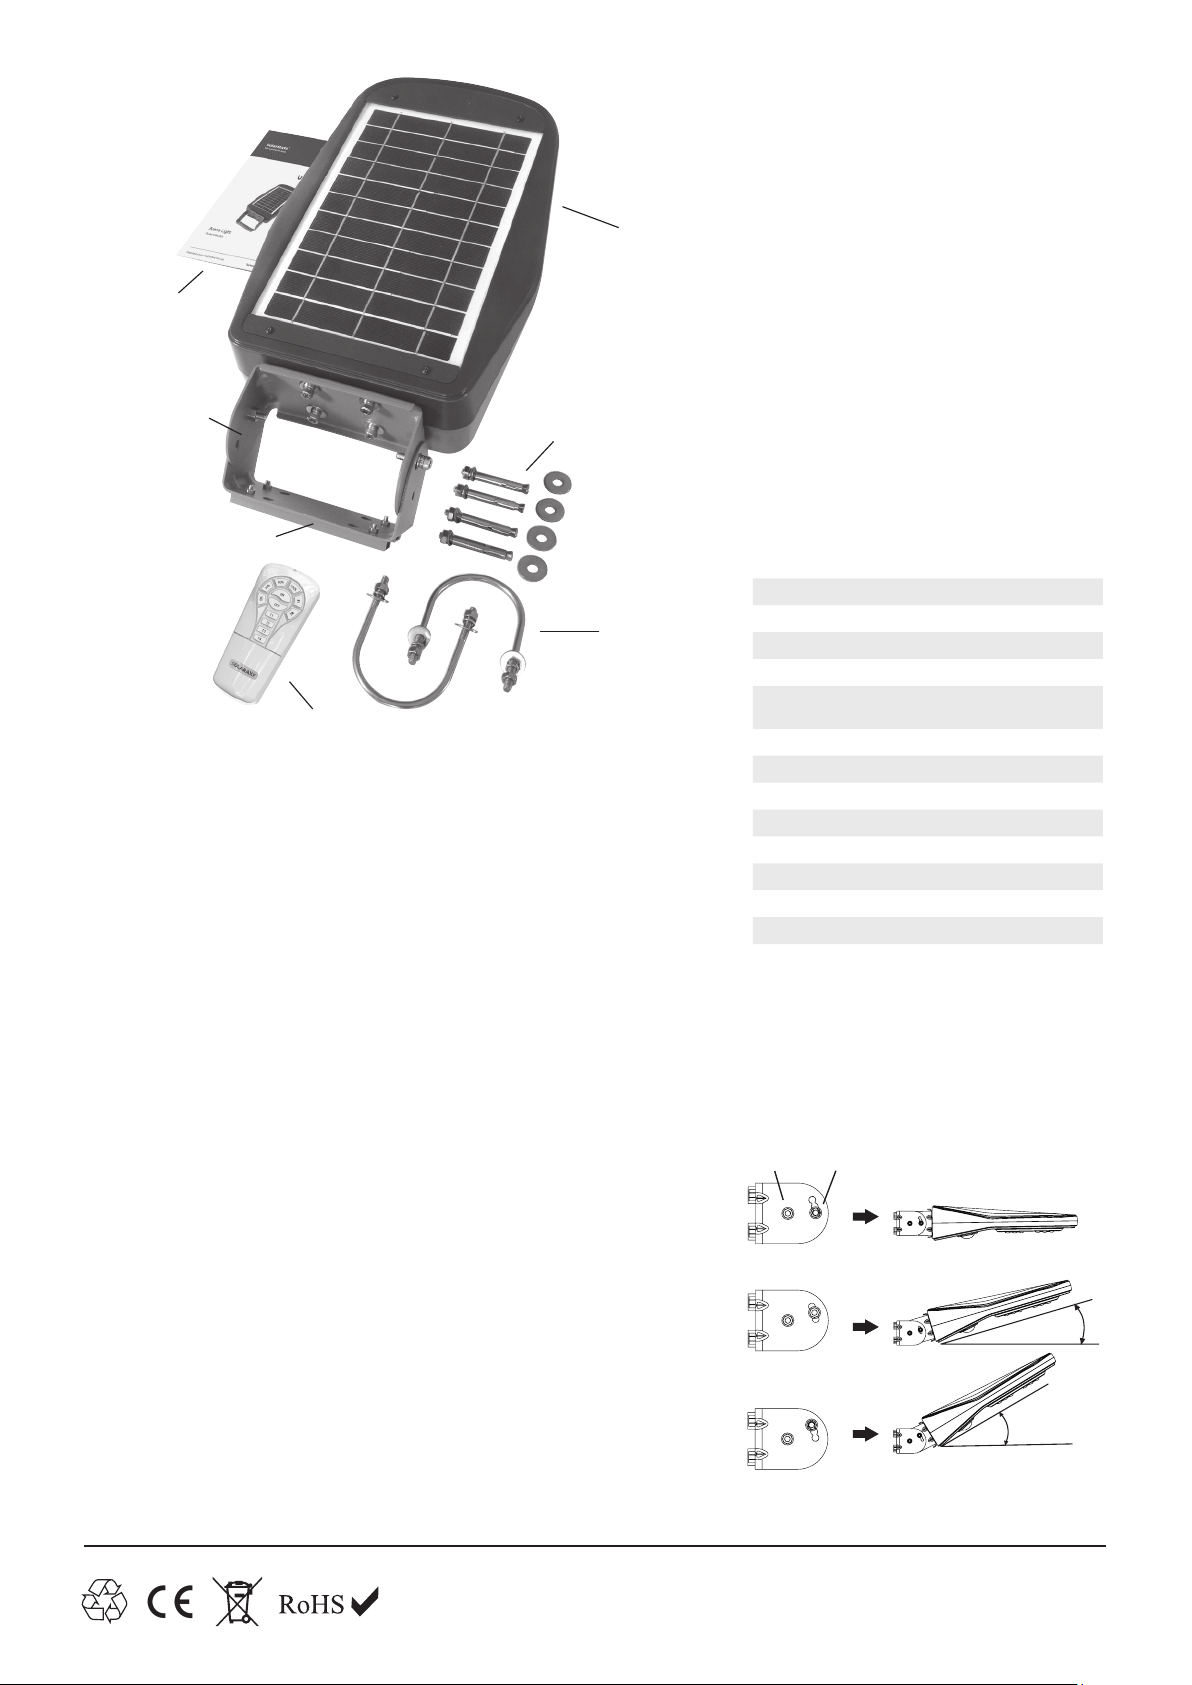
M8 nut
M6 spring washer
M6 flat washers
U bolts (c)
Fig. 5
Fig. 4
M8 nut
M6 spring washer
M6 flat washers
Expansion bolt
*To achieve either 5, 6, 7 or 8 hours as previously noted, you must open
the back of the remote control, where the AAA batteries are located
and you will see a switch – set this to the On position. This means that
pressing T1 will provide a 5 hour time, T2 a 6 hour etc.
M1 – Set the light to illuminate up to dawn to dusk at the 10%
brightness level and then auto switch to 100% brightness when
movement is detected by the lights PIR movement sensor. The light
will remain illuminated at 100% for 30 seconds or until the movement
has stopped and then revert back to the 10% brightness level. NOTE
– this function is not advised during the UK winter because the solar
panel cannot generate enough power to operate the light even at 10%
brightness dawn to dusk.
M2 – Set the light to illuminate up to dawn to dusk at the 30%
brightness level and then auto switch to 100% brightness when
movement is detected by the lights PIR movement sensor. The
light will remain illuminated at 100% for 30 seconds or until the
movement has stopped and then revert back to the 30% brightness
level. NOTE – this function is not advised during the UK winter
because the solar panel cannot generate enough power to operate
the light at the 30% brightness dawn to dusk.
Tip: If the Arena Light is being used in a sports field eg equestrian
arena, 5-a-side football, pitch, tennis court etc the main functions that
will be used are On (to turn the light on) – 60% or 100% (to select the
brightness) and Off (to turn the light off).
NOTE – any Arena Light remote control will operate any Arena Light
– in other words, if multiple Arena Lights are being used, only one
remote control needs be used to operate them all.
6. Fixing Arena Light – Before fixing read point 5
Wall Mounting (Fig. 4):Before starting to mount the Arena Light to
the wall, separate the two halves of the bracket by removing (a) and
(b) fixings. Remove the two metal spacers from the loose half of the
bracket. Using the supplied expansion bolts (if fixing to a cavity or solid
wall), or self tapping screws (not supplied) if fixing to a timber wall,
attach Arena Light through the four holes in the back of the loose half
of the bracket. Once fixed in place, attach Arena Light to the bracket
using fixings (a) and (b).
Pole Mounting (Fig. 5):Firstly, decide how to secure the pole, which
needs to be a standard scaold pole or similar. This might be by
attaching to an existing post and rail fence or it might be free standing.
If free standing, the pole needs to be either cemented into the ground
(500mm min) or xed using the quick release ground mount plate that
can be ordered from www.solartechnology.co.uk. To x Arena Light
to the pole, loosely secure the U bolts (c) through the four holes in
the Adjustment Bracket, then slide the pole through the U bolts and
tighten so Arena Light is rmly clamped to the pole. Now position the
pole in the ground.
NOTE – when mounting Arena Light try to keep the light head as
level as possible because this helps ensure the light does not auto
hibernate itself.
Fig. 3
5. Operation of Light
Before fitting the light in its final position push and hold the button
on the underside of the light (Fig. 2) for a few seconds until the light
comes on. It will stay illuminated for a short while and will then turn
off but it confirms it is ready for night time operation. Should you
ever need to store your Arena Light
press the button in (Fig. 2)
and this will switch the
whole system off.
First Night Operation: On the first evening, after the Arena Light has
been primed and fitted, the light will automatically turn on in M1 mode
(see below). NOTE – sometimes this will not occur automatically
depending on what setting it left our factory in. In this case just press
the On button on the remote control (Fig. 3). Its important that if you
intend to use your light via the remote control (ie only turning it on
when you want it illuminated and off when you don’t) you return to
the light after dark (only on the first night) and press either the 60% or
100% button to increase the brightness and then press the off button
once you have finished. Now you can return to the Arena Light any
evening and it will only illuminate when you press the On button.
Lighting Modes: After the first night of use, the remote
control button provides the following functions:
On – turns the light on (at night time only);
Off – turns the light off.
10% - illuminates the light at 10% of its
brightness – run time max dusk to dawn
(typical winter run times, up to 12 hours
per night)
30% - illuminates the light at 30% of its
brightness – run time max dusk to dawn
(typical winter run times, up to 4 hours
per night)
60% - illuminates the light at 60% of its
brightness – run time up to 10hrs (typical
winter max run times, 2 hours per night)
100% - illuminates the light at maximum
brightness run time up to 6 hours (typical
winter max run times, 1 hour per night)
In each of the above modes the light can be
turned off at any time (by pressing Off) but there
is also the option to set the light on a specific timer as follows:
T1 – press this to set any of the above brightness settings for a fixed run
time of 1 or 5* hour/s – after 1 or 5 hour/s the light automatically reverts
to M1 mode (see below). To cancel the timer mode press and hold T1 for
2 seconds and you will see 3 quick flashes of a red indicator LED on the
light to confirm.
T2 – press this to set any of the above brightness settings for a fixed run
time of 2 or 6* hour/s – after 2 or 6 hour/s the light automatically reverts
to M1 mode (see below). To cancel the timer mode press and hold T2
for 2 seconds and you will see 3 quick flashes of a red indicator LED on
the light to confirm.
T3 – press this to set any of the above brightness settings for a fixed run
time of 3 or 7* hour/s – after 3 or 7 hour/s the light automatically reverts
to M1 mode (see below). To cancel the timer mode press and hold T3
for 2 seconds and you will see 3 quick flashes of a red indicator LED on
the light to confirm.
T4 – press this to set any of the above brightness settings for a fixed run
time of 4 or 8* hour/s – after 4 or 8 hour/s the light automatically reverts
to M1 mode (see below). To cancel the timer mode press and hold T4
for 2 seconds and you will see 3 quick flashes of a red indicator LED on
the light to confirm.
Technical helpline 01684 774 000