Snooper Shotsaver Tour Pro S430 Manuel utilisateur

User manual
tour pro s430

Page
Components 3
Basic Operation 4
Play Golf
Starting a new game and selectiing a golf course 5
Find a course using GPS
Find a course by name
Using Tour Pro Hole View 6
Display lay-up distances and distances to hazards 7
Using FCB (Front, Centre, back) Hole View
Using the Electronic scorecard 8
Recording Club distances
Golf settings 9
Unit of mesurement
User profile
Player list
Languages
Page
Games History 9
View club distance
Registering your S430 Tour Pro
Updating S430 Tour Pro
General User Settings 10
Brightness
Volume
Language
Calibrate the screen
Power save
Information
Picture 11
Satellite Navigation & GPS Speed Trap locator
Troubleshooting 12
Snooper Accessories & Additional Software 14
Service under Warranty 15
2
Contents
Important Safety Information
• Please read this carefully before using Shotsaver Tour Pro .
• Do not open the case of Shotsaver Tour Pro
• Always treat your product with care and keep it in a clean and dust-free
place
• Do not expose Shotsaver Tour Pro to moisture or humidity.
• Do not expose Shotsaver Tour Pro to extreme high or low temperature.
• Do not attempt to disassemble your product.
• Use only the chargers and batteries approved by Performance Products
Limited. The use of any other type may invalidate any approval and warranty.
• Never use the charger if the plug is damaged.
• Never touch the charger if your hands/ feet are wet.
• Do not expose the charger to water, it may cause electrical fires.
• Do not attempt to repair the charger yourself for your own safety.
• To reduce the risk of fire or burns, do not disassemble crush or puncture the
battery.
• Do not let the metal contacts on the battery touch other metal object, it
could lead to short-circuit and damage the battery.
Copyright
Copyright @2012 SNOOPER. All rights reserved.
Product specifications and features are for reference only and are subject to
change without prior notice.
Declaration
This User Manual is published by SNOOPER without any warranty.
Improvement and changes to this User Manual necessitated by typographical
errors, inaccuracies of current information, or improvements to programs and/
or equipment, may be made by Performance Products Limited any time and
without notice. Such changes will, however, be incorporated into new editions
of this User Manual.
tour pro s430

UK • 3
Return to contents
Components Included
The following components come as standard with your Shotsaver Tour Pro:
1 x Snooper Shotsaver Tour Pro system
1 x Quick Start Guide
1 x USB PC connection lead
1 x Download Software Disc, including the full user manual
PLEASE NOTE
Due to our desire to continually improve our products, the specification may change without notice.
S430

UK • 4
Return to contents
Basic Operation
1. Register Shotsaver FREE at www.snooperneo.co.uk
2. Charge unit with charger provided until the LED on the front of the unit changes from red to green.
3. Power the unit on by pressing and holding the button below the LCD until the Shotsaver launch screen is displayed.
Press an hold the power button.
4. Tap on the ‘Golf’ icon on the home menu screen to launch the Shotsaver Tour Pro software.
5. Play Golf
Tap the ‘Play Golf’ icon to enter the Tour Pro range finder software.
Note: To switch the unit Off the S430TP must be in the home menu screen.
To switch the S430TP Off during a ‘game’
1. Press the arrow on the bottom left hand side of the screen.
2. Press end current game
3. “Are you sure” Press ‘Yes’
4. Press ‘Home Menu’
5. “Do you want to exit the golf application?” Press ‘Yes’
6. Now press and hold the button (below the LCD screen).
7. Press the ‘power off button’ after a few seconds the unit will switch off.
To switch off when in the Shotsaver menu screen follow steps #4 to #7
S430

UK • 5
Return to contents
Starting a new game and selecting a golf course.
Find a course using GPS
Wait a few moments for your unit to connect to GPS and it will automatically display the courses nearest to your location. If you a
standing at the course you are about to play, the name of that course should be displayed at the top of the list. Simply tap the golf
course you are going to be playing at, then select the colour of Tee box you will be using and press the ‘Start’ button to begin.
Find a course by name
Press the Spell button and then select the country that the course is in. Then, use the keyboard to type in the name of the golf
course or the first few letters of the name you want to find and press the ‘Search’ button. Your unit will display a list of golf courses
that match your request. Tap the golf course you are going to be playing at, then select the colour of Tee box you will be using
and press the ‘Start’ button to begin.
Changing courses or resuming a game in progress.
If you exit a course before completing it you will be shown three buttons. ‘Start a new game, Continue current game, End
current game’ If you want to start a new game, press the ‘Start a new game’ button. If you are in the middle of a game and want
to return to it, press the ‘Continue current game’ button. If you want to end a game and exit the Shotsaver Tour Pro software, press
the ‘End current game’ button.

UK • 6
Return to contents
Using Tour Pro Hole View
Your unit will display an overhead view of the entire hole as per the example below
1. Hole number and Tee box colour selected. Press and use the arrows to mobe backwards and forwards through the holes.
Press the hole number to select the hole you want to view.
2. Par
3. Stroke Index
4. Distance to the front of the green
5. Distance to the middle of the green
6. Distance to the back of the green
7. Switch between 2D view, 3D view & Green View
8. See Flyover of hole.
9. Move to next hole
10. Scorecard/Record Club Distance
11. Exit round
12. Zoom in or out
13. Battery power indicator.
2D View 3D View Green View
S430
1
2 3 7
6
5
4
12
11
8
91013

UK • 7
Return to contents
Display lay-up distances and distances to hazards
Using a tee peg or similar, tap anyway on the screen to display the distance to that point from the point where you are standing.
The distance from that point to the front, centre and back of the green will also be displayed as indicated.
Using FCB (Front, centre, back) Hole View
If you select a course where Tour Pro technology is not available the FCB Hole View will be displayed instead. FCB will display
distances to the front, centre and back of each green as well as the distances to selected bunkers and other hazards around the
course.
1. Hole number and Tee box colour selected. Press and use the arrows to move backwards and forwards through the holes.
Press the hole number to select the hole you want to view.
2. Par
3. Stroke Index
4. Distance to the front of the green
5. Distance to the middle of the green
6. Distance to the back of the green
7. Move to next hole
8. Scorecard
9. Exit round
10. Battery power indicator.
11. See Flyover of hole.
1 2 3
6
5
4
9
7810 11

UK • 8
Return to contents
Using the Electronic scorecard
First you need to set up your ‘User profile’ and also the ‘Player list’ if you want to save scores for yourself and any other players
in your group. Go to the Shotsaver menu and tap on ‘Golf settings’ and then ‘User profile’. Then enter your initials or a short
name up to 8 characters long and your handicap. Next go to ‘Player list’, press ‘Add’ and enter the name and handicap of any
other players in your group. To set up the scorecard for play, first find and select the course you wish to play. Once the course has
loaded, press the ‘Menu’ button followed by the ‘Scorecard’ button. Next press the ‘Scorecard menu’ button and press the ‘Add
player’ button. You will then be shown a list of all the players you have stored on your device. Highlight the player you want to
add and press ‘Select’
During play when you want to enter a score, press the (menu) button, followed by the scorecard button. Tap the box in the
column below the name that corresponds with the hole you have just played, enter your score and press OK to save it. Press the
back button to return to Hole view. The Electronic scorecard will automatically calculate your Net and Stableford scores.
Recording club distances
You can only record club distances whilst playing a course, so first find and select the golf course you are playing at. Once the
course has loaded, press the ‘Menu’ button followed by the ‘Record club distance’ button. Then highlight the club you want to
record, stand alongside the ball before you strike it and press ‘Select’. ‘Distance Tracking Mode’ will be displayed at the bottom of
the screen. Next, play your shot and walk to where the ball has landed. When you are alongside your ball again press the ‘Target’
icon at the bottom right hand corner of the screen. The distance of that shot will be displayed on the screen and saved for future
reference.
To view the club distances you have recorded, go to the main menu, press ‘Golf Settings’ and then ‘View Club Distance’
UK • 9
Return to contents
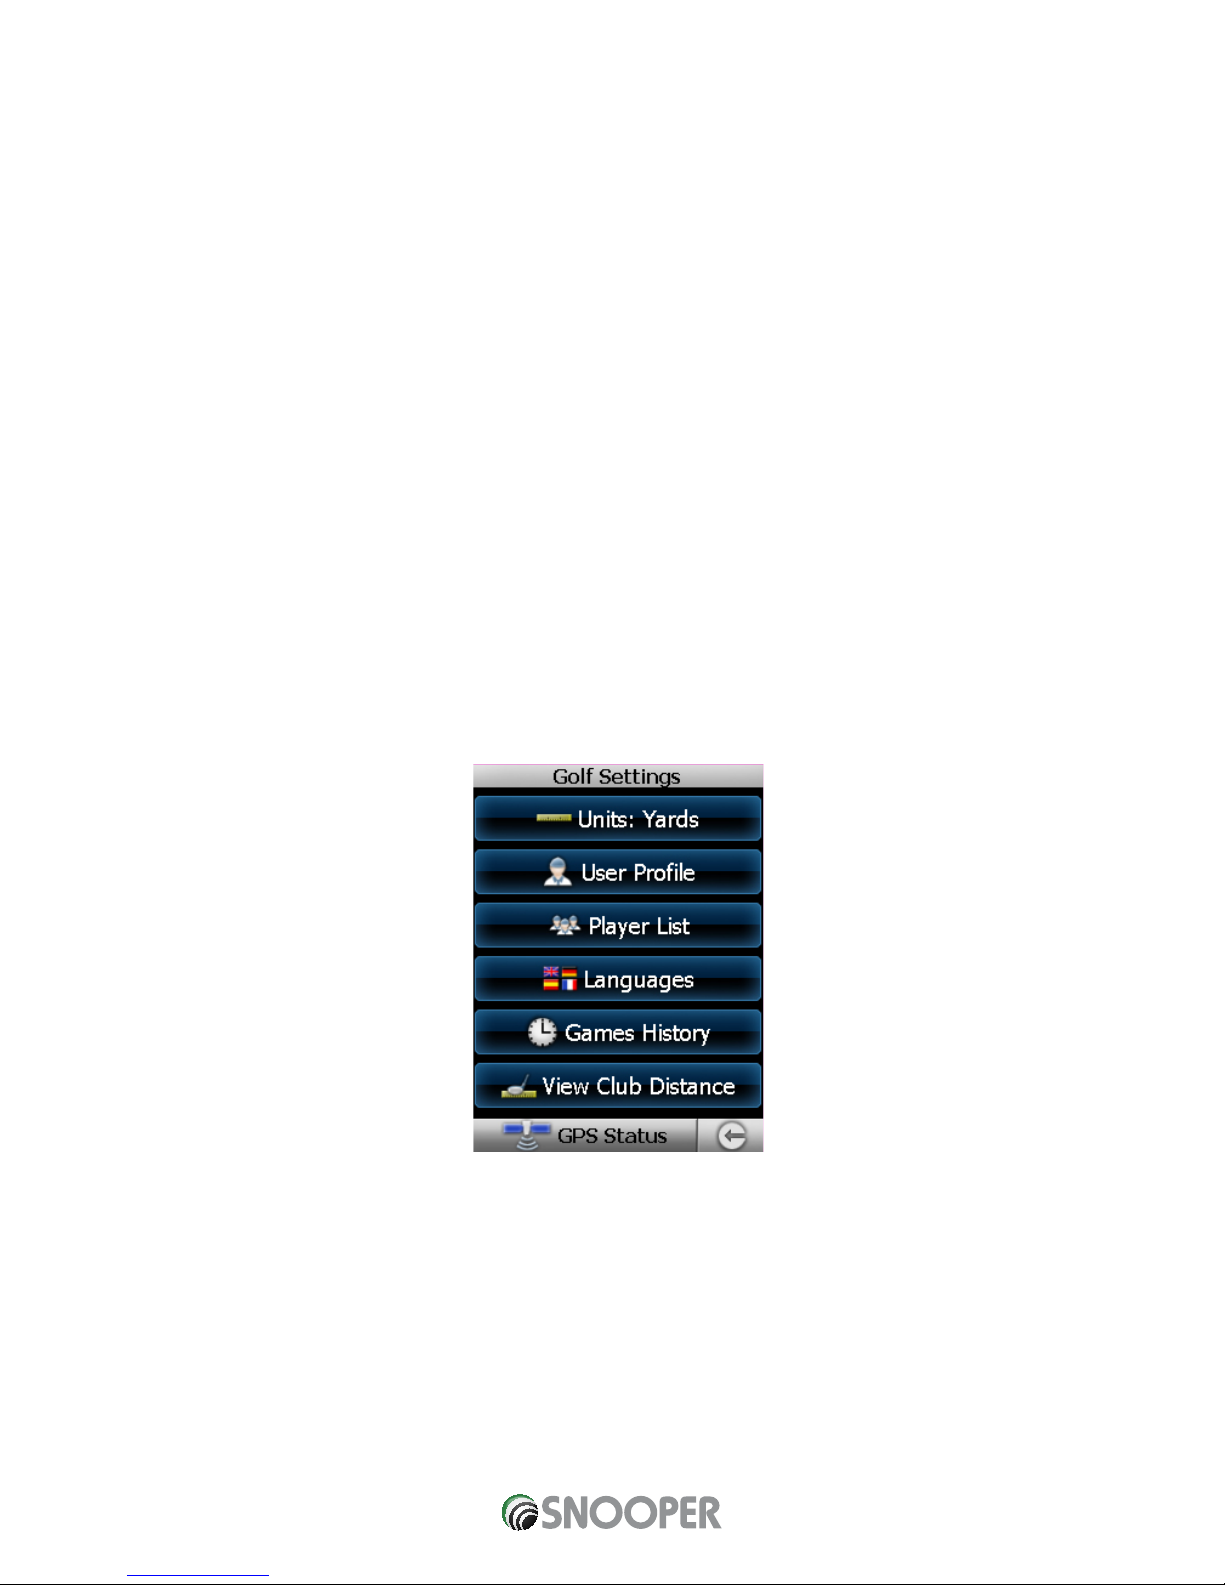
Golf settings
Unit of measurement
Tap the ‘Units:’ button to change the unit of measurement between metres and yards
User profile
Tap on the ‘User profile’ button to set up your name and handicap. You will need to do in order for the Electronic score to
calculate your Net and Stableford scores correctly.
Player list
Tap on the ‘Player list’ button to add the details of additional players. This is required if you would like to use the Electronic
scorecard to calculate scores for other players in your group as well as your own.
Languages
Tap on ‘Languages’ to change to a different language
Games history
Tap on ‘Games history’ to view historical Electronic scorecard data. Highlight the round of golf you would like to review and press
‘View scorecard’
View club distance
Tap on ‘View club distance’ to view all club distances you have you recorded. The View club function enables you to see the
distance of your last shot recorded, your average distance, maximum distance and minimum distance recorded for each club.
Registering your S430 Tour Pro
To keep the golf course data on your S430 Tour Pro up to date, you will need to update the Shotsaver Golf Course database
periodically. Before you can perform an update you will need to register your unit. To register please visit www.snooperneo.co.uk.
Registration is free of charge.
Updating S430 Tour Pro
The Shotsaver S430 Tour Pro comes preloaded with all the golf course data we have available at the time it is produced. However
we continue to expand this database and new golf course information is added weekly. To update your S430 with the latest
Shotsaver golf database take the CD Rom included and insert it on to a PC with internet connection and follow the on-screen
instructions. Please note that you will need to register your S430 first at www.snoopernoe.co.uk. Registration is free of charge.

UK • 10
Return to contents
General Unit Settings
To change the settings of your device press the Settings’ button in the main menu.
Brightness
To adjust the brightness of the display press the brightness button in the Menu. Use the + and - buttons to increase or decrease
the brightness of the screen. Press the X button to confirm and exit the setting.
Volume
To adjust the volume press the volume button in the menu. Use the + and - buttons to increase or decrease the volume. Press the
X button to confirm and exit the setting.
Language
To change the language press the language button in the menu and then the language you require. Press the X button to confirm
and exit the setting.
Calibrate the screen.
To re-calibrate the screen press the Calibrate button in the menu and then follow the on-screen instructions.
Power Save
The battery life of your Shotsaver Tour Pro will vary depending on what settings you use.
Backlight permanently on - up to 5 hours
With the backlight permanently on the battery will last up to approximately 6 hours.
Backlight auto off setting - up to 10 hours
Extend the battery life up to 11 hours by setting the backlight to automatically switch off after a short period of activity (similar to
most mobile phones) Go to the SETTING section in the Main Menu of the device displayed when you first power the unit on. Click
on POWER SAVE and choose your preferred BACKLIGHT OFF TIME - 1min, 30 sec, 20 sec, 10 sec.
Information
Press the information button for information on the software and hardware version of your device.
Picture
View pictures on SD card
To view pictures on this device first put the images you want to view on suitable micro SD card. Put the SD card in to the SD card
slot on the underside of the unit. Press the Picture icon and to view the pictures on the SD card tap SDMMC Card. The images you
have placed on the SD card will be shown in the Preview section. Scroll up or down using the arrows and tap the ‘thumbnail’ of
the image you want to view. Use the back and forwards arrows to scroll through your images. Tap the ‘X’ button to exit the Picture
at any time.
Slide show
First select the speed of the slides to be viewed. You can select the images to be displayed for 1, 2, 3, 4, 5 or 10 seconds. Once you
have selected the time you require, press the play button and all your images will be displayed in rotation. To exit the slide show
at any time tap anywhere on the screen.
Table des matières
Autres manuels Snooper GPS

Snooper
Snooper SHOTSAVER S430 Manuel utilisateur

Snooper
Snooper SPT200 Manuel utilisateur

Snooper
Snooper Sapphire Plus Manuel utilisateur

Snooper
Snooper Shotsaver S210 Manuel utilisateur

Snooper
Snooper S2 neo Manuel utilisateur

Snooper
Snooper SC5800 Manuel utilisateur

Snooper
Snooper S7000 Manuel utilisateur

Snooper
Snooper my-trak wpt250 Manuel utilisateur

Snooper
Snooper S1000 Manuel utilisateur

Snooper
Snooper Shotsaver S320 Manuel utilisateur


