SnoMaster ZBC-15 Instructions d'installation
ZBC-15 ICE-MAKER
USER MANUAL
AND PRODUCT
SPECIFICATIONS

CONTENTS
Before Using Your Appliance
Critical Safety Information For Your Safety
IMPORTANT SAFETY INFORMATION 02
04
07
07
INSTALLATION INSTRUCTIONS
Water
Accessories Included
Control Panel
MAINTENANCE
Cleaning the Interior
Cleaning the Exterior
ENERGY SAVING TIPS
01
Warranty Registration
Service and Support
WARRANTY, SERVICE AND SUPPORT
08
TROUBLESHOOTING
11
PARTS LIST
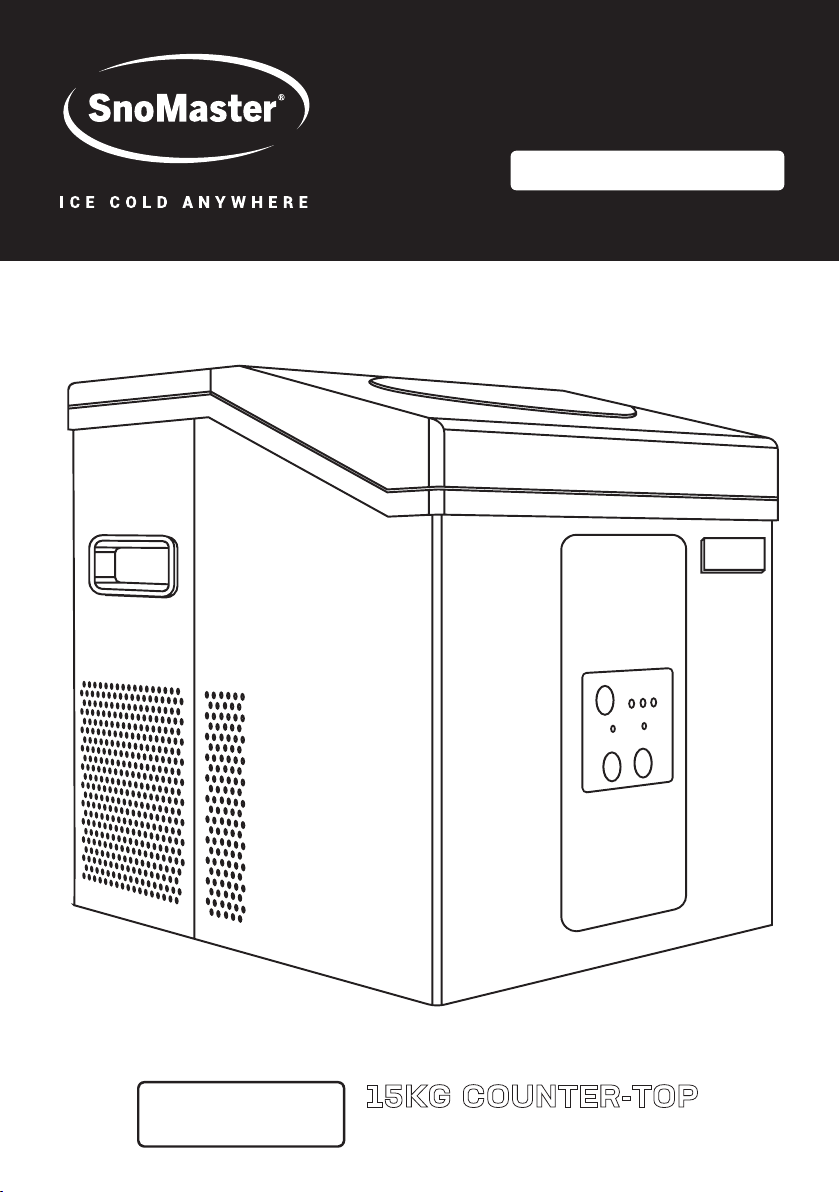
THANK YOU FOR PURCHASING THE ZBC-15,
15KG COUNTER-TOP ICE-MAKER
This product is warranted for 5 years on the compressor, 3 years
on the unit and 1 year on all parts not listed from the date of
purchase. Warranty does not cover products that have not been
used in accordance with the user guide or are outside the warranty
terms and conditions, which can be found at the following url:
https://snomaster.co.za/warranty/
WARRANTY, SERVICE AND SUPPORT
WARRANTY REGISTRATION
Register your SnoMaster ZBC-15,
15kg Counter-Top Ice-Maker
now for warranty, and allow us
to provide you with the best
possible after sales service:
• Please log onto our website at
www.snomaster.co.za
• Click on the ‘Warranty’ tab.
• Enter warranty information and
upload proof of purchase at the
bottom of the page.
SERVICE AND SUPPORT
Should an instance arrive where
you require assistance, contact
our service team:
• Please log onto our website at
www.snomaster.co.za
• Click on the ‘Support’ tab.
• Click ‘Find a Repair Agent Near You’
and enter your region.
• Alternatively contact us via email:
info@snomaster.co.za or contact
us on +27 11 392 5315.
ON THE UNIT
WARRANTY
ON COMPRESSOR
WARRANTY
01

This manual contains important information including safety,
installation, maintenance and warranty instructions of the
SnoMaster ZBC-15, 15kg Counter-Top Ice-Maker.
Please read this manual carefully before use and follow all safety
information and instructions. It is recommended to keep this
manual for easy reference so that you are familiar with the
operation and maintenance of your appliance.
CRITICAL SAFETY INFORMATION FOR YOUR SAFETY
Before using this appliance, ensure it is correctly positioned and
installed as outlined in this manual. Follow these basic precautions
to prevent the risk of fire, electrical shock, or injury:
• This appliance is designed for domestic indoor use only and is
exclusively intended for making ice.
• Ensure that the incline angle of the appliance is not more than 45°
during transportation or operation.
• Before using your appliance for the first time, you should wait about
12 hours after positioning it in a place.
• The appliance needs to be levelled for optimal operation. You can
adjust the appliance feet to level it +/- 10mm.
• Ensure the plug is easily accessible after positioning the appliance.
• Avoid connecting or disconnecting the electric plug with wet hands.
• To disconnect the appliance, grip the plug and pull it from the wall
outlet. Never pull out the plug by the cord.
• It is advisable to use a dedicated power source and avoid
using extension cords.
IMPORTANT SAFETY INFORMATION
SNOMASTER ZBC-15, 15KG COUNTER-TOP ICE-MAKER
02

• Please unplug the appliance or disconnect the power before
performing any cleaning, maintenance, or servicing.
• If the appliance power supply cord is damaged, it must be replaced by
SnoMaster, its approved agent, or a similarly qualified person to
prevent any hazard.
• It is recommended that the circuit breaker size should be no more
than 20 amps.
• This appliance operates on a single-phase voltage of 230V/50Hz, to
avoid electrical surges, it is advised to use a surge protector plug.
• Cleaning and maintenance should be supervised by adults, especially
if children are involved.
• The appliance should be placed on a flat surface and should be
completely unobstructed. Ensure to leave 150mm space around the
appliance to ensure proper ventilation for the appliance. Place the
appliance away from direct sunlight and heat sources (stove, heater,
radiator, etc.).
• Unless specifically recommended in this manual, do not attempt to
repair or replace any part of the appliance. All other servicing should
be referred to a qualified technician.
• Never clean appliance parts with flammable fluids as they may create
a fire hazard or explosion. Also, avoid storing or using petroleum or
other flammable vapours and liquids near this appliance.
• Avoid solvent-based cleaning detergents or abrasives on the interior
or exterior as they may damage or discolour it.
Please observe the following instructions:
• Always ensure the appliance is out of reach of
children. Before disposing of it, damage the body.
• Follow the instructions of your local regulations
when disposing.
WHEN DISPOSING THE APPLIANCE
03
This appliance contains CYCLOPENTANE and R600a
refrigerant , which is FLAMMABLE and may cause a fire
or an explosion.
• Remove the appliance from the box, ensure all packaging materials,
stickers and films are removed from the product. Clean the
appliance's surfaces with a mild detergent and a damp cloth before
initial use.
• Clean the inner liner, ice basket, water storage tank, water box ice
pusher and evaporator with a mild detergent and damp cloth before
initial use.
• Ensure the appliance is placed on a level, sturdy surface.
•Caution: Installing the appliance on carpeting may lead to
discoloration due to heat emission from the compressor.
• Ensure adequate air circulation for the appliance by maintaining a
clearance of at least 150mm on all sides.
• Dimensions (mm) Unit: (H) 415 (W) 380 (D) 400
• Storage Volume: 2Kg
• Net Weight: 17.2Kg
• Ice Making Capacity: 15Kg/24h
• Voltage: 220-240V/50Hz
• Total Input Power: 110W
• Dimensions (mm) Packaged: (H) 455 (W) 425 (D) 455
• Rated Current: 1.0A
• Suggested Applications: Oce, Apartment, Kitchen, B&B,
Home Bar, Pub
• Design Criteria: Engineered for the African Climate
12 CUBES PER CYCLE | PORTABLE | STAINLESS STEEL
INSTALLATION INSTRUCTIONS
Before installing your new appliance, please read all safety
instructions in this manual and follow the installation
instructions below:
PRODUCT FEATURES
SPECIFICATIONS:
04
• Water treated with reverse osmosis purification often gives a false
water indicator. You can add a pinch of salt to correct this, or rather
use filtered mineralized water.
• Ice cycle time is dependent on water temperature.
• Clean and drain the appliance at least once or twice a month.
Lemon juice or 10ml vinegar can be added to the water to help
the cleaning process.
• To prevent lime build-up it is advised to clean the appliance with a
descaling liquid once a month, dependent on the water quality
in your area.
WATER
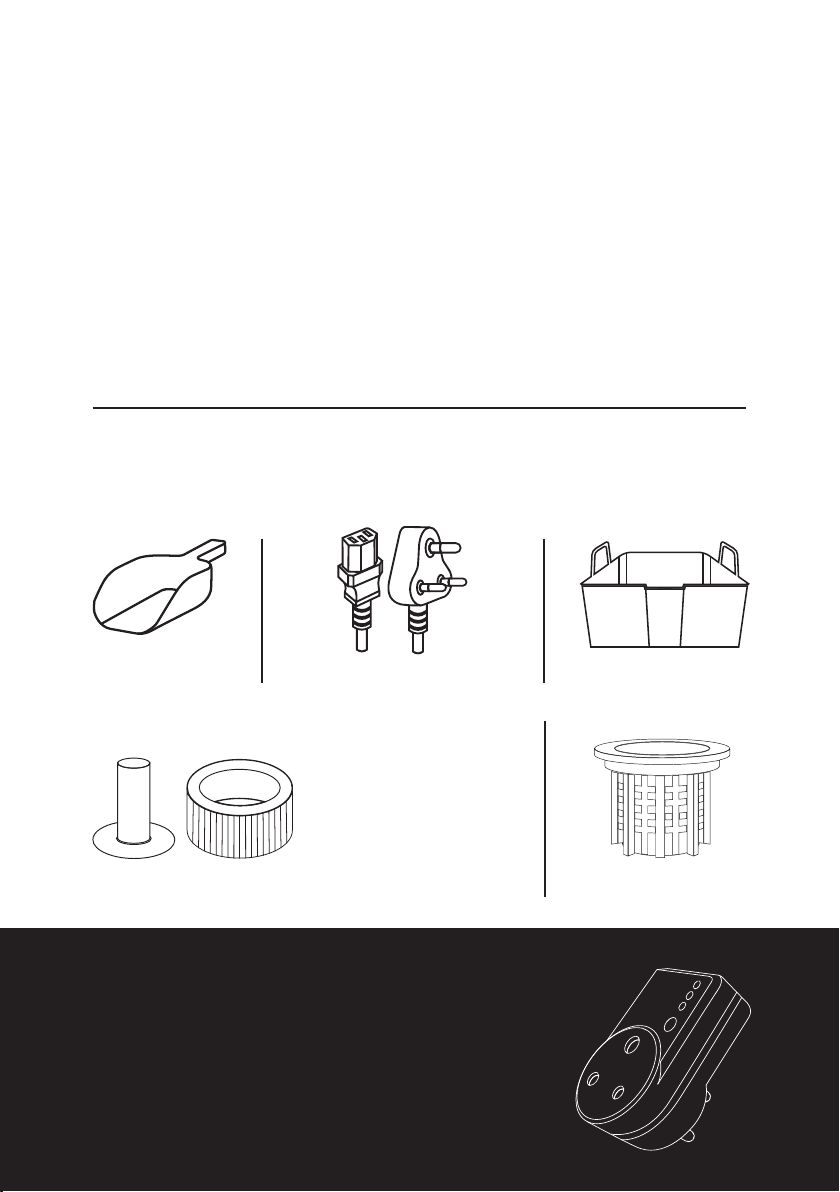
ACCESSORIES INCLUDED
Please Check If All The Accessories Shown Below Are Included:
05
To avoid electrical surges, it is advised to use
a surge protector plug. (Please note that this
must be purchased separately and does not
come with the unit.)
SURGE PROTECTOR PLUG
1 x ICE SCOOP
1 X DRAIN CAP
WITH SILICON
GROMMET
1 x FILTER
1 x 220V POWER CORD 1x ICE BASKET
OPERATION PROCEDURE
• Select the ice bullet size and
then press the start button.
(The green indicator light will
flash until ice bullet size has
been selected and the start
button has been pushed).
• Let the appliance run a few
cycles to fully calibrate.
• Place the Ice Basket inside the appliance.
• Ensure that the water drain cap is secure with the silicone
grommet inside.
• Fill the water tank with drinkable water only, ensuring that the
water level does not exceed the bottom of the ice basket.
• Connect the appliance to a dedicated power source.
1
2
3
4
5
6
7
8
9
A
B
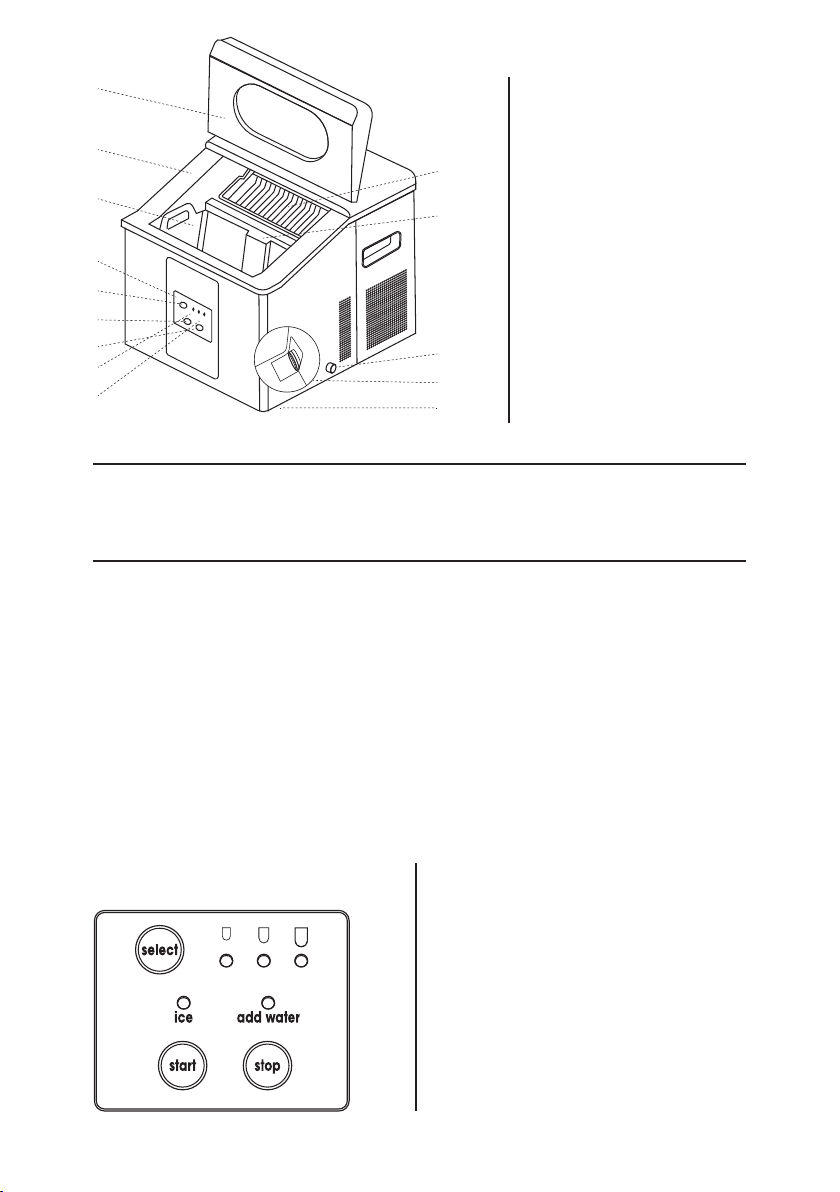
Select Ice Size
Start Ice Making Cycle
C
D
Stop Ice Making Cycle
Ice Full Indicator
EWater Low
Indicator
Lid
Inner Liner
Ice Basket
Control Panel
Ice Pusher
Ice Full Sensor
Water Drain Cap
Filter
Leveling Feet
STRUCTURE
CONTROL PANEL
06
1
5
6
7
9
2
3
4
A
B
C
D
E8
To ensure safety, remember to always disconnect the appliance from the
power supply before performing any form of maintenance or cleaning.
MAINTAINENCE
• The appliance will now start producing ice. *Time between ice making
cycles will vary depending on the ambient and water temperature.
• To change the ice bullet size, press the 'Select' button to choose
your bullet ice size preference.
• When the ice basket is full, the 'Ice' indicator light will illuminate.
You can either remove ice and store, or the ice will melt into the
water tank for water recycling.
• When the water level is low or water tank is empty, the 'Add Water'
indicator light will illuminate. You will need to add water to water tank.
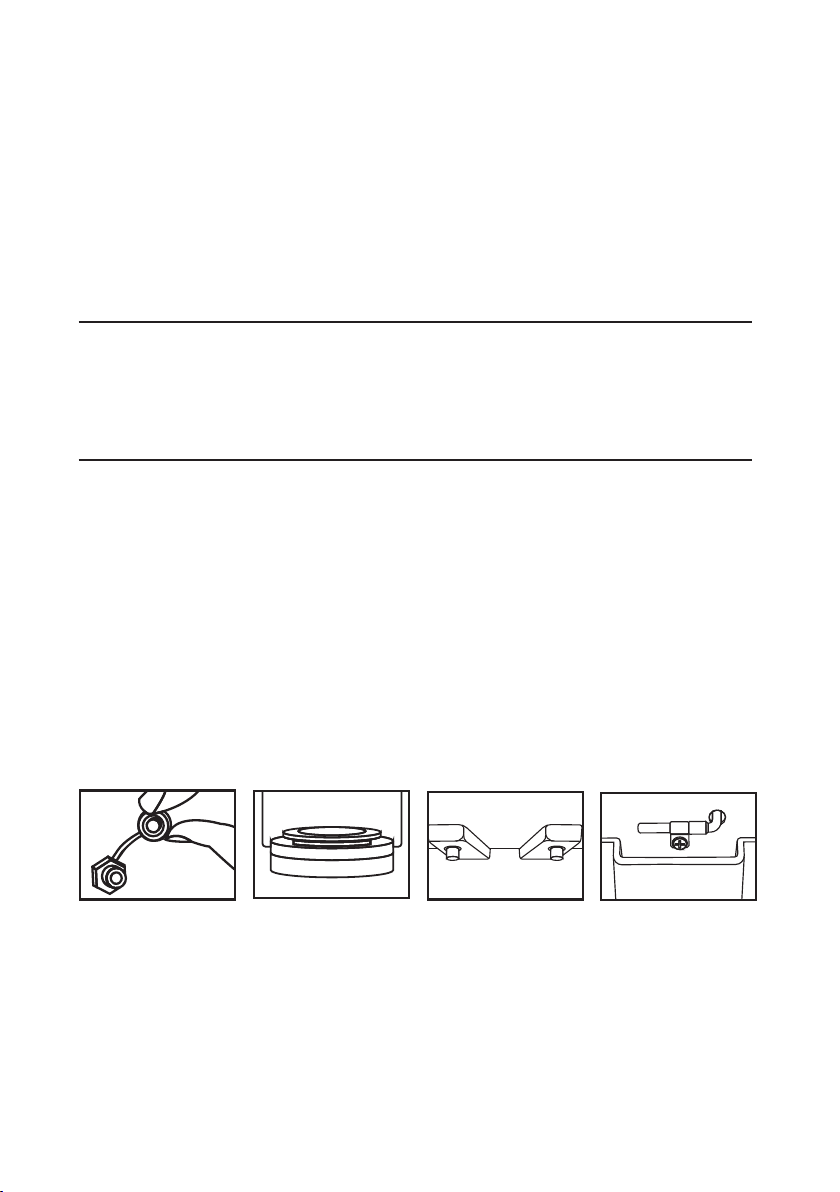
INTERNAL CLEANING
• Empty the water tank using the drain plug and store the drain cap
with silicone grommet in a safe place while doing this.
• Remove the inner filter and ensure the filter is free of any debris.
SWITCHING THE APPLIANCE OFF:
• Wait for the current ice cycle to finish and press the 'Stop' button.
• Unplug the appliance from the power source.
07
• Wipe the interior dry and use a damp cloth with warm water and a mild
detergent. Avoid using any abrasive chemicals.
• Ensure that the interior is completely dry with no water inside.
• Clean the interior filter regularly (at least once a month) as well as the
'ice-full' and 'water sensors'.
DRAIN CAP WITH
SILICON GROMMET ICE-FULL SENSOR
FILTER WATER SENSORS
Table des matières
Autres manuels SnoMaster Machine à glaçons


