SMRT TENT SKY LOFT Manuel utilisateur

SKY LOFT
Your childhood treefort just got a massive upgrade.
Owner Manual

2
Your childhood
treefort just got a
massive upgrade.

Sky Loft Owner Manual
3
Safety Warning
Parts
Installation Prep
Getting your SMRT Tent on your vehicle
Installing the Mounting Hardware
Final Set Up Steps
Packing Up the Sky Loft
Tent Care & Upkeep
Offseason Storage
4
6
8
9
10
11
11
12
14
TABLE OF CONTENTS
ATTENTION: Manuel en Français
Si vous souhaitez lire ce manuel en français,
veuillez visiter notre site Web à l’adresse www.
smrttent.com et télécharger le PDF en français.
ATENCIÓN: Manual en Español
Si desea leer este manual en Español, visite
nuestro sitio web en www.smrttent.com y
descargue el PDF en Español.

4
FIRST THINGS FIRST: BE SAFE!
HOW TO CAMP SMRT
Congratulations on your purchase! We know
you are going to love the rooftop tenting
lifestyle, and many great adventures await
you. But before you pack up and leave on your
first trip, you need to properly install your
SMRT Tent, and know how to use it safely.
Although rooftop tenting and sleeping off the
ground has many safety benefits, there are
still steps that need to be taken to prevent
injury and dangerous situations. Remember
that you are still using nature’s space and that
it needs to be treated with respect. You will
be sharing it with animals, weather, and other
people.
Follow the instructions in this booklet to
safely and securely install your tent onto
your vehicle. For your ease and convenience,
you can also watch our Install Videos on
our YouTube Channel (SMRT Tent). You can
follow the QR code on this page to get to our
channel.
Please contact your vehicle manufacturer for
specific load rating of your roof rack. Not all
factory roof racks or aftermarket roof bars can
safely accommodate a SMRT Tent.
The installation of a SMRT Tent on your roof
rack will change your vehicle’s centre of
gravity, height and handling. The manufacturer
disclaims all responsibility in case of accidents
due to improper use, improper maintenance,
or checking the tightness of the brackets
regarding the fitting of your chosen roof rack
system.
Improper installation or use of the SMRT Tent
may result in serious injury or death. SMRT
Tent, the manufacturer, shall not be liable for
special, indirect incidental or consequential
damages.
Something close to our hearts is the
environment in which we have our fun; it
needs to be treated well and with respect so
the generations after us can explore too. When
using your SMRT Tent and exploring, stay
on designated roads and trails. Go over, not
around, obstacles to avoid widening the trails.
Cross streams only at designated fords, and
when possible avoid wet trails. Avoid sensitive
areas (meadows, lake shores, wetlands and
streams) – this protects wildlife habitats and
sensitive soils from damage. Don’t disturb
historical, archaeological or paleontological
sites. Try to leave no trace, leave the area
better than you found it, properly dispose
of waste, and avoid the spread of invasive
species.
Finally, go have some fun!
Scan this code to
view the SMRT Tent
YouTube Channel for
Install Videos!

Sky Loft Owner Manual
5
• Check your mounting hardware before every trip and tighten your bolts if
necessary.
• Maximum travel speed is 120km/hr (74.5mph)
• Ensure ladder is well secured to your Rooftop Tent and at the correct angle
(approx. 70 degrees between ladder and ground) to avoid injury.
• Be sure to always have a light source to help you safely move around in the
dark.
• Keep all flame and heat sources away from the tent materials. Under no
circumstances should any naked flame sources or heating devices be used
inside or near the tent!
• Keep campfires well away from tent and be cautious of embers.
• Keep a fire extinguisher or a water source nearby when having a fire.
• Do not smoke in your Rooftop Tent.
• Do not operate any device which burns fuel inside your Rooftop Tent.
• Keep exits clear.
• If you’re camping in an undeveloped campground or in the backcountry, hang
up your garbage and food in a tree and make a “bear hang” that’s far away
from your tent, keeping it out of any animal’s reach.
• Always ensure your tent is securely closed and fastened before departing and
driving away.
• Do not park in waterways or areas that could be flooded at night.
Safety Warnings

6
PARTS
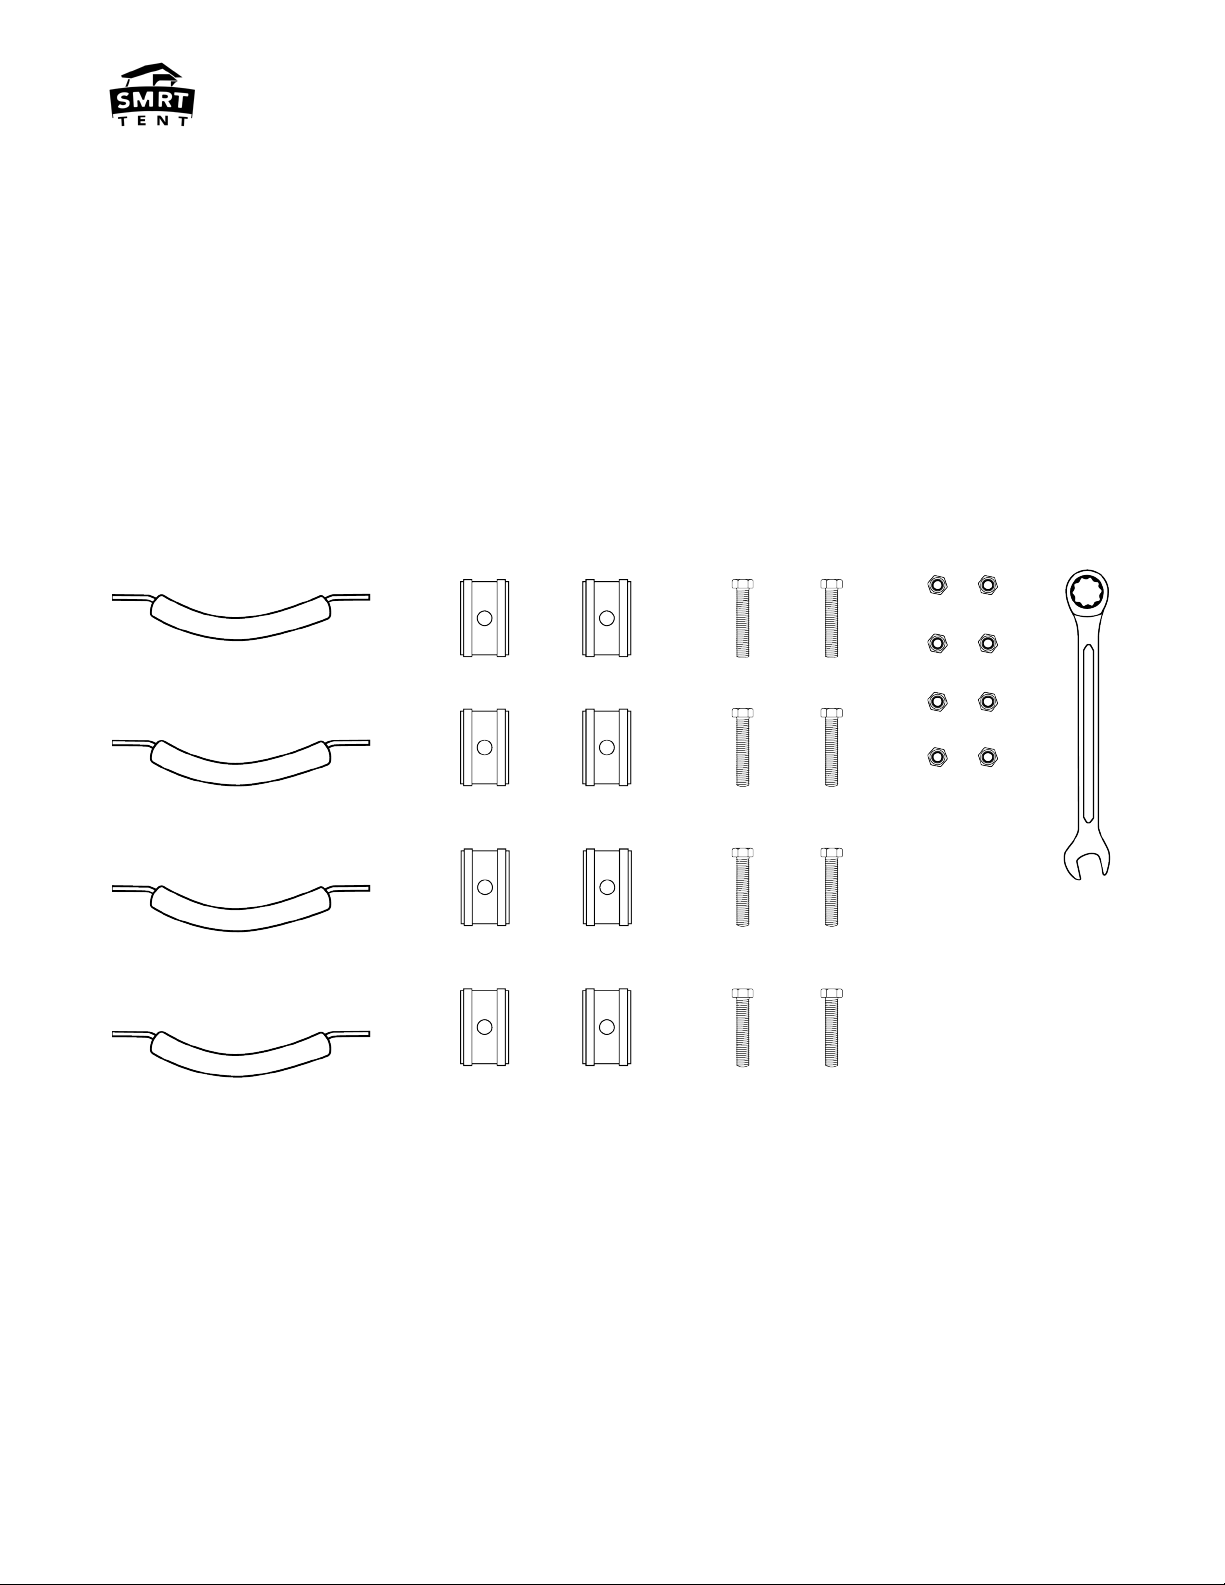
4X 8X 8X 8X 1X
Once you open your tent, you will remove the contents from the inside.
In a small bag will be the hardware:
We recommend laying your hardware out on a flat surface for easy access and to avoid
losing a piece.
Mounting Brackets Sliders Bolts Nuts #13

Sky Loft Owner Manual
7
2X 1X 2X
Window Rods Telescopic Ladder Shoe Bags#13

8
We recommend laying your new tent
on the top piece of the cardboard
box it came in to set it up!
• Undo the two straps at the back
of the tent by depressing the
levers and pulling the straps out
the top. Once both straps are
undone, you can open the tent.
• Pull down the bungee cord from
the middle of the tent and lower
it to the base
• Flip the bottom tent flap down
around the base of the tent
• Unzip the main door at the
back of the tent and remove all
contents from tent. You should
have 2 window rods in a bag, 2
shoe bags, a ladder bag, and an
install kit bag.
• Unclip the buckles on the ladder
bag and find the install kit inside
the bag (beige pouch). Remove
the contents. You should find a
13mm ratchet wrench, 4 bottom
brackets wrapped in rubber, 8
sliders, and 8 nuts and bolts.
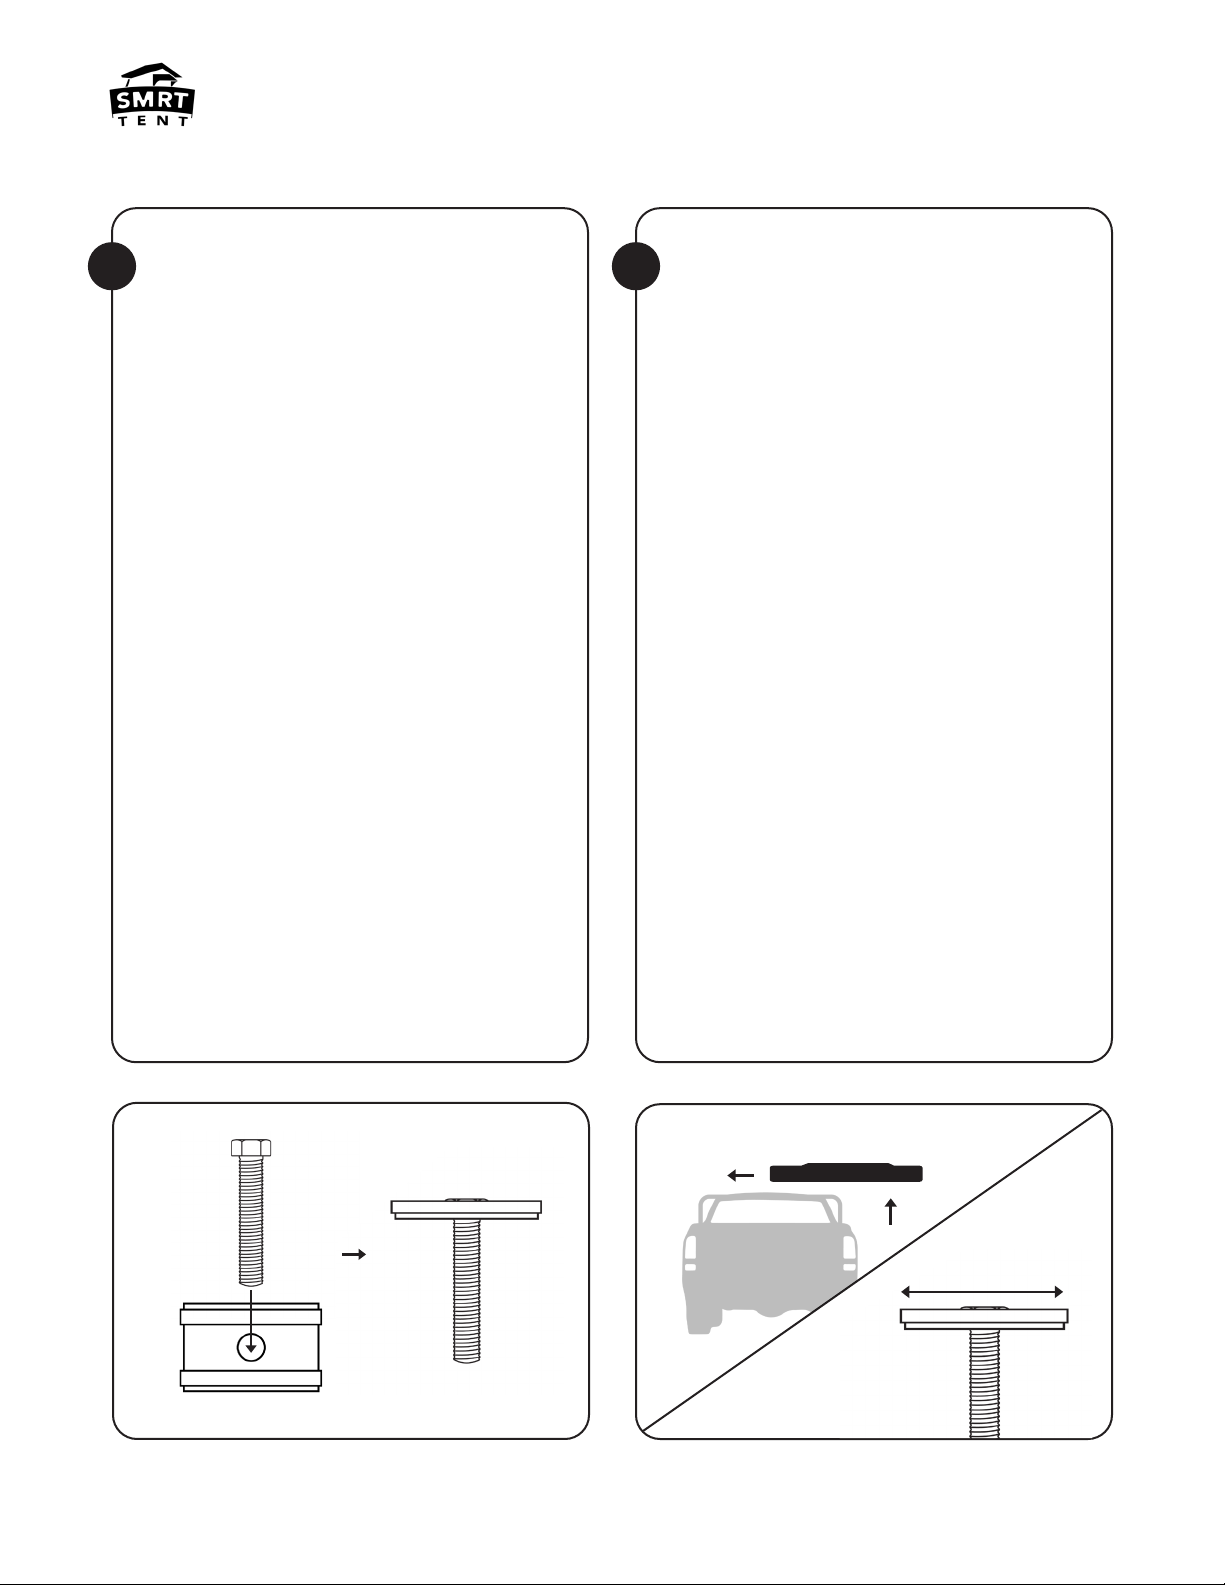
• Take the nuts off the bolts and
put the bolts into the sliders, with
the head of the bolt sitting in the
channel, so the slider top remains
flush with the head of the bolt. Set
aside. (Figure A)
• Undo the knot in the upper strap
at the back of the tent. You will
use this strap to pull down and
close your tent while in use.
• Unzip the side windows and fold
them into the tent to create an
opening for air to flow out.
• Push down evenly on the tent to
somewhat close it back up and
reattach the straps. Note: This
can be a loose close, you don’t
have to have your fabric tucked in;
we usually leave ours open with
3-4 inches of space. This partial
closing is only to make the lifting
of the tent easier.
1 2
Open the tent and remove the
contents for install.
Prep the tent to be installed on
your vehicle.
AB
C

Sky Loft Owner Manual
9
• Get some help lifting your tent
onto the vehicle with another
person or an overhead hoist. We
do not recommend doing it by
yourself.
• Pick up the tent and bring it to
the side of the vehicle. Holding
the front and back, lift it up to the
height of the rack. Slide the tent
across the rack until you have both
mounting rails on the crossbars
or rack that you have (Figure
B). Don’t worry about it being
completely centered yet.
• Stand at the back of the tent
where your straps are located. Tilt
the back of the tent up and slide in
2 Sliders (with bolts) per mounting
rail into the centre portion of
the tent, and between your two
mounting rails (4 total). Let the
tent down softly. (Figure C)
• Now walk around and insert 1
Slider into the mounting rail on
each corner. These will sit on the
outside of your crossbars/rack.
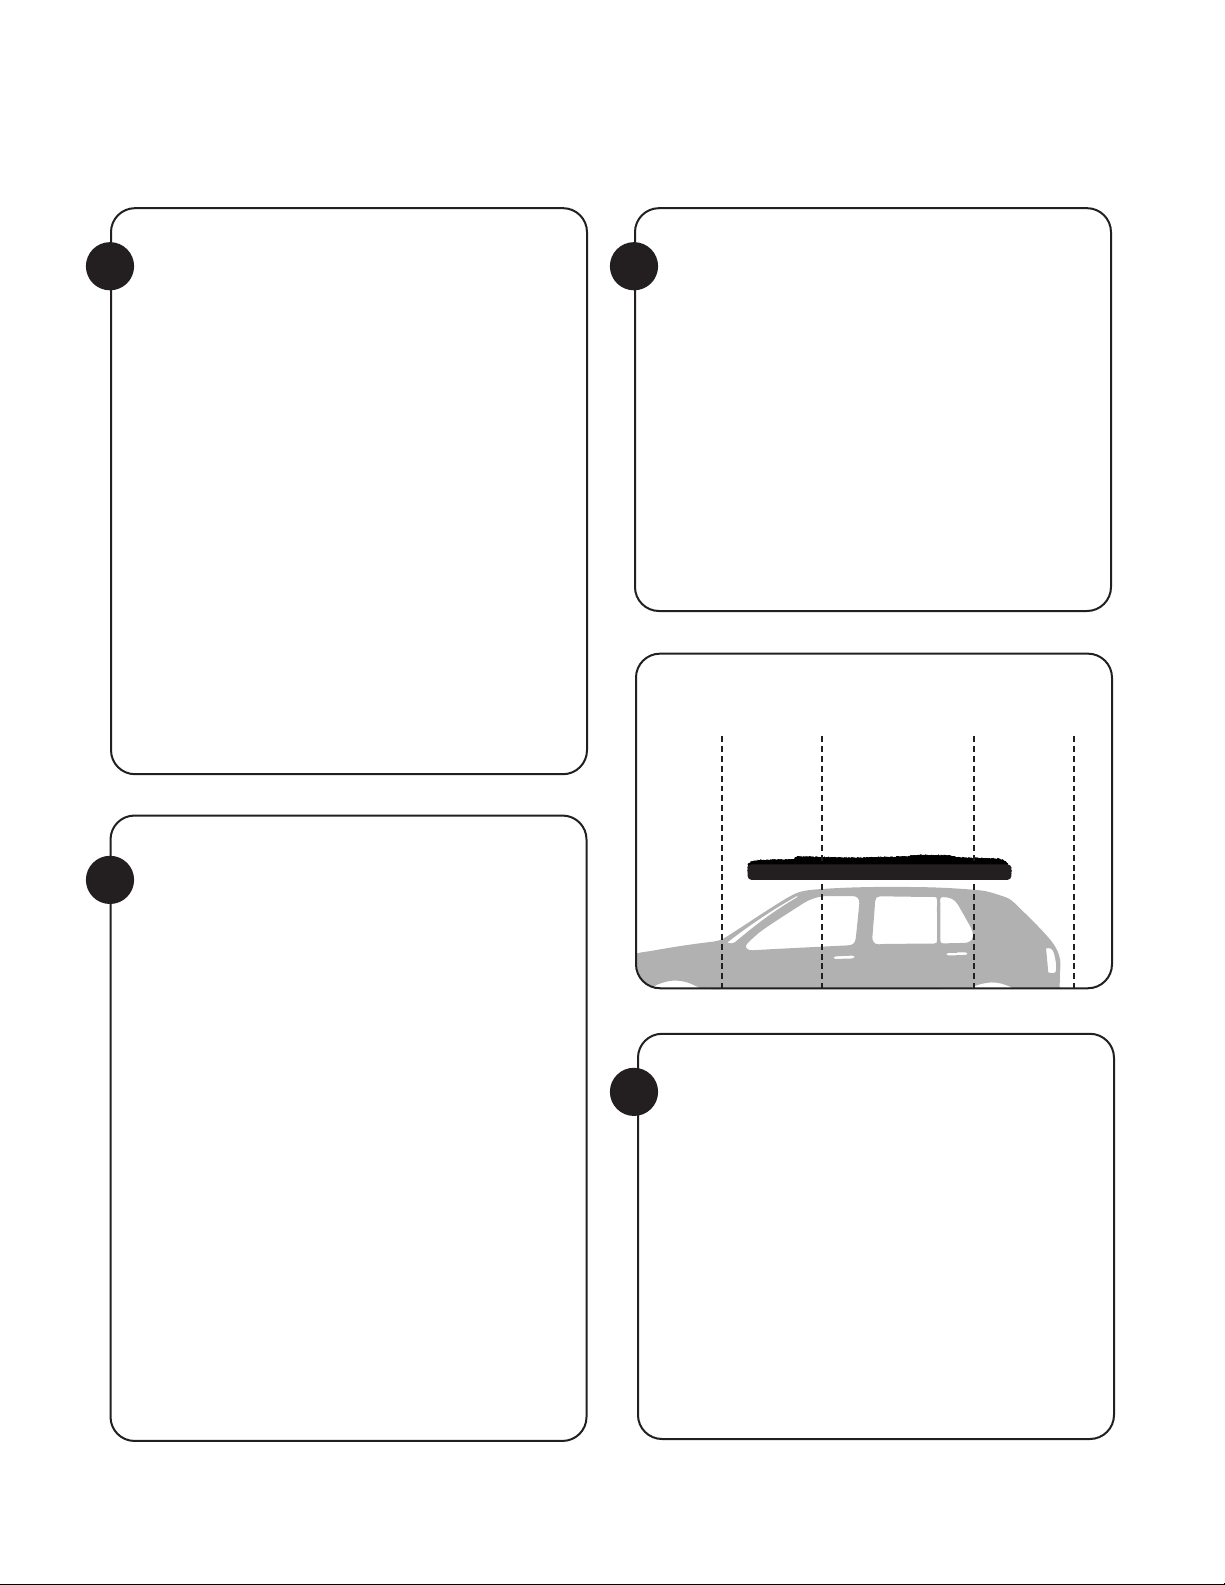
• Next you need to centre the tent,
finding the desirable location – it is
OK to have some overhang to the
3
4a
Grab a friend to help you lift
the tent onto your rack or
crossbars.
Install sliders for mounting
and center the tent on your
vehicle.
C
D
1/3 MAX
27 in
68.6 cm 68.6 cm
CENTER ZONE 1/3 MAX
27 in
SAFETY ZONES
front or the rear, but we want to
keep that to a maximum of 1/3 of
the tent. (Figure D)
• Stand at the front of your vehicle
and make sure it is centered side
to side. Then repeat this standing
at the back of your vehicle.
• Keep repeating until you are
satisfied.
• Once we have found the desired
mounting location, we must install
our mounting brackets. Start on
any corner.
• Take one of the sliders from inside
the centre channel, and the one
from the outside, and attach the
lower bracket with two nuts. Do
not tighten yet – only thread them
Assemble and tighten the
mounting brackets.
4b
5a

10
• On the back, take your two window
prop rods. You will notice two slits
on the fabric skirt. If you open the
slit, you will notice a hole for the
end of the rod.
• At about a 40-45 degree angle,
insert the straight end of the rod –
you might have to wiggle it in, make
sure it is inserting ½ - ¾ of an inch
(13-19mm). 5/8-7/8 of in (16-22mm)
• Hook the hook end of the rod into
the eyelet of the fabric skirt. Do
both sides. (Figure F)
• Now that we have our tent
attached and clamped, we like to
check how secure it is. Give your
tent a firm shake with both hands
and make sure the tent is not
sliding on the rack at all.
• Seriously, shake it hard.
• Now that we have our tent
attached, let’s open the tent back
up. Hook your ladder to the back
of the tent and open it up. Note:
The ladder will hook onto any side
you wish.
• Locate your shoe bags. The “S”
clips will clip onto the other
two remaining ladder mounting
locations.
Give your tent a firm shake,
shake, shake!
Setup & Open
Set up the Window Rods
E
on. Repeat that step 3 times on
all corners, giving you 4 mounting
locations. (Figure E)
• Now you need to tighten the
nuts. The tightening sequence
for the mounting hardware is 4
rotations on inner nut, followed by
4 rotations on the outer nut, and
repeating until tightened evenly.
This ensures an equal tightening
sequence. You will know you have
tightened enough when you see
the bottom bracket start to deflect
slightly. Do not tighten one side at
a time - this will create an uneven
clamping load.
• Repeat on the other 3 mounting
locations.
Important Warning: It is
important to note that this
tent has a Max traveling speed
of 120km/h when installed.
Please adhere to this guideline
to ensure your safety, and your
tent’s integrity.
6
8
7
5b
Autres manuels SMRT TENT Tente