SMART-AVI 4K-Wall Manuel utilisateur

2
WHAT'S IN THE BOX?
PART NO. QTY DESCRIPTION
SM-4KWL-S 1 4x4 Port HDMI, Real-Time switching matrix with intergrated 2x2
video wall
CCPWR06 1 6’ Power Plug Cable
SAVI-RMT 1 IR Remote Control
SM-EYE-NY 1 IR Receiver
EN-QKVM-EAR-P 2 Rack mount brackets
1 Quick Start Guide
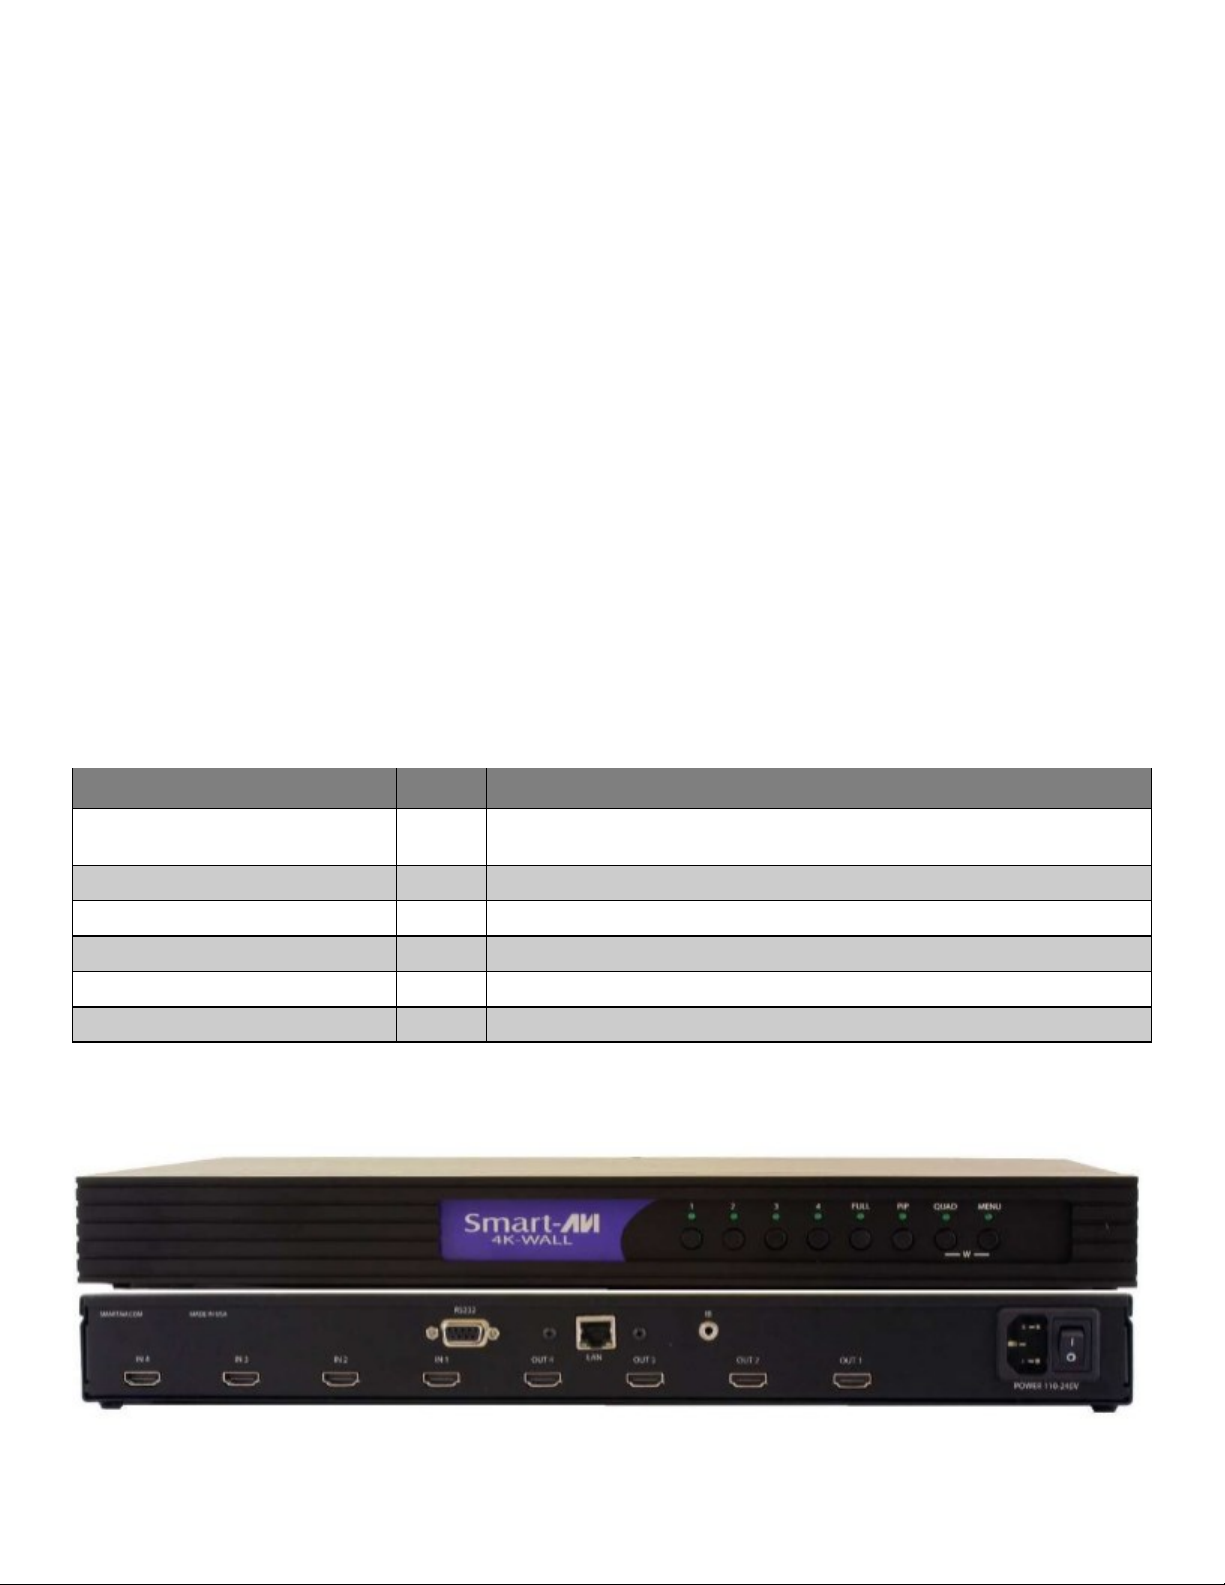
Figure 2-1
Brackets for mounng this device in a standard 19” rack can be ordered from SmartAVI.
WHAT’S IN THE BOX?_____________________________________________________________________ 2
INTRODUCTION__________________________________________________________________________ 3
FEATURES________________________________________________________________________________ 3
APPLICATION_____________________________________________________________________________ 3
TECHNICAL SPECIFICATIONS_____________________________________________________________ 4
INSTALLATION____________________________________________________________________________ 5
LEARN EDID______________________________________________________________________________ 5
FRONT PANEL CONTROL_________________________________________________________________ 6
ON SCREEN DISPLAY (OSD)__________________________________________________________________ 8-14
CONTROL USING IR REMOTE CONTROL_______________________________________________________ 15
USING RS-232 COMMANDS__________________________________________________________________16-18
CONTROL VIA ETHERNET (TCP/IP)____________________________________________________________ 19
LIMITED WARRANTY STATEMENT_____________________________________________________________20
Table of content

3
INTRODUCTION
To create a four-screen 2x2 video wall with four HD video inputs, the 4K-Wall video wall controller
provides a truly simple plug-and-play hardware soluon. With four inputs and four outputs, users can
arrange their content in numerous ways, providing unique funconality by combining the abilies of a
video wall hardware controller and a 4x4 HDMI port Matrix. The 4K-Wall is HDCP compliant.
Users can stretch one large image over four screens, send an input to each screen, send four images
to each screen or create a customizable Picture-in-Picture display. Beer sll, there’s no soware re-
quired, as all content management opons are eortlessly controlled via the 4K-Wall video wall con-
troller unit itself. There’s no need for addional drivers. Just connect the HD inputs and HD screens
to the controller and it’s ready to go.
FEATURES
• Stand-Alone Unit, Requiring no Addional Hardware or Soware
• Plug-and-play ready
• Four HDMI inputs and four HDMI outputs
• DVI-D up to 1920x1200 input
• Learns any EDID
• Internal EDID database
• Mulple conguraons
• HDCP and HDMI 1.4 compliant
• Supports IR and RS-232
APPLICATIONS
• Corporate or Educaonal Presentaons
• Corporate Lobbies
• Airport Installaons
• Restaurants
• Wall Displays
• Entertainment Venues
• Digital Signage
• Point-of-Sale
• Dealer Rooms
• Security
• Control Rooms
• Shopping Centers
4
TECHNICAL SPECIFICATIONS
VIDEO & AUDIO
Output Resoluons Up to 1080P (1920x1080@60Hz)
Input Resoluons Up to 1080P (1920x1080)
Outputs (4) HDMI
Inputs (2) HDMI, (1) VGA, (2) USB 2.0 Type A
HDCP Compliance 1.0/2.0
Audio (1) 3.5 mm input, (1) 3.5 mm output
CONTROL
Front Panel Buons
IR Remote Control SAVI-RMT
Ethernet (TCP/IP) RJ-45
OTHER
Power Adapter PS12VDC5A
Dimensions 7.5” W x 2” H x 8.25” D
Weight, Unit only 2.8 lbs.
Working Temperature 32 to 122°F (0 to 50 °C )
Working Humidity Up to 85% RH (no condensaon)
Storage Temperature -4 to 149 °F (-20 to 65 °C )
Storage Humidity Up to 90% RH (no condensaon)
USB MEDIA PLAYER USB player requires the IR Remote Control for navigaon and media selecon.
Signal Type USB 2.0, 1.1, and 1.0 (Type A)
Video Formats * MJPEG, MPEG-1, MPEG-2, MPEG-4, Vvid, DivX H.264
Max Resoluon 1920x1080 @30fps
Max Data Rate 20 Mbps
Audio Formats * MP3, WMA, AAC, MP2, PCM, AC3
Photos Max Resoluons * JPEG - 15360x8640, BMP - 9600x6400, PNG - 9600x6400
*PLEASE NOTE: 4K-WALL 3x3V2 only supports the primary formats listed above. Any unlisted
formats are not compable with 4K-Wall.

5
Application diagram
installation
1. Make sure the 4k-WALL is turned o.
2. Connect up to 4 HDMI Inputs (i.e PC, Blu-Ray Player, Digital Signage, etc.) to the HDMI INPUT
ports of the 4k-WALL using HDMI cables.
3. Connect up to 4 HDTVs to the HDMI OUTPUT ports of the 4K-WALL using HDMI cables or
HDMI-to-DVI adapters for DVI displays.
4. Connect the IR receiver to the IR input jack at the back of the 4K-WALL.
5. Connect a cat5/cat6 cable to the RJ45 connector.
6. Oponally connect an RS-232 cable from PC to the RS232 port of the unit for addional
control.
7. Turn on the 4K-WALL.
8. Wait for the unit to inialize. This should take less than 1 minute.
LEARN EDID
Once 4K-WALL 2x2 boots up, it will automacally default to HDMI + Audio for the EDID. Depending on the monitors
used, using either the built in custom EDID may work beer than the local EDID or vice versa.
To learn the Local EDID, press and hold buon 2 + 3 simultaneously on the front panel.
Please note that Local EDID will only take the EDID from OUTPUT 1.
To learn HDMI + Audio EDID, press and hold buon 1 + 4 simultaneously on the front panel.
To learn HDMI EDID, press and hold buon 1 + 3 simultaneously on the front panel
To learn DVI EDID, press and hold buon 1 + 2 simultaneously on the front panel.

6
Available configurationS
Video Wall Mode: User can select any of the four HD inputs and project the
image across four HD screens (2x2 conguraon).
Full Mode: User can select any of the four HD inputs and project the image
individually on all four HD screens, with supported resoluon up to
1920x1080 on each screen.
Press FULL (output, input) Example: Input 4 to out 2 = “Full, 2, 4”
Quad Mode: User can divide each screen into four secons with all four in-
puts playing on each screen. Users can place each screen in dierent loca-
ons, further enhancing the 4K-WALL’s matrix funconality.
Press QUAD with desired channel 1,2,3,4
PiP Mode: Users can create Picture in Picture (PiP) displays on each screen
using all four inputs, with one large HD source and three accompanying PiP
sources alongside.
Press PiP with desired channel 1,2,3,4
To switch to Video Wall Mode: Press the QUAD and MENU buons simultaneously
then press the desired input channel 1, 2, 3, or 4.

7
ON-SCREEN DISPLAY (OSD)
On-Screen Display (OSD) gives users great exibility and ease of use when looking to manage their video wall.
It can be operated with the IR Remote Control through the Front Panel Buons as shown in the following pag-
es. Please note that the OSD will only appear on OUTPUT 4.
CONTROL USING ON-SCREEN DISPLAY (OSD) WITH THE FRONT PANEL
Figure 7-1
To change modes with the OSD, navigate using the following buons on the front panel shown in 7-1
Front Panel Navigation
1 = Down
2 = UP
3 = Le
4 = Right
FULL = Enter / OK
PiP = Return / Back
QUAD = (no funcon)
MENU = Open / Close On Screen Display
Display Modes
The on-screen display will disappear aer a few seconds of inacvity or you can press MENU to
make the on-screen display disappear. The 4K-Wall will remain in video wall mode and the input can
be changed by pressing the corresponding number buon.

8
ON-SCREEN DISPLAY (OSD) (CONTINUED)
Figure 7-3
The on-screen display will disappear aer a few seconds of inacvity or you can press MENU to
make the on-screen display disappear. The 4K-Wall will remain in Full mode and the input can be
changed by pressing the corresponding number buon.
Video Wall Mode:
VIDEO WALL MODE: Users can select any of the four HD Inputs and project the image across four
HD screens (2x2 conguraon).
Press the MENU buon and navigate to highlight WALL.
Press FULL to select into WALL and use 1 (Down) or 2 (UP) buon to highlight and select the de-
sired input number to be displayed on the video wall.
Press FULL. The video wall should now display the selected input.
Full Mode: (Roung individual inputs to individual output displays.)
FULL MODE: Users can take advantage of full matrix funconality by roung any of the four HD in-
puts to any of the four HD screens, with supported resoluons up to 1920x1080 on each screen
Press the MENU buon and navigate to highlight FULL.
Press FULL to select into FULL and use 1 (Down) or 2 (UP) buon to highlight and select the de-
sired output number, followed by pressing FULL, then highlight and select the input number.
Press FULL. The specied output should now display the selected input.
To rout another: Repeat steps 2-3 above. Aer changing to FULL mode once, the on-screen display
will always return back to the main menu with FULL mode highlighted again to make it easier for us-
ers to quickly assign addional outputs.
9
ON-SCREEN DISPLAY (OSD) (CONTINUED)
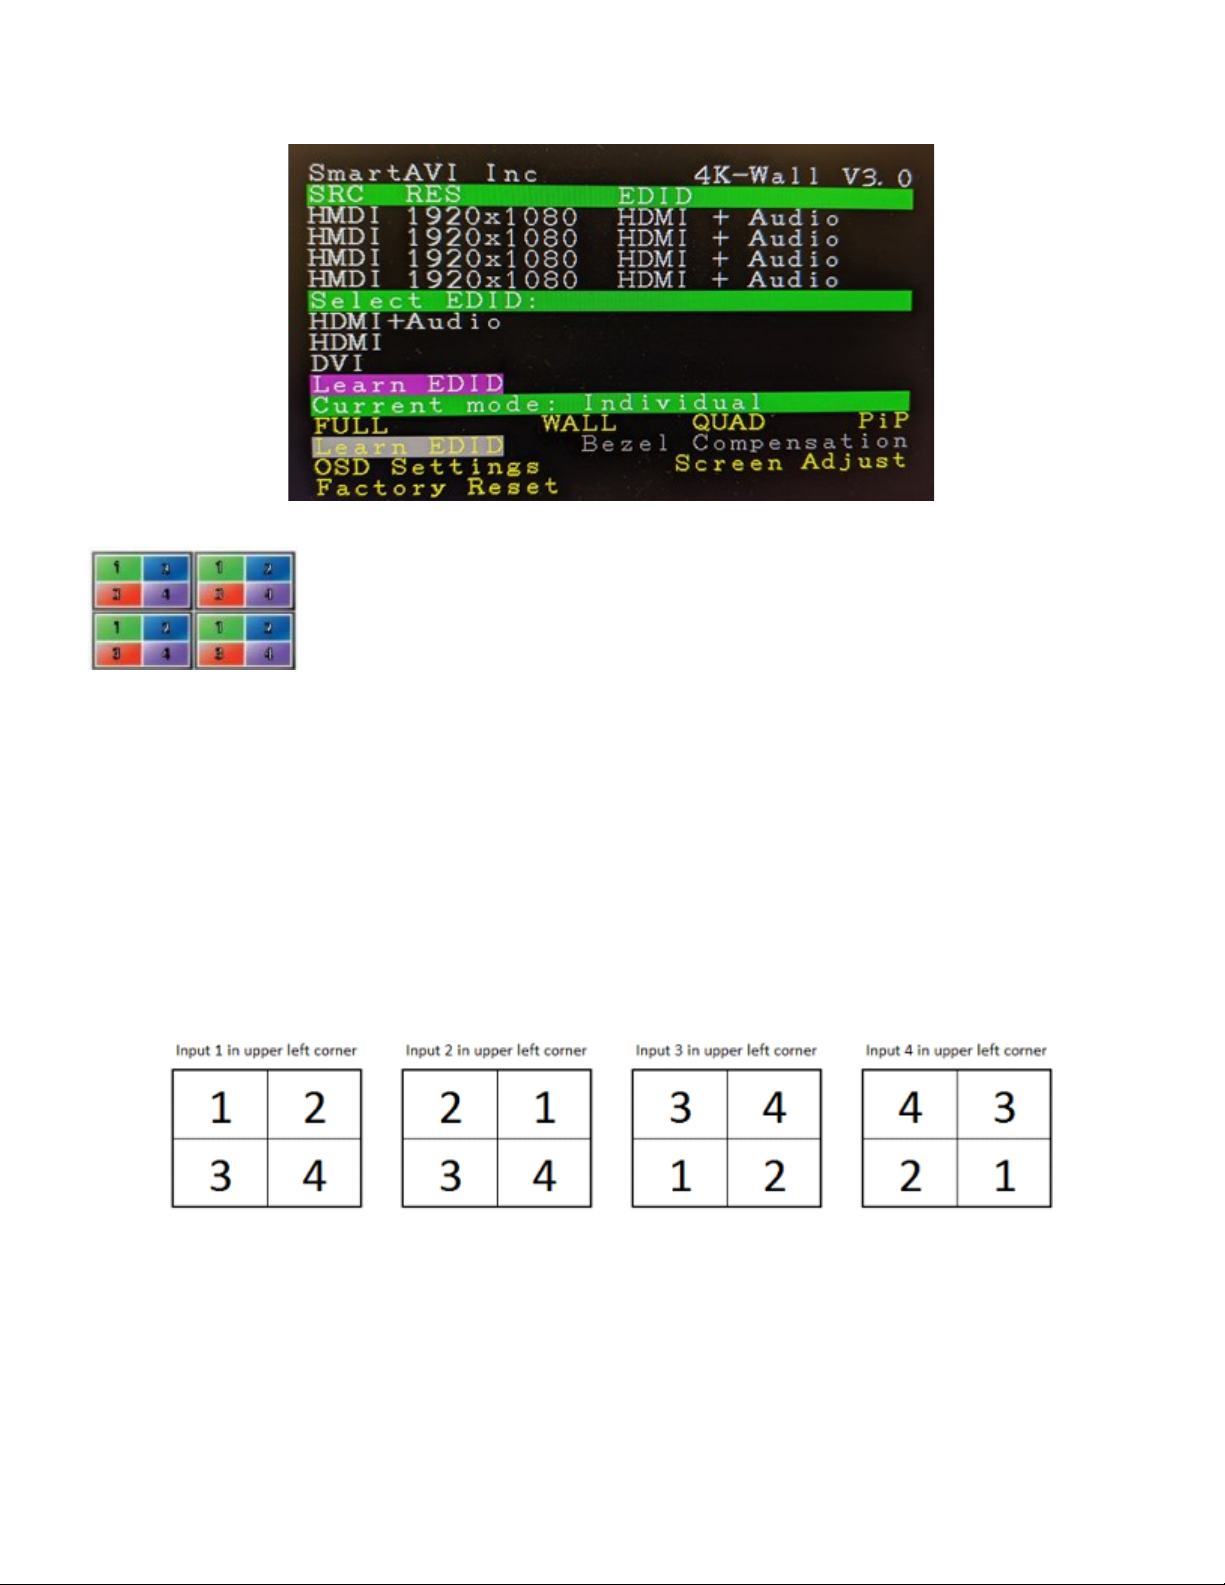
Quad Mode:
QUAD MODE: Users can divide each screen into four secons with all four inputs playing on each
screen. Users can place each screen in dierent locaons, further enhancing the 4K-Wall’s matrix
funconality.
Press the MENU buon and navigate to highlight QUAD.
Press FULL to select into QUAD and use 1 (Down) or 2 (UP) buon to highlight and select the de-
sired input number.
Press FULL. The selected input number will appear in the upper le corner of each display. The
other 3 displays will be in the posions shown below in Figure 7-4 depending on the input
selected.
Figure 7-4
To try a dierent conguraon: Repeat step 2 above using a dierent input.
10
ON-SCREEN DISPLAY (OSD) (CONTINUED)
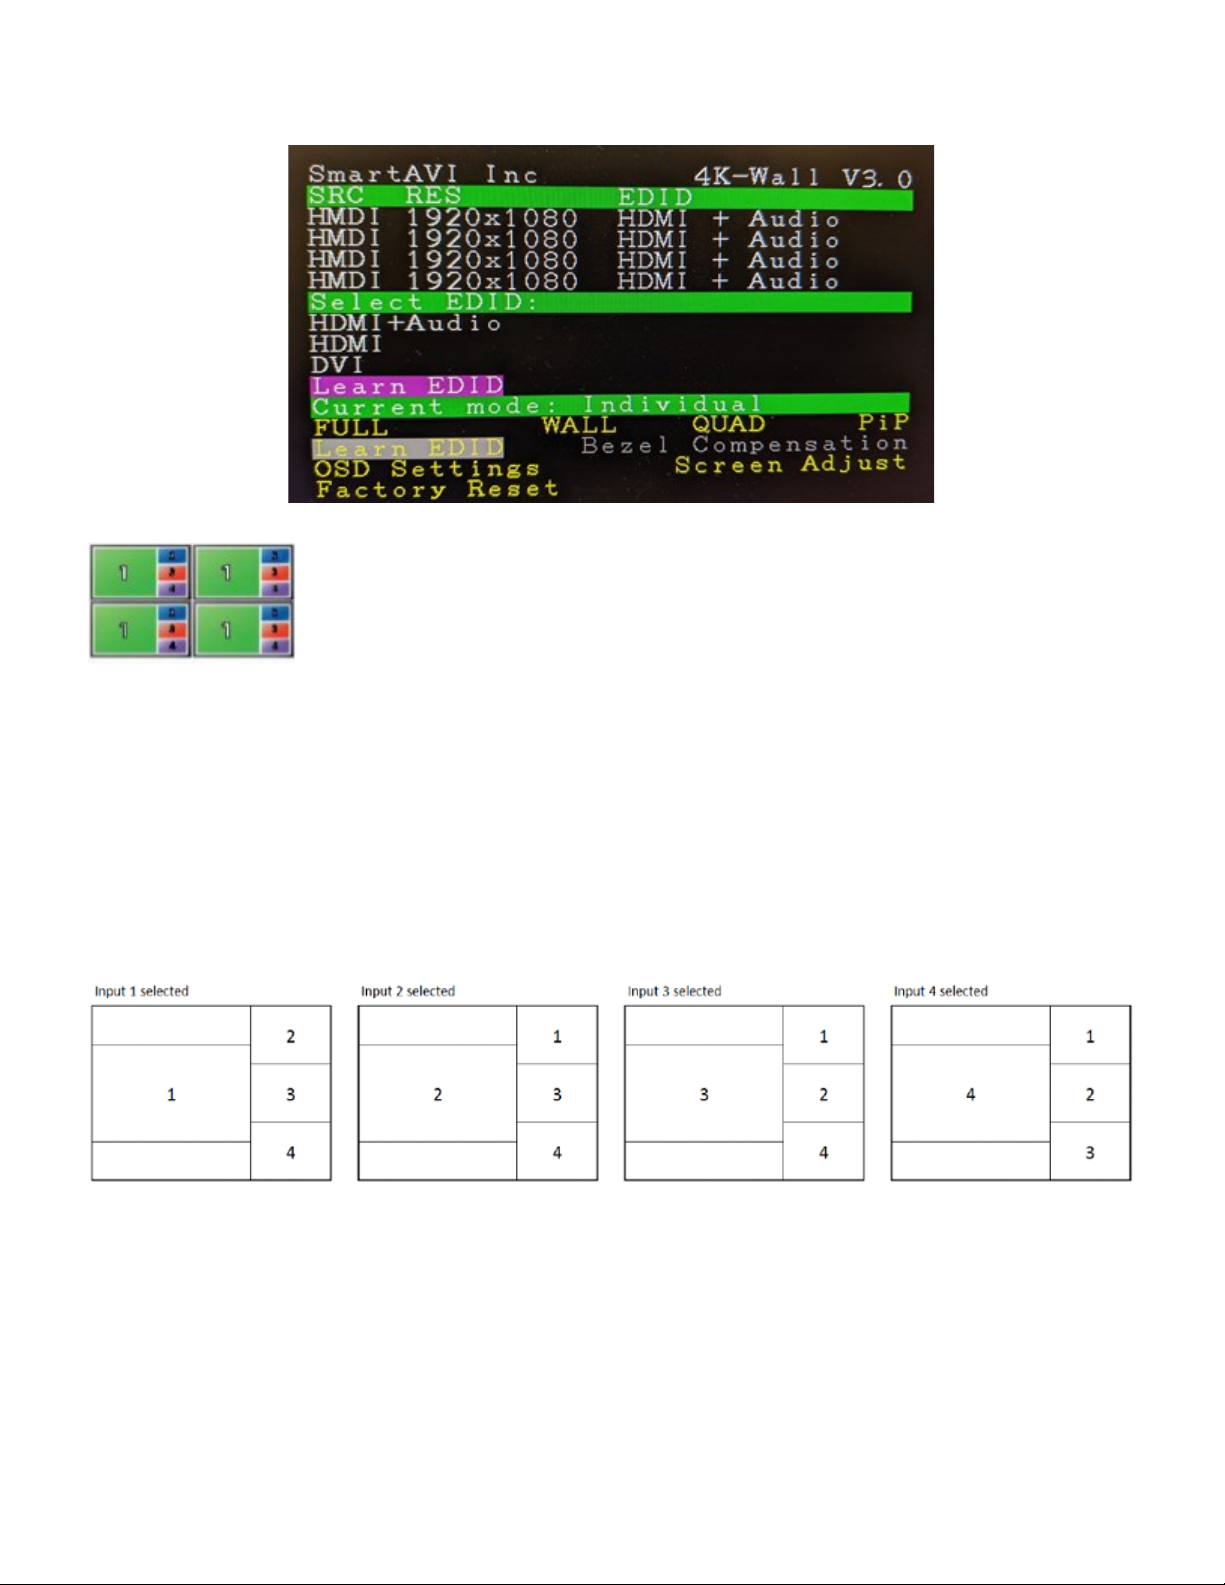
PiP Mode:
PiP MODE: Users can create Picture in Picture (PiP) displays on each screen using all four inputs, with
one large HD source and three accompanying PiP sources alongside.
Press the MENU buon and navigate to highlight PiP.
Press FULL to select into PiP and use 1 (Down) or 2 (UP) buon to highlight and select the desired
input number to be set as the largest display.
Press FULL. The other inputs will be displayed on the right side starng with the lowest number
input at the top to the highest number input towards the boom. See Figure 7-5
Figure 7-5
The input displayed the largest can be switched by repeang step 2 above using a dierent input.
Ce manuel convient aux modèles suivants
1
Table des matières
Autres manuels SMART-AVI Affichage numérique


