7
DesignView Presentation System is a product of Skyline Exhibits
Patents Pending
©2011 Skyline Exhibits
DesignView
®
Presentation System
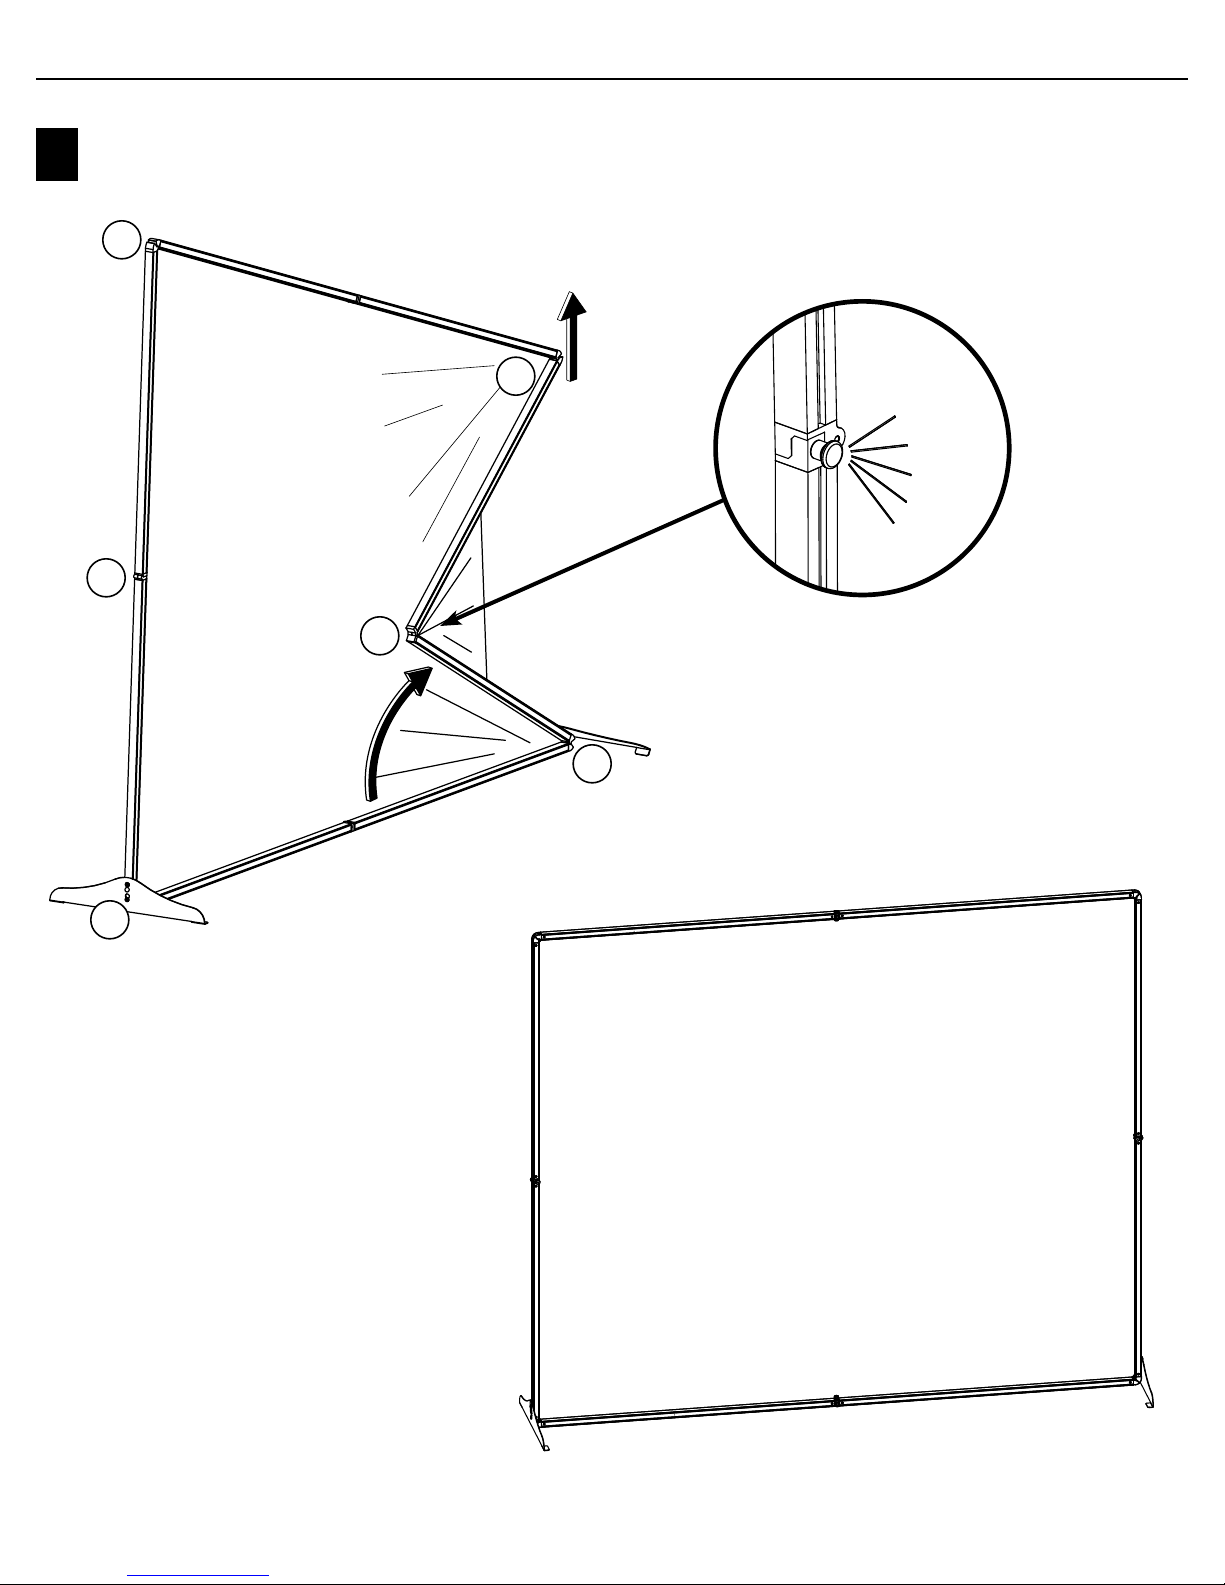
IMAGE PROJECTION
Steps to set up the Dukane Projector
1.
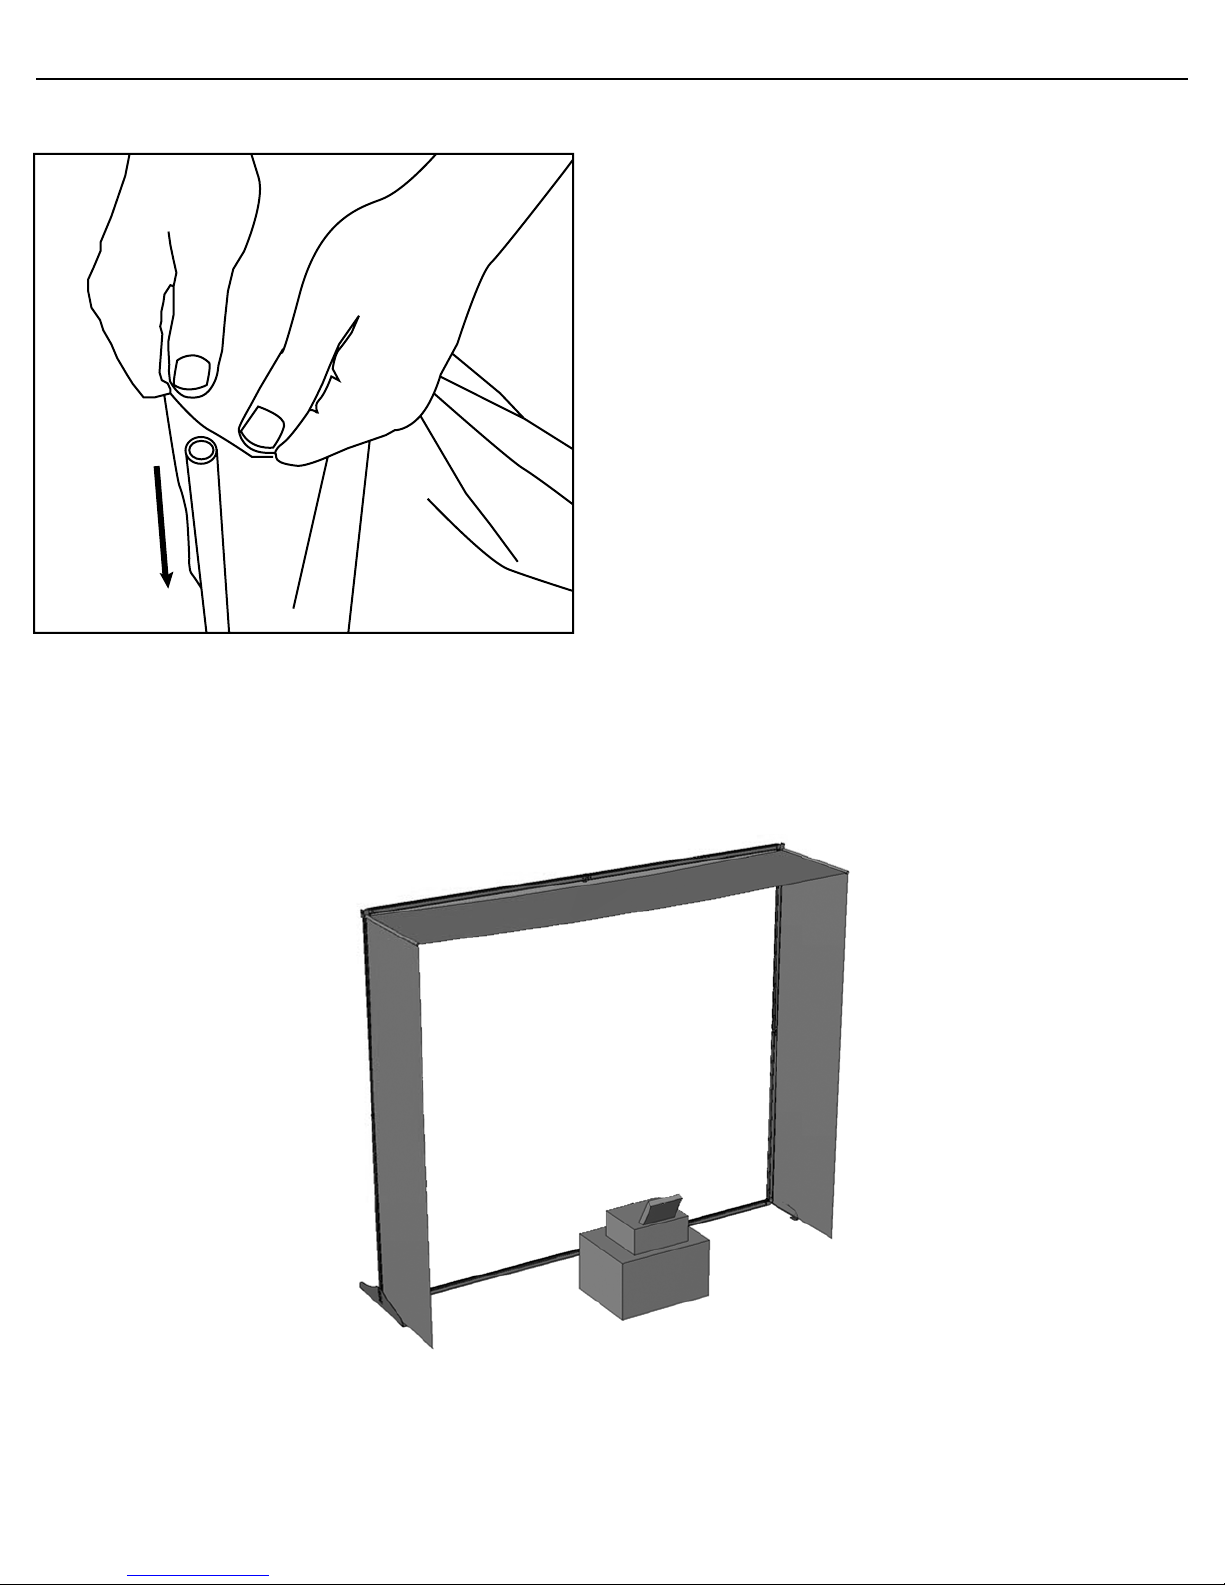
Place the projector on the surface you will be using to project from (floor or projector case) behind (or
in front of) the projection screen. The projector should be centered on the projection area (white space) and
parallel to the screen.
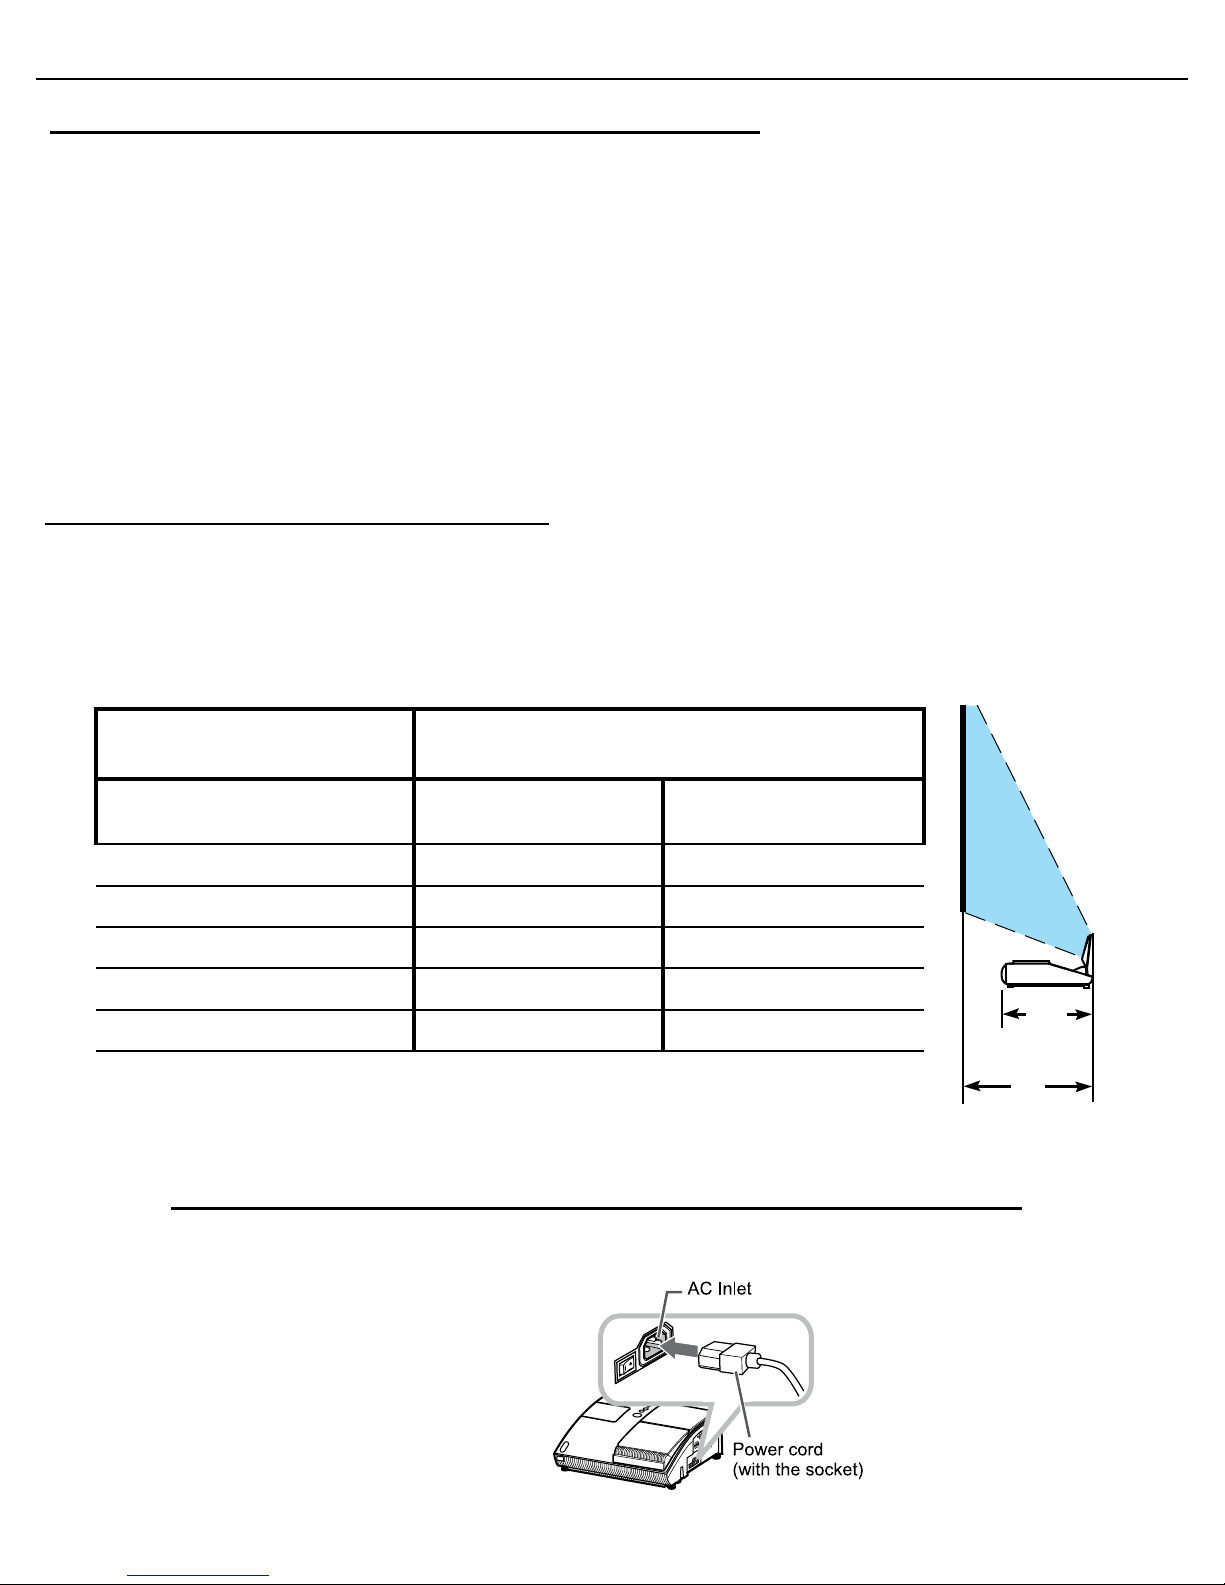
2.
Determine the distance between the projector and the projection screen by referring to the set up grid below.
CHOOSE YOUR VIDEO
SIZE
APPROXIMATE EXHIBIT SPACE NEEDED - DISTANCE
FROM SCREEN TO FAR SIDE OF PROJECTOR
Diagonal Video Size When
Fabric Is Stretched On Frame Projector On Floor Projector On Case
50” (127 cm) N/A 17” (43 cm)
66.7” (169 cm) N/A 23” (58 cm)
75” (191 cm) N/A 26” (66 cm)
92” (234 cm) 31” (79 cm) N/A
100” (254 cm) 34” (86 cm) N/A
For example, if your projection area (white space) is a diagonal video
size of 100” (254 cm), place the rear of your projector (distance A)
34” (86 cm) away from the screen.
The projector should be placed on the case for the three smallest screen sizes.
3.
Plug power cord into projector and AC outlet.
Dukane 8101H Projector Support Resources:
1.
These quick Start instructions are meant to serve as a supplemental reference during your trade show set up. Please
refer to the instructions enclosed with your projector before you set it up for the first time as they include more
detailed information on how to set up and operate your projector safely and more effectively.
• Dukane provides directions in a Concise User manual as well as in a more comprehensive booklet and CD
formats.
2.
If you are unable to resolve issues by reviewing these instructions please review the Dukane website at
http://www.dukane.com/av/service/default.asp
3.
Call Toll-free Support During Business Hours 800-676-2487.
Emergency Technical Support After hours 630-632-5244 or 630-464-0783
(14”)