Skydio Beacon Manuel utilisateur
Skydio Beacon User Guide
Total Control in Your Palm
Thank you for purchasing the Skydio Beacon. The Skydio Beacon unlocks a new level of
robustness by extending communication range and providing accurate user positioning while
also enabling lightweight controllability.
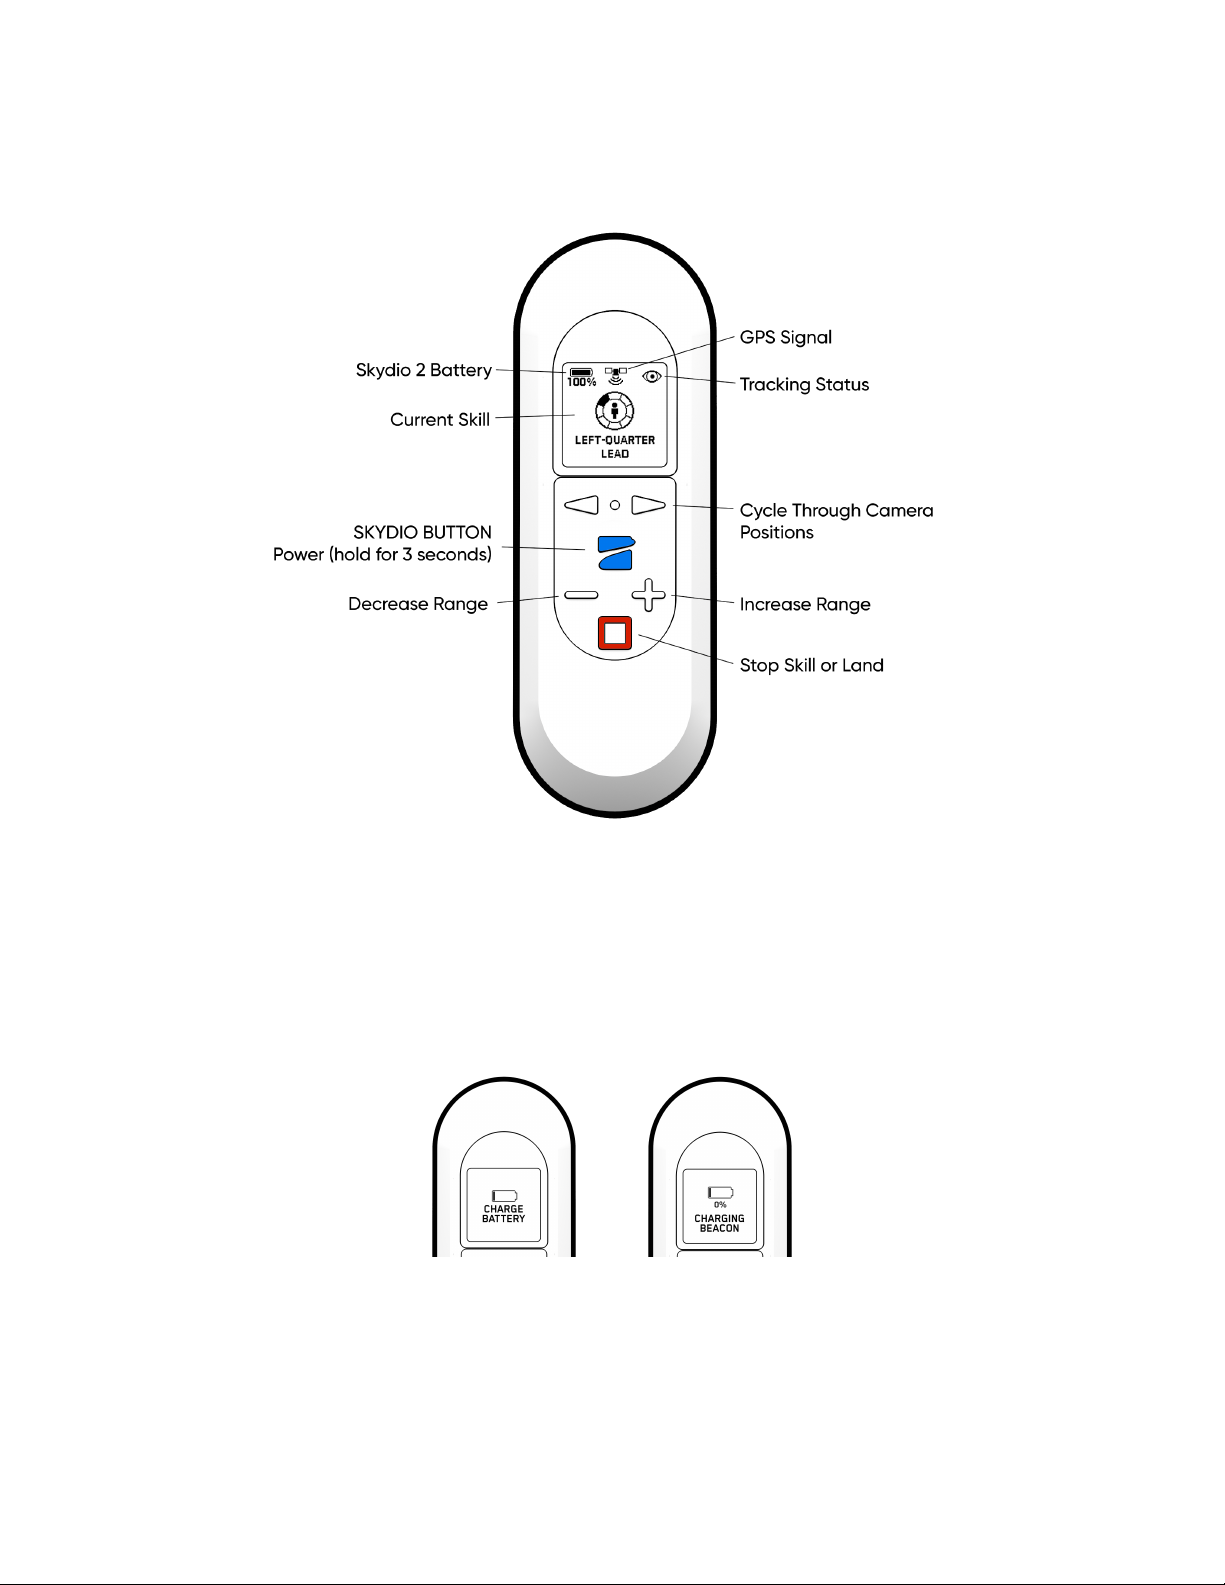
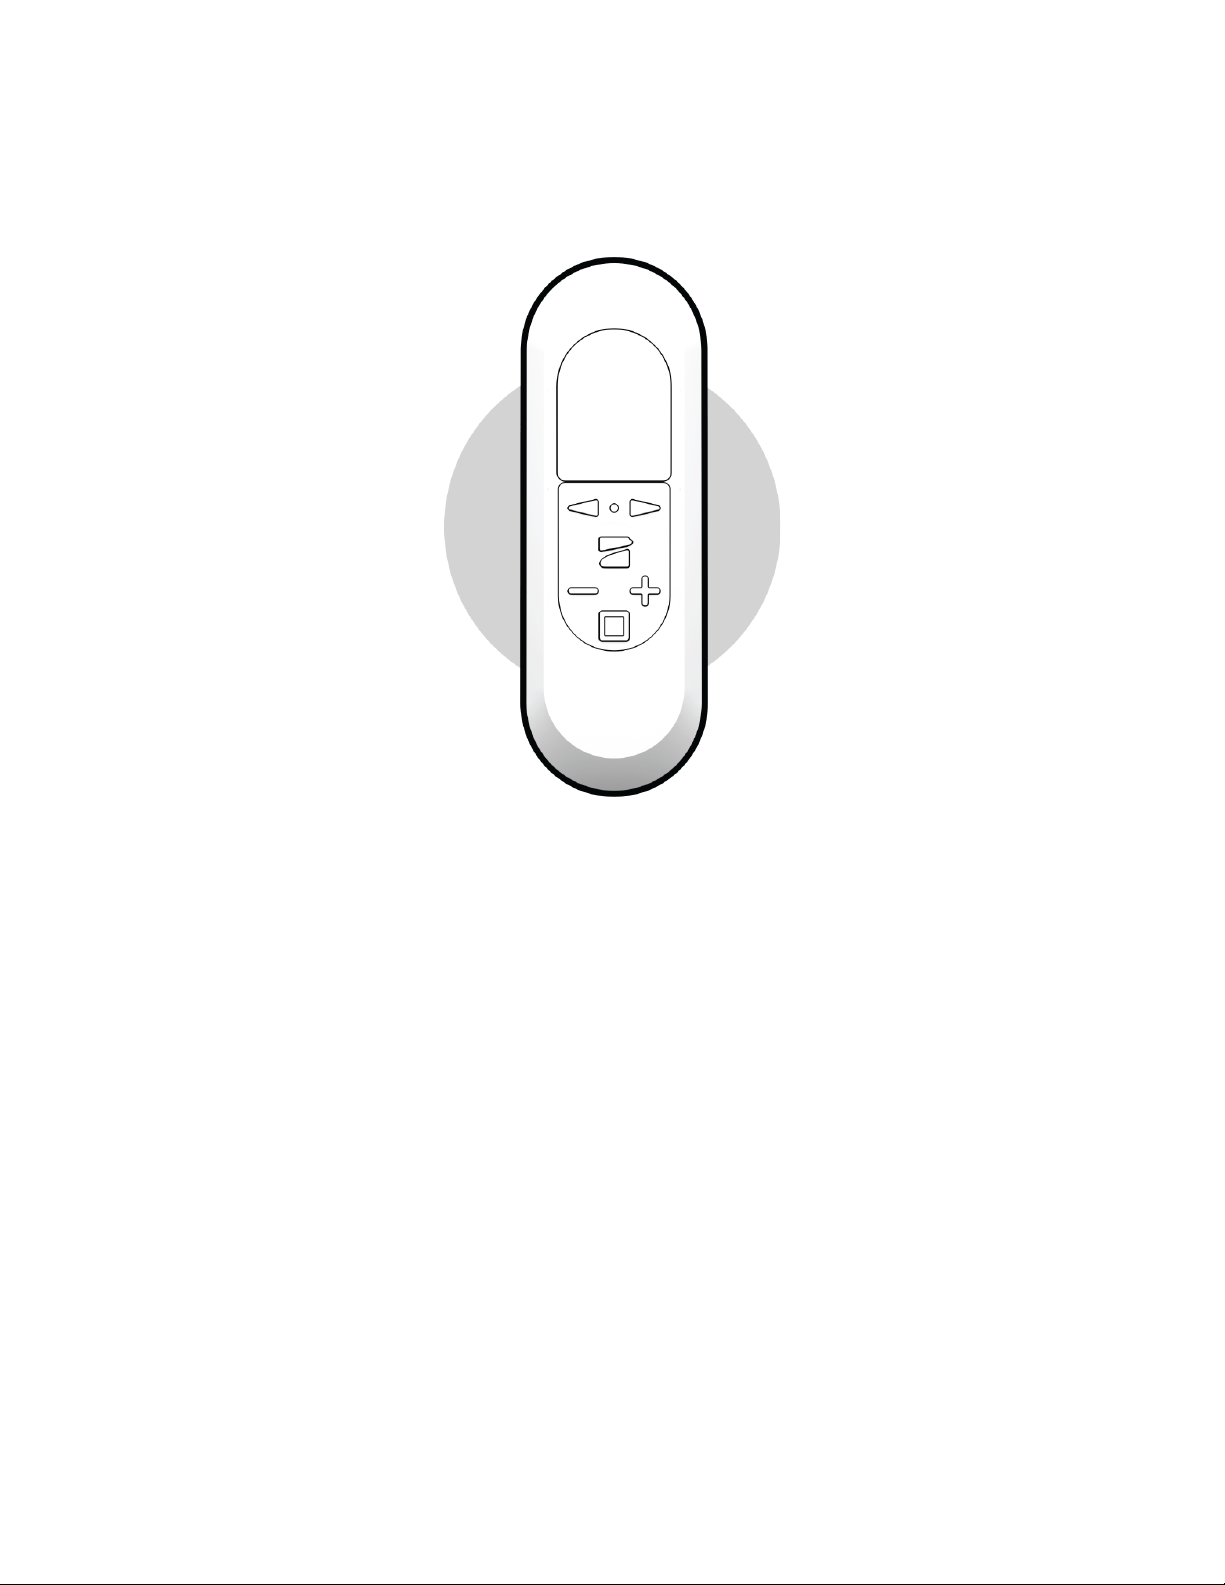
Overview
Charging the Beacon
The USB-C charging port allows you to charge your Beacon by connecting the USB-C cable
and power adapter that came with your Skydio 2.
NEEDS CHARGE CHARGING
The beacon’s screen will indicate that it is currently charging
. When the beacon is fully charged
the screen will turn off.

Pairing the Beacon to Skydio 2
To fly with the Beacon, you must first pair the Beacon with Skydio 2. Each beacon may only be
paired to a single Skydio 2 at a time. Once a beacon is paired with a drone, it will automatically
connect to that drone every time it is turned on until it is paired with a different Skydio 2.
1. Connect a Skydio battery to Skydio 2; to turn on, press and hold the power button for 5
seconds.
2. Press and hold SKYDIO button for 3 seconds button to turn on beacon.
3. If your Beacon has never paired with a Skydio 2 drone before, the screen will instruct
you to connect the beacon to a vehicle.
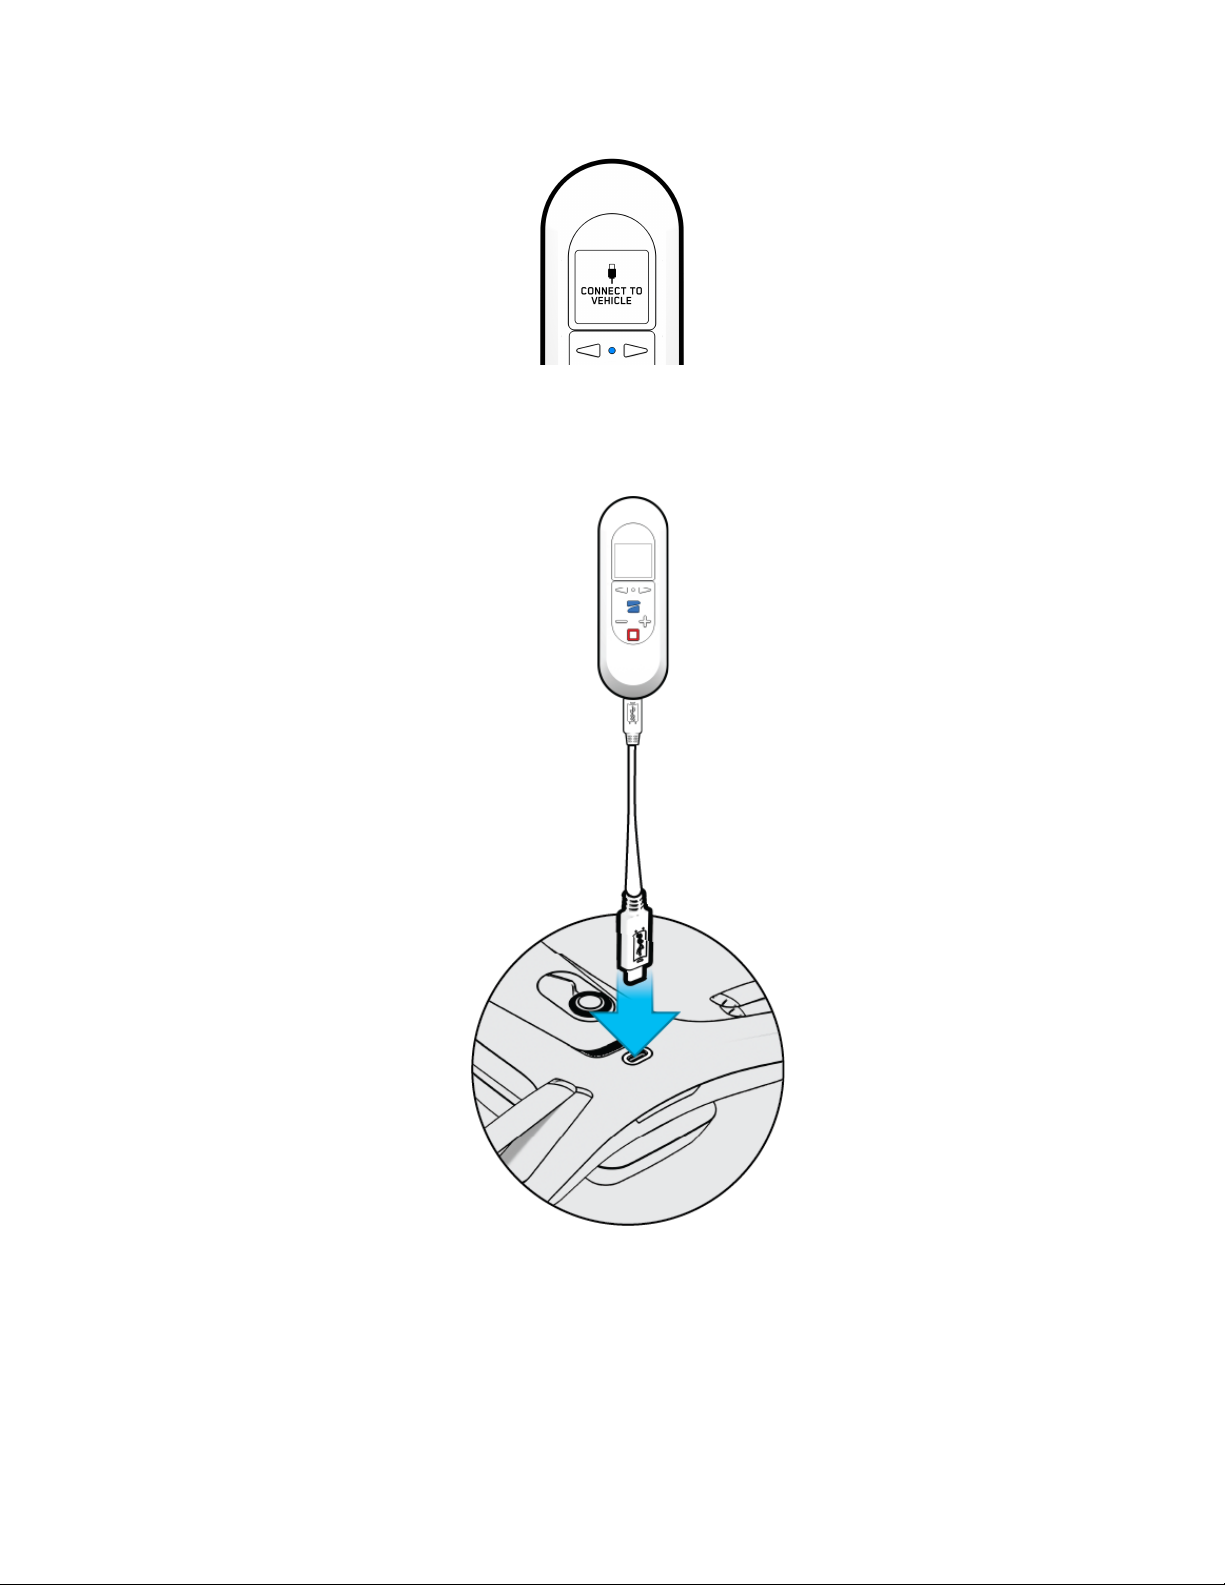
LED Blinking Blue
4. Plug the Beacon into Skydio 2 using the USB-C cable that came with the Skydio 2.
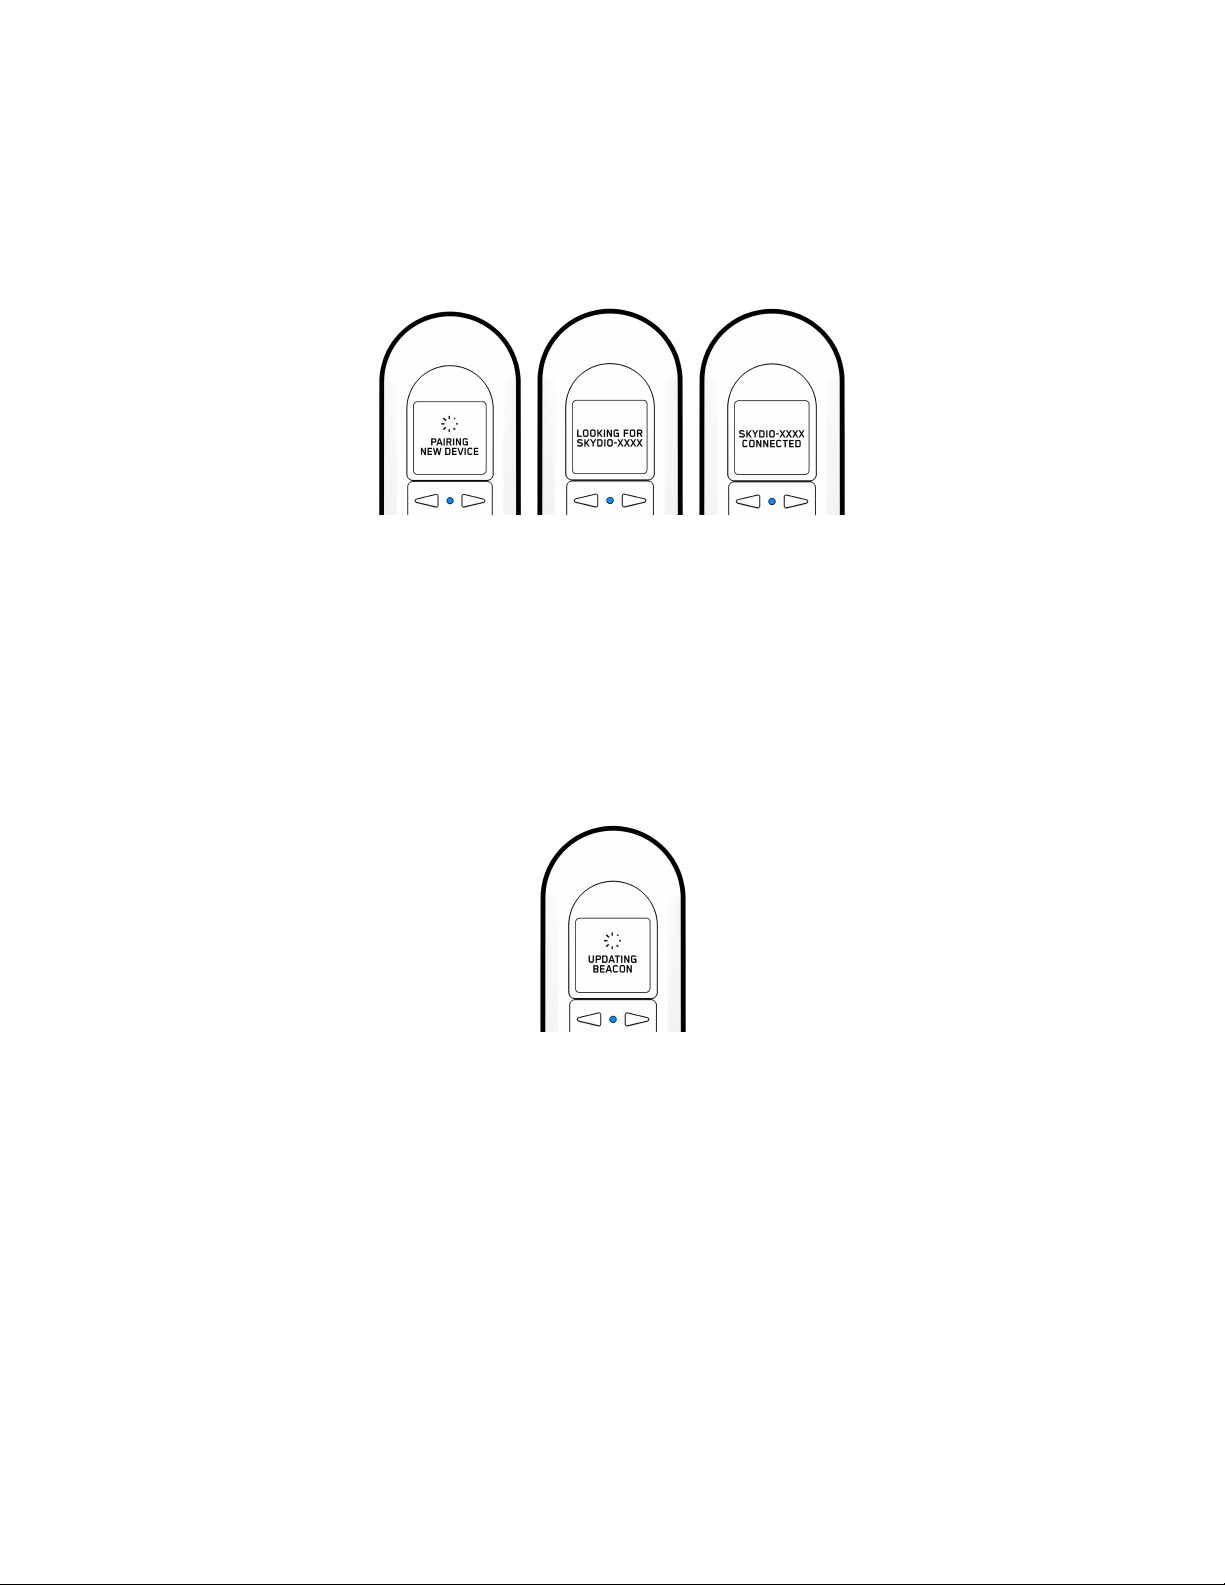
5. The Beacon will say “Connected to Skydio-XXXX” when it has sucessfully paired and
connected to Skydio 2.
LED Blinking Blue LED Solid Blue
Updating Beacon Software
The Beacon will automatically check for a software update every time it connects to Skydio 2. If
an update is available, the screen will display “Updating Beacon”. The Beacon will
automatically apply the new software update and reconnect to the Skydio 2 when it is finished.
Do not power off Beacon while update is in progress.
LED Blinking Blue
Learning to Fly
If you have not done so, Skydio highly recommends you perform your first Skydio 2 flight
without the Beacon in order to complete the Learn to Fly experience. See the Your First Flight
section of the Skydio 2 User Guide for more details.
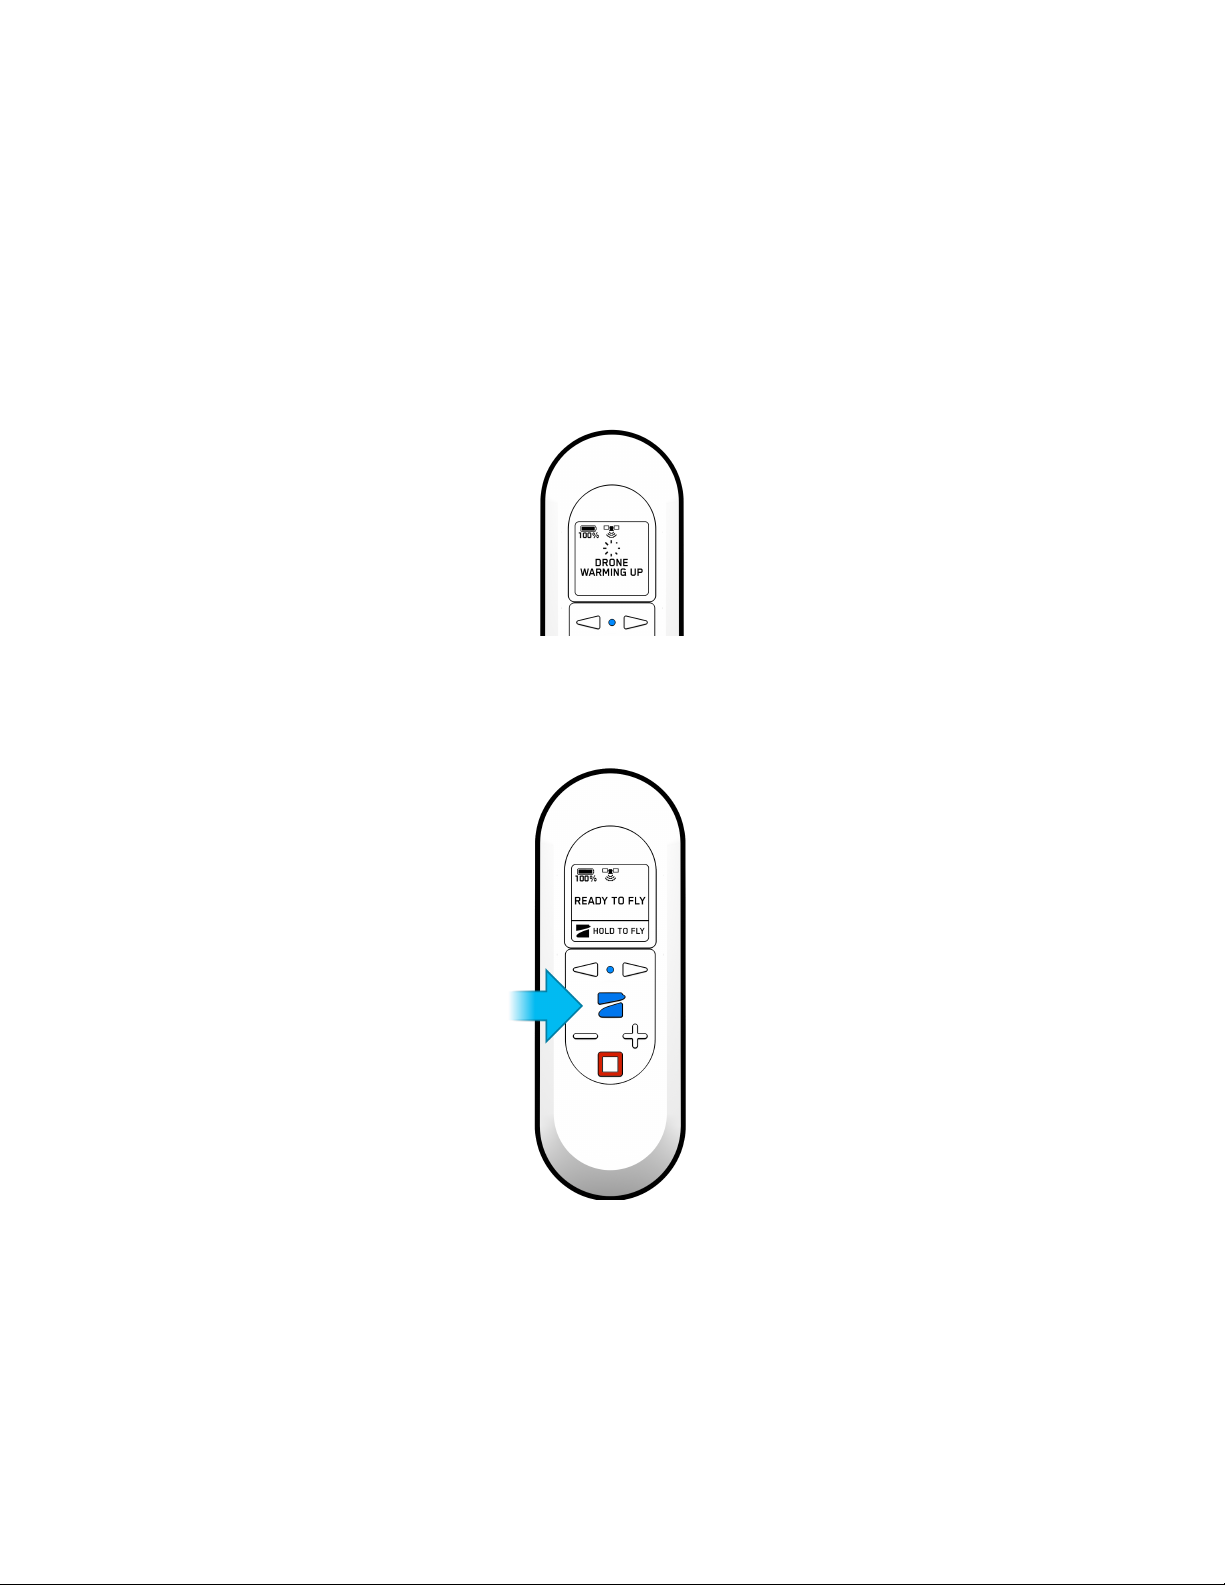
Preparing for Launch
1. Before launch, your Beacon will perform pre-flight checks such as looking for updates.
The Beacon relies on a strong GPS signal to operate and is required for launch. The
GPS strength indication can be found in the center icon of the header. If GPS is poor
you may be prompted to connect your phone to the beacon’s WiFi to speed up the
process.
LED Blinking Blue
2. To fly, press and hold the Skydio button to launch.
LED Solid Blue
Flying with Beacon
1. Hand Launch vs. Ground Launch

a. After launching, the vehicle will turn and acquire a subject.
i. Ground Launch: Vehicle will look for subject closest to Beacon.
ii. Hand Launch: The vehicle automatically determines subject based on
their proximity to the take-off location. This is particularly helpful when you
are in a group or there is close proximity of other people so that the
vehicle confidently identifies the correct subject.
2. Tracking
a. When tracking a subject the Skydio 2 relies on Visual recognition of a subject to
follow. However there may be cases, such as going through dense trees, where
the subject is not completely visible. In cases such as these, Skydio 2 will rely on
GPS tracking to maintain subject lock. These fluctuations in subject tracking are
surfaced by the icon in the top right corner.
Troubleshooting: If it looks like the vehicle has locked onto the wrong subject
when using the Beacon, check to see if the Ambiguous Visual Tracking icon is
present (see below). You may either go into Steering Mode to move the vehicle
directly in front of you, begin moving away from others so that the vehicle can
better distinguish you, or select yourself from your phone.
Icon
State
Ambiguous Visual Tracking
Skydio 2 picks a subject out of a group but isn’t 100% confident it’s
the right person.
Implicit Visual Tracking
Skydio 2 is confident it has automatically identified the subject.

Explicit Visual Tracking
A subject is selected specifically on the phone.
GPS Tracking
Skydio 2 is using the Beacon’s GPS to track a subject.
Not Tracking
Skydio 2 is not tracking a subject.
3. Beacon GPS
a. GPS strength can be seen via the center header icon. If the three satellite rings
are present then GPS is good. If GPS drops below an optimal connection, the
beacon will prompt you to check the phone.
4. Range
a. Pressing the “+” and “-” buttons will change the range that Skydio 2 will track you
from. You may choose close, medium and far tracking distances.
Beacon Skills
Motion Track Skill
Motion Track is the default skill after launch and allows Skydio 2 to track and maintain a
safe distance from the subject while avoiding obstacles. In this skill you may use the Left
and Right Arrows or Wand, described below, to change the angle Skydio 2 films the
subject from, such as from the front, side, or behind.
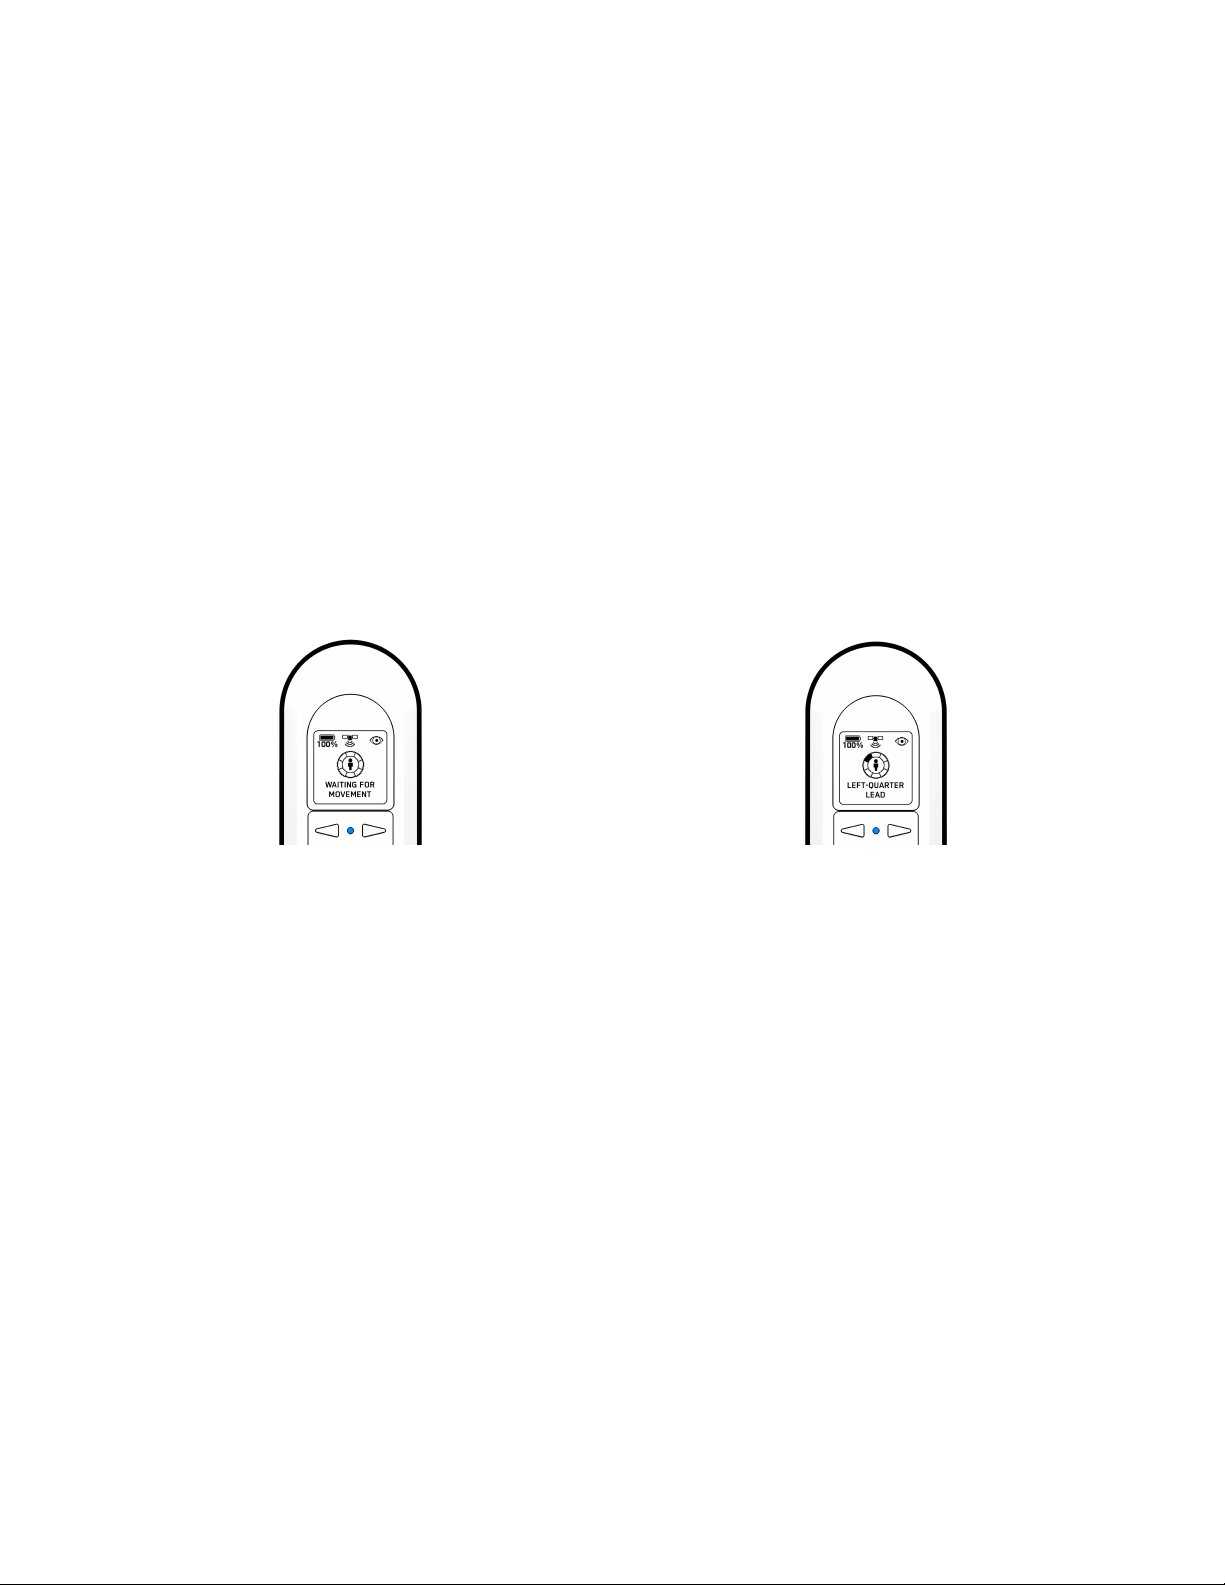
In order for Skydio 2 to track a subject in a specified orientation, the subject must be
moving in order for Skydio 2 to determine where to move itself. If you change Skydio 2’s
orientation and notice it not changing to the newly selected orientation, begin moving so
Skydio 2 can determine where to move.
AFTER WANDING: SUBJECT NOT MOVING SUBJECT MOVING
○ Orientation Options:
■ Lead
■ Right-Quarter Lead
■ Right Side
■ Right-Quarter Follow
■ Follow
■ Left-Quarter Follow
■ Left Side
■ Left-Quarter Lead
2. Hover
The Hover skill keeps Skydio 2 stationary while maintaining sight of you. Enter the Hover
skill by pressing the Stop button. Once in Hover, you may select Motion Track, Fixed
Track, or Steering by using the arrows and pressing the Skydio button. While
Hovering, use the “+” and “-” buttons to change height.
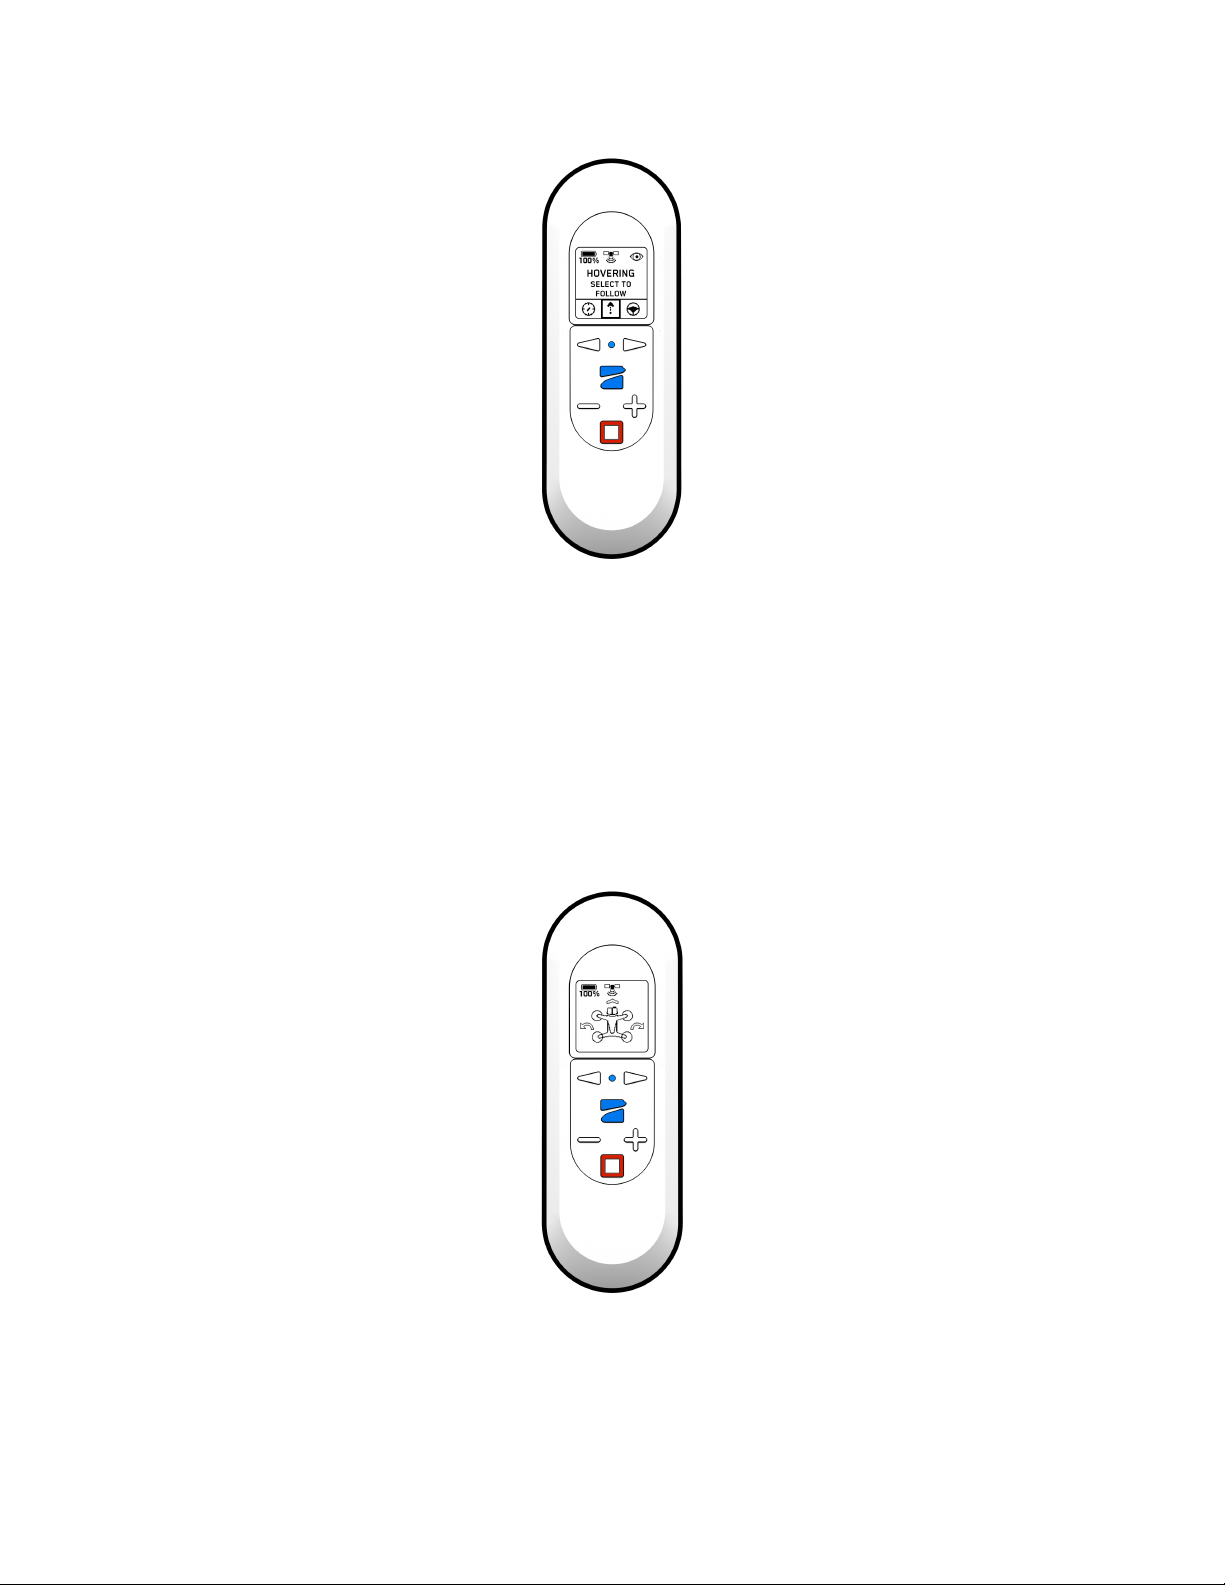
3. Steering
The Steering skill allows you to manually control Skydio 2 and can help you get out of
tight situations where the drone may become stuck. Enter the Steering skill by pressing
the Stop button, then use the arrows to scroll right and select Steering with the Skydio
Button. Once in Steering, you may re-enter Hover by pressing the Stop button.
■ Use the arrows to turn left or right
■ Press and hold Skydio button and move forward.
■ Use the “+” and “-” buttons to change height.
4. Fixed Track
○ When tracking a subject, the Fixed Track skill allows you to set Skydio 2 in a
fixed position in relation to the tracked subject. Enter the Fixed Track skill by
Autres manuels pour Beacon
2
Table des matières
Autres manuels Skydio Contrôleurs


