CONNECT
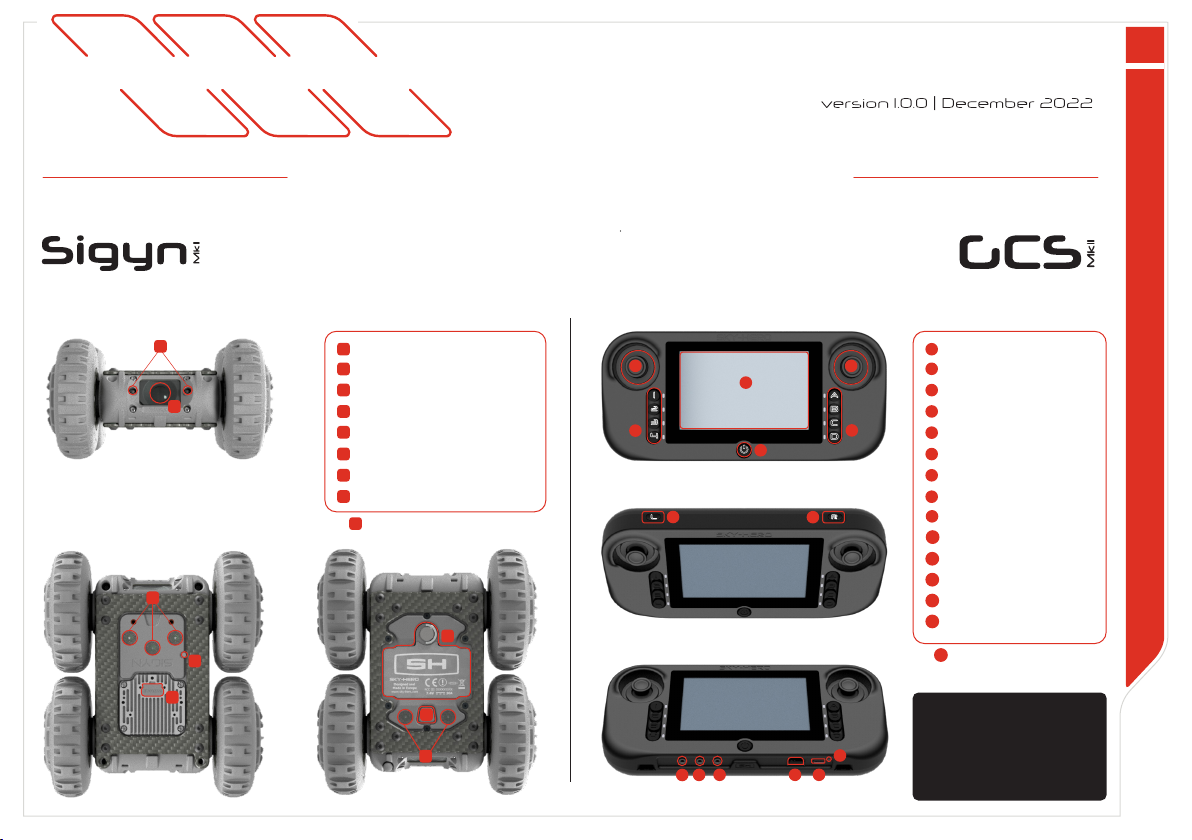
QUICK START GUIDE | SIGYN MkI
FIG. 5
4
FIG. 6
FIG. 4
3
PULL
OUT
7
PUSH
4
Turn On the Sigyn MkI by pressing the central button on the lower frame
The LED on upper frame will show a green light
On the GCS MkII, push the button on the left associated to the Sigyn MkI
tactical ground robot
You will then see on the GCS MkII the A/V stream transmitted by the Sigyn
MkI. You can start operating the ground robot
Turn On the GCS MkII by pressing ON/OFF button 1
7
3
4
A
B
C
D
Fig. 3
SHORT
PRESS
FIG. 6
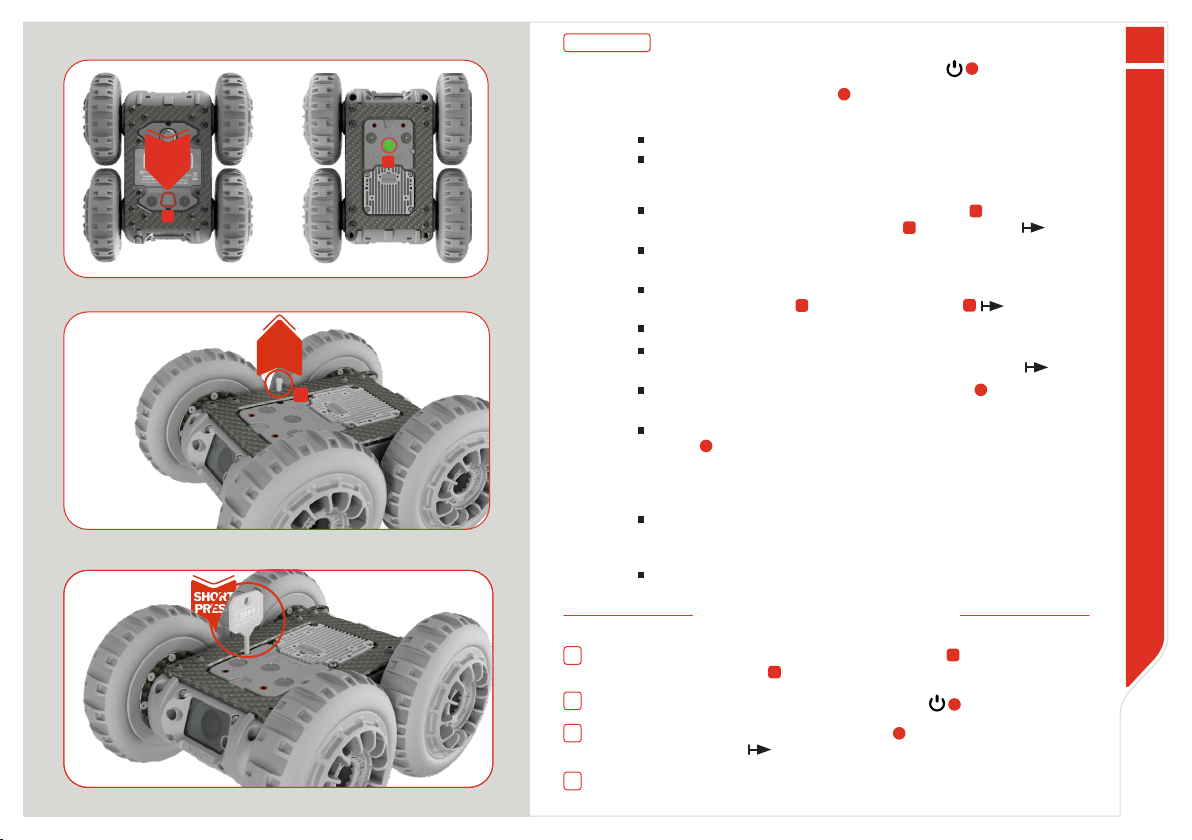
You are in possession of a Sigyn MkI Extension Set :
1. Turn on the GCS MkII by pressing ON/OFF button
2. Enter the menu (press Button D), navigate and select «Version »
3. Check if your remote rmware is 3.0.0 :
4. Then, bind the GCS MkII together with the Sigyn MkI :
Turn On the Sigyn MkI by pressing central button on the lower
frame. The status LED on upper frame becomes green
You have 40 sec. to press the binding button on the device. If this
time limit is passed, turn off the Sigyn MkI and restart step 4
Turn the Sigyn MkI back on the upper frame and remove the small
protective rubber cap next to the upper LEDs
You will see the small LED binding button with a steady red light
Use the binding key to gently press it once. The LED button is
ashing green light. Now, bind the device with the remote
On the GCS MkII, enter the menu (press Button D), navigate to
«Advanced Settings Menu» and select it.
In this menu, select«Device Binding»,navigate to the desired left
button to allocate to your device, select it; then select«Loki2,
Sigyn»on the following screen. A pop-up message appears on the
GCS MkII screen showing «Connecting» - along with incrementing
dots - to indicate the binding operation is progressing.
Once the binding is complete, the GCS MkII displays the Sigyn MkI
A/V stream. On the Sigyn MkI, the binding LED button turns steady
green.
Put the rubber cap back on the binding button on the Sigyn MkI
If Yes, proceed to step 4 to bind the Sigyn MkI and GCS MkII
If No, proceed rst with the rmware upgrade of GCS MkII and Loki MkII
OPTION B
1
5
7
Fig. 5
Fig. 6
5
4
Fig. 4
3
3
4