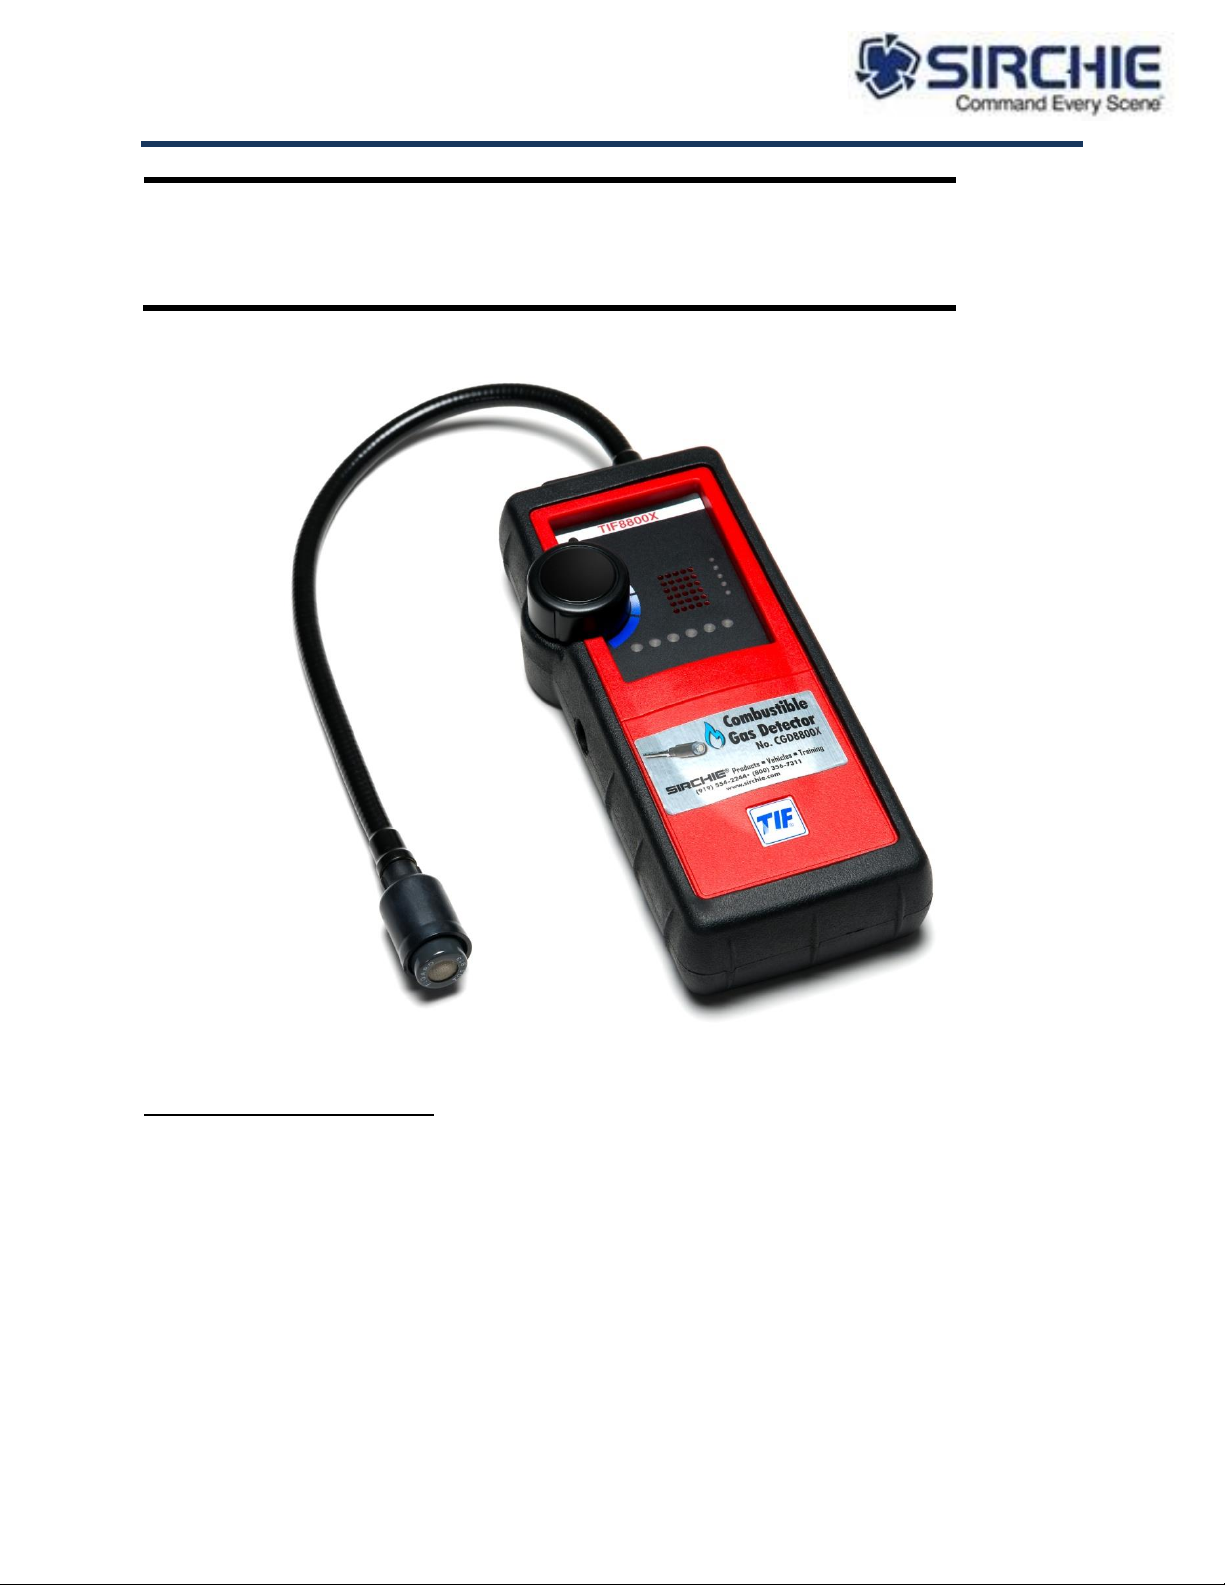
Technical Information TI0387R9
100 HUNTER PLACE, YOUNGSVILLE, NC 27596 USA
Ph: (919) 554-2244, (800) 356-7311 • Fax: (919) 554-2266, (800) 899-8181
3. During the charge cycle, the yellow LED (charge) is illuminated. Once charging is complete,
the green LED (READY) will also illuminate.
•Leaving the AC adapter connected after charging will not damage the instrument. However,
be aware that the instrument will not operate until the AC adapter has been disconnected.
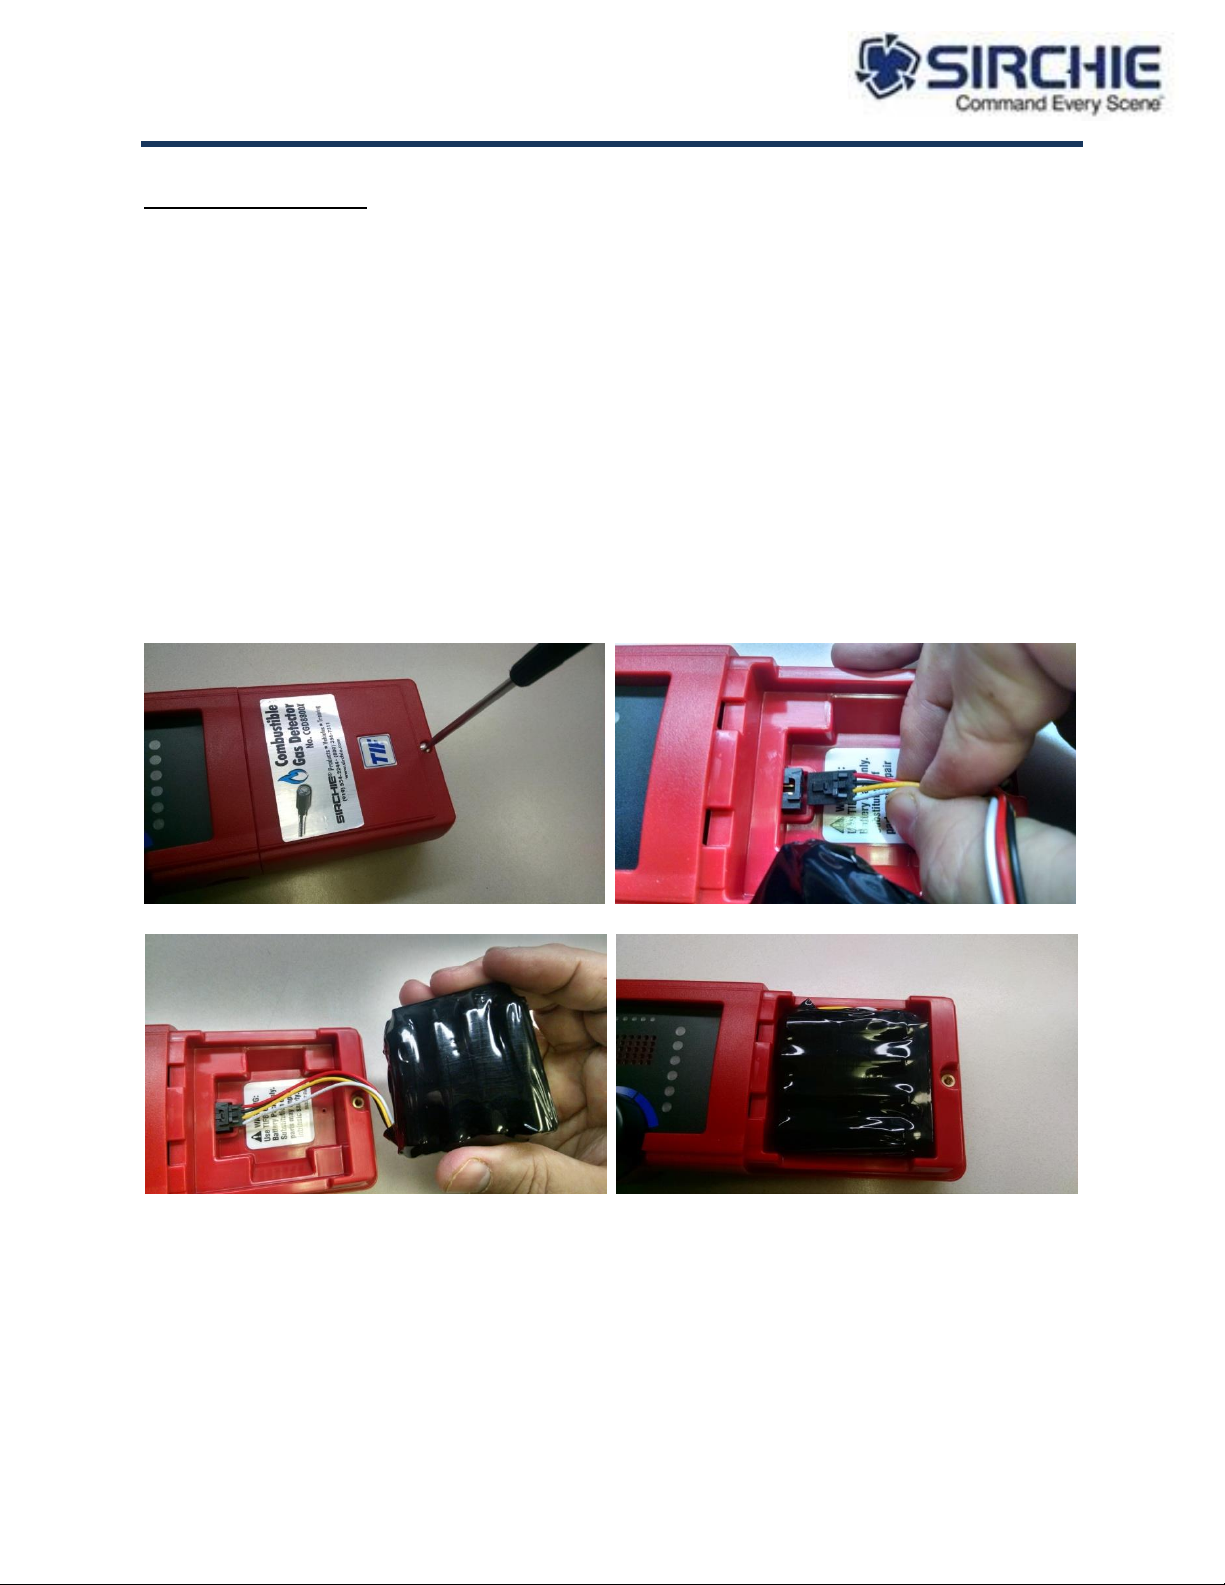
•The battery pack is shipped pre-charged but its condition upon arrival to the user is unknown
due to parasitic drainage that occurs during storage and shipment. An initial charge cycle is
recommended to achieve full performance of the instrument. This initial charge will take 2-6
hours depending on the actual condition of the battery pack. Subsequent charges (applied
after the red low-battery LED illuminates) will take approximately 15 hours.
•New battery packs need to be conditioned before they’re capable of optimum performance.
To condition a new battery pack, charge it fully then operate the instrument as normal until
the low battery LED illuminates. Repeat this procedure a minimum of 3 to 5 times.
Safety Precautions
CAUTION: To prevent personal injury:
Always insure that the rubber boot is installed on the instrument. Failure to do so may impair
the intrinsic safety of the instrument —without the rubber boot in place, there is a possibility
of static charge leading to explosion.
CAUTION: To prevent equipment damage:
•Charge the NiMH battery pack only in temperatures between 32°F and 104°F (0°C and 40°C).
Charging outside this temperature range may cause permanent damage to the battery pack.
•Use only the AC adapter included with the CGD8800X to charge the NiMH battery pack.
Controls / Operation
Once the battery pack is fully charged, the CGD8800X is ready to use.
1. Move the instrument to a known, non-contaminated atmosphere.
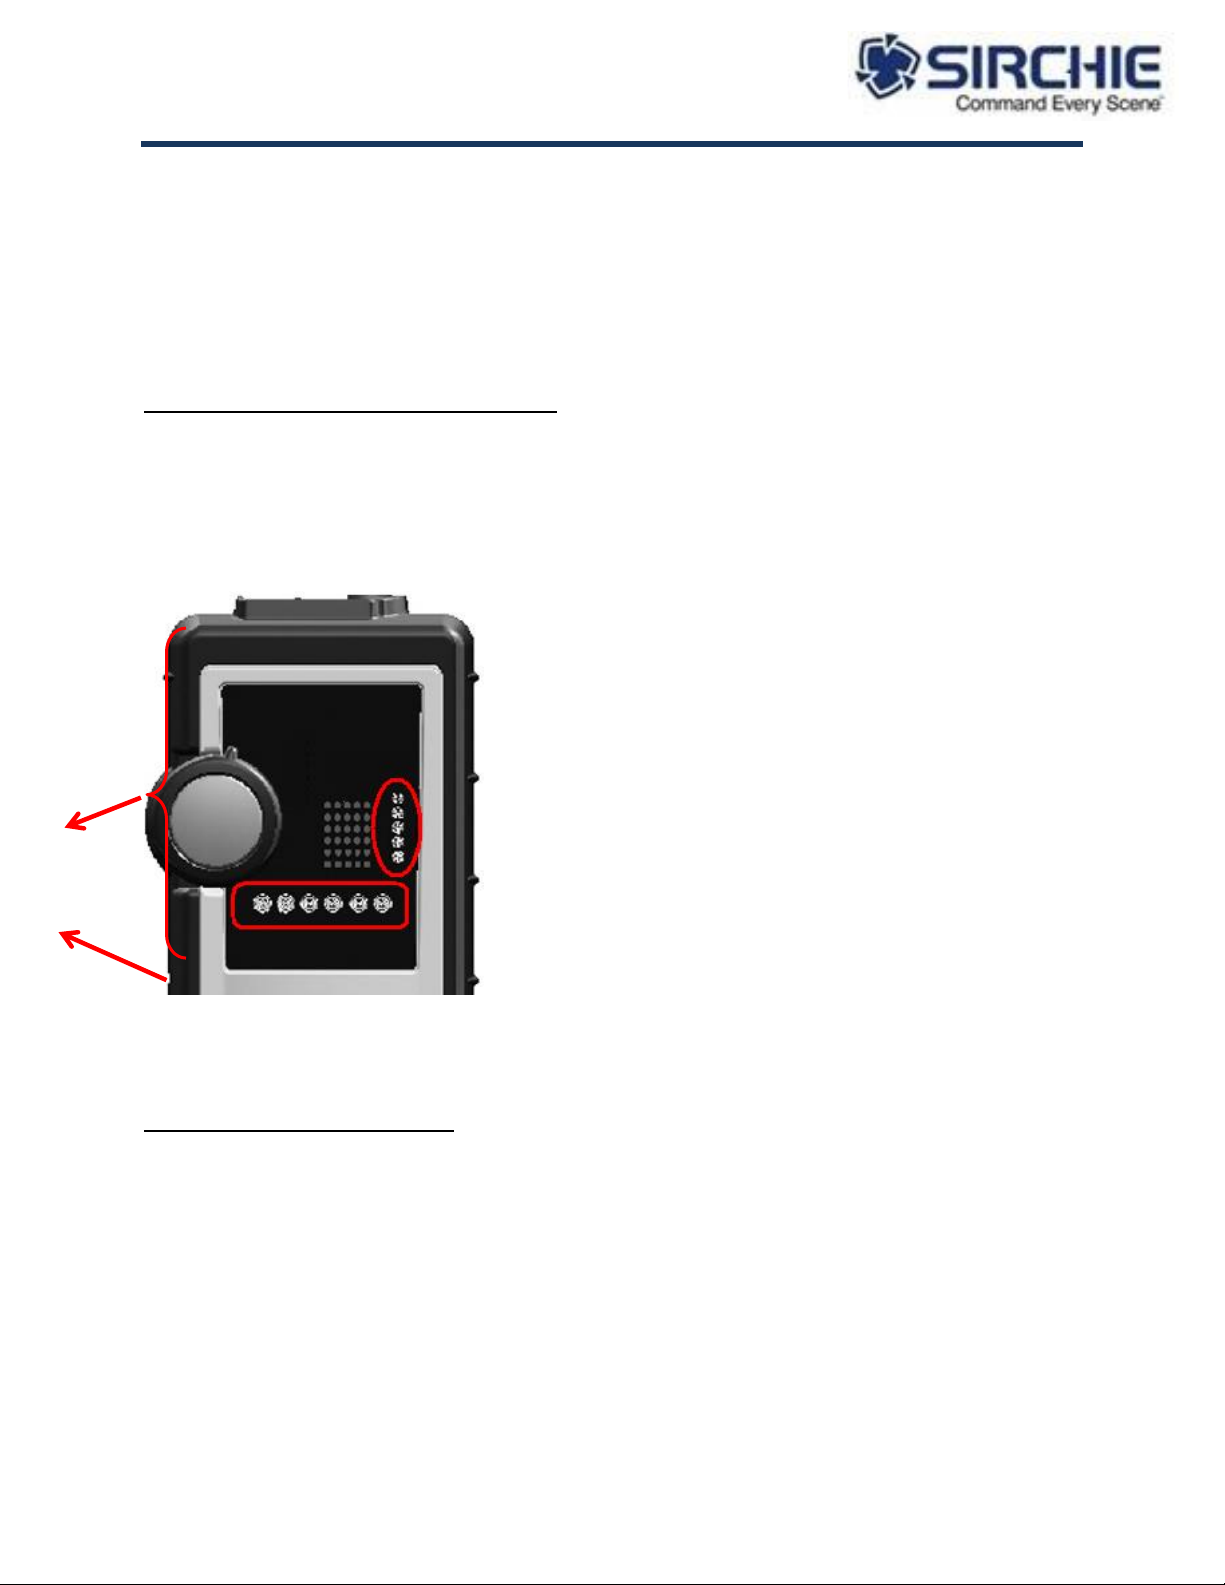
2. Turn the sensitivity control fully counter-clockwise.
3. Turn the power switch ON. The power LED should be illuminated and no sound should be
heard. Once the instrument has warmed up for about 30 seconds, a ticking sound will be
heard.
4. Rotate the sensitivity control to the highest setting that does not cause the instrument to
alarm.
5. Search the general area of the suspected leak. When a detectable compound enters the
sensor, the tick rate increases and the leak intensity LEDs illuminate from left to right. The
larger the concentration, the more LEDs will light up.