Sionyx Aurora Sport Manuel utilisateur
1/29
This User Manual includes the Aurora Sport, Aurora 'classic', and the Aurora PRO. Colors, features, and accessories will vary.
∴
Getting Started
What's in the Box
Battery Charging
Modes, Buttons and Settings
Electronic Viewfinder (EVF)
Scene and Focusing Rings
MicroSD Card
Setting the Date and Time
Attaching the Neck Strap [Not available with Aurora Sport]
∴
Photo and Video Modes
Focusing, Zooming, and Exposure Compensation
The Scene Ring
Playback, Deleting, and Zooming in on Photos and Videos
Photo Settings: Shutter | Burst | HDR | Self Timer | Panorama | Time Lapse
∴
Photo and Video Advanced Settings
Brightness (EVF) | Overlay | EVF Time Out | Night Glow | Quick Review (photo) | Invert
Image Video Settings: EIS | Frame Rate | Resolution
∴
Loop Mode
Trigger Type and Mode
∴
WIFI/Settings Mode
About: FW Version | Serial # | MAC Address | Factory Reset
Auto Power OFF
Calibrate Compass (original Aurora only)
Date and Time
Language
SD Card
Chimes
Audio
GPS (original Aurora only)
WIFI (and the Mobile App)
∴
Reference Information
Battery - usage tips, storage, handling and disposal
Camera Specifications
SiOnyx Customer Care[br][br]
Warranty
∴
Getting Started
Congratulations on the purchase of your new SiOnyx Aurora Night Vision camera! Let’s get started!
What's in the Box?
Note: The Aurora Sport does not include the Quick Start Guide, the Neck Strap, or the Microfiber Bag.
2/29
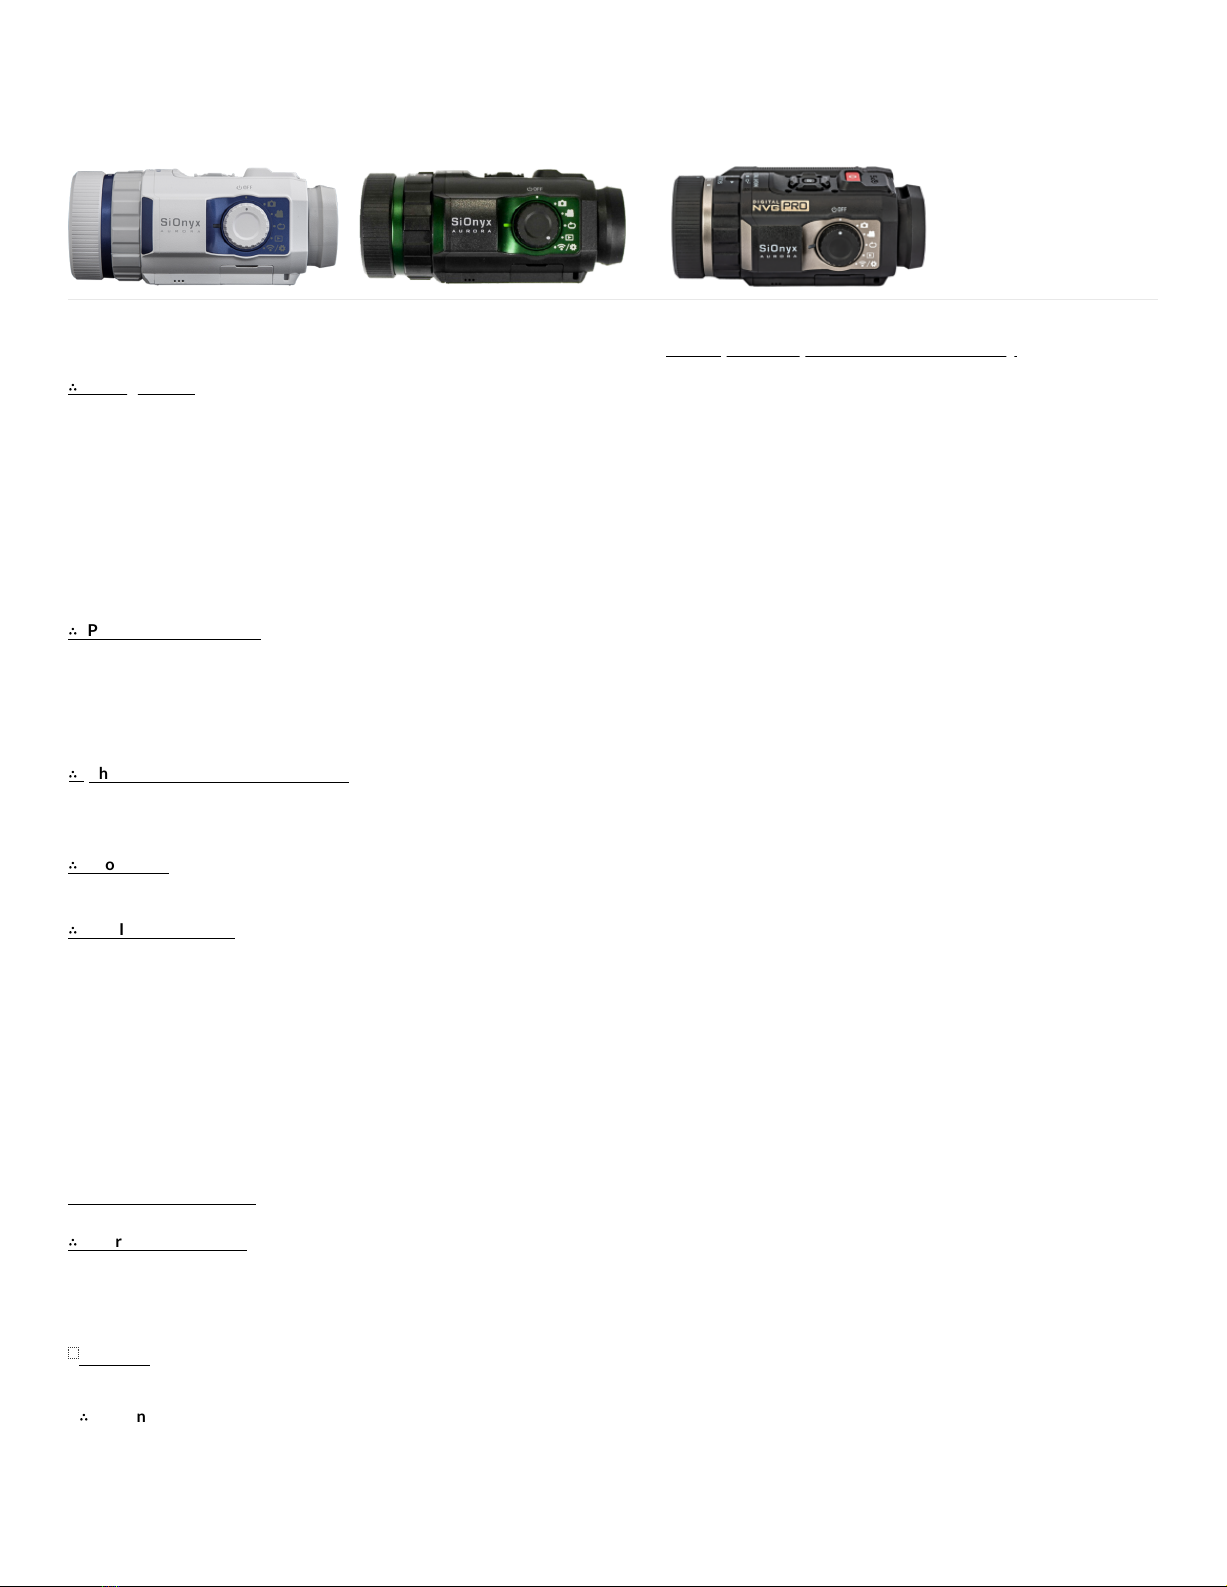
Aurora 'classic' Aurora Sport Aurora PRO
1. Aurora Camera Aurora Sport Camera Aurora PRO Camera
2. Camera Battery (np-50) Camera Battery (np-50) 2 Camera Batteries (np-50)
3. USB Charge/Data Cable USB Charge/Data Cable USB Charge/Data Cable
4. Quick Start Guide 32GB MicroSD Card
5. Neck Strap Neck Strap
6. Microfiber Bag Hardshell Waterproof Case
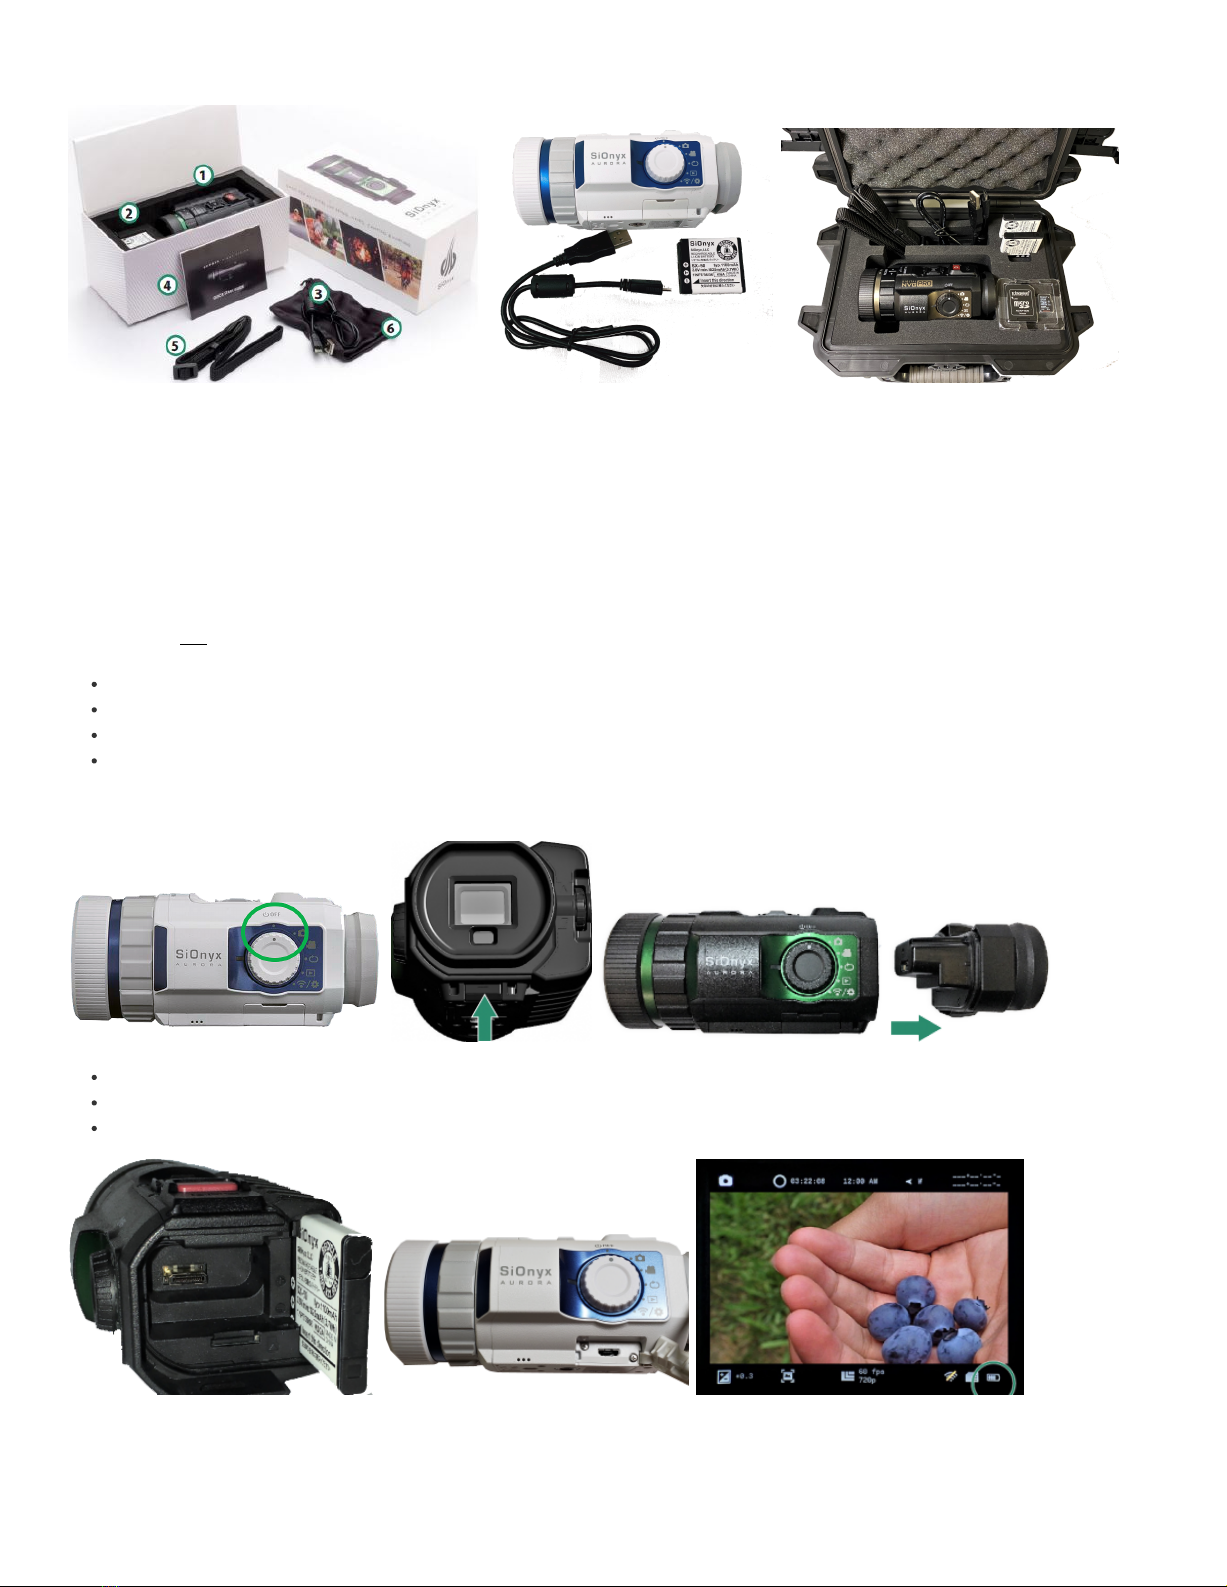
The Battery (Click here to view a related video)
Charge the battery via the USB port under the rubber flap before using your camera for the first time.
Make sure the camera is in OFF mode.
Remove the Viewfinder by pulling down on the Viewfinder Release button.
Pull the Viewfinder straight out.
Slide the battery into the battery slot.
Insert the Micro USB cable into the camera.
Connect the camera to a powered-on computer or plug it into a wall charger using the supplied USB cable.
A green led on the side of the camera will blink slowly during the charging process. When the battery is fully charged, the light will turn off. To remove the
battery, press the tab on the left side of the battery and slide the battery out. The charge level can be seen on the bottom right of the menu screen.
Note: It will take about 2-3 hours to charge the battery to 100% and it will last ~2 hours of video capture. Video recording will stop at 29 minutes.
3/29
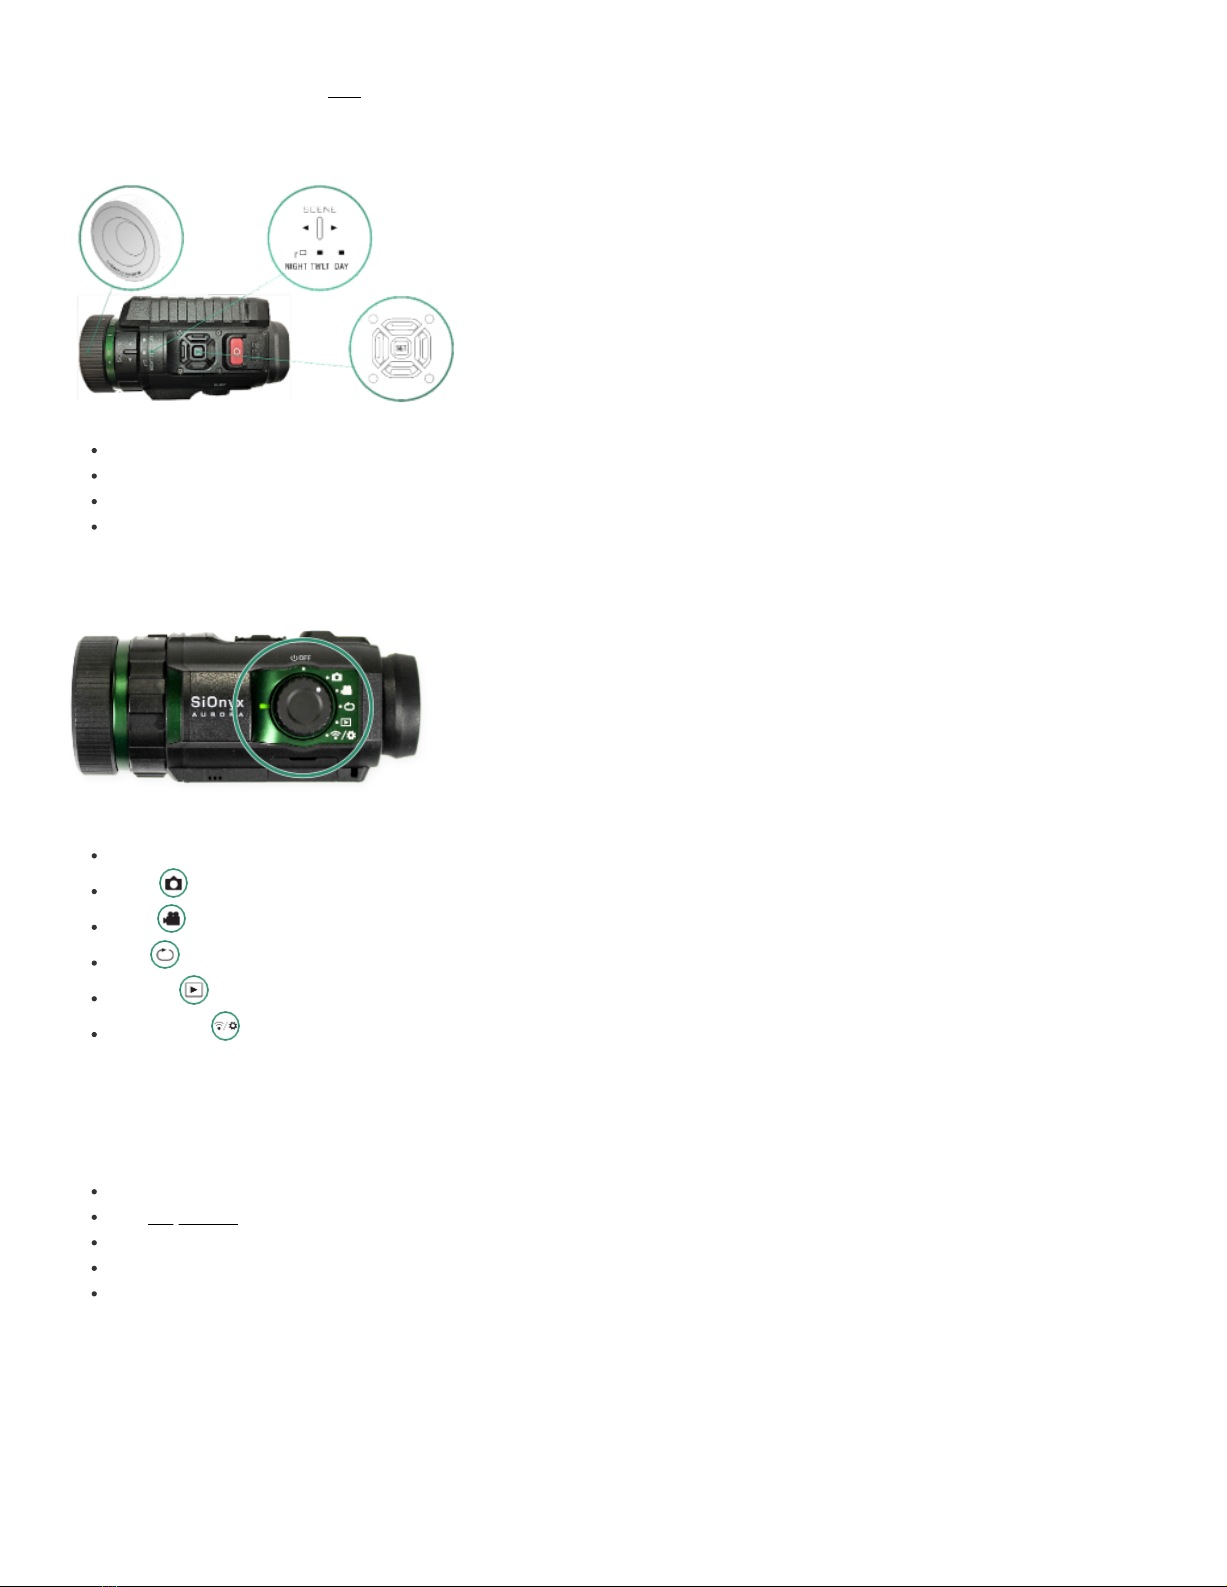
Settings, Modes and Buttons (Click here to view a related video)
Settings
Shutter Button (Single Shot, Video Start/Stop)
Advanced Settings (Zoom, Gain, etc.)
Scene Ring (Day, Twilight, Night)
Focus Ring
Modes
The Mode Dial turns the camera on and off as well as to set the camera mode.
Power Off
Photo
Video
Loop
Playback
WiFi/Settings
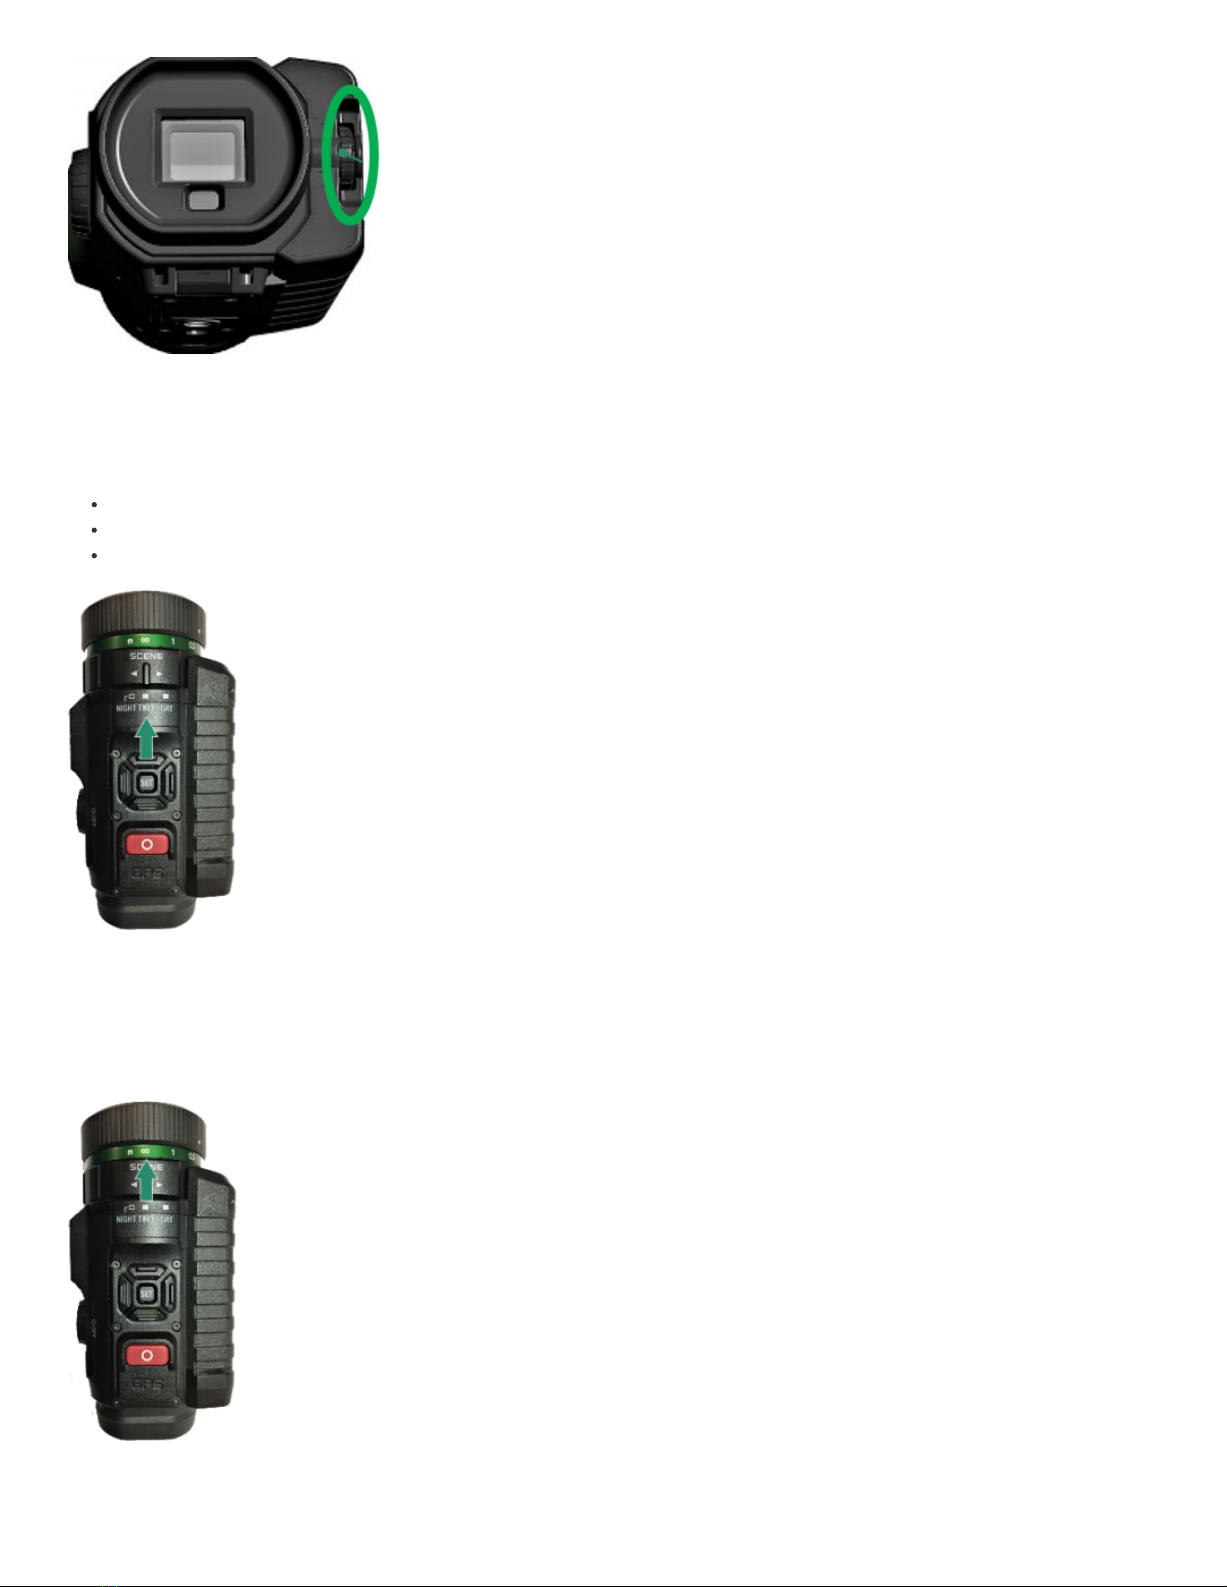
Electronic Viewfinder (EVF)
The EVF (Electronic Viewfinder):
contains a menu and control system for the camera
has a Diopter Dial on the right side allows you to focus the menu without prescription glasses
needs to be removed to access the battery and MicroSD card
timeout is set to automatic by default
will turn off when the camera is moved away from your eye (pop-up)
4/29
Scene Ring
Use the Scene Ring to adjust the lens to the time of day.
Night (f/1.4) – full night vision
Twilight (f/2.0) – approximately one hour before sunrise and one hour after daylight
Day (f/5.6) – sun or clouds
Focusing Ring
Use the Focusing Ring to adjust the focus visually or by the distance settings on the dial.
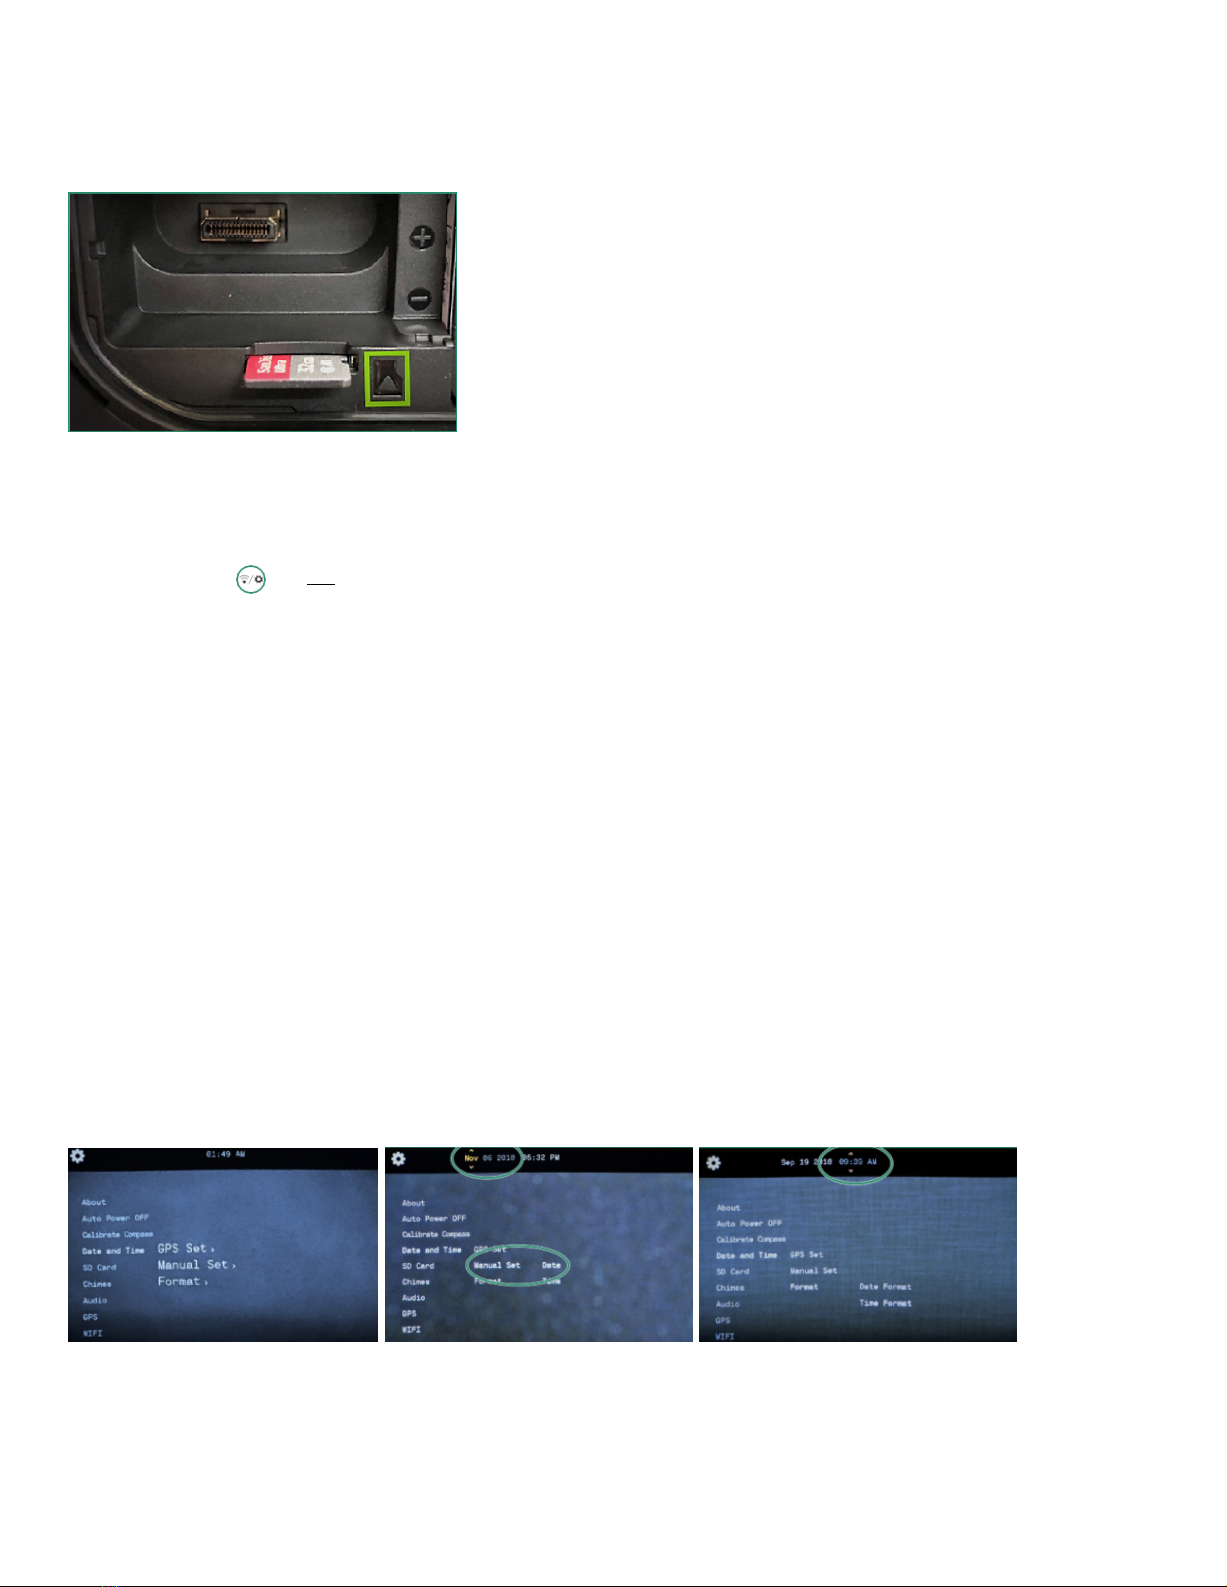
MicroSD Card (32GB card included with Aurora PRO)
5/29
To insert the MicroSD card:
1. Remove the Viewfinder by pulling down on the Viewfinder Release button.
2. Pull the Viewfinder straight out.
3. Insert the MicroSD card into its slot and push it until it locks.
To remove it, push it again and it will release, then pull it straight out.
CAUTION: Do not force the MicroSD card into the slot or data may be damaged.
Setting the Date and Time (Click here to view a related video)
To set the date and time:
1. Rotate the Settings Dial to the WiFi/Settings menu.
2. Press SET to access the WiFi/Settings menu.
3. Toggle down to Date and Time and toggle right to the Date and Time options.
4. To set the date and time manually, toggle down to Manual Set.
5. Toggle right to Date and press SET. The date at the top of the menu is now in change mode.
6. Toggle up and down to change the Date and press SET. Repeat these steps to set the Time.
NOTE: The "Set Time" warning will appear until the date and time are set.
To set the format of the date and time:
1. Rotate the Settings Dial to the WiFi & Settings position.
2. Toggle down to Date and Time and then right and down to Format.
3. To set the Date Format, toggle right and press SET.
4. Select the Date Format at the top of the screen. Select an option and press SET.
5. Toggle down to Time Format and press SET.
6. Select the option you want at the top of the screen and press SET again.
7. Toggle left twice to exit to the main menu.
8. Toggle left twice to return to the main WIFI/Settings menu.
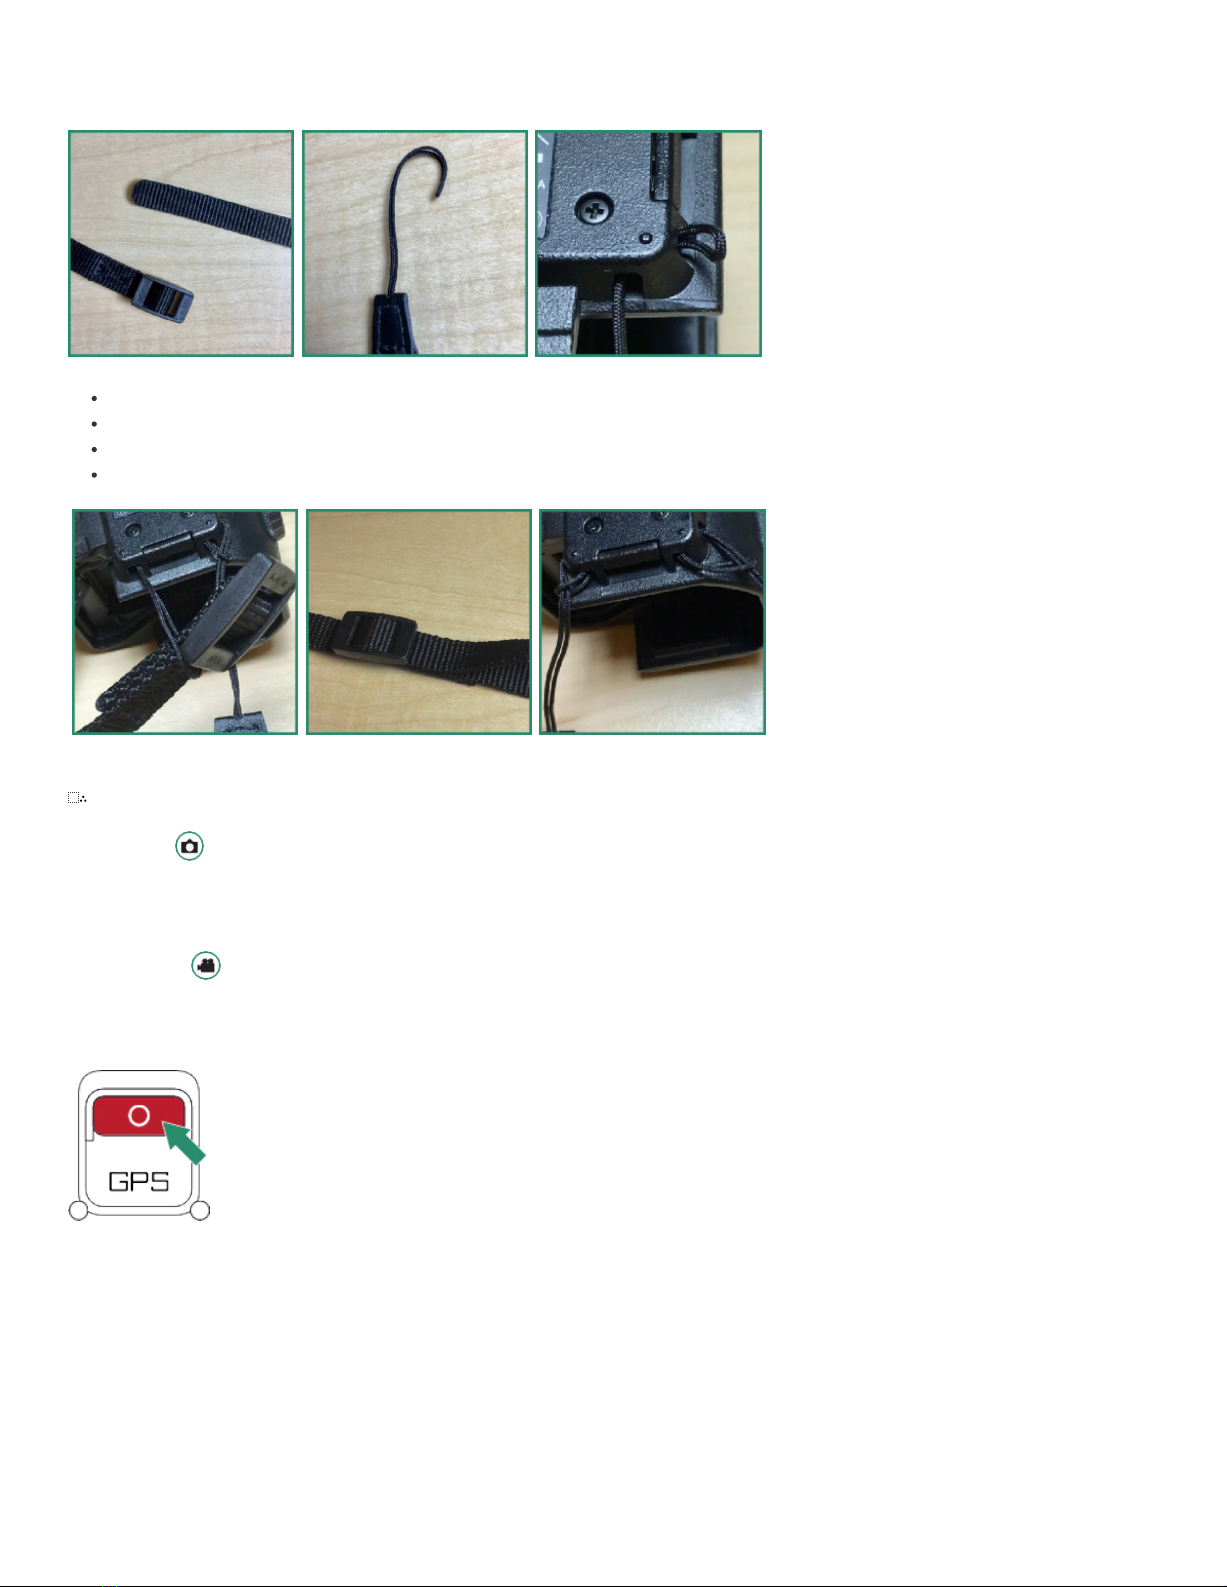
Attaching the Neck Strap [Not available with Aurora Sport]
A detachable neck strap allows you to keep the camera accessible on any adventure.
1. Separate the neck strap into two parts.
6/29
2. Make a loop at either end of the strap.
3. Insert the loop into one end of the neck strap holder and pull it through.
Place the end of the strap through the loop.
Repeat the entire procedure on the other side of the neck strap holder.
Redo the clasp on the strap.
Pull the straps to tighten the loops.
∴
Photo and Video Modes
Taking a Photo
1. To take a photo, rotate the Settings Dial to Photo Mode.
2. Press the Shutter button to take a photo.
Shooting a Video NOTE: AURORA WILL RECORD 29 MINUTES OF VIDEO AND STOP.
1. To shoot a video, rotate the Settings Dial to Video Mode.
2. Press the Shutter button to start and stop the video.
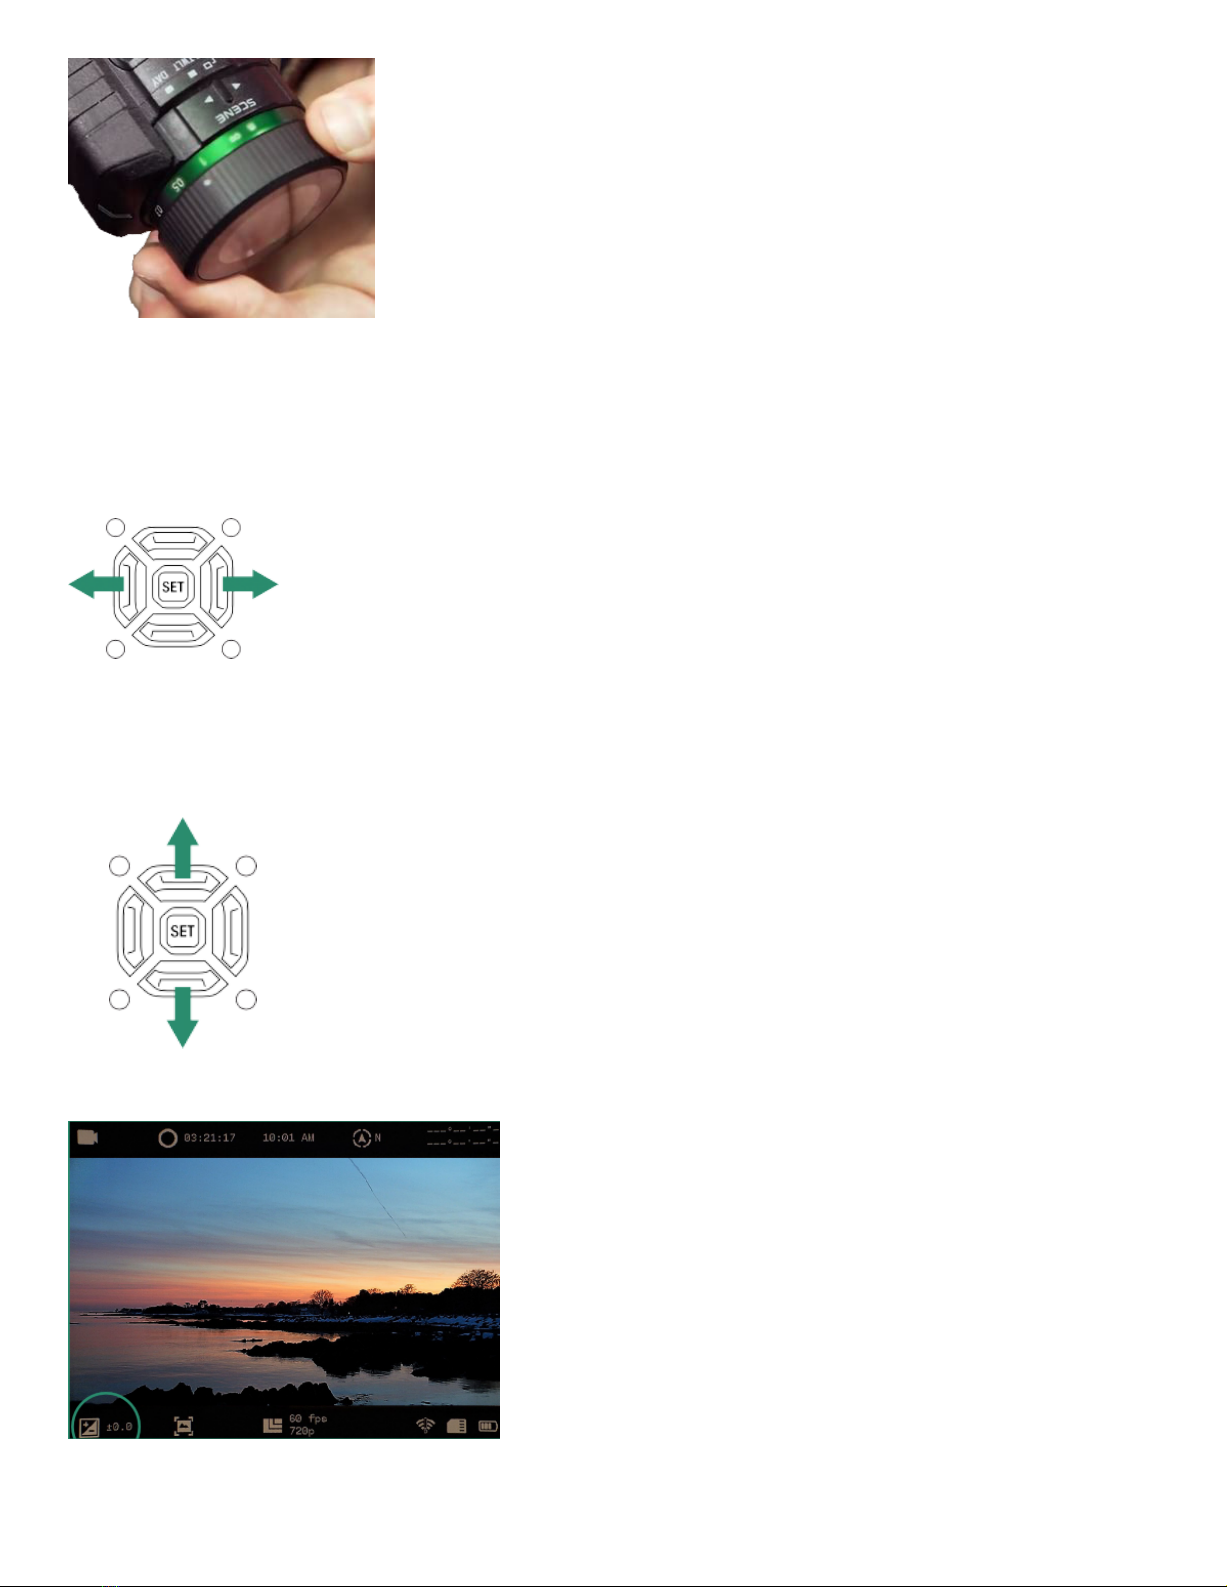
Adjusting the Focus
To bring an image into focus, turn the Focusing Ring left and right.
7/29
Note: To assist in focusing, estimate the distance where the subject in your scene will be and set that distance in meters on the focus scale.
Zoom
To zoom in and out, toggle left and right with the buttons either side of SET.
Three toggle clicks to the right gives you 1:1 imaging.
Exposure Value (EV/Gain)
Exposure Value adjusts the brightness and darkness of the scene.
Toggle up and down to increase or decrease.
NOTE: The EV setting is located on the bottom left of the Viewfinder screen.
8/29
Playback Mode allows you to view, delete and zoom in on photos and videos.
1. Rotate the Settings Dial to Playback Mode.
2. You’ll see the latest photo or video you shot.
3. Toggle left and right to view your photos or videos.
Viewing and Zooming In
You can view and zoom in on photos and videos in the Playback Mode.
1. Rotate the Settings Dial to Playback Mode.
2. You’ll see the latest photo or video you shot.
3. Toggle left and right to view your photos or videos.
4. You can zoom in temporarily by long pressing SET.
5. Double-click SET to get a permanent zoom.
6. Long press the right toggle button to further zoom in, or the left toggle button to zoom out.
7. Quick presses of the various toggle buttons pan around the image.
NOTE: To return to normal view, long press the left toggle and double-click SET.
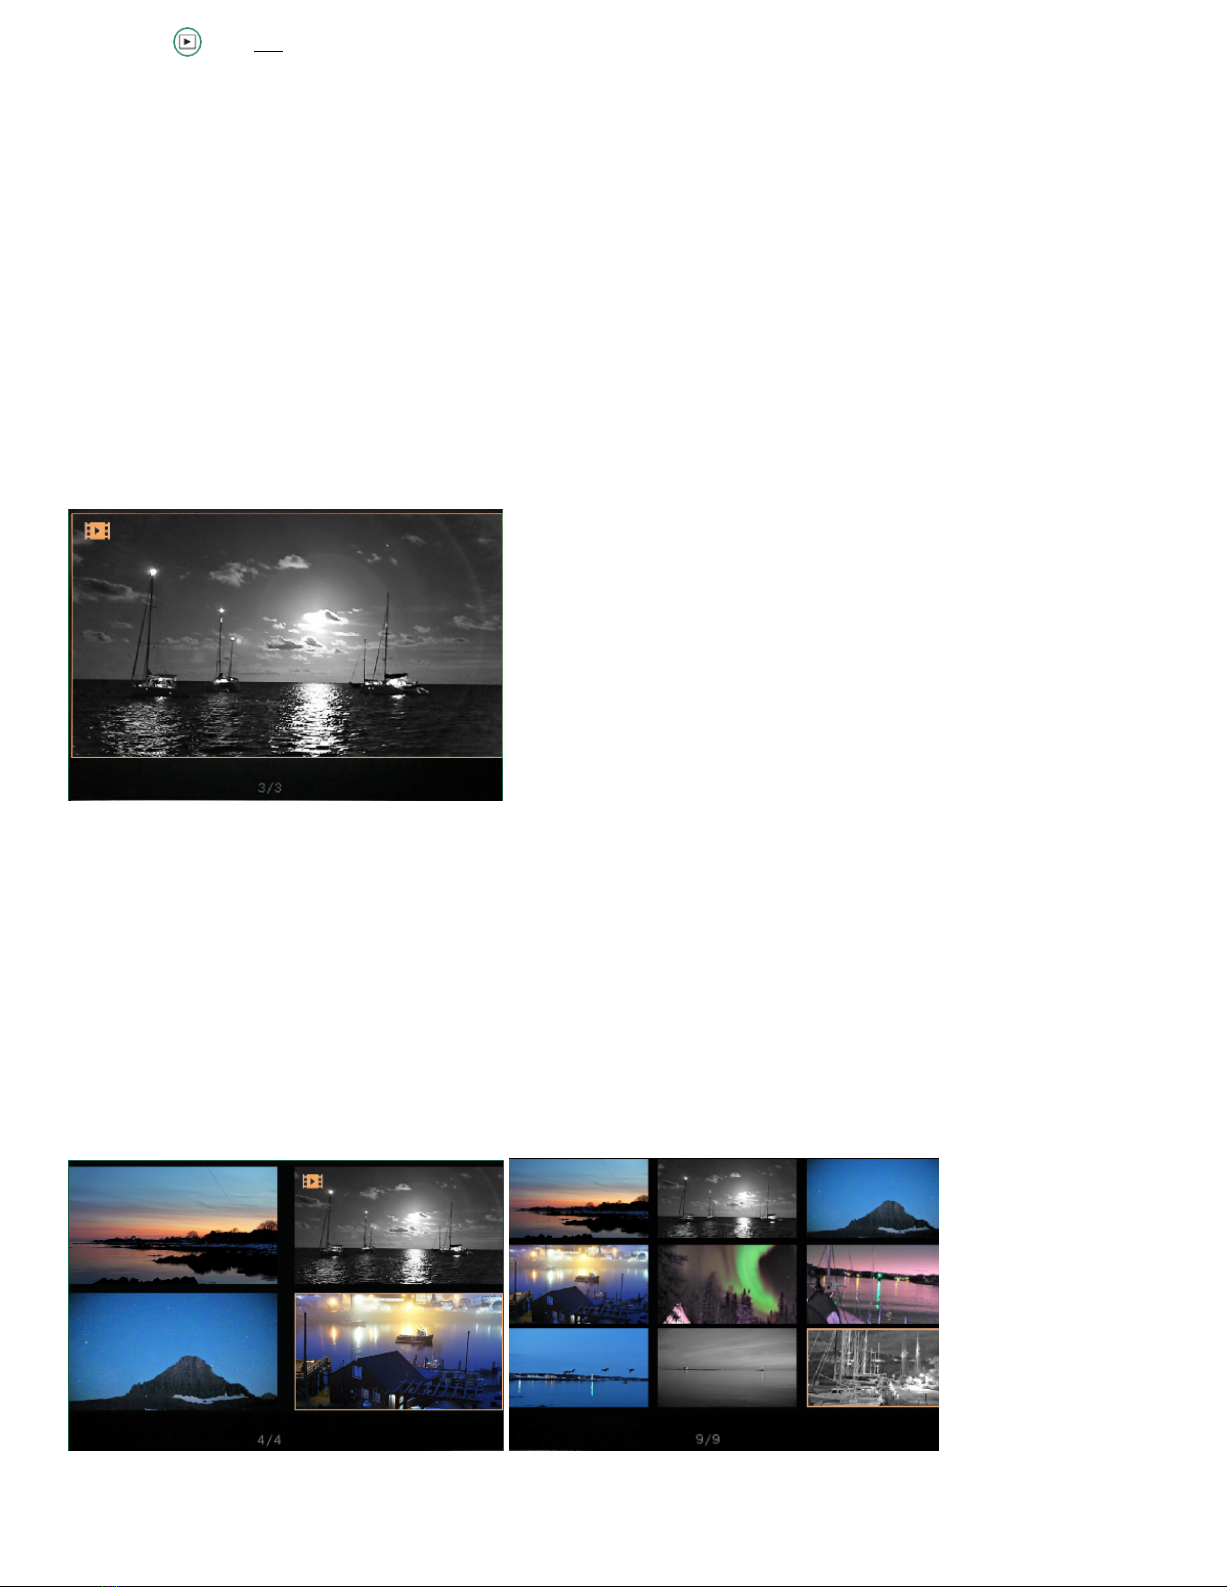
Viewing Thumbnails of Photos and Videos
You can view four or nine thumbnails of photos and videos in the Playback Mode.
1. Rotate the Settings Dial to Playback Mode.
2. You’ll see the latest photo or video you shot.
3. Toggle up twice quickly and you’ll four thumbnails.
4. Toggle up twice quickly again to view nine thumbnails.
5. Toggle left and right to highlight the photo or video.
6. To exit out of thumbnail mode, toggle up twice quickly.
Playback Mode (Click here to view a related video)
9/29
View videos in the Playback Mode.
1. Rotate the Settings Dial to Playback Mode.
2. Toggle to the video that you want to play.
3. Long press SET until the video starts playing.
Deleting Photos and Videos
Delete photos and videos in the Playback Mode.
1. Rotate the Settings Dial to Playback Mode.
2. Toggle to the photo or video that you want to delete and press SET.
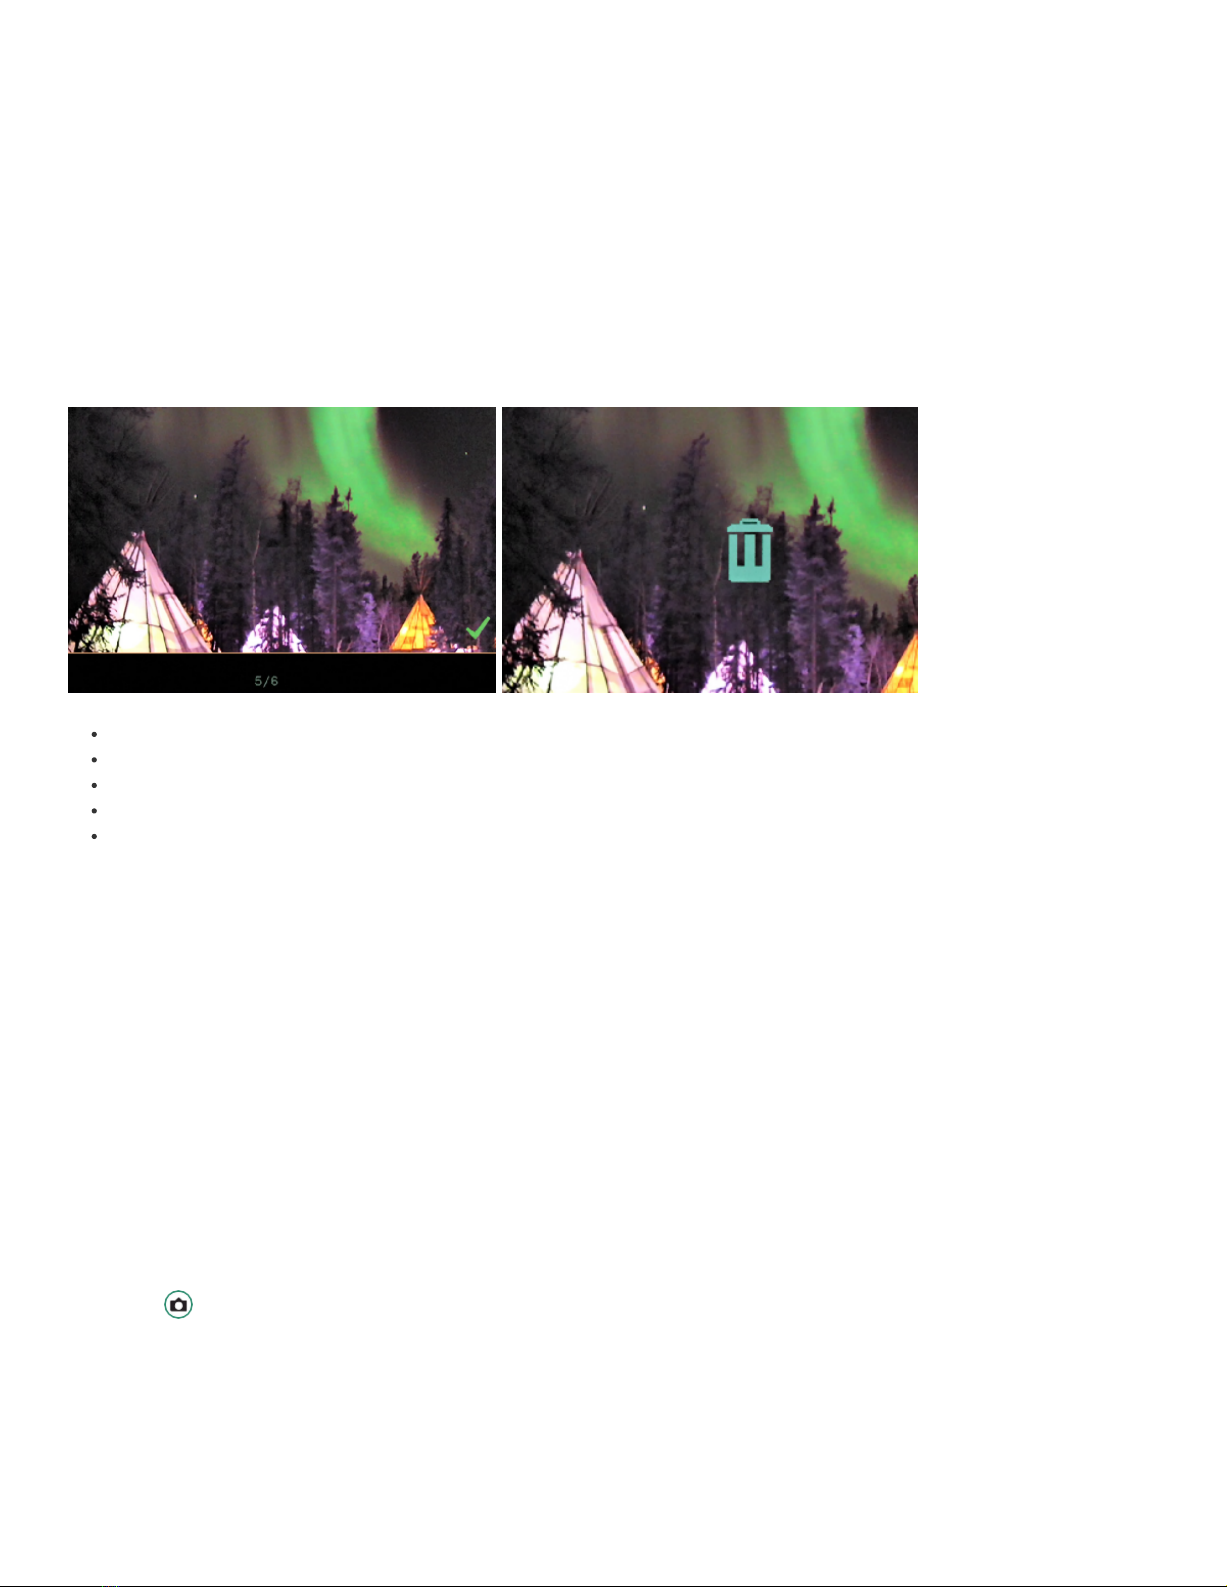
3. A green checkmark will appear in the bottom right-hand corner.
Long press SET until a trash can image appears.
To keep the photo or video, toggle left and the green checkmark will return.
Press SET to remove the checkmark.
To delete the photo or video, long press SET until the trash can starts to flash.
Release the SET button. The image or video is now deleted.
Deleting Multiple Photos and Videos
You can delete multiple photos and videos at the same time.
1. Rotate the Settings Dial to Playback Mode.
2. Toggle to the photos or videos that you want to delete.
3. Select the image and press SET.
4. You’ll see a green checkmark in the bottom right-hand corner.
5. Do this for each image that you want to delete.
6. Long press SET until a trash can appears.
7. To continue with deletion long press SET until the trash can starts to flash.
The photo(s) or video(s) are now deleted.
NOTE: If you decide not to delete the photo(s) or video(s), toggle left and press SET to remove the checkmark(s).
Photo Settings
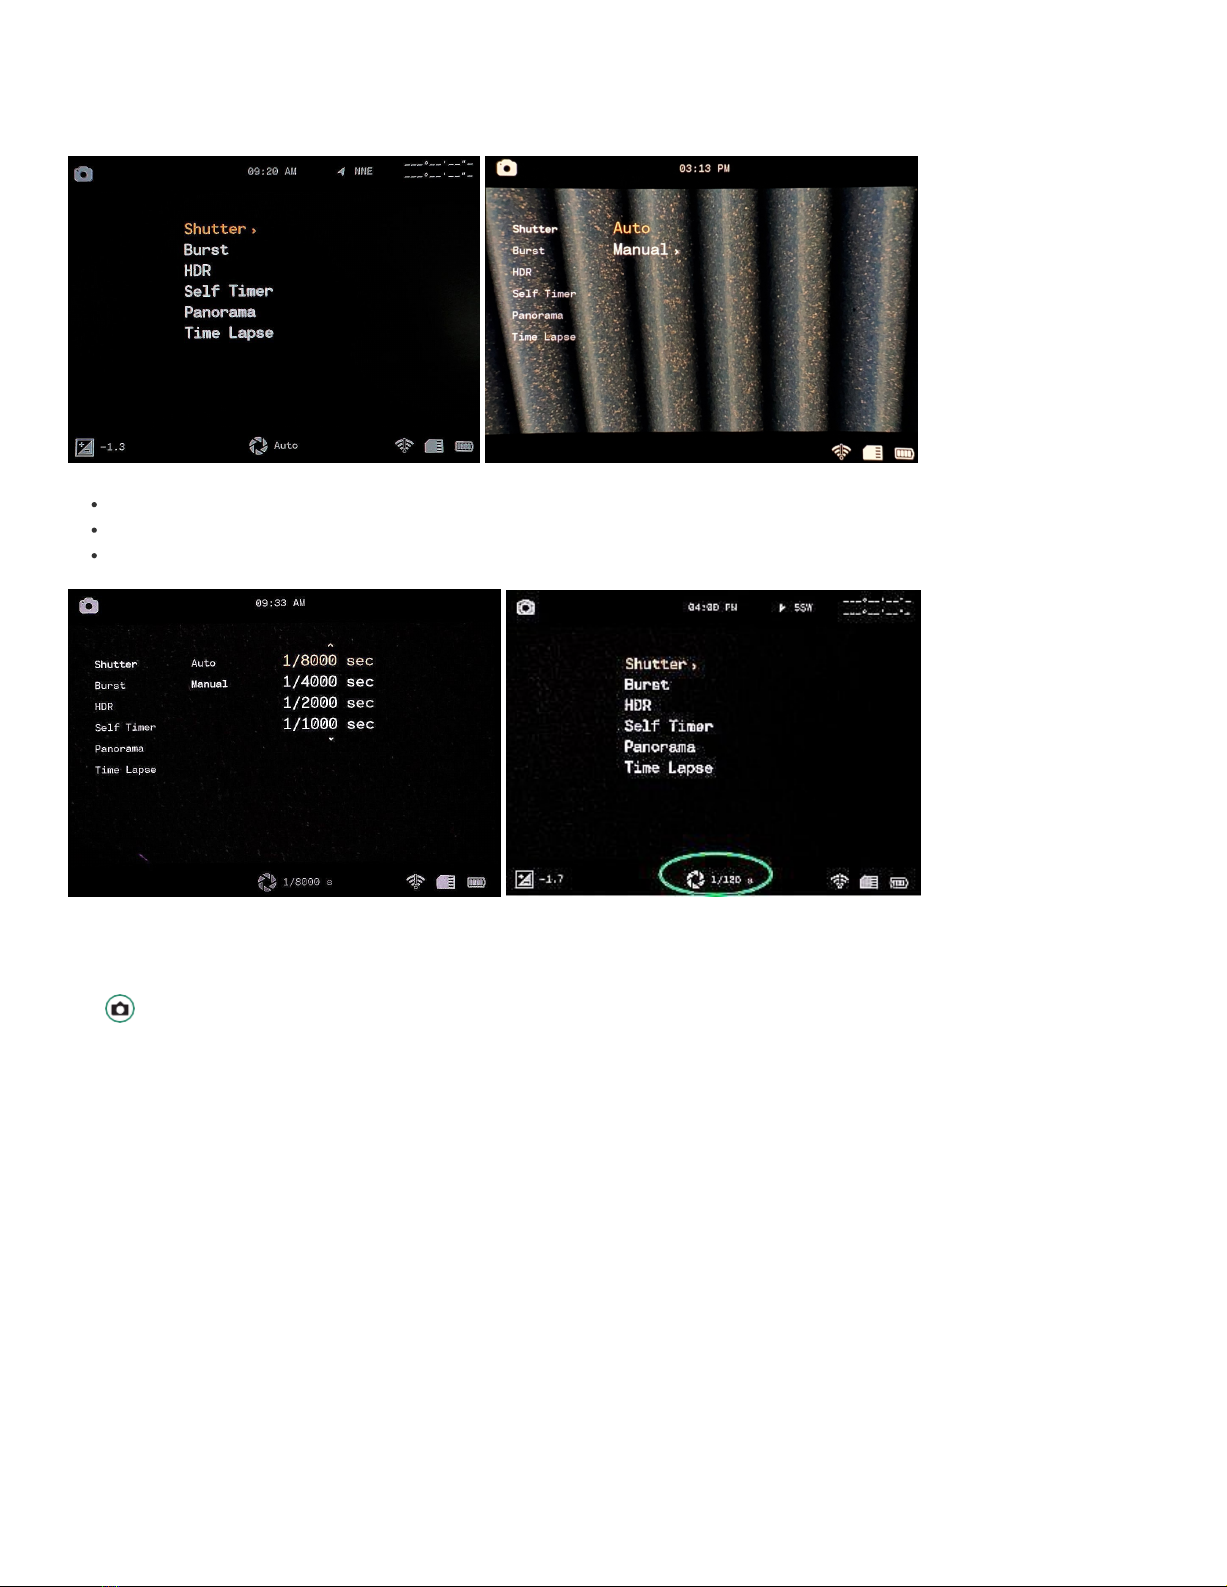
Shutter
Shutter speed is the length of time the shutter is open when you take a photo. A faster shutter speed lets in less light and reduces subject motion. There
are two shutter settings: Auto and Manual. Your camera is set to Auto by default. The Manual setting allows you to adjust the shutter speed from
1/8000" to 1.5".
Playing Videos
10/29
2. Press SET to access the Camera menu.
3. Toggle right on Shutter to Auto or Manual.
4. To set the shutter settings manually, toggle down to Manual and right to the shutter speeds.
Toggle up and down to scroll through the shutter speed settings.
Press SET to select the shutter speed that best suits your scene.
Toggle left and press SET to exit the Shutter speed menu.
The shutter speed is now visible at the bottom of the screen.
Burst
The Burst Mode enables you to take consecutive photos at a rate of 10 frames per second (fps), 5 fps or 2.5 fps and is helpful when capturing action.
1. Turn the camera on by rotating the Settings Dial to Photo Mode.
2. Press SET to access the menu.
3. Toggle down to Burst and then right to the options.
4. Select the option the best suits your scene and press SET.
5. Press SET to exit out of the menu and you’ll see the Burst setting icon.
1. Turn the camera on by rotating the Settings Dial to Photo Mode.
Ce manuel convient aux modèles suivants
2
Table des matières
Autres manuels Sionyx Caméra IP


