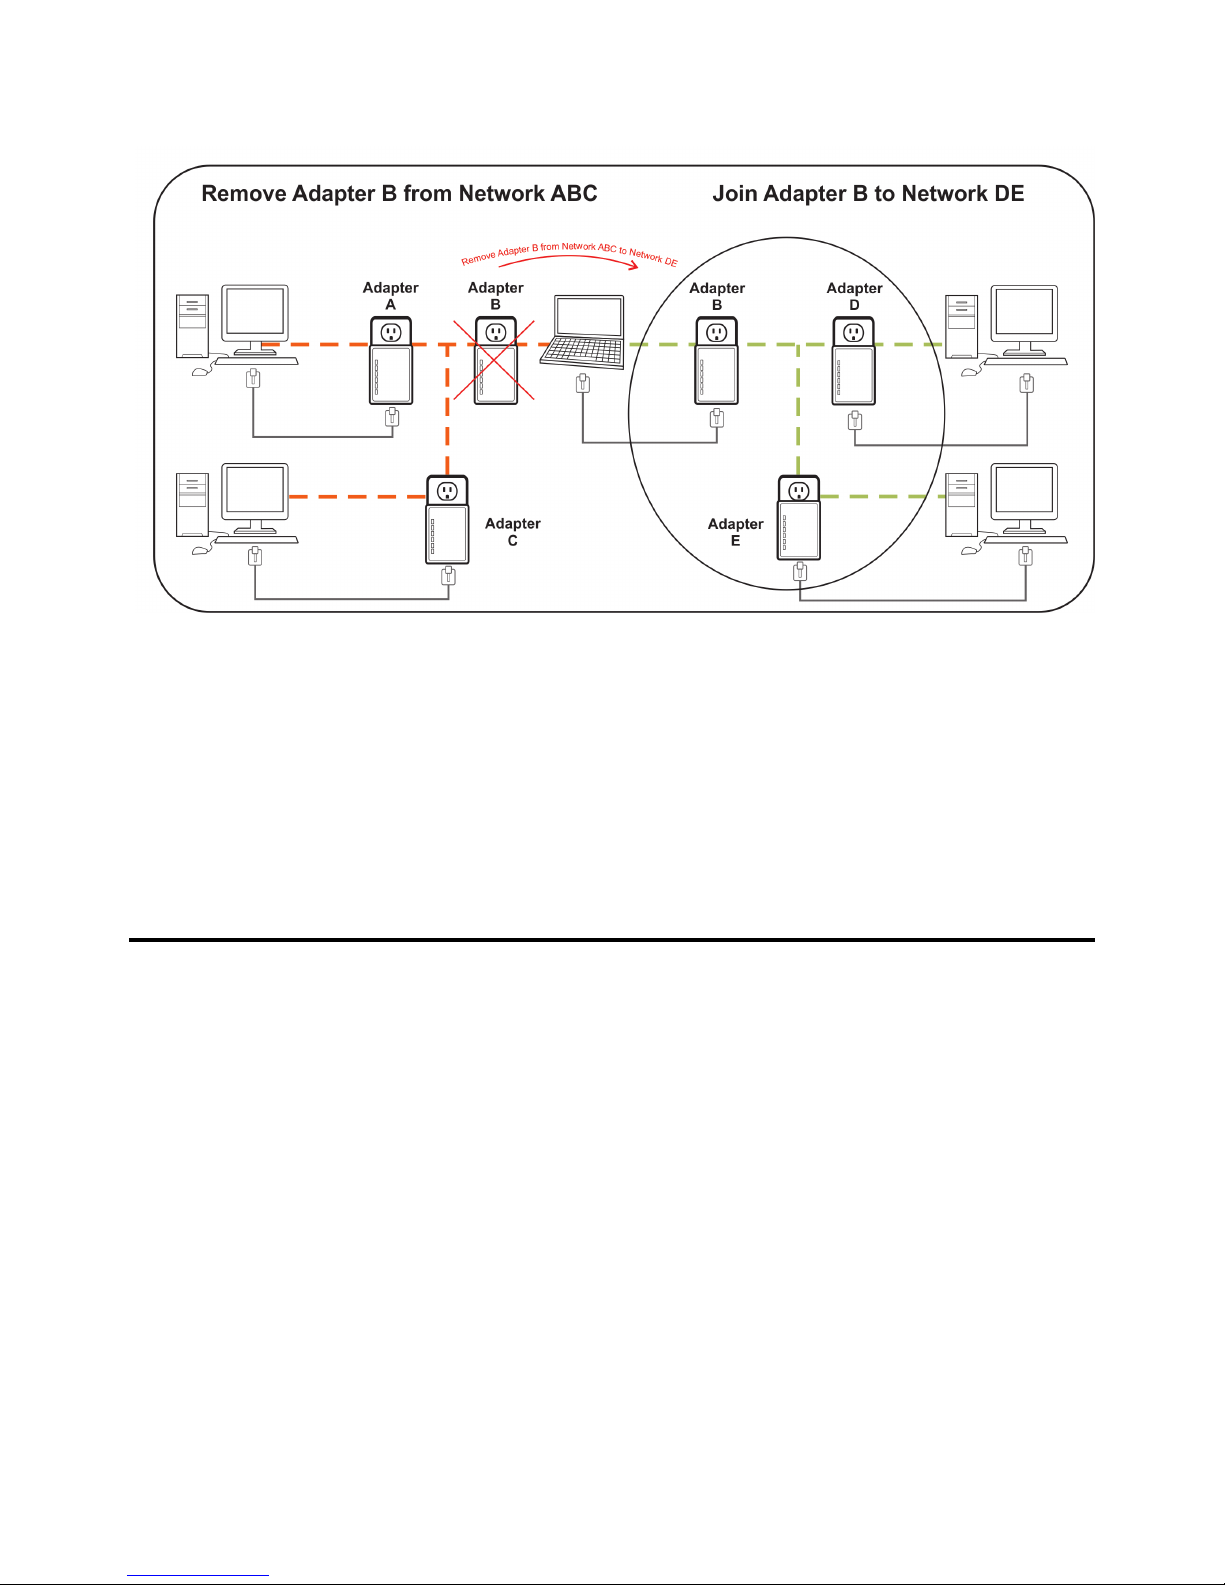
2.3 Removing Bridge B from Bridge A & C Network and join with Bridge D &
E (Network BDE)
The procedure is as follows:
1. Press and hold the Reset button on Bridge B for 2~3 seconds, then release. The password to Bridge B has just
been set to default setting and removes itself from Bridge A & C.
2. Press and hold the Security button on Bridge D for 2 seconds.
3. Within 120 seconds after the Power light on Bridge D starts to flash, press and hold the Security button on
Bridge B for 2seconds then release.
4. Bridge Band Bridge D are now connected to each other, which in turn becomes part of Network BDE.
3Troubleshooting and Disclaimer
If your HomePlug AV Ethernet Bridges have difficulty communicating with each other, check the following:
•Try power cycling the unit by unplugging it from the wall for 10 seconds and plugging it in again.
•Use a pin and hold the Reset button down for 2 seconds on each unit you are trying to connect. The HomePlug
AV Ethernet Bridge’s light will flash, the units will reset and attempt to link using default factory settings.
•Try plugging the HomePlug AV Ethernet Bridge into an adjacent plug.
•HomePlug AV Ethernet Bridges work better when plugged directly into the wall outlet. Connecting these
Ethernet Bridges to a power strip or surge protector may degrade network performance or completely stop net-
work signals.
•This HomePlug AV Ethernet Bridge should not be used on GFI protected outlets as some outlets will filter out
HomePlug power line signal.
•This HomePlug AV Ethernet Bridge should not be used in areas with excessive heat.
•Certain florescent or incandescent lights are noise sources on the electrical and can degrade performance.
•If your building has more than one circuit breaker box, your HomePlug AV Ethernet Bridges may not be able to
connect between the different circuit breaker boxes. In this case, connect one HomePlug AV Ethernet Bridge to
a power outlet located on each of the circuit boxes. Connect Ethernet cable between each of the HomePlug AV