Siamp SCC 80 Guide rapide
CISTERNS
Download products information from www.siamp.com
112
CISTERNS
SCC 80
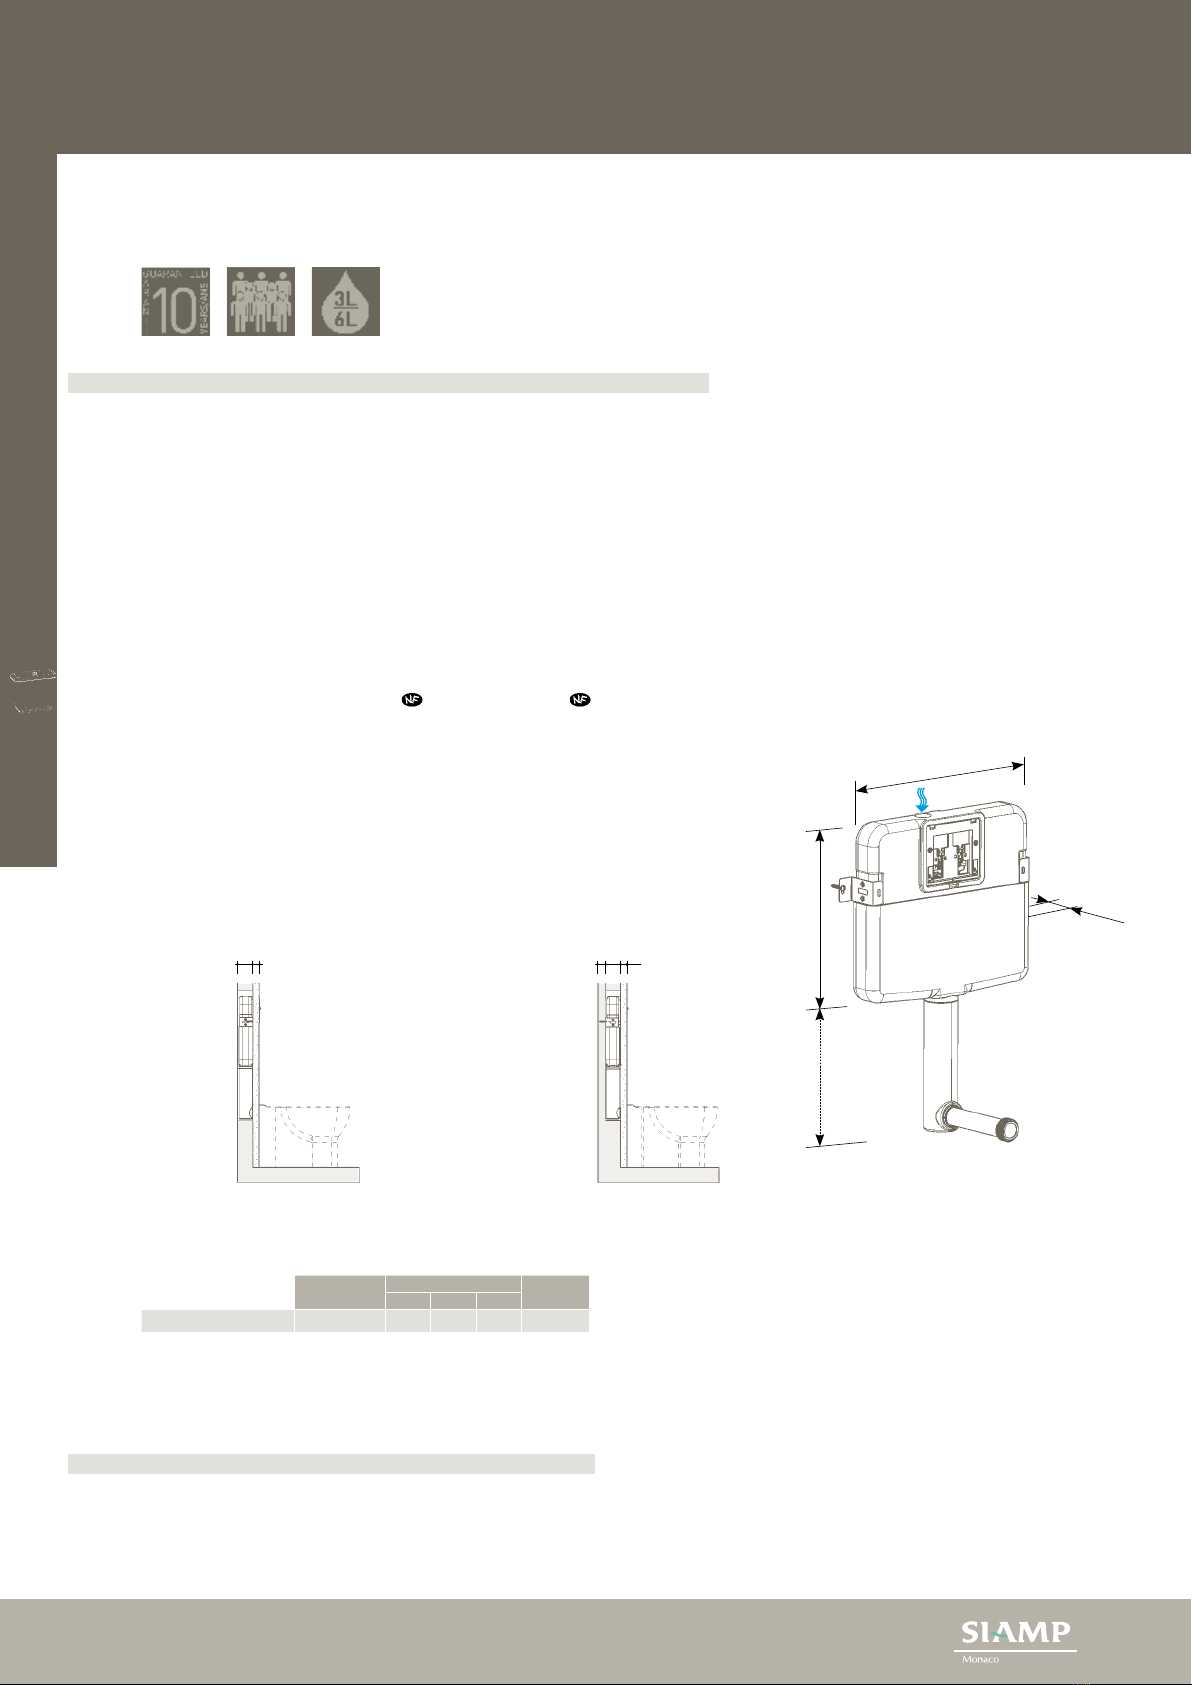
DESCRIPTIOn
◗ For ground or suspended pans
◗ Masonry recessed inside wall
◗ Masonry mesh
◗ Low level installation
◗ Back or front wall fixing
◗ Mechanical double or simple flush front commands,
see choice page XX
◗ Cistern made from PEHD
◗ Cistern maximum water volume 7,2l
◗ Outer PSE insulation
◗ Adjustable double flush flush valve, 3l./6l. factory preset.
◗ Adjustable noiseless float valve , 6l. factory preset
◗ Stop cock
◗ Inner or outer water connexion
◗ 3/8th" M or 1/2" M water connexion
◗ Height adjustable insulated supply bent
◗ Supply sleeve with pan seal
Packing Packing Palette
Quantity
Nb M3Kg
SCC 80 Carton 1 -
SUPPLEmEnTS:
Command (See page 54)
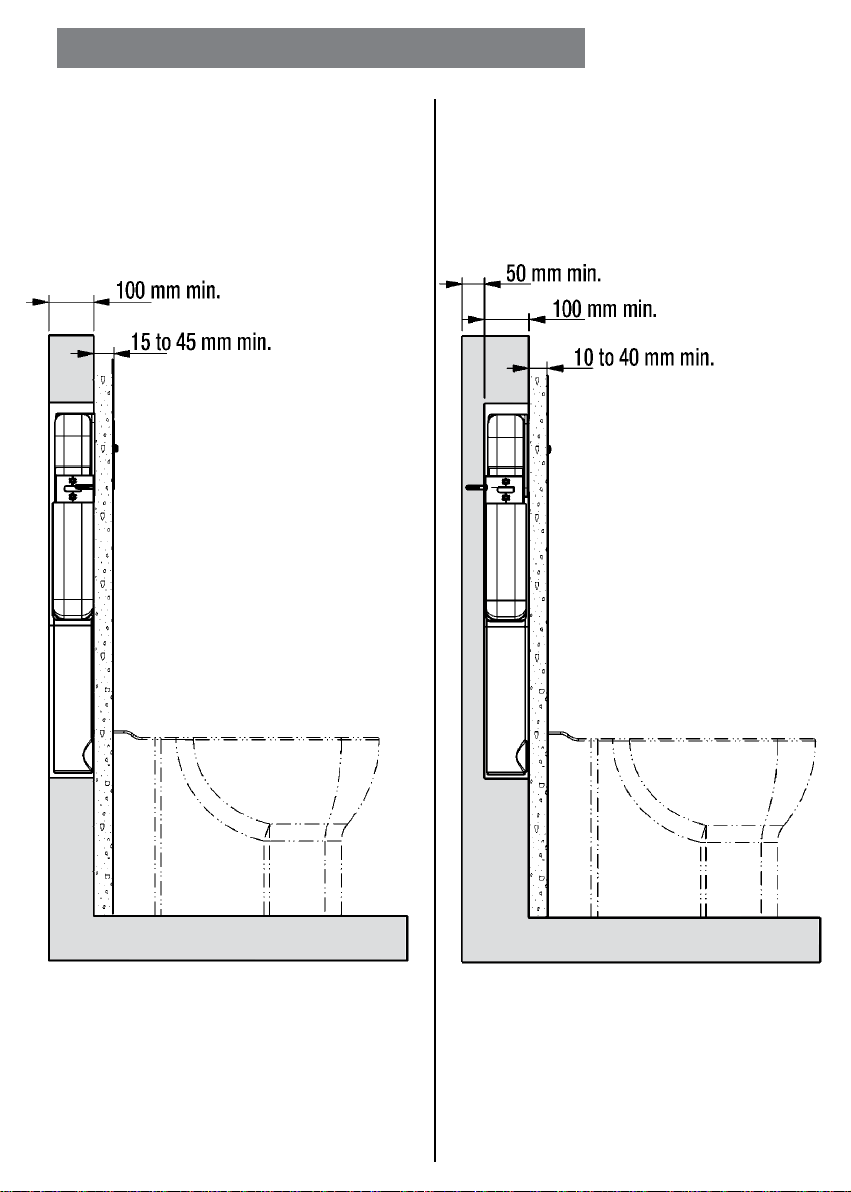
I III II III
I = 100 mm min.
II = 15 45 mm min.
I = 50 mm min.
II = 100 mm min.
III = 10 40 mm min.
230 ~ 330 mm 480 mm
510 mm
90 mm
Front fixing back fixing
CONCEALEDCISTERN
INTEGRA 80
ASSEMBLY AND MAINTENANCE MANUAL
GB
2
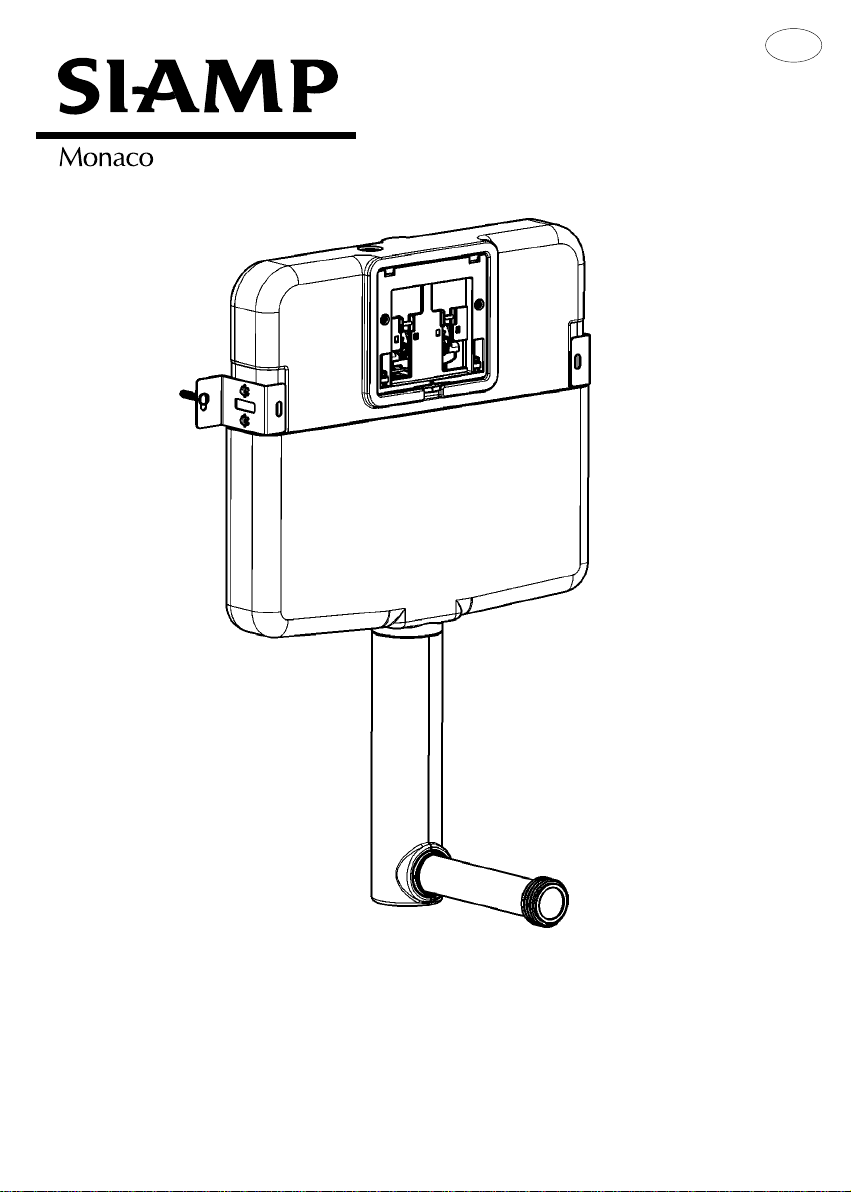
DESCRIPTION
a
d
f
h
i
k
e
g
b
j
c
l
m

3
Toolsrequired:
• Key of 19 mm
• Metal saw
• Drill with a bit diameter 8 mm
• Leveller
• Pencil & ruler
• Measuring tape
• Hammer
• Screwdriver
Advice:
• Keep this notice for any future maintenance
Read the instructions supplied with the bowl, the seat cover, the cistern and the pressurised
water supply system before starting installation work.
Before tting the cistern, the supply pipe should be ushed clear.
1 / The internal Equilibrium valve was designed to be used with clear, non agressive
water supplied under a pressure from 1 bar (15 p.s.i) to 10 bars (150 p.s.i).
It is tted with a lter to prevent foreign bodies from impeding the ow.
This lter may require occasional cleaning. Proceed as described page 14.
2 / The internal stop valve should be regularly turned off and on to ensure
that it remains serviceable.
Siamp shall not be responsible or liable for improper installation of the product or of any
cistern tting damage caused by the use of cleaners containing chlorine
Complete cistern (feat. double ush and oating valves)
Supply bend
Supply sleeve
Wall mounting bracket x 2
Stop cock M 1/2˝ - F 3/8˝
Plug x 2
Screw plug x 2
M6 washer x 2
Cistern anti-condensation lining
Supply bend anti-condensation lining
Template
Supply bend cap
Foam obturator
a
b
c
d
e
f
g
h
i
j
k
l
m
4
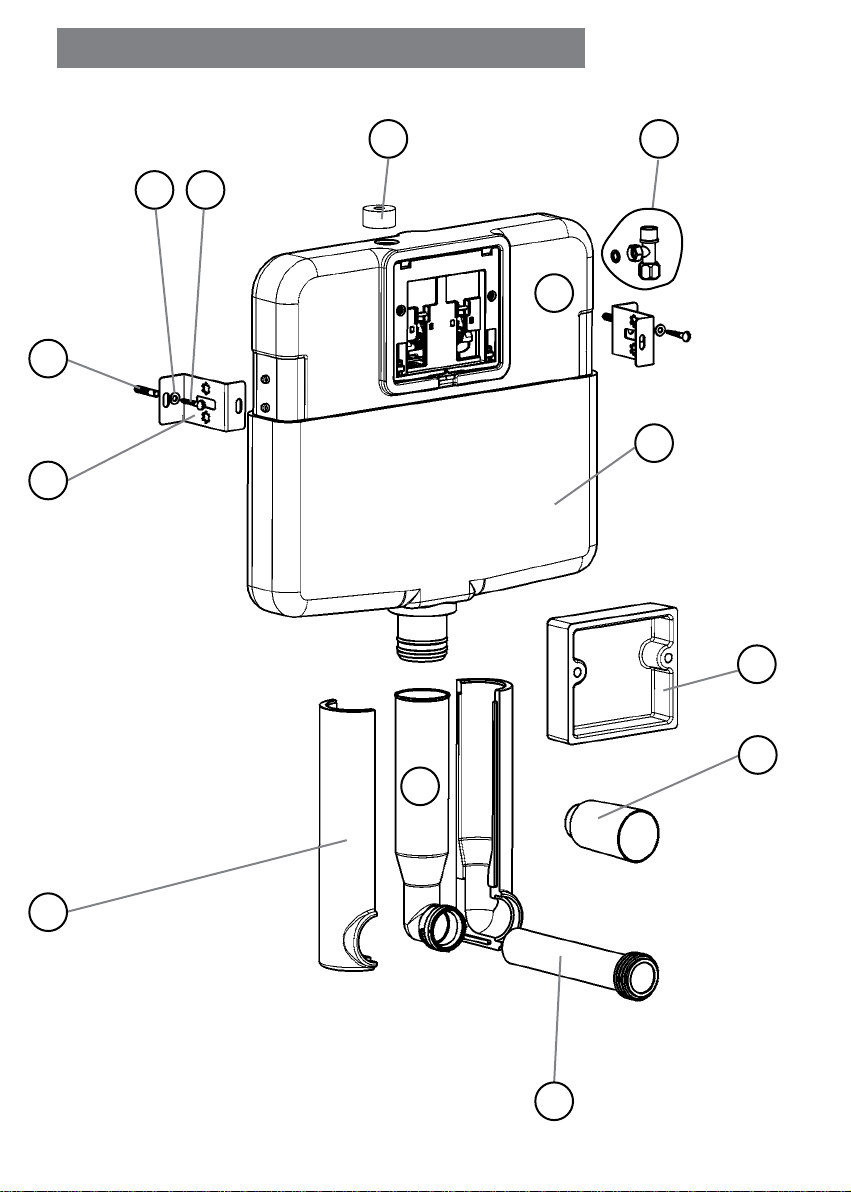
CISTERNDIMENSIONS
BACKFIXATIONFRONTFIXATION
5
WALLCONFIGURATIONS
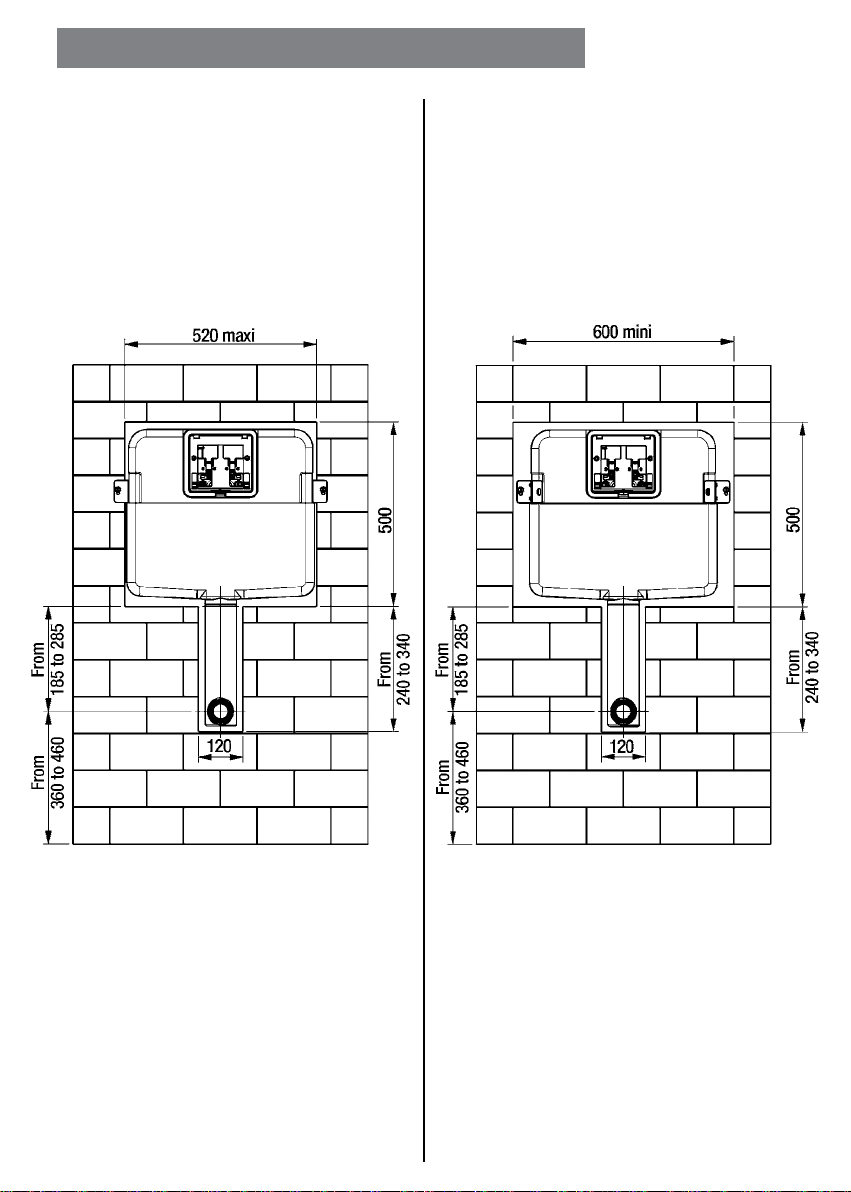
BACKFIXATIONFRONTFIXATION
6
WALLCONFIGURATIONS
7
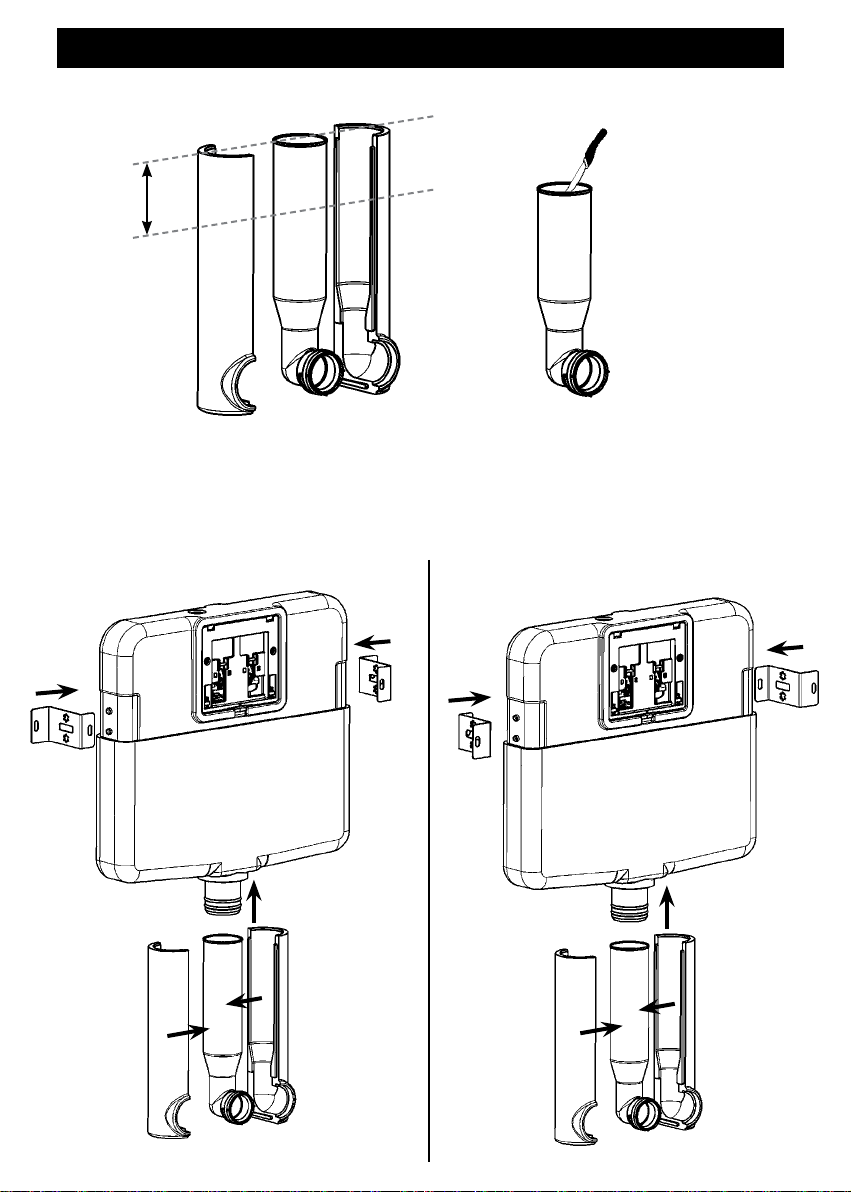
I-CISTERNASSEMBLING
➍
➍
➌
➋
➍
➍
➊
➌
➋
➊ If needed, adjust supply bend and supply bend lining to desired height. If cut, supply bend must deburred.
➋ Assemble anti-condensation lining onto supply bend.
➌ Mount supply bend onto cistern.
➍ Clip brackets onto cistern.
BACKFIXATION
FRONTFIXATION
From 0
to 100 mm
8
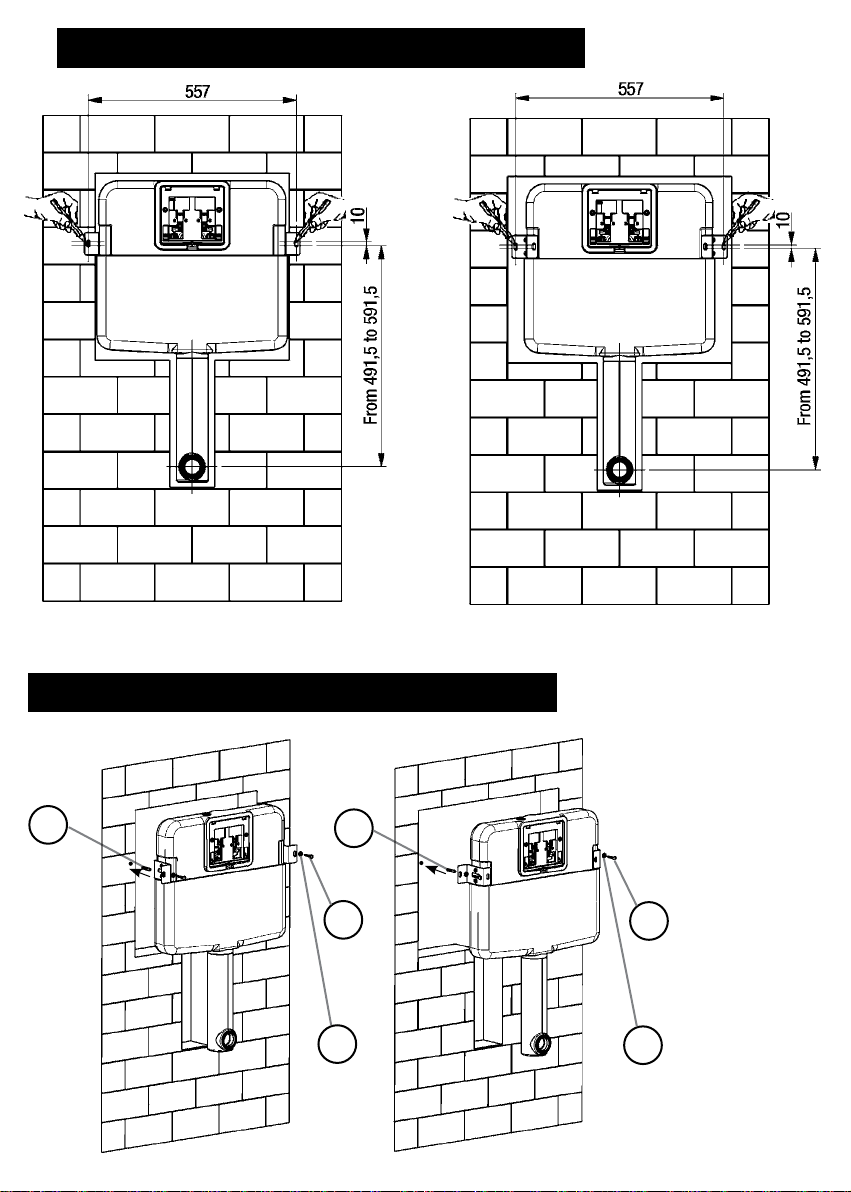
II-WALLPOSITIONING
III-WALLFIXING
➊ Place assembled cistern onto wall. Check horizontal and vertical levels alignments. Mark the 2 drilling points.
Drill wall at the marks using a Ø8 bit. Maximum drilling depth: 45 mm.
➊ Fix cistern into wall using (f)
plugs, (g) screw plugs and
(h) M6 washer.
➊
f
h
gg
➊
BACKFIXATION
BACKFIXATION
FRONTFIXATION
FRONTFIXATION
f
h
9
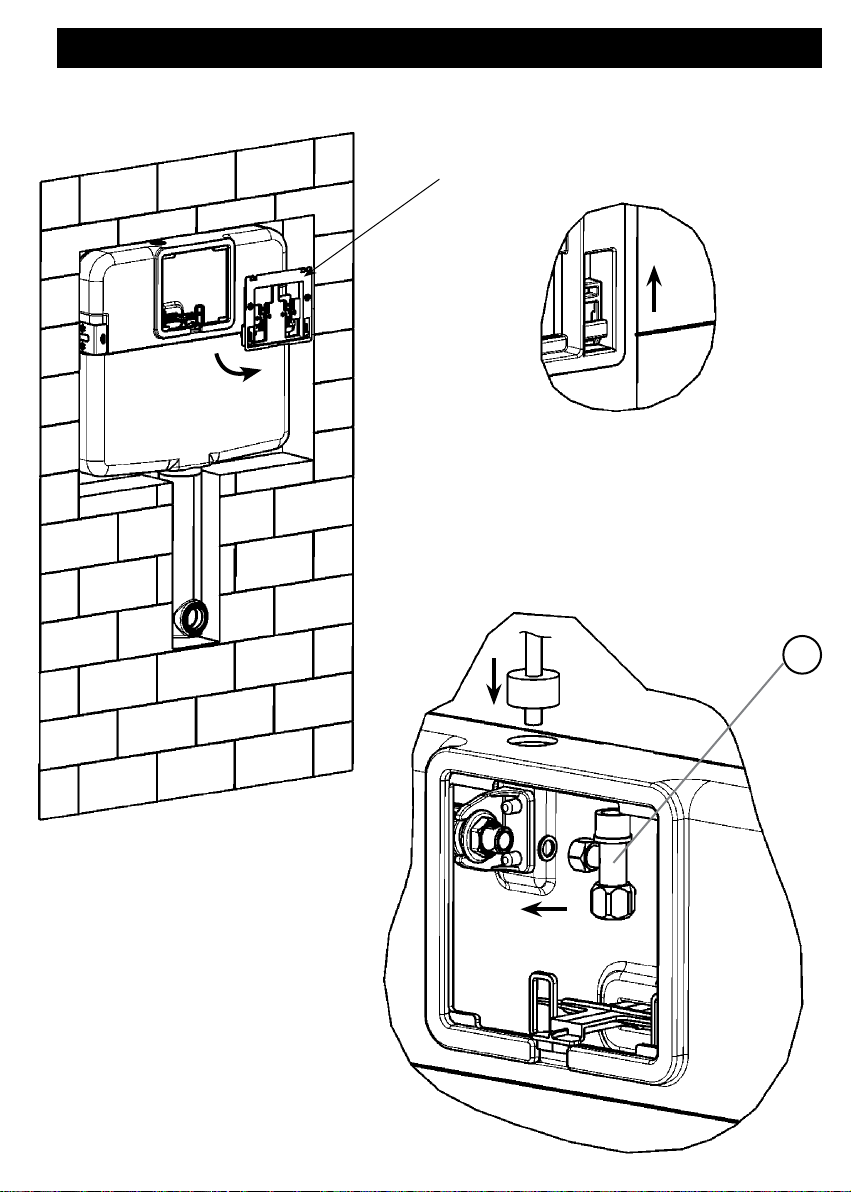
IV-WATERSUPPLYCONNECTION
➊ Remove the frame by lifting the two locks
➋ Connect stop cock (e) to oat valve placing bre seal in
between
➌ Insert foam obturator on water supply pipe
➍ Connect water supply pipe to ½’’ stop cock end (ensure
tightness using a bre seal, not supplied)
➎ Place foam obturator in between pipe and cistern hole
Frame
➋
➊
e
➌
Table des matières
Autres manuels Siamp Produits de plomberie

Siamp
Siamp OPTIMA 50 Manuel utilisateur

Siamp
Siamp Optima 49 Manuel utilisateur

Siamp
Siamp SEGMENT Manuel utilisateur

Siamp
Siamp VERSO BCM 350 Guide rapide

Siamp
Siamp Monaco Manuel utilisateur

Siamp
Siamp Quieto OD Manuel utilisateur

Siamp
Siamp INTRASLIM Guide de maintenance et de service

Siamp
Siamp Monaco OPTIMA 49 Manuel utilisateur

Siamp
Siamp Monaco Guide de maintenance et de service

Siamp
Siamp SCU 350 Manuel utilisateur


