Shunxun SX-VW02 Manuel utilisateur
1
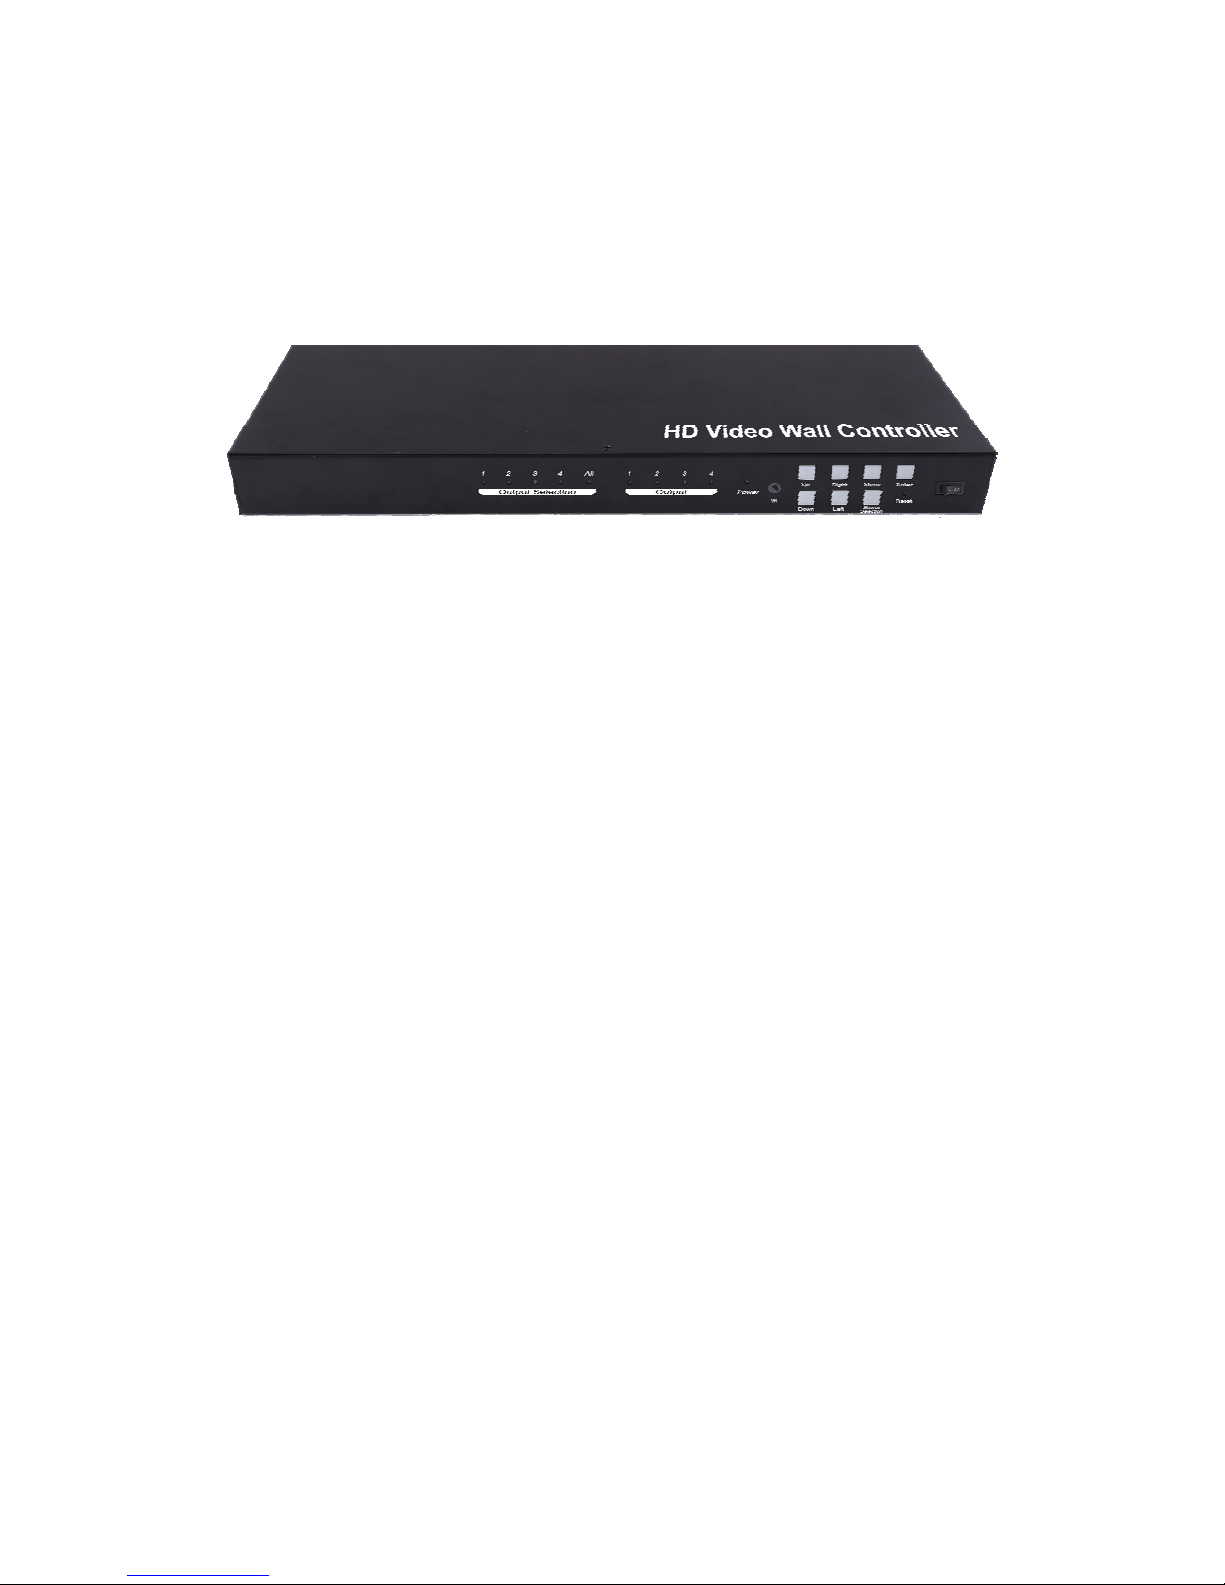
HD Video Wall Controller with Mixed inputs
Operating Instructions
Dear Customer
Thank you for purchasing this product. For optimum performance and safety, please read
these instructions carefully before connecting, operating or adjusting this product. Please
keep this manual for future reference.
1. FEATURES
Support USB/VGA/Composite/HDMI input.
Select 1 of 4 source and distribute to 4 displays.
Create a 2x2 Video Wall Controller from any source to four displays.
Support multi-level cascading to creat 3x3, 4x4...Video Wall (Max 10x10).
Support 180° rotation.
Support resolution up to 1080p Full HD.
Support Panel control, IR control, RS232 control.
2. NOTICE
Our company reserve the right to make changes in the hardware, packaging and any
accompanying documentation without prior written notice.
3. TABLE OF CONTENTS
Specifications
Package Contents
Panel Descriptions
Connecting and Operating
Typical Application
Remote Control Instruction
RS232 Control
Maintenance
Product Service
Warranty
2
4. SPECIFICATIONS
5. PACKING CONTENTS
1) Main Unit: HD Video Wall Controller
2) 1x Power supply 5V4A
3) 4x Screws
4) 2x detachable mounting ears
5) 1x IR Cable
6) 1x Remote controller
7) Operating Instructions
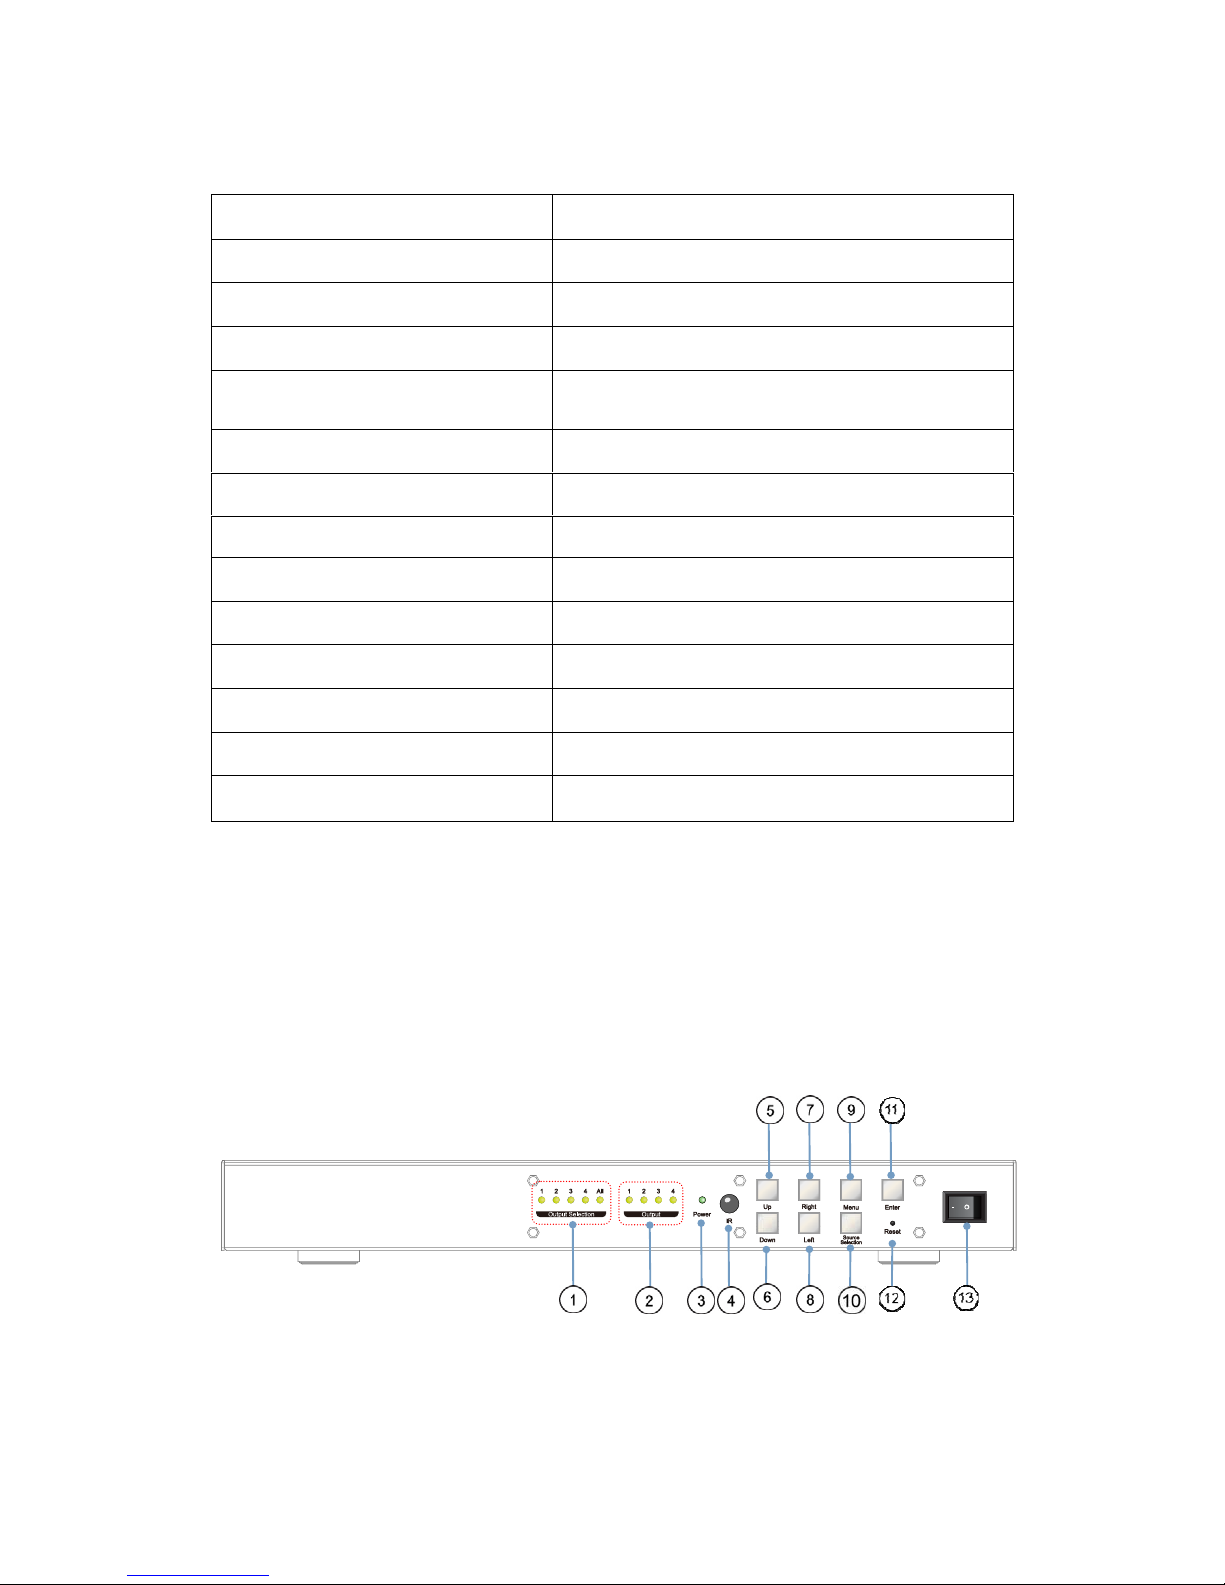
6. PANEL DESCRIPTIONS Front Panel
1. Output Selection 2. Indicator of Output 3. Power input indicator
4.IRport 5.Up 6.Down
7. Right 8. Left 9. Menu
10.SourceSelection 11.Enter 12.Reset
13. Power button
Operating Temperature Range 0 to +35°C (32 to +95°F)
Operating Humidity Range 5 to 90 % RH (no condensation)
Input Video Signal 0.5-1.0 volts p-p
Input DDC Signal 5 volts p-p (TTL)
Video Format Supported DTV/HDTV: 1080P/1080i/720P/
576P/480P/576i/480i
Audio Format Supported LPCM
Input ports 1xHDMI, 1xUSB, 1xVGA, 1xAV
Output ports 4xHDMI
Splitter mode 1x4 HDMI Splitter
Video wall mode 2x2,3x3,4x4......10x10 video wall
Control Way Panel control, IR control, RS232 control
Power consumption 15watts(Maximun)
Dimension (mm) L380.6XW136.6XH43.5 mm
Weight 1725g
3
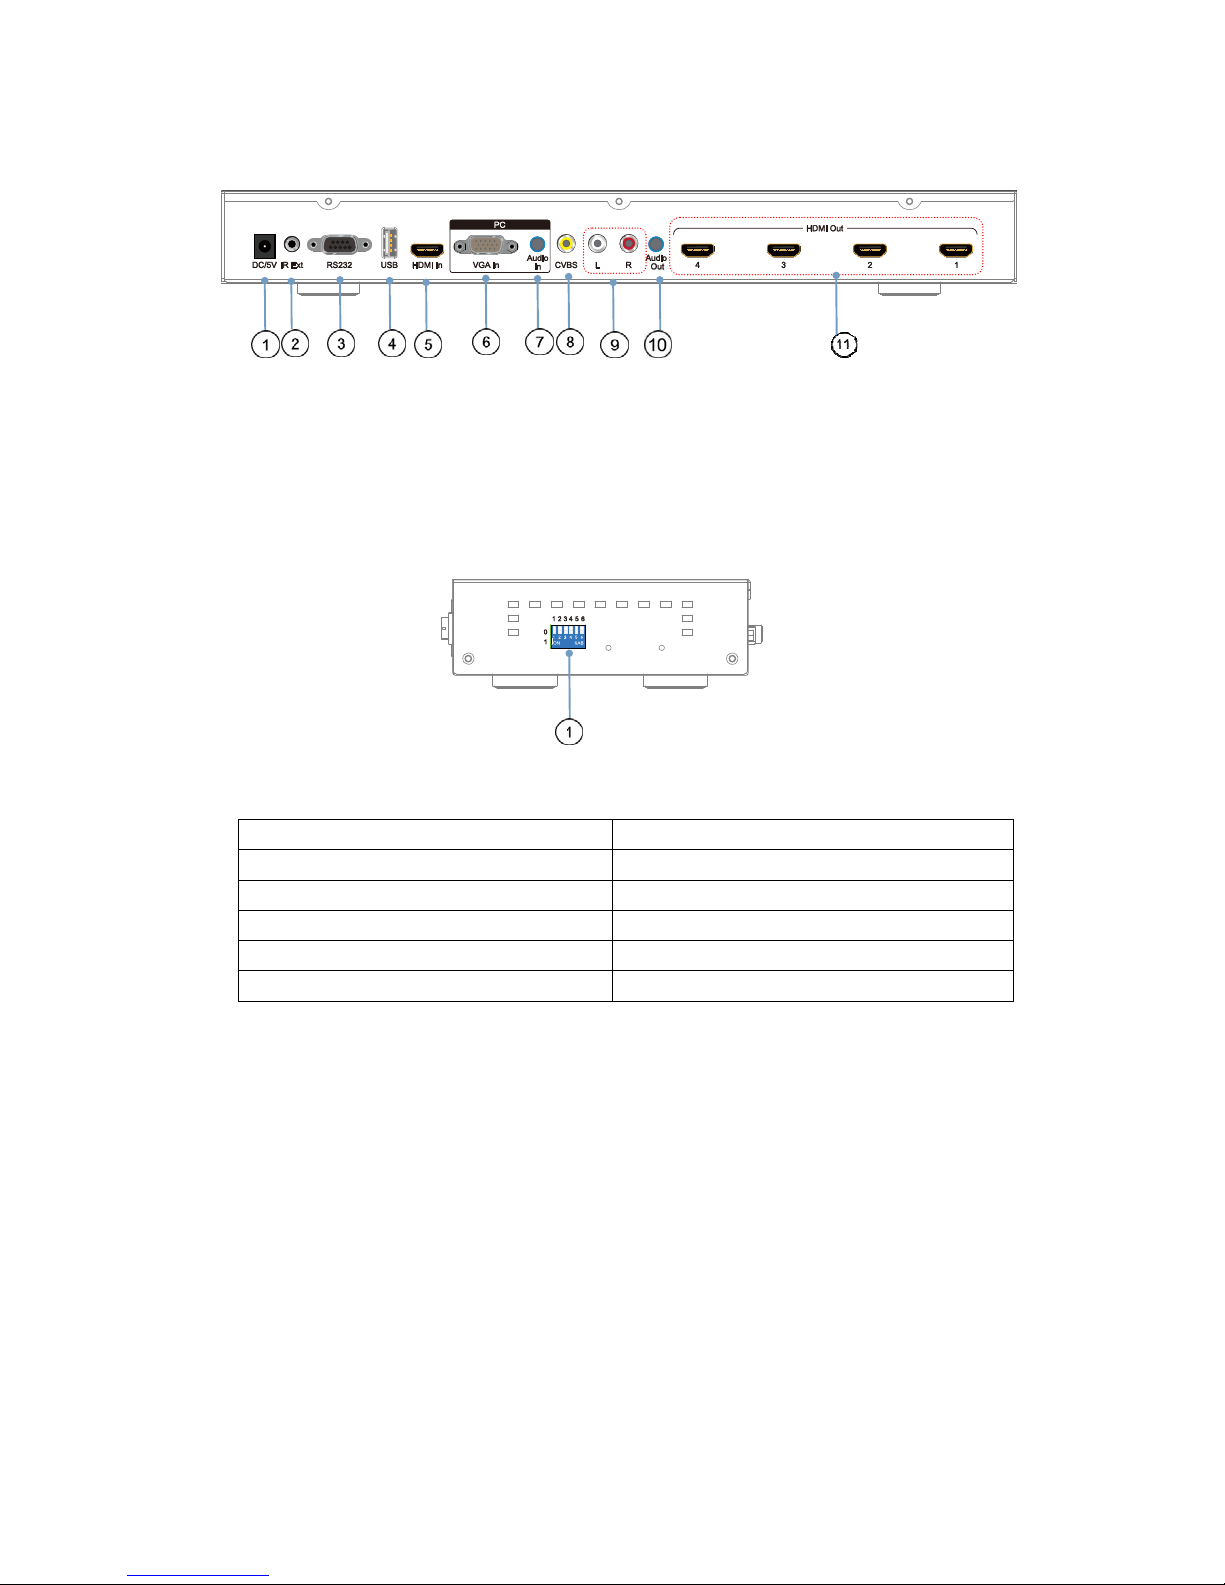
Rear Panel
1. Power input port 2. IR Ext port 3. RS232 port
4. USB input port 5. HDMI input port 6. VGA input port
7. Audio input port 8. CVBS input 9. L /R Audio input
10. Audio output 11. HDMI output
Right Panel
1. DIP switch for EDID choosing
000001 Setting for Output1
000010 Setting for Output2
000100 Setting for Output3
001000 Setting for Output4
010000 Turn on Multi-function button “All”
100000 Turn on “Splicing setup” mode
If you need make splicing setup for 4 HDMI outputs, you can set to “001111”
7. CONNECTING AND OPERATING
1) Connect the sources into the video wall controller and Press the button on the remote.
to choose the input Signal (VGA, HDMI, USB, AV input).
2) Connect HDMI OUT to display equipments.
3) Power up the Video Wall Controller.
4) Control the Video Wall Controller by Panel button / DIP Switch / Remote /
RS232 Command.
4
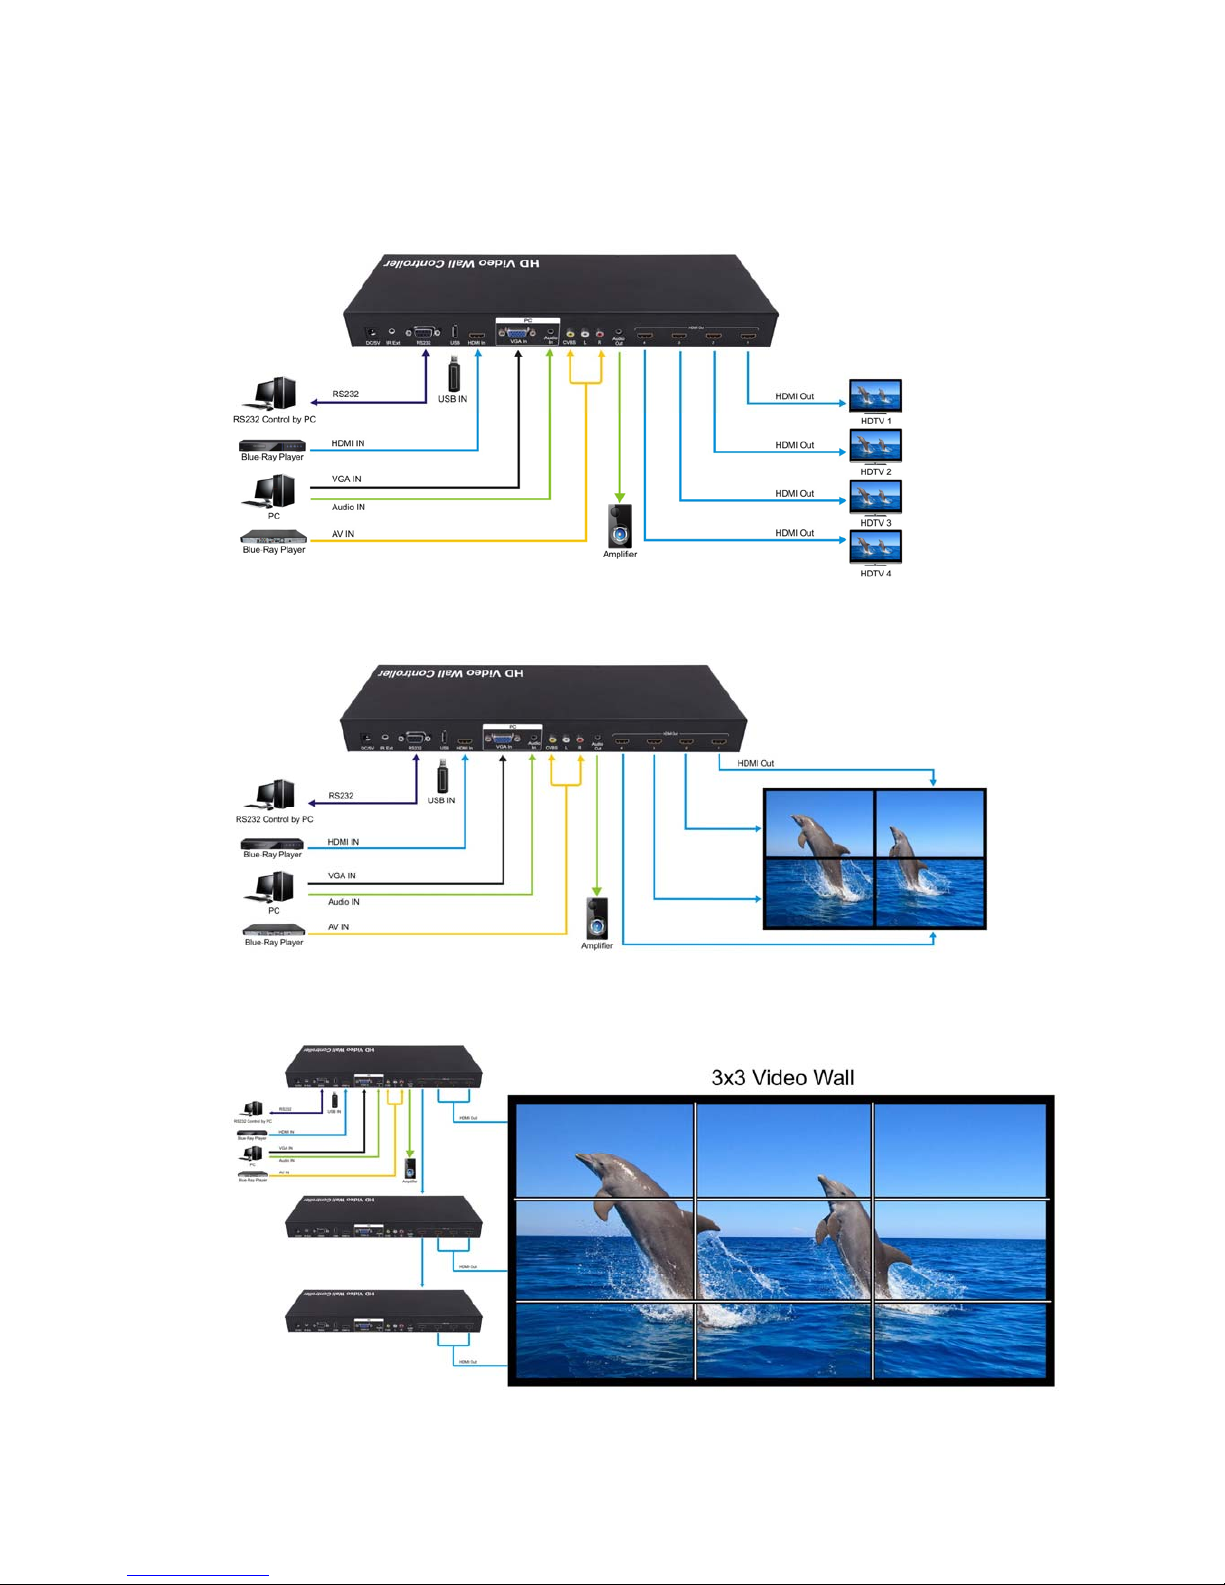
8. Typical Application
Application 1: Split a single source to 4 displays
Application 2: 2x2 Video Wall Displaying
Application 3: Multi-Level Cascading (Max 10x10 Video Wall)

5
9. Remote Control Instruction
1. Power on/off
2. Mute
3. Next one
4. Stop
5. Previous one
6. Play/Stop
7. USB Disk input
8. HDMI input
9. AV input
10. VGA input
11. Menu
12. Multi-function Button
13. Up
14. Left
15. Right
16. Down
17. Mirror on/off
18. Back
19. Output 1 ~ Output 4
20. Splicing on/off
Note1: isunderUSBmode.
Note 2: is Multi-function Button.
2.1.Press button “ALL”, the “ALL” indicator will turn green, then press “ ” into
the main menu.
2.2 Under USB input mode , press button “ALL” for all the setting
2.3.Press button “ALL”, then press , to adjust the volume
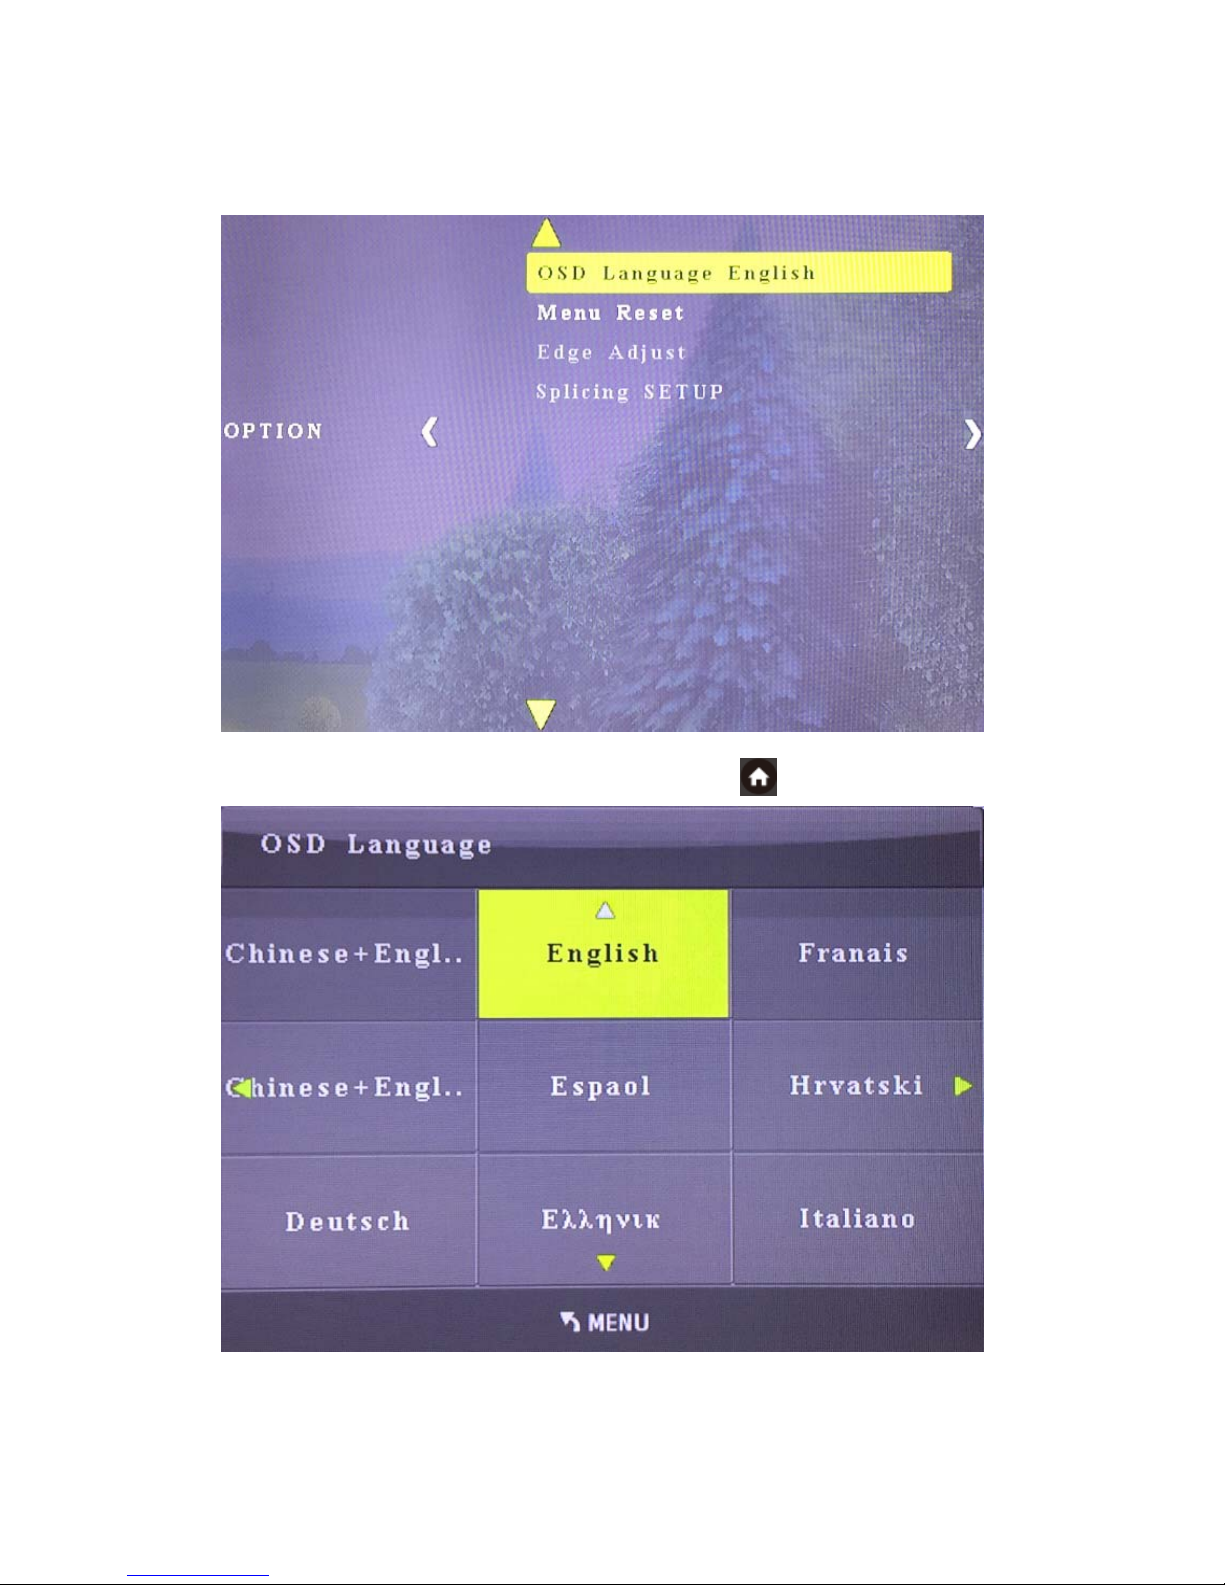
9.1 Language Setting
9.1.1 The main menu language Settings
1. Press “All” button, the “All” indicator will turn green, then press “ ” to enter into the
main menu.
6
2. Move the left or right arrow, enter into the below interface, choose “OSD Language
English”, then press “Ok”.
3. Choose the required language, then press “OK”, press “ ” back to the main menu.
7
9.1.2 Language setting for each output
1. Press the Output No on the remote and press “ ”, press “OSD Language” and
choose therequiredlanguage
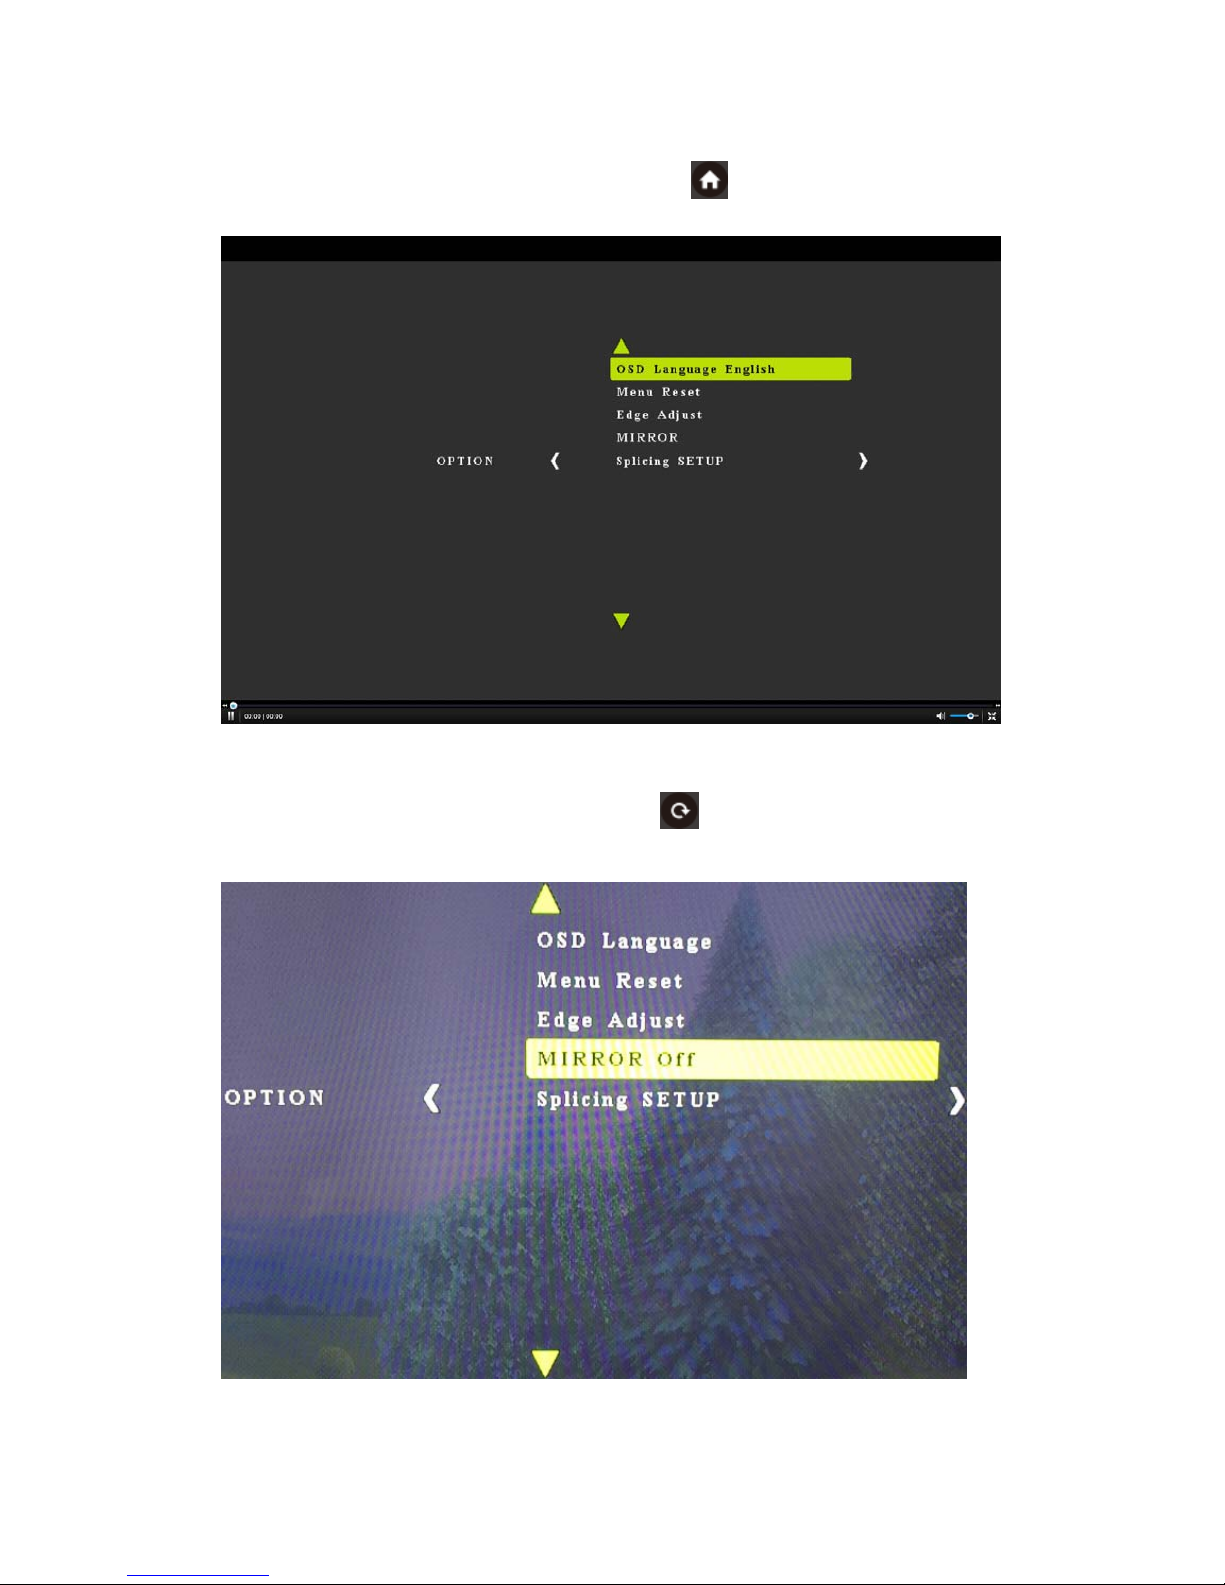
9.2 Mirror Function ( 180°Rotation )
1. Press the Output No on the remote, the press “ ”
2. You can also turn on /off the Mirror function on the menu as below:
8
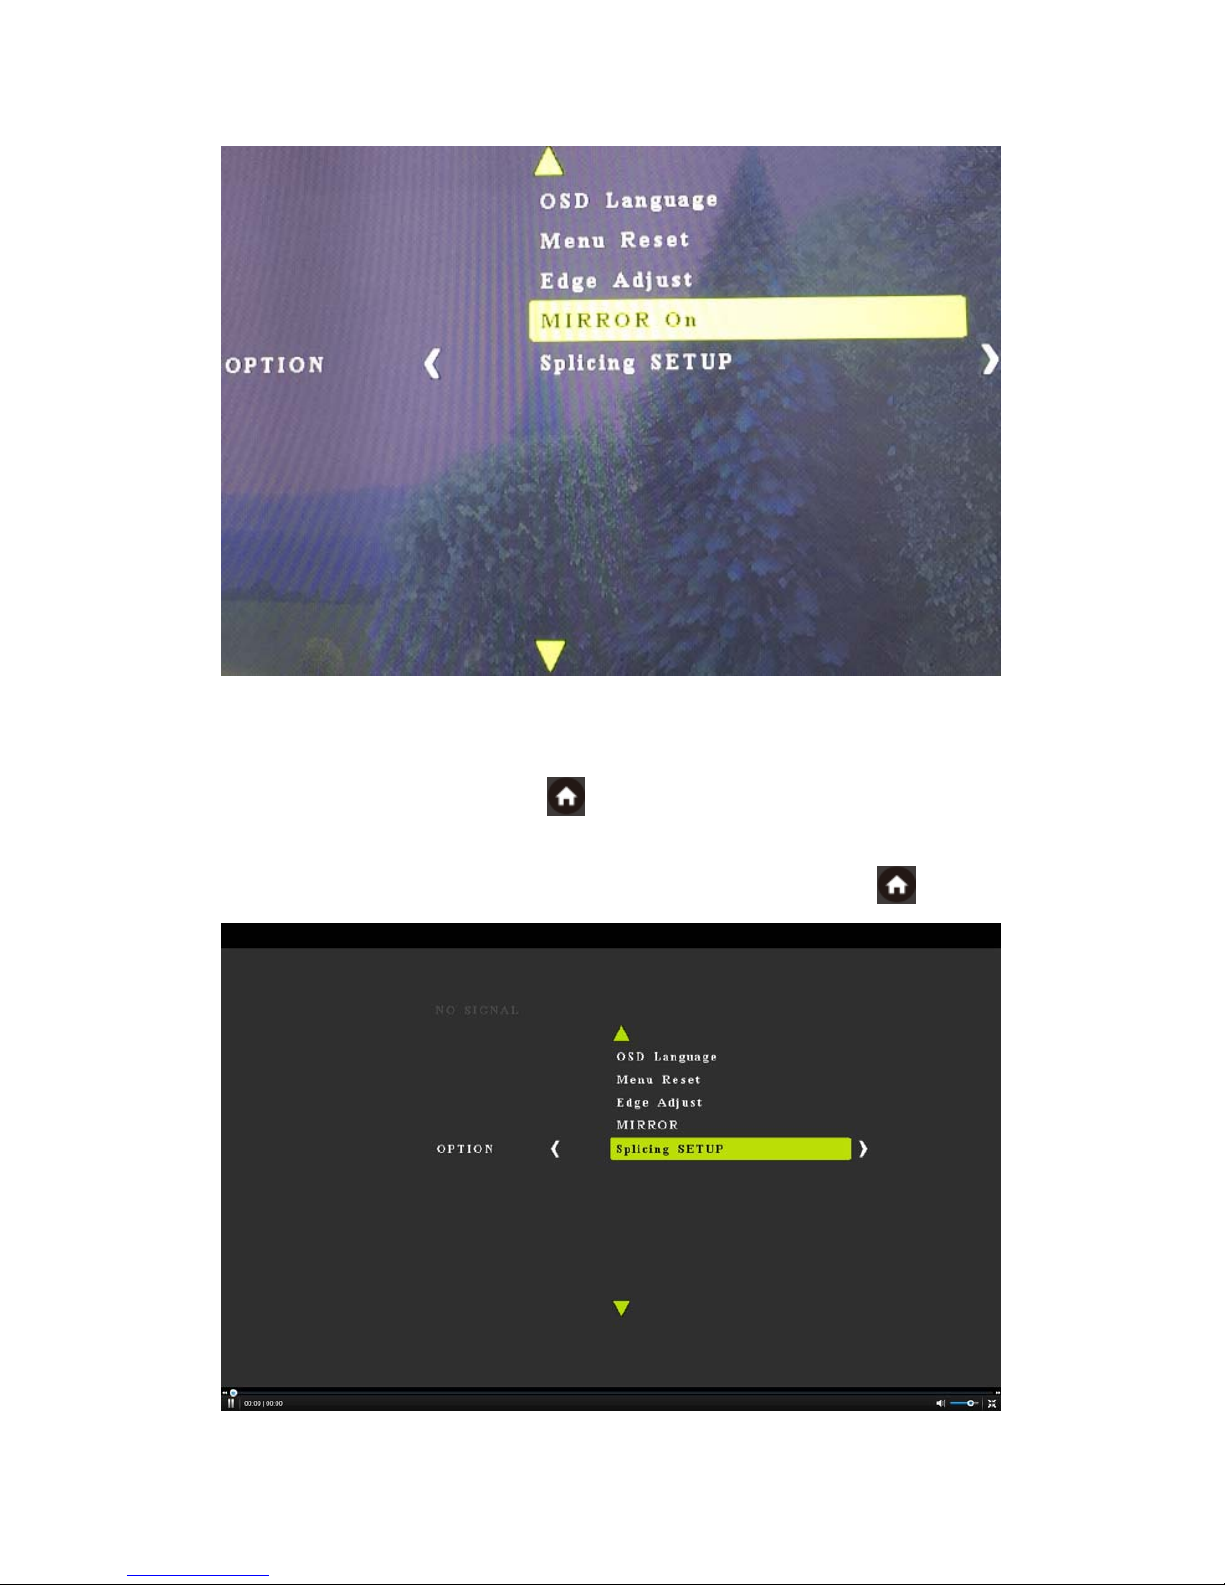
9.3 Splicing Setup:
1. Press the Output No on the remote or use DIP Switch to choose the output, the relative
indicator will turn green, then press “ ”.
For example, if you need make splicing setup for output 1 to output4, press “1”,”2”,”3”,”4”
on the remote, the indicator “1” to indicator “4” will turn green , then press “ ”.
9
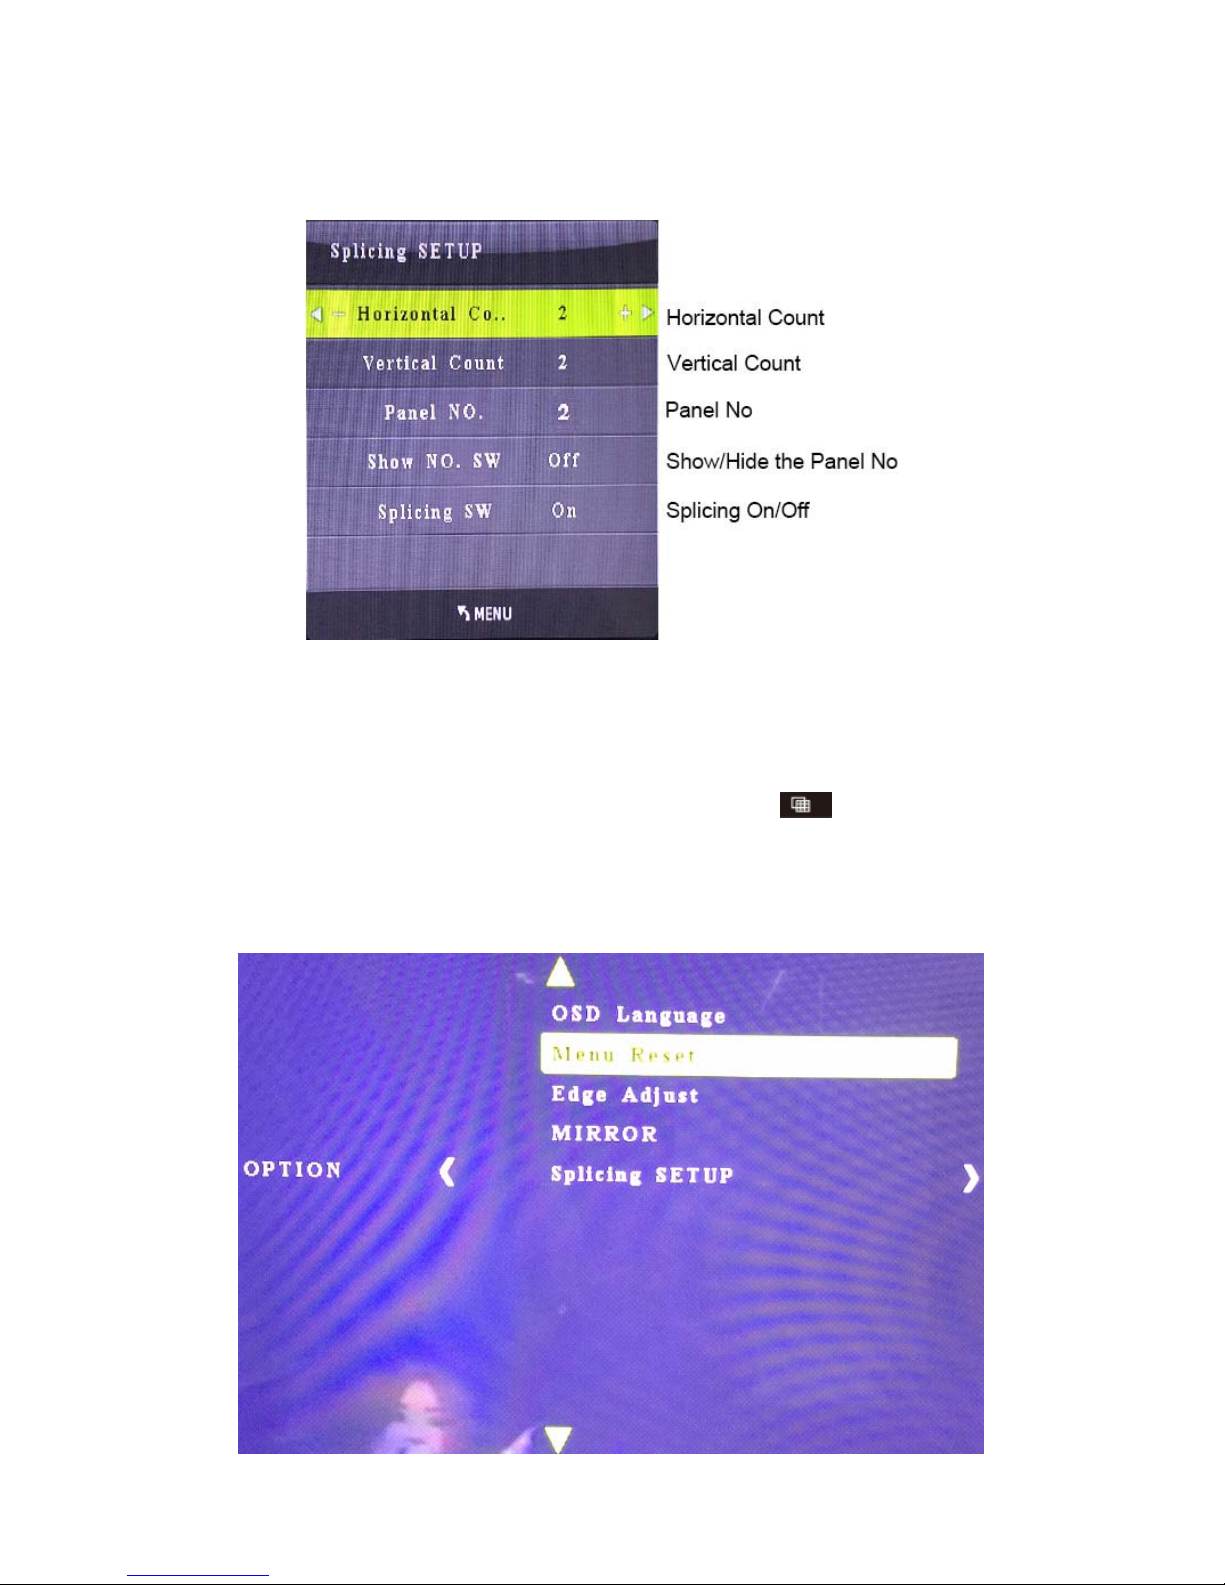
2. Choose “Splicing SETUP”, When the Horizontal Count and Vertical Count is the same,
there will be no deformation on the image.
3. When cascade for NXN video wall , the output which cascade for next layer should be
set as “1x1”, other outputs should be set as your required”NXN”.
For example, if you need cascade for “3x3”, the output 1 need to connect with next Video
Wall Controller , then the output 1 should be set as “1x1”, output2 to output4 should be set
as “3x3”.
4. After setting the Horizontal Count and Vertical Count, press “ ” to turn on /off the
video wall mode
9.4. Menu Reset
Choose “Menu Reset” to restore factory setting.
10
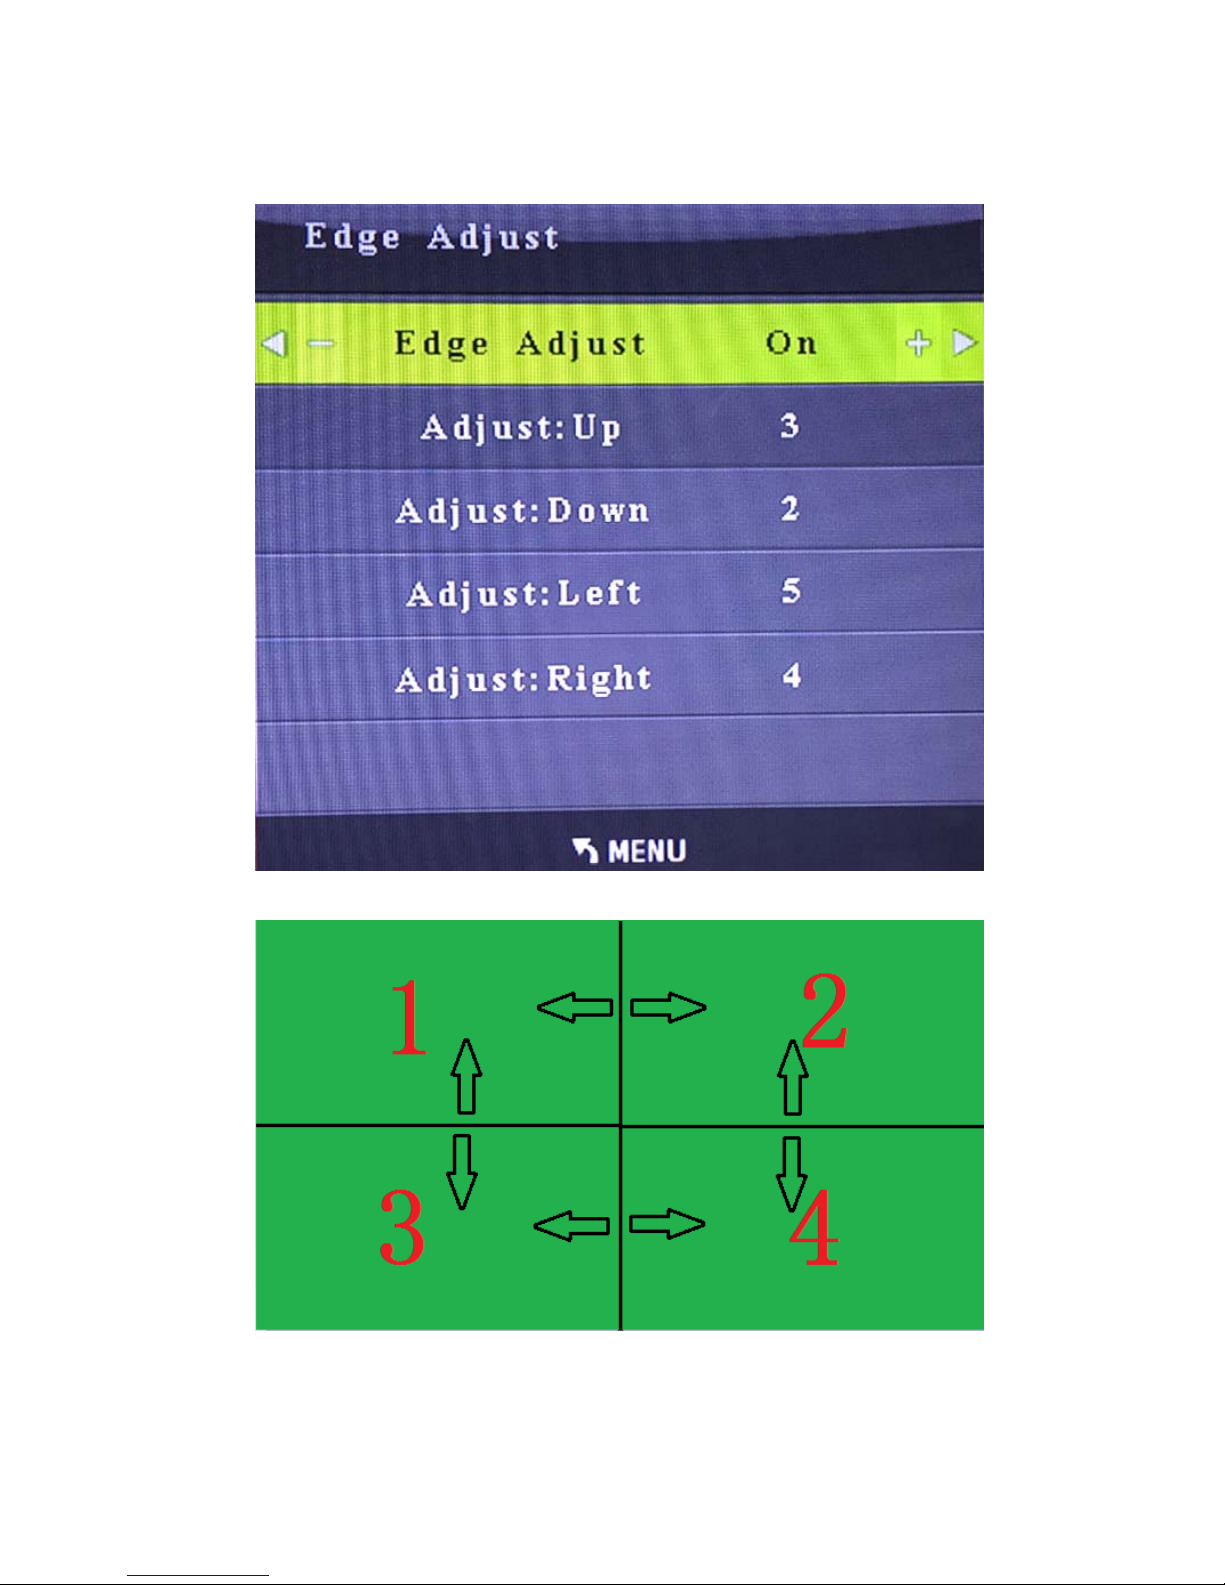
9.5. Edge Adjust.


