Seagull 2C-LP427B Manuel utilisateur

1
XP-DT325B
4B-2053A
Thermal Barcode Printer
User’s Manual
Direct Thermal Printer
Please keep the user’s manual properly for reference
2C-LP427B

Contents
Copyright statement............................................................................................................................ 1
I. Product............................................................................................................................................. 2
II. Receiving........................................................................................................................................3
2.1 Unpacking and checking accessories............................................................................................3
2.2 Printer components.................................................................................................................... 4
2.2.1 Front view.................................................................................................................................. 4
2.2.2 Rear view................................................................................................................................... 4
III. Installation.....................................................................................................................................5
3.1 Install the printer........................................................................................................................... 5
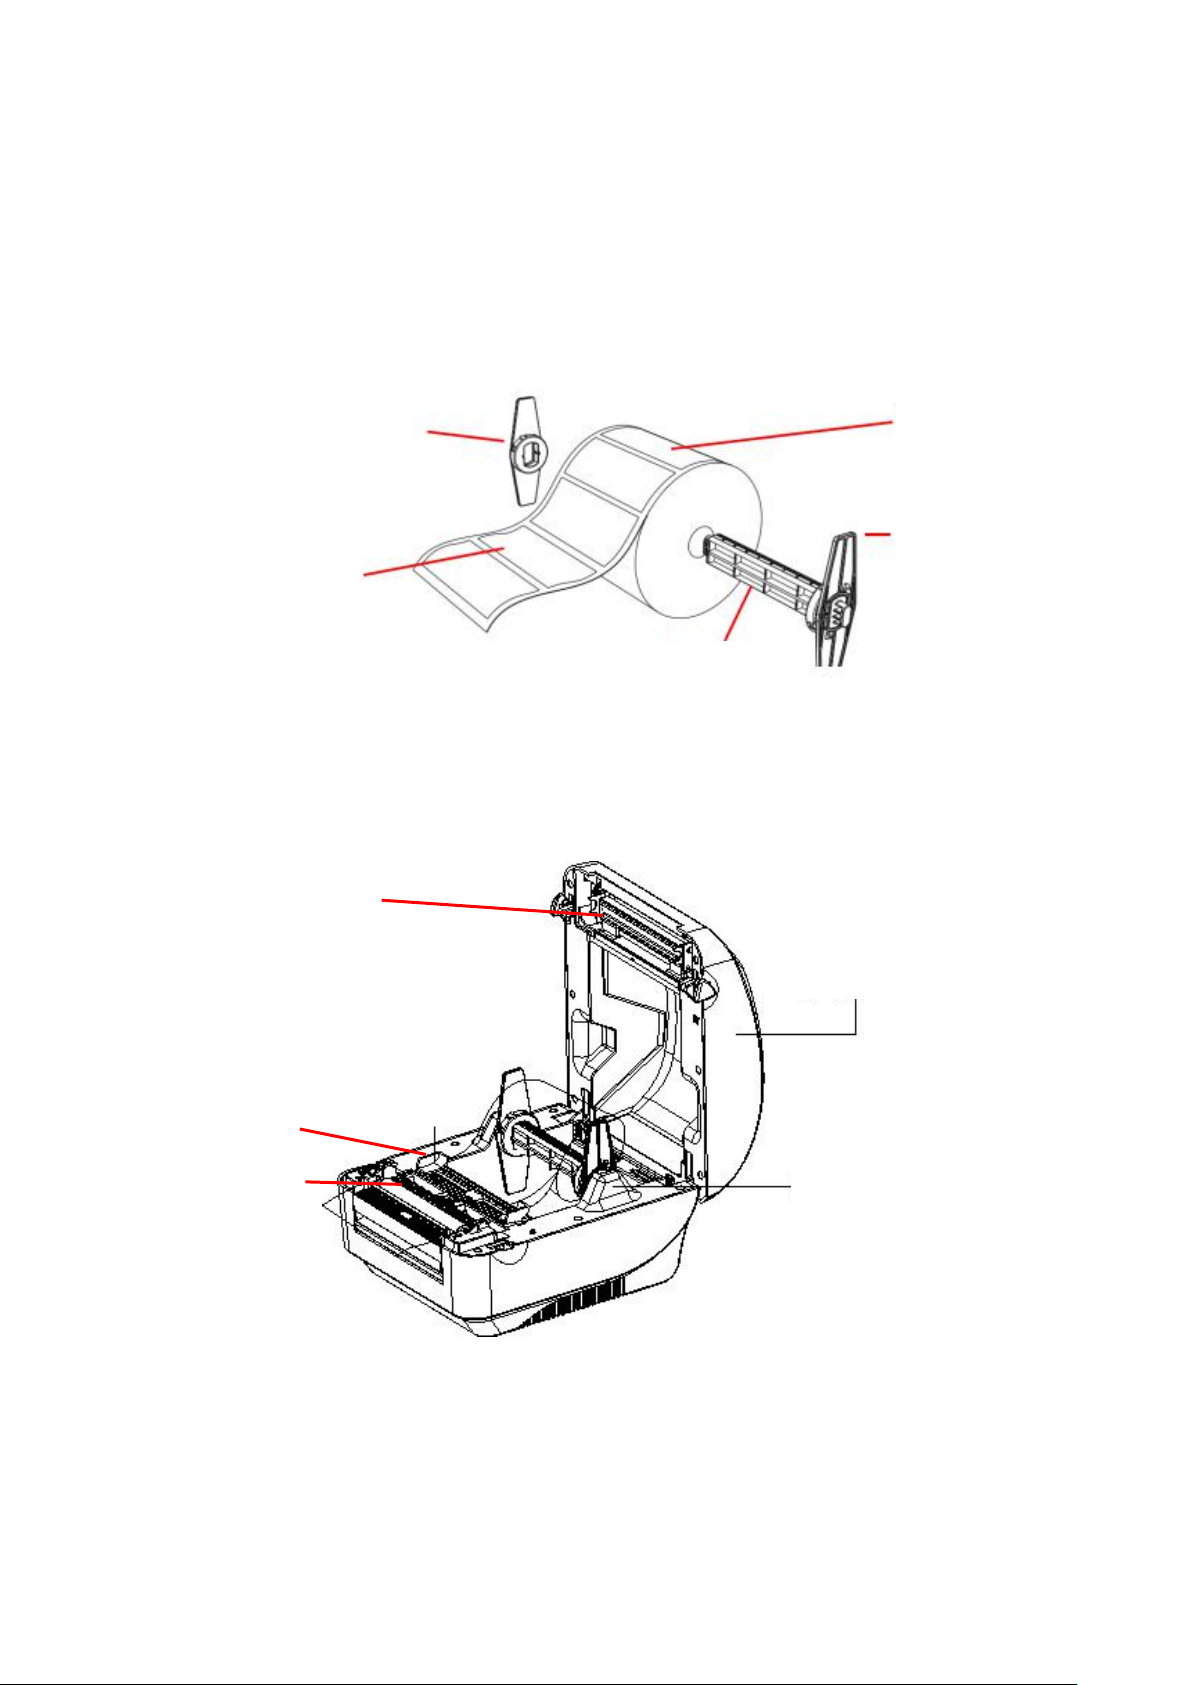
3.2 Install the label.............................................................................................................................. 6
3.3 Install the external label holder - optional.................................................................................... 7
IV. LED indicator and button functions..............................................................................................9
4.1 LED indicator................................................................................................................................9
4.2 General button functions............................................................................................................... 9
4.3 Boot function.................................................................................................................................9
4.3.1 Gap/black mark sensor detection...........................................................................................10
4.3.2 Gap/black mark sensor detection, printing self-test value and entering the debugging mode11
4.3.3 Printer initialization............................................................................................................... 14
4.3.4 Skip the AUTO.BAS program............................................................................................... 15
V. Printer Diagnostic Tool...............................................................................................................16
5.1 Enable the Diagnostic Tool program........................................................................................ 16
5.2 Printer settings...........................................................................................................................17
5.3 Calibrate the paper sensor with the printer diagnostic tool...................................................... 18
5.3.1 Auto correction.......................................................................................................................18
VI. Troubleshooting........................................................................................................................ 19
6.1 Common problems....................................................................................................................19
VII. Simple maintenance procedures of the printer........................................................................23
Update history................................................................................................................................. 24

1
Copyright statement
Information in this subject to change without notice and does not represent a commitment on the part. No
part of this manual may be reproduced or transmitted in any form by any means, for any purpose other
than the purchaser’s personal use, without the expressed written permission..

2
I. Product
Thank you for purchasing our 4B-2053A series thermal barcode printer. This
desktop printer will provide you with safe, reliable and efficient printing at a reasonable
price. By using it, the roll labels can be printed in a wide range of texts or graphic formats.
Meanwhile, its superior function and easy operation make it your best choice among the
thermal barcode printers of the same level.
The 4B-2053A series printer provides thermal printing. The printing speed is
adjustable from 2.0, 3.0, 4.0, to 5.0 inches per second. It applies to a variety of printing
materials, including paper rolls, paper slices and fan-fold labels. In addition, the printer
has the built-in 1D and 2D barcodes that are commonly used, a TTF font and eight sets of
English numeric fonts in different sizes, and supports printing in 4 different directions.
And through the zoom function, the fonts can be enlarged. All these will enable you to
improve the label printing efficiency significantly.

3
II. Brief
2.1 Unpacking and checking accessories
This printer is specially packaged to protect against possible damage in transit. However,
since the printer may still be subjected to unexpected damage during transportation, you are
kindly required to check the packaging and all units carefully when receiving the printer. In
case of obvious damage, please contact the sales dealer directly and indicate the severity of
the damage. If necessary, you should keep the packaging materials for returning the printer.
Once you have received your barcode printer, place it on a clean, steady table and carefully
remove the packaging material. Check if the following items are included:
One printer x1
One disk x1
One paper roll shaft (1" core) x1
Two baffles for paper roll shaft x2
One USB cable x1
One power cord x1
One copy of quick installation guide x1
Dealer's options:
WIFI (factory optional)
Bluetooth (factory optional)
User's options:
External paper roll holder (O.D. 214 mm with 1" or 3" core)
Bushing of paper roll shaft: 1.5", two x2

4
2.2 Printer components
2.2.1 Front view
2.2.2 Rear view
1.
Power switch
2. USB interface
3. Power interface
Note: The transmission interfaces of the printer in the picture will vary depending on the model
of machine you purchase. For the actual transmission interface, please refer to the catalog
specifications.
Paper exit
Printer cover
Hook for cover
LED
Feed
Pause
Transparent lid
123

5
III. Installation
3.1 Install the printer
1. Place the printer on a smooth surface and make sure the power is off.
2. Plug one end of the parallel port cable, serial port cable or USB cable into the slot on the
back of the printer, and connect the other end of the cable to the appropriate slot of your
computer.
3. Plug the power cord into the power slot on the back of the printer and plug the other end
into an AC socket.
Note: Make sure the printer power is switched off when you plug the power cord into the
power slot on the back of the printer

6
3.2 Install the label
1. Insert the paper roll shaft into the paper roll and insert it into the paper roll shaft bushing.(*If
the paper roll you are using has a core of 1 inch, remove the 1.5" paper roll shaft bushing, and
simply use the paper roll shaft only.)
*1.5"纸卷轴榇套
纸卷
打印面朝上
纸卷轴
固定片
2. Push the printer cover release button forward with both hands to open the printer cover.
3. Place the label roll on the label roll holder. (Print side up)
4. Pass the label through the paper guide and pull the label over the rubber roller.
Print head
Paper guide
Rubber roller
1.5” Paper roll
shaft bushing
Print side up
1’’ Paper roll shaft
Paper roll
Fixing piece
Printer cover
Label holder

7
5. Close the printer cover.
Note: To avoid poor printing quality, make sure the printer cover is closed tightly.
3.3 Install the external label holder - optional
1. Fix the external label holder on the bottom of the printer.
2. Place the label roll on the external label holder.
External label holder

8
3. Push Hook for cover forward with both hands to open the printer cover.
4. Route the label from the external paper feed through the external paper guide and into the
printer.
5. Pass the label through the paper guide and pull the label over the rubber roller.
6. Turn the knob so that the paper guide has the same width as the label and contacts slightly the
label.
7. Close the printer cover.
External paper feed
Ce manuel convient aux modèles suivants
1
Table des matières
Manuels Lecteur de codes-barres populaires d'autres marques

POSMicro
POSMicro Datalogic PowerScan D7100 Manuel utilisateur

Marson
Marson MT780 Guide de configuration rapide

NCR
NCR RealPOS Manuel utilisateur

Motorola
Motorola SE3300 Guide de configuration rapide

Element
Element P130BT Manuel utilisateur

Motorola
Motorola Symbol LS3008 Manuel d'installation et d'exploitation


