SAMCOM FTAN20AA Manuel utilisateur

Instruction Manual
Digital Wireless Intercom SAMCOM FTAN20AA
Features of Model FTAN20AA
Simple to use" Instant" Intercom system.
Individually call and Group call function.
Connect ability to other hand held two way radio.
Sancon Inc.

1. Get Acquaint
Description of Buttons and Keys
ABC Switch DC Input (Mini USB)
Antenna
LCD Unit
10 Keys
LOCK KEY TALK KEY GROUP KEY Mic
2

Display symbols and icons
Selective icon Power On icon
Channel icon ABC icon
Group icon VOL icon
3
FTAN20AA SETUP INSTRUCTIONS

Step 1 TURN ON THE UNIT
1) Fully insert the power cord
2) Check if the switch is on "A" position
Step 2 SETTING GROUP NUMBER & CHANNEL NUMBER FOR EACH UNIT
You should set Group Number and Channel Number when you get these intercoms.
Normally no need to change the Group Number , Unless you found your neighbor has used
This number ( you can hear neighbor's speaking or they can hear from you when using)
Below is the process way for setting Group Number and Channel Number
The default group number for all units is" 0" (factory setting),you can decide wether to change
It or not
1) To keep pressing the key "-" for 5 seconds, you will hear "DU DU" sound ,meanwhile the
LCD display is " Group Call 0 " and "0" will keep flash.
2) Then you can press different number as your new Group Number from 0 to 19, be sure to keep
All the units updated to the same new Group number . if you do not change factory setting 0,
Then you can set change number after you press any of the “ LOCK/ TALK/ GROUP ”button.
When you have finished Group setting, the intercom automatically entered into the channel s 4
3) The default channel number is No.1 for all units (factory setting) you can set different Number
(1)
(2)

For each unit if you buy over 2 units, if only two units, no need to set.
After group setting finished, the display will change to " Channel 1" and "1" will keep flash.
4) You can choose new number from 0-19 as separate unit's channel number, of cause
GROUP Number can’t be choice again. Then the new number will keep flash.
5) Press any of the LOCK, TALK or GROUP button once again then the display will show new
channel number and digit number is not flash. Congratulation, you have successes set the unit's
Group Number and Channel Number.
Keep the same way for the balance unit's channel setting or Change Group Number or Channel
Number
GROUP NUMBER SETTING CHANNEL NUMBER SETTING
Keep press "-" for 5 "0" is flashing and choose any press " LOCK, TALK, or "1" is flashing and choose press " LOCK, TALK, or
seconds number from 0 to 19 GROUP any one of button any number from 0 GROUP any one button
to 19 . Group Number can not
b
once again.
same as the Channel Number. 5
Step 3 PUT THE UNIT IN DIFFERENT ROOM/PLACE
(1) (2) (3) (4) (5)

You can place the Channel 1 unit in Reception
Channel 2 unit place in General Manger Room
Channel 3 unit place in Financial Room
Channel 4 place in Store … etc.
Cautions :
1) The setting method of Samcom 20 channel wireless intercom is differ from Samcom 10
channel wireless intercom. but number 0 to 9 is same frequency. so they can be used in
communication if channel number is not over number 9
2) All of the Group Number must set to same number, otherwise Group function is not effective.
3) There are three Switch Position " A ,B,C ",the default position is on “A”; if you found inference
from neighbor you can change switch to B or C, when changing,pls keep all units position be
the same.
4) Do not put the intercoms and other electronic appliances too close,better to keep 1 meter
distance to avoid any interference even when it is operating property.
FTAN20A OPERATION PROCEDURE
ONE TO ONE TALKING
1) If you are in Channel 1 (Reception) want to talk with Channel 2 (GM Room) press key
"2" meanwhile the LCD display " Selective call 2"6
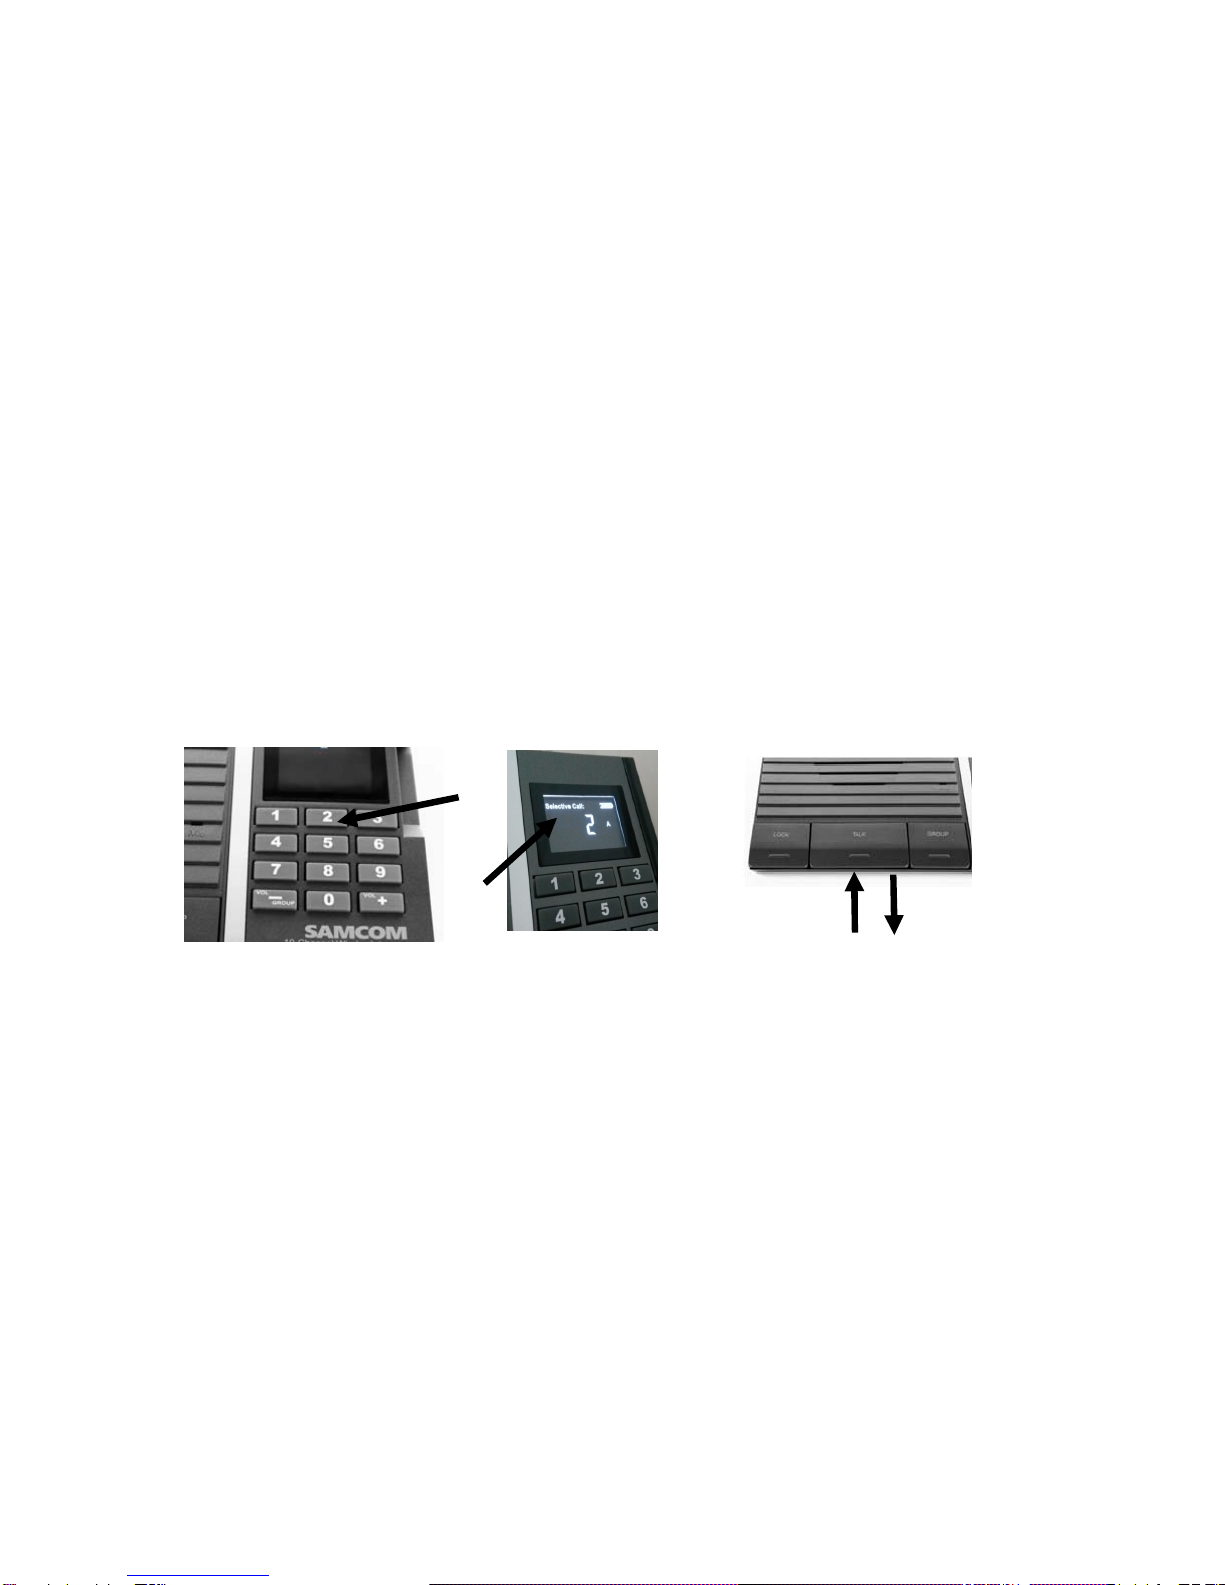
2) Within 5 seconds, keep pressing down " TALK" button, the LCD display will get to red, you can
speak to Selective Channel (Channel 2),
3) After your speech, please leave " TALK" button then LCD display will get to white, He/She from
Selective Channel (channel 2) can answer you by pressing “TALK” button once you left the“ TALK”
button
4) If there is no responses from Selective Channel or you have not speak with Selective Channel
after 18 seconds, this talking will be closed automatically, your unit will auto change back to your
original setting Channel and the LCD display will change back from " Selective call " to" Channel "
(1) Press key and leave hand
(2) Selective Number will be displayed
(3) Keep pressing“ TALK”button,when display get to red means you can speak
(4) Release the “TALK”button after speech,when display get to white means you can listen
7
LOCK BUTTON OPERATION
(1)
(2) (3) (4)

If you have long words to say at one time ,but don't want to keep pressing the "TALK" button .just
press down "LOCK" button , it will let you hand free and have a long speaking
1) If you are in Channel 1 (Reception) want to speak long with Channel 2 (GM Room)
first press key "2" and then the LCD show " Selective call 2"
2) Within 5 seconds, Press down the " LOCK" button and release your hand then LCD display will
get to red, you can speak to Selective Channel 2
3) After the speech, don't forget to press" LOCK "button again and then the LCD display will
get to white to wait for Selective Channel speaking, Of couse the selective channel can use TALK
or LOCK answer you
4) If there is no responses from Selective Channel or you have not speaking after 18 seconds
this talking will be closed automatically. The unit (channel 1) will auto change back to your
original setting and the LCD display will change back from " Selective call " to" Channel "
8
(1) Press key and leave hand
(1)
(2) (3) (4)

(2) Selective Number will be displayed
(3) Press LOCK then leave hand the display get to red you can speak
(4) Press LOCK once again the display get to white you can listen
GROUP OPERATION
If you want to speak to all the intercoms simultaneously. The "GROUP" button can help you, Just keep
pressing down " GROUP" button and LCD display will get red , then you can speak, After your speaking
is over, leave you hand from GROUP button, Then the unit will auto change back to your original setting
channel. LCD display will get to white text.
(1) Keep press GROUP button
(2) GROUP Number will be displayed and red, then all of group station can hear you
(3) Release GROUP button the channel will be changed back to your original channel
and display get to white text. 9
Volume control
(1) (2) (3)

You can adjust the volume by pressing "+" key or "-" key.
While volume adjusting icon will be appeared to indicate volume is under adjusting.
"+""-"key to increase/reduce volume from 1 to 8
(1) Reduce volume from 1 to 8
(2) Increase volume from 1 to 8
(3) The display will show your current level when you press "+" or"-"
ABC Switch Function
When you found some interference from other place such as hear other person's sound,
noise, static noise etc you can change different station from A to B or C
IMPORTANT : All the stations should be set to the same position
10
Monitor operation
(1) (2)
(3)
Autres manuels pour FTAN20AA
2
Table des matières
Autres manuels SAMCOM Système d'interphone


