rollease acmeda AUTOMATE AU Manuel utilisateur

AUTOMATE™
ARC TUBULAR FT MOTOR
433 MHZ
BI-DIRECTIONAL
ELECTRONIC
LIMIT
FAVORITE
POSITION
FABRIC
TENSION
ULTRA
LOCK
IMPACT
DETECTION
FEATURES:
• Impact Detection (Zipscreen Only)
• High Fabric tension torque
• 433 MHz Bi-Directional RF Communication
• Electronic Limit
• Favorite Position
• Ideal for premium outdoor Zipscreen shade solution
• One action to lock & un-lock shade
AUTOMATE | FT tubular AC motors combine the simple, intuitive features of ARC
“Automate Radio Communication” with the higher lifting capacity of an AC motor for
larger shade applications. Three alternate modes of operation include:
• E-type for standard use
• MANUAL FT Mode for use with conventional locking devices with fabric tensioning
• AUTO FT Mode for use with Rollease Acmeda’s proprietary ULTRA LOCK providing
automatic fabric tensioning
Functional options in each operating mode include: IMPACT DETECTION and FAVORITE
POSITION.
• IMPACT DETECTION senses an obstacle in the blinds path during downward
movement and redirects the shade to protect the motor, hardware and fabric,
ensuring product longevity.
• An intermediate setting allows for a customized FAVORITE POSITION to be preset.
AU US
INSTR. MT01-1145-0xx00x v1.15 JULY 2019

2 | Automate™Programming Instructions | FT Tubular Motors ROLLEASE ACMEDA
CONTENTS
1 ASSEMBLY 4
2 WIRING, MODES & ZONES 5
2.1 AU FT Motor 5
2.2 US FT Motors 5
2.3 Selectable Modes 6
2.4 Impact Detection 6
3 P1 BUTTON FUNCTIONS 7
3.1 Motor state test 7
3.2 Motor configuration options 7
4 INITIAL SET UP 8
4.1 Pair motor with controller 8
4.2 Check motor direction 8
4.3 Set Upper Limit 9
4.4 Set Lower Limit 9
5 ADJUSTING LIMITS 10
5.1 Adjust upper limit 10
5.2 Adjust lower limit 10
6 ADDING OR REMOVING CONTROLLERS AND CHANNELS 11
6.1 Using motor P1 Button to add a new controller or channel 11
6.2 Using a pre-existing controller to add or delete a controller or channel 11
7 FAVORITE POSITIONING 12
7.1 Set a favorite position 12
7.2 Send shade to favorite position 12
7.3 Delete favorite position 12
8 SLEEP MODE 13
9 IMPACT DETECTION MODE 13
10 FT FUNCTION SETTING 14
10.1 Activate / Deactivate Fabric Tension Mode 14
10.2 Switching between Auto & Manual Lock Mode 14
10.3 Auto Mode Operation 15
10.4 Manual Mode Operation 15
11 SUN,
WIND AND RAIN SENSOR 16
11.1 Activate/Deactivate Sun, Wind and Rain sensor functionality on the Motor 16
11.2 Pairing Sun, Wind and Rain sensor to Motor 16
12 TROUBLE SHOOTING 17
13 NOTES 18
3 | Automate™Programming Instructions | FT Tubular Motors ROLLEASE ACMEDA
SAFETY INSTRUCTIONS
WARNING: Important safety instructions to be read before installation.
Incorrect installation can lead to serious injury and will void manufacturer’s liability and warranty.
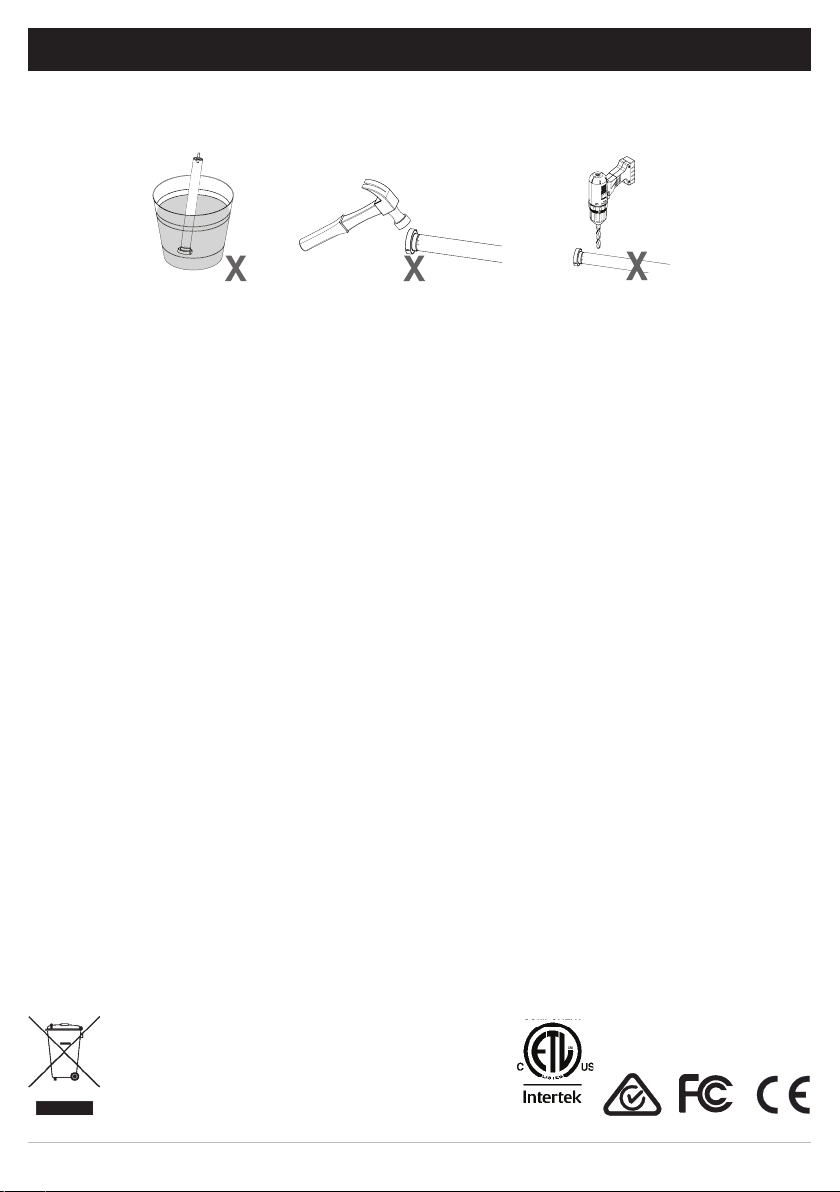
CAUTION
•Do not expose to moisture or extreme temperatures.
•Do not allow children to play with this device.
•Use or modification outside the scope of this instruction manual will void warranty.
•Installation and programming to be performed by a suitably qualified installer.
•For use within tubular blinds.
•Ensure correct crown and drive adaptors are used for the intended system.
•Keep antenna straight and clear from metal objects
•Do not cut the antenna.
•Use only Rollease Acmeda hardware.
•Before installation, remove any unnecessary cords and deactivate any equipment not needed for powered operation.
•Ensure torque and operating time is compatible with end application.
•Do not expose the motor to water or install in humid or damp environments.
•Motor is to be installed in horizontal application only.
•Do not drill into motor body.
•The routing of cable through walls shall be protected by isolating bushes or grommets.
•Ensure power cable and aerial is clear and protected from moving parts.
•If cable or power connector is damaged do not use.
Important safety instructions to be read prior to operation.
•It is important for the safety of persons to follow the enclosed instructions. Save these instructions for future reference.
•Persons (including children) with reduced physical, sensory or mental capabilities, or lack of experience and knowledge
should not be allowed to use this product.
•Keep remote controls away from children.
•Frequently inspect for improper operation. Do not use if repair or adjustment is necessary.
•Keep motor away from acid and alkali.
•Do not force the motor drive.
•Keep clear when in operation.
Do not dispose of in general waste.
Please recycle batteries and damaged electrical products appropriately.
5005833

4 | Automate™Programming Instructions | FT Tubular Motors ROLLEASE ACMEDA
.
Crown
Magnetic
Ring
Bracket
Drive
Adapter
Retaining
Clip
Motor
Head
Step 1. Cut roller tube to required length.
Please refer to Rollease Acmeda System Assembly Manual for full assembly instructions relevant to the
hardware system being used.
Step 2. Ensure roller tube is clean and free from burrs.
Step 3. Fit required crown, drive and bracket adapters.
Step 4. Slide Motor into tube.
Insert by aligning key-way in crown and drive
wheel into the tube.
Step 5. Mount motorized tube onto brackets.
Refer to Rollease Acmeda System Assembly
Manual for recommended crown, drive and
bracket adapter kits.
1 ASSEMBLY
For impact dectection to be functional, a 2
piece drive set must be used. Using a standard
1 piece drive will render the collision control
feature inoperable even if the feature is turned
on.
Tube must be close fitting with chosen crown
and drive adapters. A Hall effect sensor
embedded in the tube measures the magnetic
field change and detect the impact. Refer to
Rollease Acmeda System Assembly Manual
for recommended crown, drive and bracket
adapter kits.

5 | Automate™Programming Instructions | FT Tubular Motors ROLLEASE ACMEDA
1
2
3
Disconnect the mains power supply.
Connect the motor according to the information in the table below.
Ensure cable is kept clear of fabric.
Ensure antenna is kept straight and away from metal objects.
Ensure cable is kept clear of fabric.
Ensure antenna is kept straight and away from metal objects.
Power OFF
Water proof connector
Power Cord
2 WIRING, MODES & ZONES
MOTOR POWER NEUTRAL LIVE EARTH
MT01-1145-050001 220-240V AC 50Hz Blue Brown Yellow/Green
DO N OT REM OV E THIS LABEL
WARNING
E L E C TRICAL HAZARD !
Power shall only be supplied to this
cable once male & female
connectors are correctly coupled.
Isolate power prior to connecting or
disconnecting this motor.
This connector must not be acces-
sible to the end user. It shall be
placed within a pelmet box or within
a housing in accordance to
AS/NZS 60335.1:2011 or
(BS) EN 60335-1:2012
Failure to do so could compromise
personal safety.
DO N OT REMOVE THIS LABEL
WARNING
ELE C TRIC A L H AZARD !
Power shall only be supplied to this
cable once male & female
connectors are correctly coupled.
Isolate power prior to connecting or
disconnecting this motor.
This connector must not be acces-
sible to the end user. It shall be
placed within a pelmet box or within
a housing in accordance to
AS/NZS 60335.1:2011 or
(BS) EN 60335-1:2012
Failure to do so could compromise
personal safety.
MOTOR POWER CORD LENGTH POWER NEUTRAL LIVE EARTH
MT01-1145-069003 118 in. (3000mm) 120 VAC /
60Hz White Black Green
P1 button on motor head
P1 button on motor head
3
2
1
2.2 US FT Motors
2.1 AU FT Motor

6 | Automate™Programming Instructions | FT Tubular Motors ROLLEASE ACMEDA
Top limit
Impact detection is deactivated by default. Impact detection may be activated in all 3 modes. If an obstacle is
detected twice in the shade path during downwards movement, the motor lifts the shade up ~ 7.87in. (20cm).
Top limit
Bottom limit
Bottom limit
TENSION
UNLOCK
MODE 1
E-Type (DEFAULT)
MODE 2
FT MODE Automatic Lock
MODE 3
FT MODE Manual Lock
2.62 x TUBE DIAMETER
2.62 x TUBE DIAMETER
Inactive zone of impact detection
Active zone of impact detection
Inactive zone of impact detection
LEGEND
END OF CYCLE
CYCLE PAUSE
For impact dectection to be functional, a
specific 2 part drive adapter must be used.
Using a standard 1 piece drive will render the
collision detection feature inoperable even if
the feature is turned on.
2.4 Impact Detection
2.3 Selectable Modes

7 | Automate™Programming Instructions | FT Tubular Motors ROLLEASE ACMEDA
This table describes the function of a short P1 Button press/release (<2 seconds) depending on current motor
configuration.
The P1 Button is utilized to administer motor configurations as described below.
Approx.
Motor Response
Activate Pairing Mode
Approx.
Motor Response
Sleep Mode
Motor Response
Reverse Direction
Approx.
Motor Response
Reset To Factory Settings
Approx.
3 P1 BUTTON FUNCTIONS
P1
Press Condition Function
Achieved
Visual
Feedback
Audible
Feedback Function Described
Short
Press
If limit is NOT set None No Action None No Action
If limits are set
Operational
control of motor,
run to limit. Stop
if running
Motor Runs None
Operational control
of motor after pairing
and limit setting is
completed first time
If motor is in
“Sleep Mode” &
limits are set
Wake and control
Motor wakes
and runs in a
direction
None
Motor is restored from
Sleep Mode and RF
control is active
Hold P1 button on
motor head.
Factory settings include E-type mode and deactivate impact detection.
10
3.2 Motor configuration options
3.1 Motor state test

8 | Automate™Programming Instructions | FT Tubular Motors ROLLEASE ACMEDA
.
Consult user manual for your
controller for information on
selecting channel.
Damage to shade may occur when operating motor prior to
setting limits. Attention should be given.
Reversing motor direction using this method is only possible
during initial set-up
Hold P1 button on
motor head.
To check travel direction of shade, press UP or
DOWN on controller.
Quick Press = Step
Long Press = Continuous Travel
To reverse shade direction, hold both UP and
DOWN.
Until the motor responds.
Select channel on
controller.
Hold STOP on
controller.
Approx.
Approx.
Motor Response
Motor Response
Motor Response
Motor is now in step mode and ready for setting limits
IMPORTANT
IMPORTANT
IMPORTANT
4 INITIAL SET UP
4.2 Check motor direction
4.1 Pair motor with controller

9 | Automate™Programming Instructions | FT Tubular Motors ROLLEASE ACMEDA
SEC
SEC
S
S
5
5
Cycle shade up and down prior to setting limits to settle fabric
When using the Ultra-lock, the bottom limit must be set within the ‘locking zone’. Jog the weightbar down until you hear the locking pin click
into the latch housing.
Once the bottom limit is set, refer to Section 10 to activate Fabric Tension Mode.
After setting limits, motor will automatically exit from initial
set-up mode.
Move shade to the desired highest position by
pressing the UP button on controller.
Move shade to the desired lowest position by
pressing the DOWN button on controller.
To save upper limit, hold UP and STOP.
To save lower limit, hold DOWN and STOP.
Motor Response
Motor Response
IMPORTANT
IMPORTANT (ULTRA-LOCK V2 ONLY)
Initial set-up is complete
IMPORTANT
Approx.
Approx.
4.4 Set Lower Limit
4.3 Set Upper Limit

10 | Automate™Programming Instructions | FT Tubular Motors ROLLEASE ACMEDA
SEC
SEC
S
S5
5
Hold UP and STOP on
controller.
Hold DOWN and STOP
on controller.
Move shade to the desired
lowest position by pressing
the DOWN button.
Move shade to the desired
highest position by pressing
the UP button.
To save upper limit, hold UP
and STOP.
To save lower limit, hold
DOWN and STOP.
Approx.
Approx.
Motor Response
Motor Response Motor Response
Motor Response
5 ADJUSTING LIMITS
SEC SECS S
5 5
Approx. Approx.
IMPORTANT (ULTRA-LOCK V2 ONLY)
When using the Ultra-lock V2, the bottom limit must be set within the ‘locking zone’. Jog the weightbar down until you hear both locking pins
click into each latch housing.
5.2 Adjust lower limit
5.1 Adjust upper limit
Ce manuel convient aux modèles suivants
3
Table des matières
Autres manuels rollease acmeda Moteur

rollease acmeda
rollease acmeda AUTOMATE AX30 Manuel utilisateur

rollease acmeda
rollease acmeda AUTOMATE ARC Manuel utilisateur

rollease acmeda
rollease acmeda AUTOMATE MT01-2101-069002 Manuel utilisateur

rollease acmeda
rollease acmeda AUTOMATE MT01-2101-069002 Manuel utilisateur

rollease acmeda
rollease acmeda AUTOMATE Manuel utilisateur

rollease acmeda
rollease acmeda AUTOMATE MT01-1145-069011 Manuel d'installation

rollease acmeda
rollease acmeda AUTOMATE Manuel d'installation

rollease acmeda
rollease acmeda AUTOMATE MT01-4001-002 Series Manuel utilisateur

rollease acmeda
rollease acmeda AUTOMATE Manuel d'installation


