(Slow) S
G (Ground)
Sw (Switch)
P (Park)
(Fast) F
Terminal on motor (AMP)
180906-0 / Connector housing
880636-2 / Terminal
Fits to
0-0280314-0 / Connector
6-0160449-2 / Terminal
18,9
17,6
5,16
15
12,4
10
3
14,2
13
1,11
Actuator
466026
Switch
466221 / 12V
466222 / 24V
Park
Slow
Fast
+
(Blue) Sw
(Red) F
Parking
plate
Motor
unit
(Brown) G
(Black) P
(Green) S
3 Position switch
2 speed / Parking
(Brown) G
(Blue) Sw
(Black) P
(Red) F
(Green) S
On/Off switch
Slow speed and parking only
Fast speed and dynamic park disabled
+
NC
Cut cables, see picture
Fuse
Fuse
F
Sw
S
P
G
+
Roca switch
2 speed / Parking
LED
-
+
Gnd
Fuse
Left park pos
CW
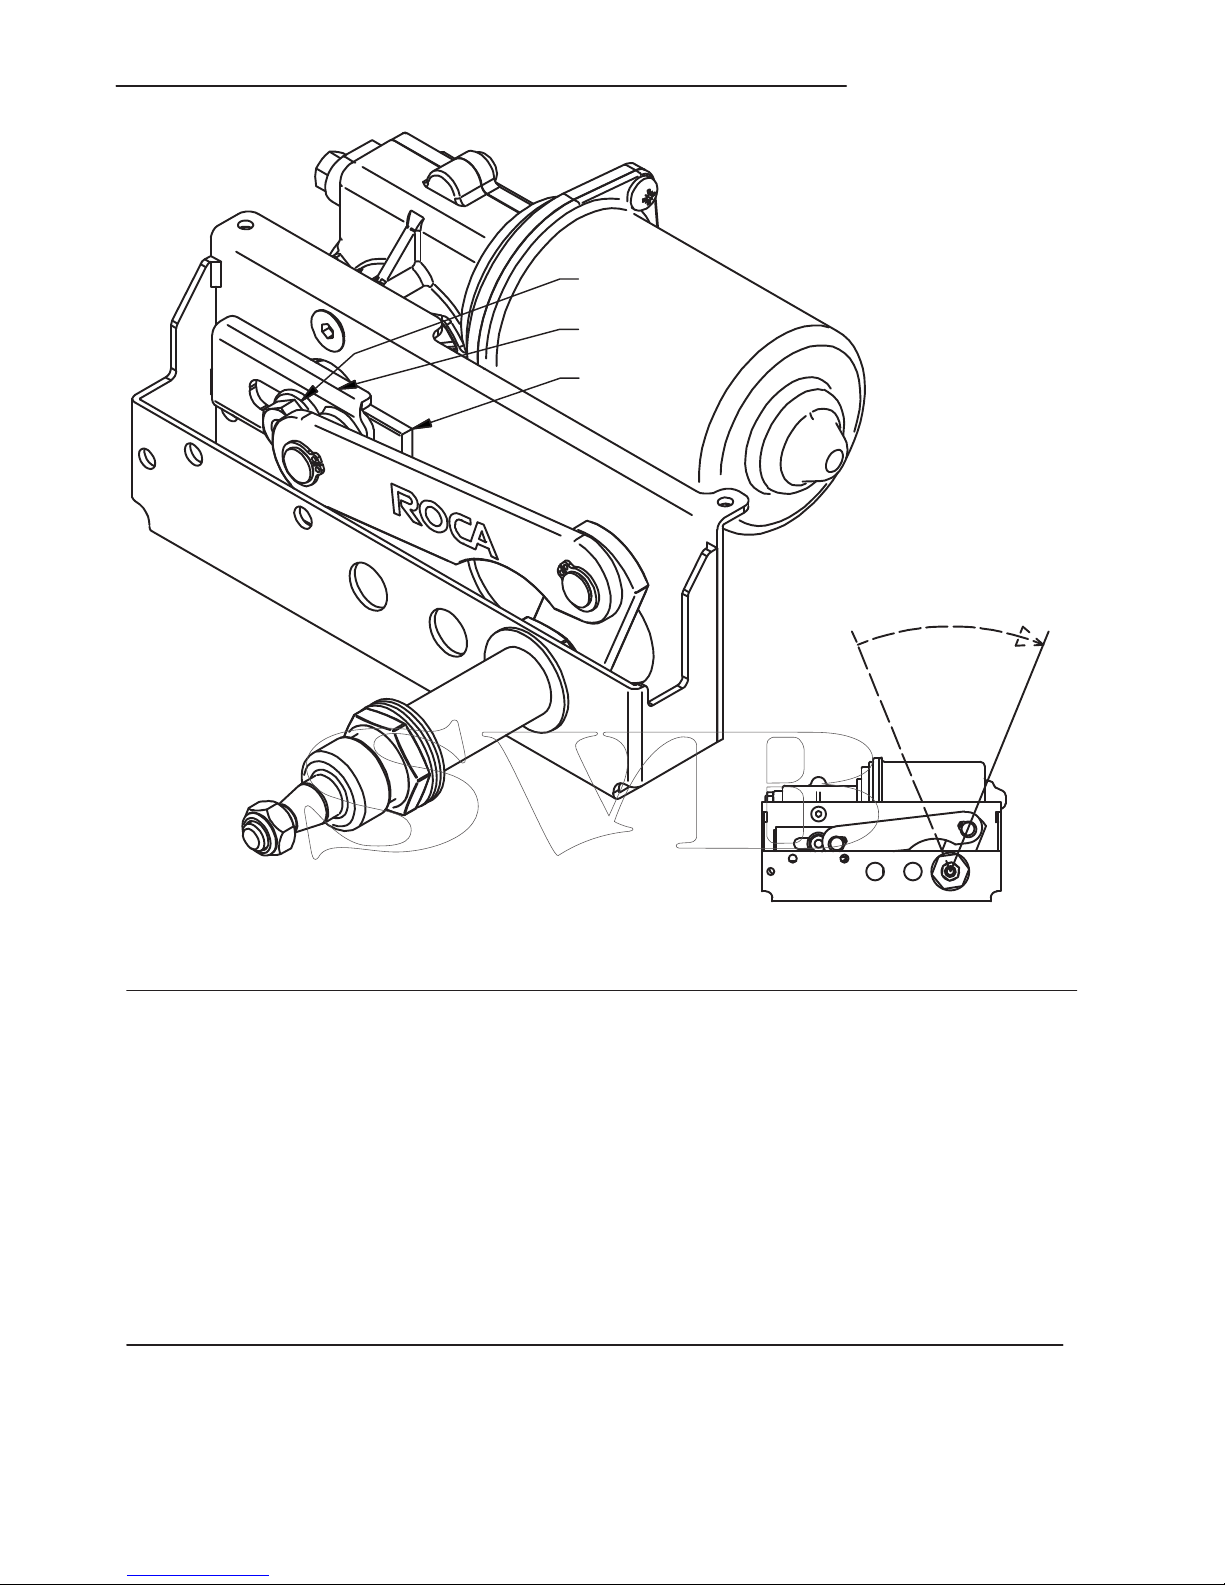
Instructions - Adjusting the sweep angle and parking position
Changing the parking position. (Must be done before installation)
Before the parking position is changed, the wiper motor should be
in parked position (Default is set to left).
Keep battery main switch turned off during any operation inside of the wiper motor.
- Loosen the nut (1), keep the nut on shaft.
- Bend the bracket (2) loose from shaft and rotate it 180°.
(Note: Be careful when loosing the bracket so the shaft doesn't rotate,
then the parking position will be wrong).
- When the slider and bracket are in position, tighten the nut firmly.
Position for slider see, Change of wiped angle.
Change of wiped angle.
The wiped angle can be set at any point between 45°and 110°.
(Default is set to 45°).
Keep battery main switch turned off during any operation inside of the wiper motor.
- Loosen the nut (1).
- Move the slider to desired angle position and tighten the nut firmly.