Ricatech RDC85 Manuel utilisateur
1

2
Introduction:
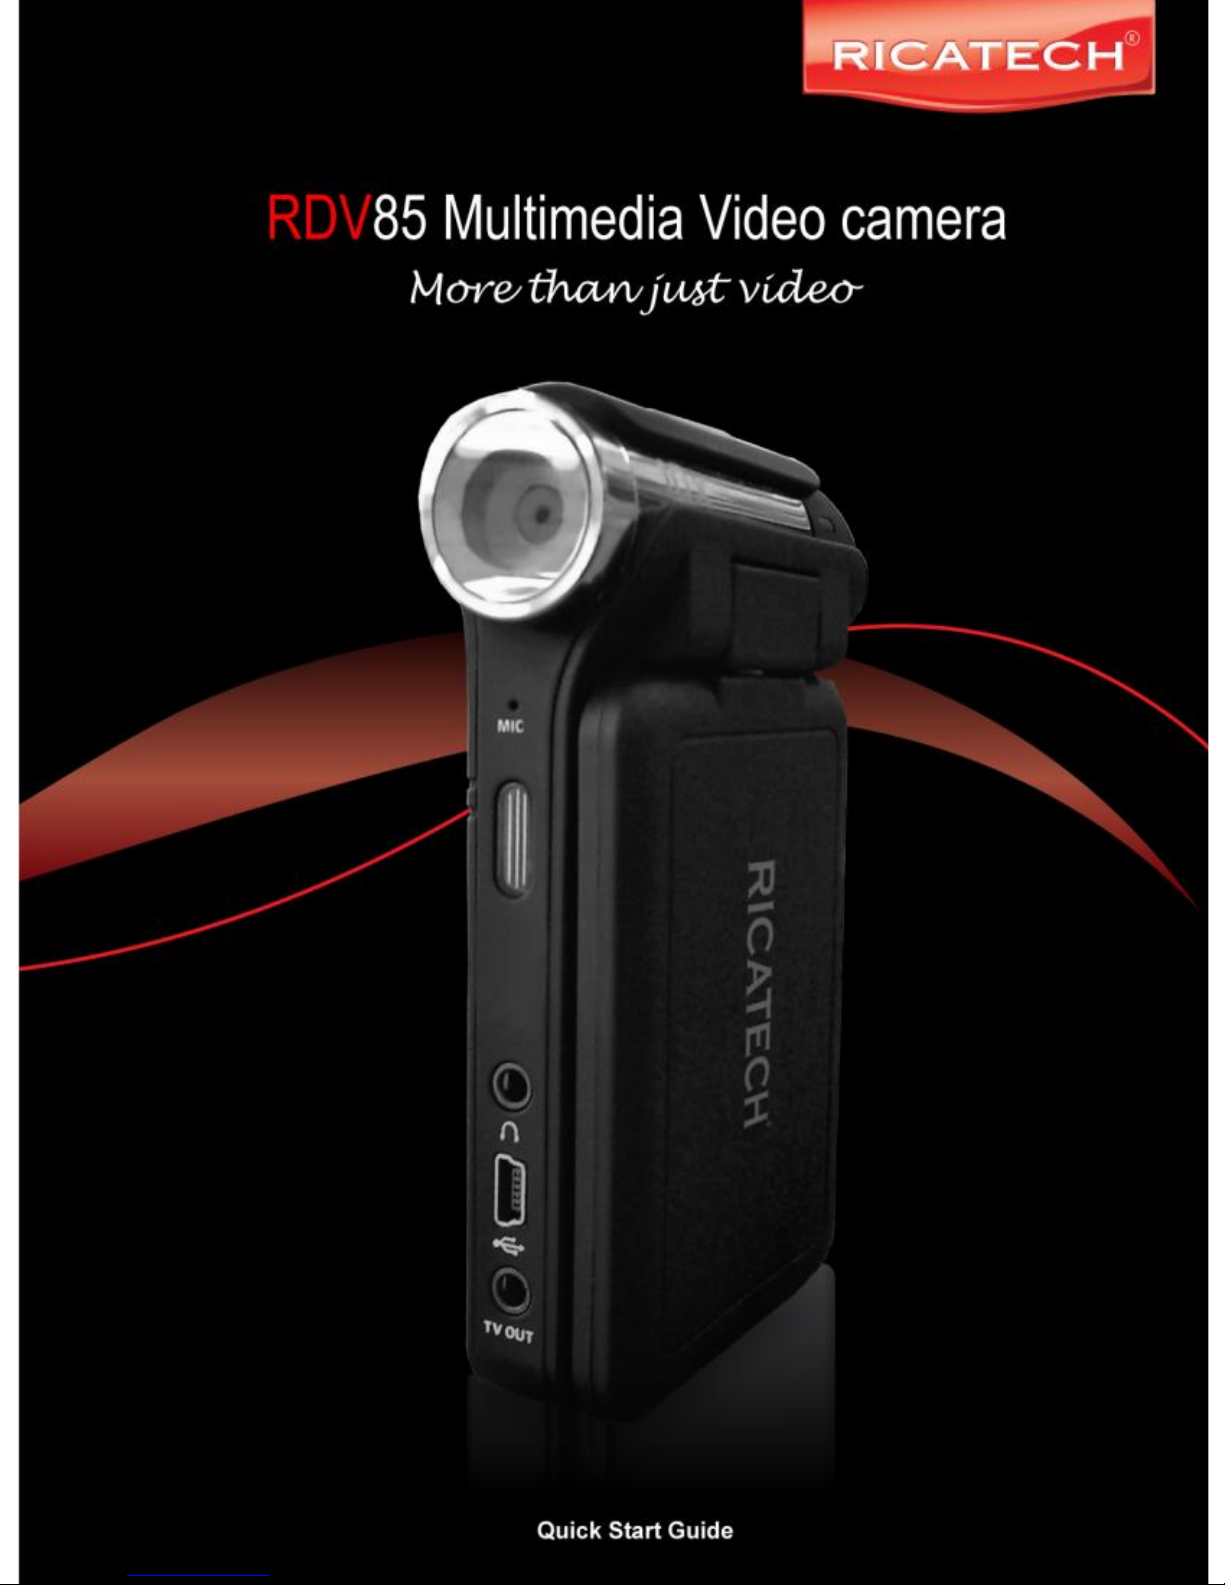
We would like to congratulate you with the purchase of your Ricatech
RDV85 Multimedia video camera.
To ensure you enjoy this device with all its option to its fullest, we advise
you to read this manual carefully before using your new camera.
While reading this manual, kindly connect the player to the provided
adapter or USB port of your computer as it needs to be charged at least
for 8 hours the first time.
We wish you the best with using your Camera. Please don’t hesitate to
contact us if you have any questions or problems. The contact data can be
found on the back of this booklet.
For more information, news and software updates please visit our website
at www.ricatech.com
With kind regards,
Ricatech BV

3
Contents
Introduction….………………………………………………………………………………………1
Contents…..…………………………………………………………………………………………2
Key Functions……………………………………………………………………………………3
Precautions……………………………….…………………………………………………………4
Button placement and functions………………………………………………………………5
Menu layout and functions…………………….………………………………………………8
Technical Information……………………………………..………………………………………41
Key Functions
2.4-inch, high resolution TFT color display
320x240 Pixels video recording at 25 FPS (Frames-per-second)
2048X1536 Pixels photo capture (3 Megapixel)
Multiple audio formats supported : MP3, MP4, MP5, WMA, AVI, ASF, 3GP
Built-in digital FM radio (optional)
Built-in microphone for digital voice recording
Multilanguage operating system
Digital real-time video effects.
Native support on WIN98SE/ME/XP/Vista and Windows 7
USB1.1 data transmission
Composite video output
E-book support
Removable USB disk function
Built-in rechargeable battery
SD/MMC memory card expansion slot

4
Precautions
1.Do not use the camera in a exceptionally cold, hot, dusty, damp or dry environment.
2.Do not drop, hit or bump the camera to prevent damage to the housing or TFT panel.
3.Please charge your battery when:
A. There is no display of the icon of battery power
B. The system automatically shuts down.
C. There is no response when you try to turn the unit on.
4.Please do not disconnect power abruptly when the player is being formatted or in the
process of uploading or downloading. This might cause an error on the internal
memory chip and possible data-loss.
5.Ricatech BV is not responsible for data loss in any way as a result of a hardware
error, software error or wrong usage of the unit by the end user.
6.Please do not dismantle this unit by yourself. Warranty will be void. Contact our
customer service when problems occur.
7.Functions, performance and design can be changed without further notice.

5
Button placement and functions

6
Menu Layout and functions
Available Modes:
01. Video camera - Digital Video Recording
02. AudioRec - Digital Audio recording
03.Ebook - Ebook reading / Studying
04. Tools - Calculator / Notepad / memory information
05.System Setup - Advanced system setting
06.Radio - FM Radio mode (Optional!)
07.Video Player - Video Playback mode
08.Audio Player - Audio Playback mode
09.Picture view - Picture viewing mode
10. Photo Camera - Photo capture mode

7
Powering on your camera ( Be sure to charge the unit first! )
When powered off, press and hold the " " button for 3 seconds, the player will display
the starting logo, and then access the main menu interface.
Selecting a menu option
Use the direction buttons to select a menu option. Use the confirmation button to
confirm
Returning to the main menu.
Press the ESC button to return to the main menu.
Connecting and charging the camera.
Connect the camera to your computer with the provided USB cable.
-Do not connect the camera to an unpowered USB HUB.
-Do not connect the camera to a “shared” or low power USB port.
-If the camera is not charging, please try another USB port.
Unpowered USB HUB
Powered USB HUB

8
Copying data to your camera.
When charged and connected the camera will be recognized by your computer as two
“Removable disks”. (The drive letters depends on the configuration of your computer)
Removable disk 1: This removable disk represents the internal memory chip of the player
Removable disk 2: This removable disk represents the SD memory expansion slot.
When an SD memory expansion card is placed you can copy data from/to this card directly
Preset folders.
In order to playback the right files in the right play mode and keep the internal memory
organized you can copy your music/photo/video files to the corresponding folders.
-MP3/WMAMusic files
-Text documents in .txt format
-Game ROM files (Optional!)
-JPEG Picture files
-3GP/MP4/AVI/ASF Video files

9
Video recording:
Select the option ”DV” in the main menu of the player and press the confirmation button
to start the Digital Video mode.
Start recording : Press the Confirmation button once
End recording : Press the confirmation button once
Press the “M” button to enter the video submenu. The following options are available.
-Video Size - Set the video resolution 160X128 / 320X240
-Quality - Set the video quality : Low/Medium/High
-Effect - Set the real-time video effect
-Exit - Return back to recording mode.
Note : Your video files are saved as .3GP files in the “Video” folder.
Audio recording:
Select the option ”AudioRec” in the main menu of the player and press the confirmation
button to start the Digital Voice recording mode.
Start recording : Press the Confirmation button once
Pause recording : Press the confirmation button once
End/Save recording : Press the ESC button once
E-book:
Select the option ”Learning” in the main menu of the player and press the confirmation
button to start the study and reading mode.
Start Reading : Select your .txt file with the direction buttons and press the
confirmation button to start reading your file.
Skipping pages : Use the direction buttons to browse through your text file
Exiting : Press the ESC button once to return to the E-book menu.
Note : The E-book reader supports .txt files only.
Adobe® PDF (.PDF) and Microsoft® Word (.doc) documents are not supported!

10
Tools:
Select the option ”Tools” in the main menu of the player and press the confirmation
button to start the Tools mode.
The following options are available:
-Calc - An easy to use digital calculator
-Notepad - Read quick notes in .txt format
-Memory - Shows memory information (internal and SD card)
-Version - Shows the software version of your RDV85 video camera
Note :
You can use the memory function to format the internal memory, or SD memory card.
Formatting will erase all data and cannot be reverted!
System setup:
Select the option ”System Setup” in the main menu of the player and press the
confirmation button to start the System setup mode.
The following options and sub-options are available:
-Language - Select the preferred menu language.
-Default - Revert all settings back to factory settings (data will be saved!)
-Sound - Turn on and off the speaker and/or key tones
-Auto OFF - Set the automatic standby/off time when the player is idle
-Style - Select the preferred menu layout styles
-Power mode - Select the display-off time when the player is idle
Table des matières
Manuels caméscope populaires d'autres marques


Panasonic
Panasonic AG-HMC152EN Manuel utilisateur

Insignia
Insignia NS-DCC5HB09 - Camcorder - 720p Manuel utilisateur

MYDLINK
MYDLINK DCS-6100LH Manuel utilisateur

Sony
Sony video Hi8 Handycam CCD-TR555 Manuel utilisateur

SECURECOM
SECURECOM V-5014B Manuel utilisateur

Panasonic
Panasonic HDC-SD100 Manuel utilisateur


