Recordex RX-100SA Manuel utilisateur

Standalone DVD/CD AutoLoader Duplicator
QUICKSTART GUIDE
Recordex RX-100SA™

Recordex® RX-100™ DVD/CD AutoLoader - QuickStart Guide
The box and foam used to package your RX-
100™ is specially designed to prevent shipping damage. If your duplicator requires
service during the warranty period and you don’t have original packaging we will send
you a replacement set, but the cost for a replacement set is $45.00. So we recom-
mend keeping the original box & foam.
When calling for service we will
need to know the serial number of your RX-100™, the date of purchase, and the
name of the company that sold you your AutoLoader.
Your serial number is located on the outside of your
AutoLoader box. You’ll also find the Model number listed on the same label. We rec-
ommend writing the Serial number down in the inside cover of this quick start guide.
NOTE: If your unit is not marked with a serial number then record the name of the
reseller that sold the unit, the invoice number, and the date of purchase.
If after reading the user’s manual you’re still having trouble with
your RX-100™ then give us a call or send us a message. Service Phone: 478-237-
Please duplicate responsibly and comply with all copyright rules. RecordexUSA is
not responsible for the misuse of any RecordexUSA duplication equipment.

Page 3
Verify the contents of your package against the image below.
Save the box and packaging material for return shipment should your printer
require service.
STEP 1: Unbox and Verify Contents
Figure 1.1 Package Contents
Base Unit
50-Disc
Collection Tub
100-Disc
Collection Tub
Power Cable
Disc Retrieval
Rod*
Input Tank Guide Rods

Recordex® RX-100™ DVD/CD AutoLoader - QuickStart Guide
STEP 2: Assemble AutoLoader
Figure 2.1 Insert Input Tank Guide Rods
STEP 2a: Insert the four Input Tank
Guide Rods into the holes on the top
of the base unit.
STEP 2b: Insert the 50 or 100-disc
collection tub into the slot on the left
side of the duplicator. NOTE: When
using the 100-disc tub the tub will
hang over the table edge.
Figure 3.1 Plug In AutoLoader
Plug end B into the rear of the base unit. Plug end A into a grounded 110V
electrical outlet.
1. Connect the power cord to the RX-100SA.
2. Connect the power cord to the wall outlet.
NOTE: Use only a grounded outlet. It is highly recommended that you pro-
tect your autoloader from possible electrical damage by connecting it to a
surge protector or an uninterruptible power supply (UPS).
A
B
STEP 3: Connect Power to RX-100
2b

Page 5
STEP 4: Load Blank Media Into The Input Tank
To fill the input tank start by placing a single disc into the input
tank. This will give you a solid base to place the remainder of the
blank disc stack.
The input tank can hold 50 or 100 discs depending on which input
tank guide rods are installed.
Top of Disc
Load Single Disc
First. Then Load
Rest of Stack.
Load media with the
label side up and the
data side down.
Figure 4.1 Loading Blank MediaFigure 4.1 Loading Blank Media

Recordex® RX-100™ DVD/CD AutoLoader - QuickStart Guide
The bright blue LCD panel provides easy naviga-
tion through the operating menu.
The left and right scroll buttons are used to navi-
gate through the operating menu, while the enter
and escape buttons are used to select or cancel
menu settings.
For Example, to enter the Setup sub-menu simply
scroll to Setup using the arrow buttons and then
press Enter.
Then you can scroll through the setup sub-menu
by using the arrow buttons. I.e. Push the scroll
button a few times until you see System Sound
then press Enter. You can then select Off or On
by pressing Enter. Use the Escape button to leave
a sub-menu.
The easiest way to figure it out is just to try moving
through the menus.
If you feel like you are lost just press the ESC
button until you are back to one of the three main
level menus: 1 to 1 Duplicate, Multi Duplicate, or
Setup.
The Control Panel
MENU TREE
(only
accessible when hard
drive is installed)
Language
English*
Spanish
French
Demo Run
Software ID
Erase Disc
System Sound
On*
Off
Test Mode Set
Off*
On
Default Reload
No*
Yes
DVD burn Speed
Maximum*
01...20x
Auto compare
Disable*
Enable
Read error skip
Disable*
Enable
Over burn mode
Disable
Enable
Copy mode
DAO*
TAO
* indicates the factory
default setting
ESC Enter
Figure 5.1 User Control Panel
1
2
34
56
1 LCD Display
2 Power Indicator
3 Scroll Left Button
4 Scroll Right Button
5 Escape Button
6 Enter Button

Page 7
The RX-100SA has two duplication modes: 1 to 1 Duplication and Multi-Master
Duplication. A hard drive must be installed to operate in Multi-Master Duplica-
tion mode. The unit is designed for easy installation of an optional hard drive.
1 to 1 Duplication is the default duplication mode and is the only duplication
mode available if a hard drive is not installed. In 1 to 1 Duplication mode you
simply load a master disc in the source drive (located on the left side of the
unit), select 1 to 1 Duplicate (press Enter), set the quantity of discs to dupli-
cate, and press Enter. The RX-100 then cycles your blank discs from the input
tank through the burner and ejects completed discs into the output tank. Re-
fer to page 10 for more complete instructions.
Multi-Master Duplication Mode allow you to automate the duplication of sever-
al small jobs in one easy step. Simply create sets of master and blank discs
and place them in the input tank. Select Multi Duplicate and press enter. The
RX-100 will automatically load the master disc to the hard drive and then
make copies until it either runs out of blank media or comes to the next mas-
ter disc. See the illustration below for further clarification.
Duplication Modes & Installation of Optional Hard Drive
Master #1
Blanks for
Master #1
Master #2
Blanks for
Master #2
Figure 5.2 Multi-Master Mode

Recordex® RX-100™ DVD/CD AutoLoader - QuickStart Guide
You will need an IDE Hard Drive, and a small Philips head screw driver to in-
stall the hard drive. NOTE: The hard drive must be set to SLAVE mode.
Please refer to the hard drive documentation for directions on setting the hard
drive up as a slave device.
STEP 1: Open the side panel by sliding the cover to the right. Set panel cover
aside.
STEP 2: Remove the IDE Ribbon Cable from the Source Drive (use the “Pull to
Remove” tab to remove cable). Move the ribbon cable out of the way so you
have easy access to the hard drive tray. Next, remove the two screws holding
in the hard drive tray.
STEP 3: Remove the hard drive tray and mount the hard drive using the bot-
tom holes of the hard drive tray.
STEP 4: Slide the hard drive tray back into the RX-100 using the tray rails, and
tighten the two screws that hold in the hard drive tray.
STEP 5: Connect the IDE ribbon cable to the Hard Drive and to the Source
Disc Drive. Next, connect the power cable to the hard drive. The red wire will
be closest to the ribbon cable and the yellow wire will be closest to the right
edge of the case.
STEP 6: Replace the panel cover.
STEP 7: Power on your RX-100SA. The unit will automatically detect that the
hard drive is present.
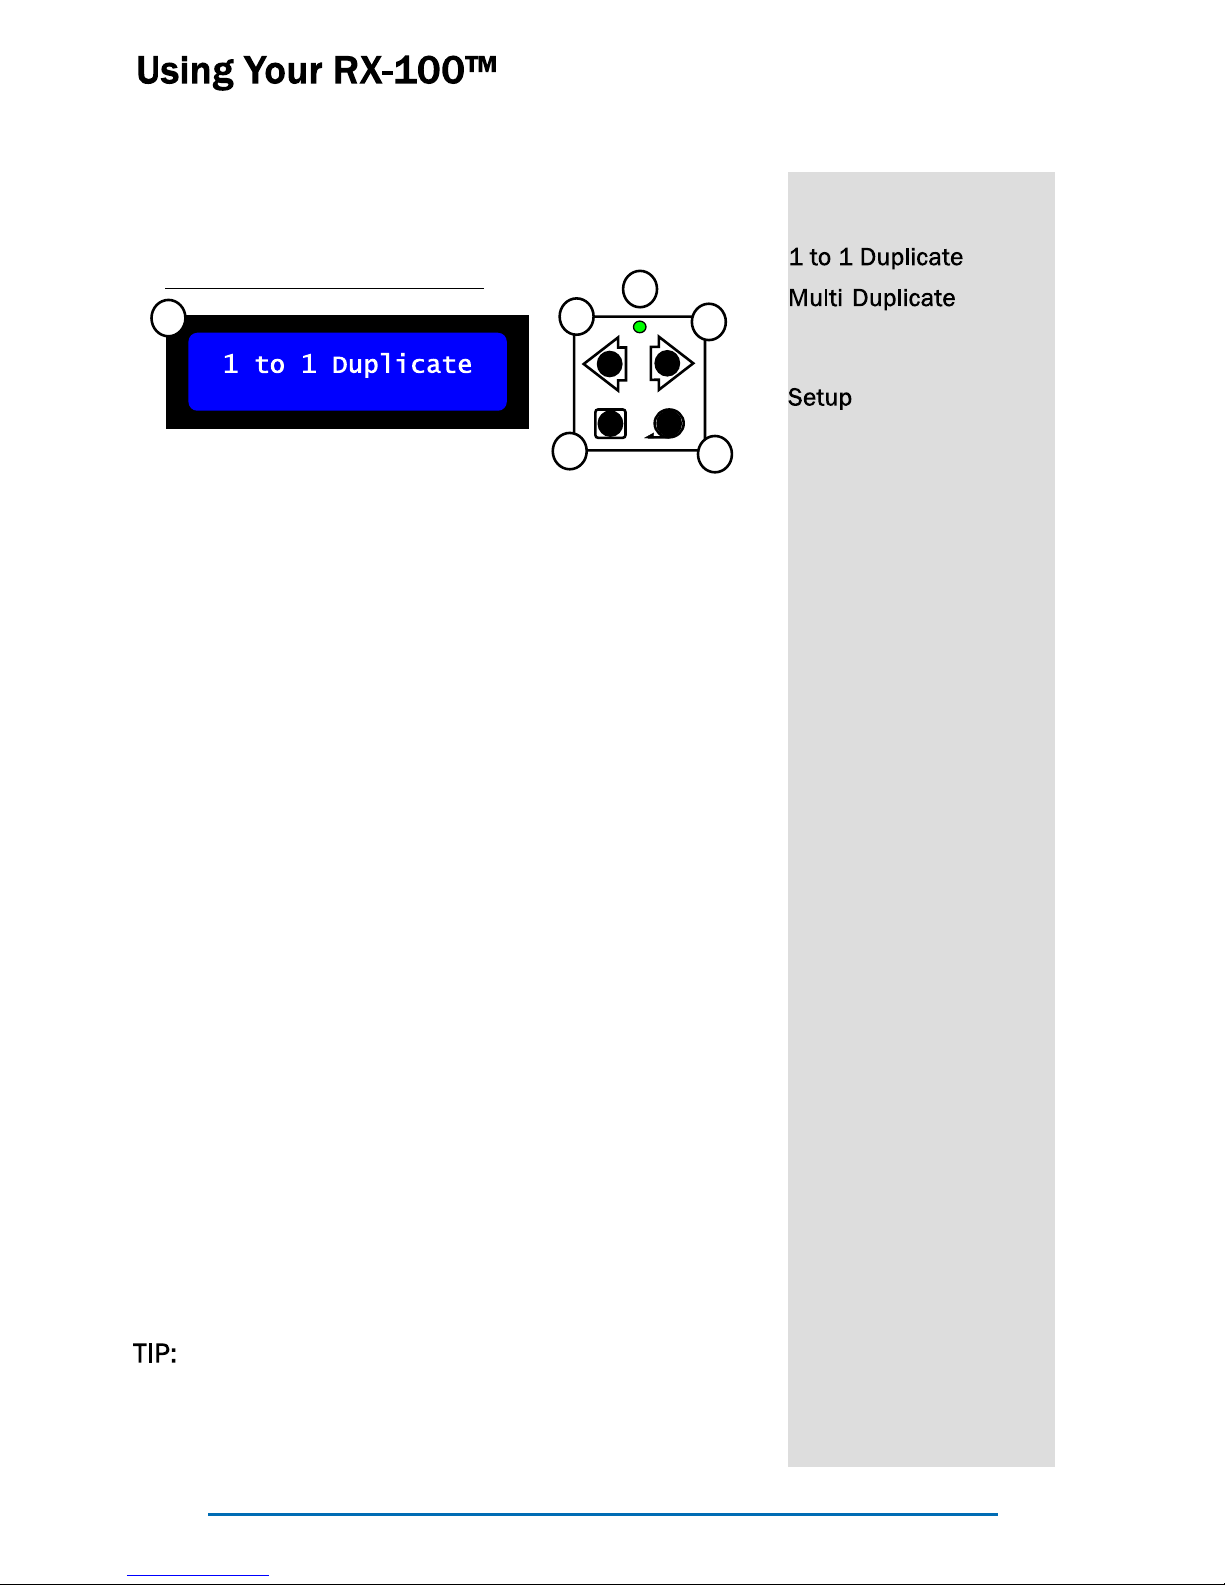
STEP 8: Scroll to Setup, and press Enter, then scroll to Format Hard Drive and
select DVD and press Enter. Now your RX-100 is ready to operate in Multi-
master Mode!
If the hard drive is not detected recheck the connections and make sure that
your hard drive is set to slave mode.

Page 9
CLOSE
OPEN
B
B
CLOSE
OPEN
STEP 1 STEP 2 & 3
STEP 3 STEP 4
STEP 5 STEP 6
Figure 5.3 Installing a Hard Drive

Recordex® RX-100™ DVD/CD AutoLoader - QuickStart Guide
To make copies in 1 to 1 Duplication mode simply place a master disc in the
source drive located in the left side of the unit, then select the number of cop-
ies you wish to make and press enter. Be sure to have enough blank media
loaded into the input bin.
1 to 1 Duplication
Increase
Quantity
Decrease
Quantity
Press Enter to Start
Copy Process
Press Enter to Set Copy Quantity
& Start The Copy Process
NOTE: This step is only present
when a hard drive has been
installed. If you choose No then
the RX100 will copy the source
disc from the source DVD drive
directly, if you choose Yes then
the RX100 will first load the
source disc image to the hard
drive, and then proceed to write
to the target discs using the
hard drive as the source. Copy-
ing from the hard drive is usually
a little faster and can be more
reliable for copying large
amounts of data at high speed.
It is recommended to copy from
the hard drive if you are making
a lot of copies.
Change Selection
from Yes to No
Confirm
Selection
Figure 5.4 1 to 1 Duplication Mode
Table des matières
Autres manuels Recordex duplicateur de disques
Manuels duplicateur de disques populaires d'autres marques

Kanguru
Kanguru U2-DVDDUPE-S Manuel utilisateur

StarTech.com
StarTech.com 8STSATDUP11 Manuel utilisateur

DUPLO SEIKO CORPORATION
DUPLO SEIKO CORPORATION Duprinter DP-460 Manuel utilisateur

Addonics Technologies
Addonics Technologies UDFH7 Manuel utilisateur

Vinpower Digital
Vinpower Digital MiniLoader VDX-1 Manuel utilisateur

Addonics Technologies
Addonics Technologies CFASTD5 Manuel utilisateur


