RD9 Solutions MiiA.bit Manuel utilisateur

MiiA.bit Robot
Robot and App Getting Started Guide

Hello! And congratulations on taking the first step in
future-proofing yourself for the Fourth Industrial
Revolution (4IR)! This document will take you
through everything you need to know about getting
started on your journey! So without further ado, let's
dive in! :)
2016 - 2019 RD9 Solutions. All Rights Reserved.

Assembling your Robot
As you may have noticed, your robot comes disassembled. Therefore, the first step is building
your robot. You can find the assembly instruction manuals in the Robot Support tab in the
MiiCode mobile app. Download and follow the easy step-by-step instructions to get started!
MiiA.bit Control Board
Now that your robot is assembled, let's dive in and have a closer look at your MiiA.bit Control
Board. This section outlines all the different components on the control board and how they
function.
2016 - 2019 RD9 Solutions. All Rights Reserved.

Bluetooth Module
Power Switch
The Bluetooth Module power switch is used to turn Bluetooth functionality on and off. During
normal operation, when using your MiiA.bit Robot with the MiiCode mobile app, this switch
should always be set to the ‘On’ position.
The Bluetooth module should only be turned off when uploading new firmware onto the control
board.
Connection Indicator
The Bluetooth Connection Indicator is a green light. It shows the connection status of the
Bluetooth Module. A flashing connection indicator means the Bluetooth Module, and therefore
your robot, is not connected to any device. A steady connection indicator means that the
Bluetooth Module, and your robot, is successfully paired with a device!
Power
On/off Switch
The Power On/Off Switch is used to turn your robot on. It should be noted that the switch must
be in the off position when charging the robot.
Power Indicator
The Power Indicator light shows whether the robot is turned on or not. When the robot is
powered on, and the Power On/off switch is in the on position, this light will be steadily on.
When the robot is powered down, either when the Power On/off switch is in the off position or
when the battery has been fully depleted, this light will be off.
Charging
Battery Input
The Battery Input Connector is used to connect the rechargeable Lithium Polymer (LiPo) battery
to the robot control board. The LiPo battery must remain connected during operation and
charging.
2016 - 2019 RD9 Solutions. All Rights Reserved.

USB Connector
The USB Connecter allows you to plug in a Micro USB cable (typical Smartphone Cable). With a
Micro USB cable, the USB Connector allows for two different functions:
● Charging the rechargeable battery - Connect a Micro USB cable to the USB Connector
and use a Smartphone Charger or Computer/Laptop USB port to charge the battery.
Note that the LiPo battery should remain connected to the Battery Input during charging.
● Uploading new firmware - Connect a Micro USB cable to the USB Connector and
connect the robot to a Computer/Laptop. Using the Arduino IDE, new firmware may be
uploaded to the robot’s control board. This is covered further in an additional guide.
Battery Charge Indicator
The Battery Charge Indicator light indicates when the battery is being charged. While the battery
is charging, the charging indicator will be fully on. When the battery is nearing its full capacity,
the charging indicator will flash. When the charging indicator is fully off, your robot’s battery is
fully charged.
Input
User Input Button
This button accepts user input, by pressing the button, and can be programmed and used for
different things within the MiiCode mobile app.
Reset Button
This button is used to reset the program running on the board. Resetting the board puts the
robot in a default, known-state.
Grove (sensor) Input
This connector is used to connect a variety of different sensors as supported by the MiiCode
mobile app. For example, the Ultrasonic Distance Sensor supplied with MiiA.bit is connected to
the Grove Input connector. Follow connection procedure outlined in the MiiA.bit assembly
instructions.
2016 - 2019 RD9 Solutions. All Rights Reserved.

Output
Buzzer
The Buzzer can be used to create sounds of varying tones. It is controlled via the MiiCode
mobile app.
RGB LED
The Red, Green, Blue Light Emitting Diode (RGB LED) is a small light situated on the robot
control board that is capable of displaying various colours. The colour displayed is controlled by
adjusting how much ‘red’, ‘blue’ and ‘green’ light is activated in the diode. This is controlled via
the MiiCode mobile app.
DC Motor Connectors
Direct Current Motors, or DC Motors, are used to drive your MiiA.bit robot. The DC Motor
Connectors are the points to which the two DC motors must be connected. Ensure that you
follow the MiiA.bit Assembly Instructions such that the Left and Right motors are connected
correctly!
Servo Motor Connector
The Servo Motor Connector allows for the connection, and control, of a compatible Servo Motor.
This motor allows for precise, position controlled motion. Connect the Servo Motor to the control
board as shown in the MiiA.bit Assembly Instructions.
2016 - 2019 RD9 Solutions. All Rights Reserved.

MiiCode Mobile App
The MiiCode Mobile App is used to not only interact with your MiiA robot, but also contains a
wealth of useful information and plenty of features that will aid you on your journey through the
wonderful world of robotics!
Main Screen and Menu Items
This section details Main Screen of the Mobile App and explores the various Menu Item options
available.
Code Blocks
The MiiCode App uses a block-based programming language. This means that you construct
programs for your robot by connecting different blocks together. All the available code blocks
are contained in these sections. Simply drag the desired blocks from the Code Blocks menus
onto the Work Area. Using these blocks, you can build interesting programs that will make your
MiiA.bit perform some amazing actions.
Bluetooth Connection
Tap this icon to navigate to the Bluetooth Connection page. The Bluetooth Connection icon will
turn blue when your robot is successfully paired with your smart mobile device.
2016 - 2019 RD9 Solutions. All Rights Reserved.

Save Code
Tapping this icon will allow you to save any code you are currently busy assembling. You will be
prompted to give your project a name. Tapping on this icon again after already first saving your
code will save any changes you made since the last save.
Execute Code / Play Button
After you’ve assembled a program with code blocks in the Work Area, you can run your code on
your robot by tapping the Play Button. After tapping the Play Button, your code is sent to your
robot continuously, in real-time! This means that your can make changes and see the results
instantly.
After tapping the Play Button, it changes to a Stop Button. Tapping this will stop the sending of
your code to your robot.
Open Controller
Tapping the controller icon will open the Controller Screen. This screen contains a controller
with various buttons that you can program to achieve different results. You can program these
buttons but using blocks from “Controller” code blocks section.
Refresh Coding Screen
There may be times when you you’d like nothing more than a fresh start. Tapping this icon will
refresh the entire app. However, with great power, comes great responsibility: tapping this icon
will cause everything to be reset to the default state. This means that you’ll lose any unsaved
code still present in the Work Area and you’ll also lose connection to your robot. Ensure that you
saved any code you wish to keep before using this button.
2016 - 2019 RD9 Solutions. All Rights Reserved.

App Menu
Tapping the Menu Button will open up the App Menu. This menu provides access to a whole
range of other features!
Login
The Login Page allows you to register and log into the MiiCode app to unlock the full potential of
your MiiCoding experience. While much of the functionality is available without logging you, you
won’t be able to save any code that you’ve created.
MiiCode (Home)
The MiiCode menu item will return you to the Main Screen and Work Area.
2016 - 2019 RD9 Solutions. All Rights Reserved.
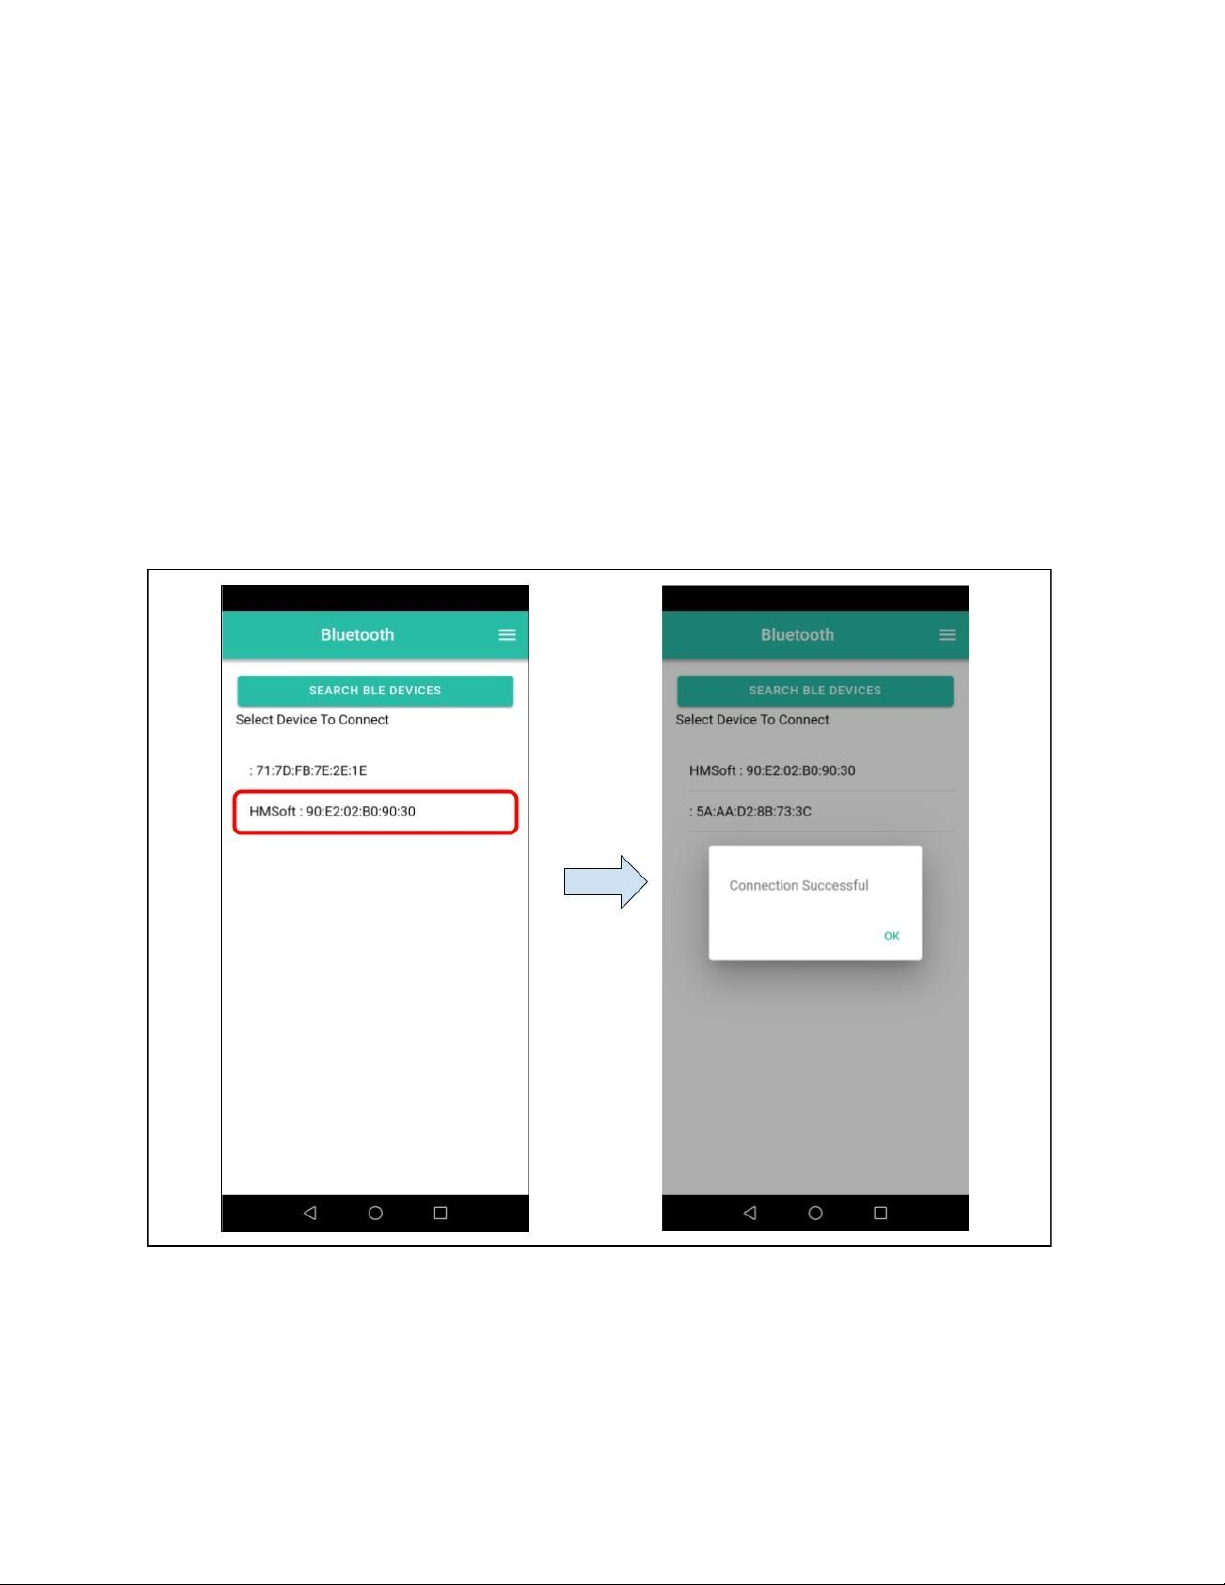
Bluetooth
Selecting the Bluetooth menu item opens that same page as tapping the Bluetooth Connection
Icon in the Main Screen. This page allows you to search for and pair with your robot. Ensure
your robot is turned on and that the Bluetooth Module is powered on. Then, select ‘Search BLE
Devices’ and wait for your MiiA.bit’s unique name to pop up.
All MiiA.bit names are in the form miiabitABCD where ABCD is the unique serial number of your
robot. This serial number can be found in the box or on the control board.
Once found, select your MiiA.bit Bluetooth Device from the list to begin pairing A connection
successful indicator will pop up once your robot is successfully connected to the MiiCode app!
2016 - 2019 RD9 Solutions. All Rights Reserved.
Table des matières
Autres manuels RD9 Solutions Robotique

Manuels Robotique populaires d'autres marques

STEMCenter USA
STEMCenter USA Pi-Bot v2.00 Manuel utilisateur

SunFounder
SunFounder PiDog Manuel utilisateur

Universal Robots
Universal Robots UR5 Manuel utilisateur

Universal Robots
Universal Robots E Series Manuel utilisateur

YASKAWA
YASKAWA MOTOMAN-MPL80 II Manuel utilisateur

EFORT
EFORT ECR5 Manuel d'instructions


