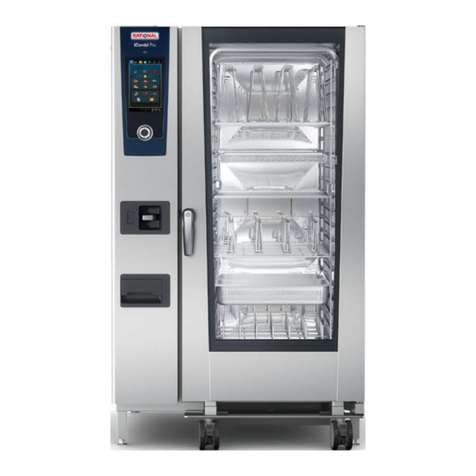
Rational CombiMaster CM Manuel utilisateur

Manual
CombiMaster CM

- 2 -
Warning:
Incorrect installation, adjustment, servicing, maintenance, cleaning, or
unatmorised modifications to the appliance can result in damage, injury
or death. Read the Operating Manual carefully before starting to use the
appliance.
For your safety:
Do not store or use any flammable gases or liquids near this appliance.
What to do in the event of danger or if you smell gas:
- Turn off the gas supply immediately
- Do not touch any electric control elements
- Make sure the area is well ventilated
- Avoid naked flames or sparking
- Use an external telephone to notify the appropriate gas supplier imme-
diately (if the gas supplier is unavailable call the relevant fire station).
„RESET“ (gas appliances only)
If the burner malfunctions "rES" will light up on the display. An acoustic
signal will sound after 15 sec. Press the Reset button to re-start the auto-
matic ignition process.
If the "rES" display does not light up again after approx. 15 sec. the
flame is burning and the appliance is operational. Please notify Customer
Support if the display is still lit after repeated pressing.
rES
Safety Instructions

- 3 -
You have a 12 month warranty from the date of first use of your machine.
The warranty excludes glass damage, light bulbs and gasket material as well as damage caused by improper
use, maintenance, repair or scaling of components.
Your
RATIONAL AG
Our Technical Customer Support Service can be reached 7 days a week on: +49 8191 327333.
For any queries relating to use please ring the RATIONAL ChefLine®: +49 8191 327300.
We reserve the right to make technical improvements!
Dear Customer
Dealer Installer
Installed on

- 4 -
Congratulations on the purchase of your new CombiMaster.
Your decision to buy a new CombiMaster means that you now have a top-of-the-range Combi Steamer.
Your CombiMaster will give you many years of reliable service thanks to its outstanding quality of finish and
almost unlimited cooking potential.
In order to make the best use of your CombiMaster’s wide variety of possible applications and benefits we
recommend that you study the Manual carefully.
And now enjoy your new CombiMaster.
For any cooking queries dial your local telephone number on the last page of this Manual.
You can reach our technical Customer Support Service 7 days a week on +49 8191 327333.
Your
RATIONAL AG
Dear Customer

General instructions / For your safety 6
Features 10
Controls 11
Cooking techniques 12
Control modes 13
Moist Heat Mode 14
Dry Heat Mode 16
Combi-Steam Mode 19
Vario-Steam Mode 21
Finishing®Mode 23
Working with the core temperature probe 2
Cool Down Function 28
Cleaning 29
Servicing –steam generator descaling 31
Appliance settings – Celsius / Fahrenheit 36
Maintenance 37
Maintenance – draining the steam generator 38
Appliance options 39
Fault indications 41
Sample applications 42
Table of contents
Info
- 5 -

General Instructions / For your Safety
Keep this manual carefully so that it can always be
consulted by anyone using the appliance.
This appliance must only be used to cook food in
catering establishments. Any other use does not
conform to the use intended and is therefore consi-
dered dangerous
Operate using hands only. Damage caused by the
use of pointed, sharp or other objects will invalida-
te the warranty.
The appliance must only be operated by specially
trained operators.
It is vital for the owner to give users regular safety
instruction.
We recommend that the owner gives your staff
regular training to preclude the risk of accidents or
of damage to the appliance.
Daily checks before switching on
• Lock air baffle top and bottom.
• Ensure that grid shelf or mobile oven rack is pro-
perly locked into position in the cooking cabinet.
General
• The temperature of door glass, outer casing and
add-ons can rise to over 60 °C
• Avoid having heat sources (e.g. grill plates, deep
fat fryers etc.) near the appliance.
• If the unit is idle for prolonged periods, shut the
water supply stop valve and turn off the applian-
ce energy supply (gas and electricity) at the
mains.
When setting up table-top units with an original
standard stand or base cabinet the maximum wor-
king height at the top rack is is not exeed 1600
mm.
WARNING –If containers are filled
with liquid or contents which liquefy during
cooking, do not use higher level racks than
those where the user can see into the slide-
in containers. Warning sticker enclosed with
appliance
Caution!
•Hot vapour (risk of scalding)!
•Containers and grids are hot!
•Make sure the mobile oven rack is correct-
ly locked in place!
Gas appliances only
• If your appliance is installed below an extractor
hood, this must be switched on when the appli-
ance is operating
• If your appliance is connected to a chimney, the
flue duct must be cleaned as stipulated in specific
regional regulations. Consult your installer.
• Do not put objects on your appliance exhaust
pipes
• The appliance must only be used in drauctur free
conditions
• Do not let objects block or obstruct the area
below the appliance.
• It may be necessary to have a flue gas interlok-
king system connected to the appliance, consult
your installer.
General Instructions / For your Safety
- 6 -

Loading/removing
Open appliance door slowly. .
When it is opened the heating and fan wheel shut
down automatically.
The integral fan wheel brake is activated. The fan
wheel runs on briefly.
Do not touch the fan wheel
Do not insert containers or grids until the grid shelf
has been properly secured and the mobile oven
rack has been pushed up to the stop and locked
into place.
Only use genuine heatproof accessories made by
the appliance manufacturer.
Appliances with grid shelves (6x1/1 GN,
6x2/1 GN, 10x1/1 GN, 10x2/1 GN)
Removal
Slightly raise grid shelf and lift out of front catch.
Swivel grid shelf to middle of cooking cabinet.
Press grid shelf upwards, lift from fixings. Slot into
place in reverse order.
Mobile oven racks
Working with mobile oven racks / mobile
plate racks and transport trolleys
using table-top units (option)
- Remove grid shelf
- Lay run-in rail on appliance floor and engage.
- Push in mobile oven rack or mobile plate rack
- Push in mobile oven rack or plate rack up to the
stop and lock into place
- Transport trolleys must be properly fixed to the
appliance using the holder
- Disengage mobile oven rack or plate rack and pull
out
- When transporting the mobile oven rack or plate
rack on the transport trolley make sure trolley is
engaged in the transport safety catch
- Cover and secure containers with liquids so that
there is no risk of scalding from liquid slopping
over.
Warning!
•Shut GN-container locks on mobile oven
rack!
•Mobile oven racks, mobile plate racks,
transport trolleys and appliances on
casters can tip over when being moved
over an inclined plane or threshold.
General Instructions / For your Safety
- 7 -

Appliance size Max. load size
6x1/1 GN 30 kg (max. 15 kg per rack)
10x1/1 GN 45 kg (max. 15 kg per rack)
20x1/1 GN 90 kg (max. 15 kg per rack)
6x2/1 GN 60 kg (max. 30 kg per rack)
10x2/1 GN 90 kg (max. 30 kg per rack)
20x2/1 GN 180 kg (max. 30 kg per rack)
Low water
The indication H2O may appear on the display
when you switch on. This means that the steam
generator is not yet filled with water. When it is full
the display goes off automatically.
• If the display is still lit, check that the water valve
is open and the strainer at the water supply
(solenoid valve) is not blocked
Ambient temperatures
If ambient temperatures drop below +5 °C, make
sure the cooking cabinet is heated to room tempe-
rature (> + 5 °C) before starting to use it.
Core temperature probe
• The core temperature probe may be hot – use
oven gloves..
• Cool core temperature probe with cold water
before use
• Do not let core temperature probe hang out of
the cooking cabinet.
• Remove core temperature probe before unloa-
ding the food.
Cool Down
Use "Cool Down" function to cool the cabinet.
Caution!
•During "Cool down" the fan wheel is run-
ning when the door is open!
•Do not switch on "Cool down" function
unless air baffle is correctly locked
•Do not touch the fan wheel.
•Appliance must not be cooled with cold
water.
Hand shower (optional)
Pull hand shower out to use
Press hand shower control button to select 2 regu-
lation rates.
Hand shower retracts automatically
Make sure the hand shower is fully rewound after
use.
Caution
•Hand shower and hand shower water may
be hot!
H2O
General Instructions / For your Safety
- 8 -

Cleaning
•Leave the appliance door slightly open if it is
going to be idle for a prolonged period (e.g. over-
night).
• Do not clean unit with high-pressure cleaner
• Do not treat unit with acids or expose to acid
fumes – this will damage the protective layer of
stainless steel and units might discolour.
• Follow the instructions on the cleaner pack.
• For cleaning sequence see "Manual Cleaning "
chapters.
• Only use cleaning agents made by the appliance
manufacturer.
Caution!
•Wear proper protective clothing, gloves,
goggles and mask.
Descaling
• Note that the steam generator must be descaled
as required (see Descaling chapter).
Caution!
•Aggressive chemical fluid - corrosive!
•To prevent damage to materials and
health it is vital that you use:
Schutzkleidung
protective clothing
safety goggles
protective gloves
face mask
the manufacturer’s descaling accessories
Maintenance
• Inspection, maintenance and repair work must
only be carried out by trained technicians.
• The unit must be switched off at the mains when
cleaning, carrying out inspection, maintenance or
repair work.
• If the appliance is installed on casters, freedom of
movement must be restricted so that electrical
cable, water and drainage gas pipes cannot be
damaged when the unit is moved. If the unit is
moved make sure that electrical cable, water and
drainage gas pipes are disconnected correctly. If
the unit is returned to its original position, make
sure that the retention device, electrical cable,
water and drainage gas pipes are correctly fitted
Servicing
• To ensure that your appliance stays in perfect
working order it should be serviced at least once
a year by an authorised service partner..
General Instructions / For your Safety
- 9 -

Appliance serial number
(visible only when door is open)
Draft diverter (optional)
(gas appliances only)
Interior lighting
Appliance door with double glass pane
Door handle
Table-top units: one-handed operation with
slam function
Floor models: one-handed operation
Unlocking device to open double glass
door panel (inside)
Integral, self-draining door drip pan
(inside)
Drip collector connected directly to
appliance drain
Appliance feet
(height adjustable)
Unit data plate
(with all the important electrical data such as
power input, voltage, number of phases and fre-
quency, as well as appliance model and applian-
ce serial number, see also
functions/settings/model)
Control panel
Protective cover for electrical installation
area
Hand shower (optional)
(with automatic rewind)
Run-in guide
(Floor models)
Air filter
(Installation area ventilation)
Features
Info
- 10 -
CM 6 x 1/1 GN, identical for 10 x 1/1 GN, 6 x 2/1 and 10x2/1 GN
CM 20 x 1/1 GN, identical for 20 x 2/1 GN.
Table des matières
Autres manuels Rational Appareils de cuisine

Rational
Rational iVario 2-XS Manuel utilisateur

Rational
Rational VarioCookingCenter 112T Manuel utilisateur

Rational
Rational SelfCookingCenter series Manuel utilisateur

Rational
Rational iVario IVP2-S Manuel utilisateur

Rational
Rational iCombi Classic Series Manuel utilisateur

Rational
Rational iCombi Pro Manuel de service