PYLE Audio PIPCAMHD45 Manuel utilisateur

Outdoor Wireless/Wired HD P2P Network Camera Pro.
(with H.264 image compression)
Instruction Manual
CONTENTS
1. INTRODUCTION........................................................................................................................................... 4
1.1 Features ............................................................................................................................................ 5

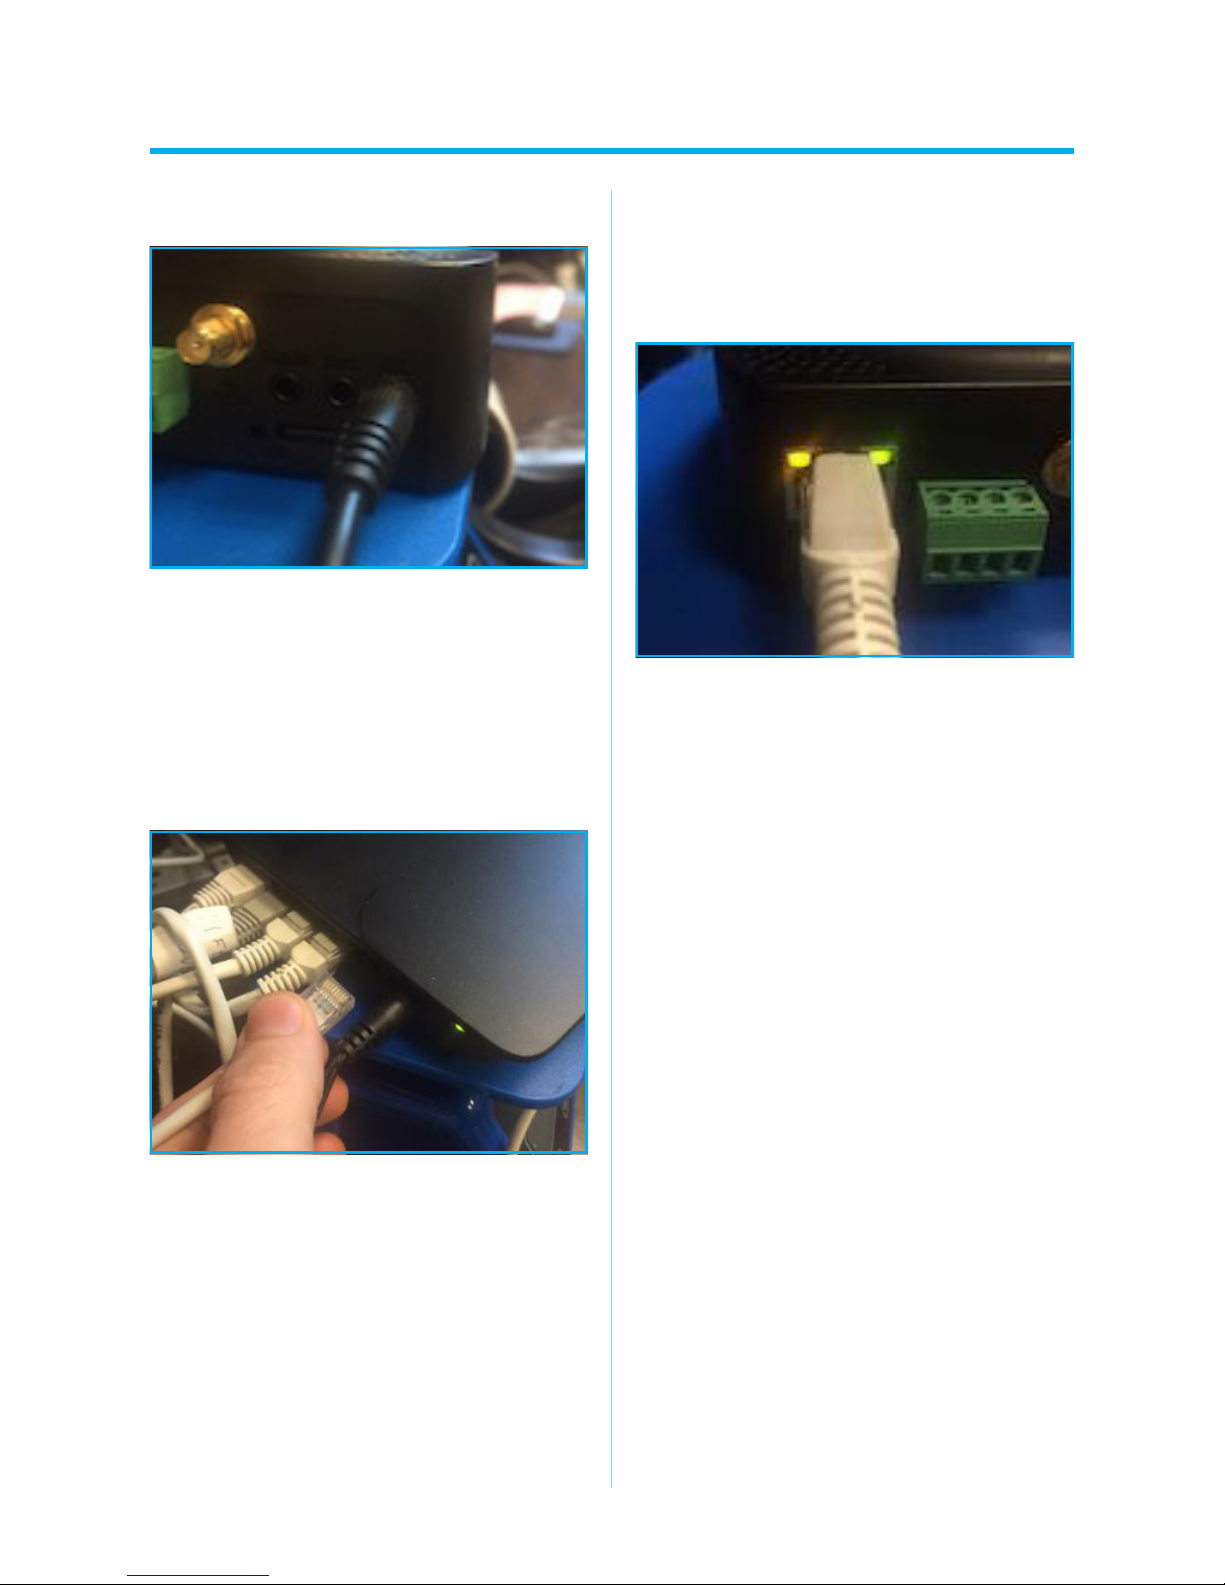
1. Plug your camera into AC power
2. Plug your camera directly into
your router with wired Ethernet wire
(included)
NOTE: Wired Ethernet is required for
setup. Wireless will be congured later.
NOTE: Wait 2-3 minutes for camera
to boot.You will see the camera run
through a full range of pan and tilt
motion.
3. When boot up completes, your
camera's ethernet port will ash yellow
and green lights indicating the camera is
connected to your router.
NOTE: If lights are not ickering the
camera is not receiving data. Please
check for faulty ethernet cable and that
your router is working with another
device.
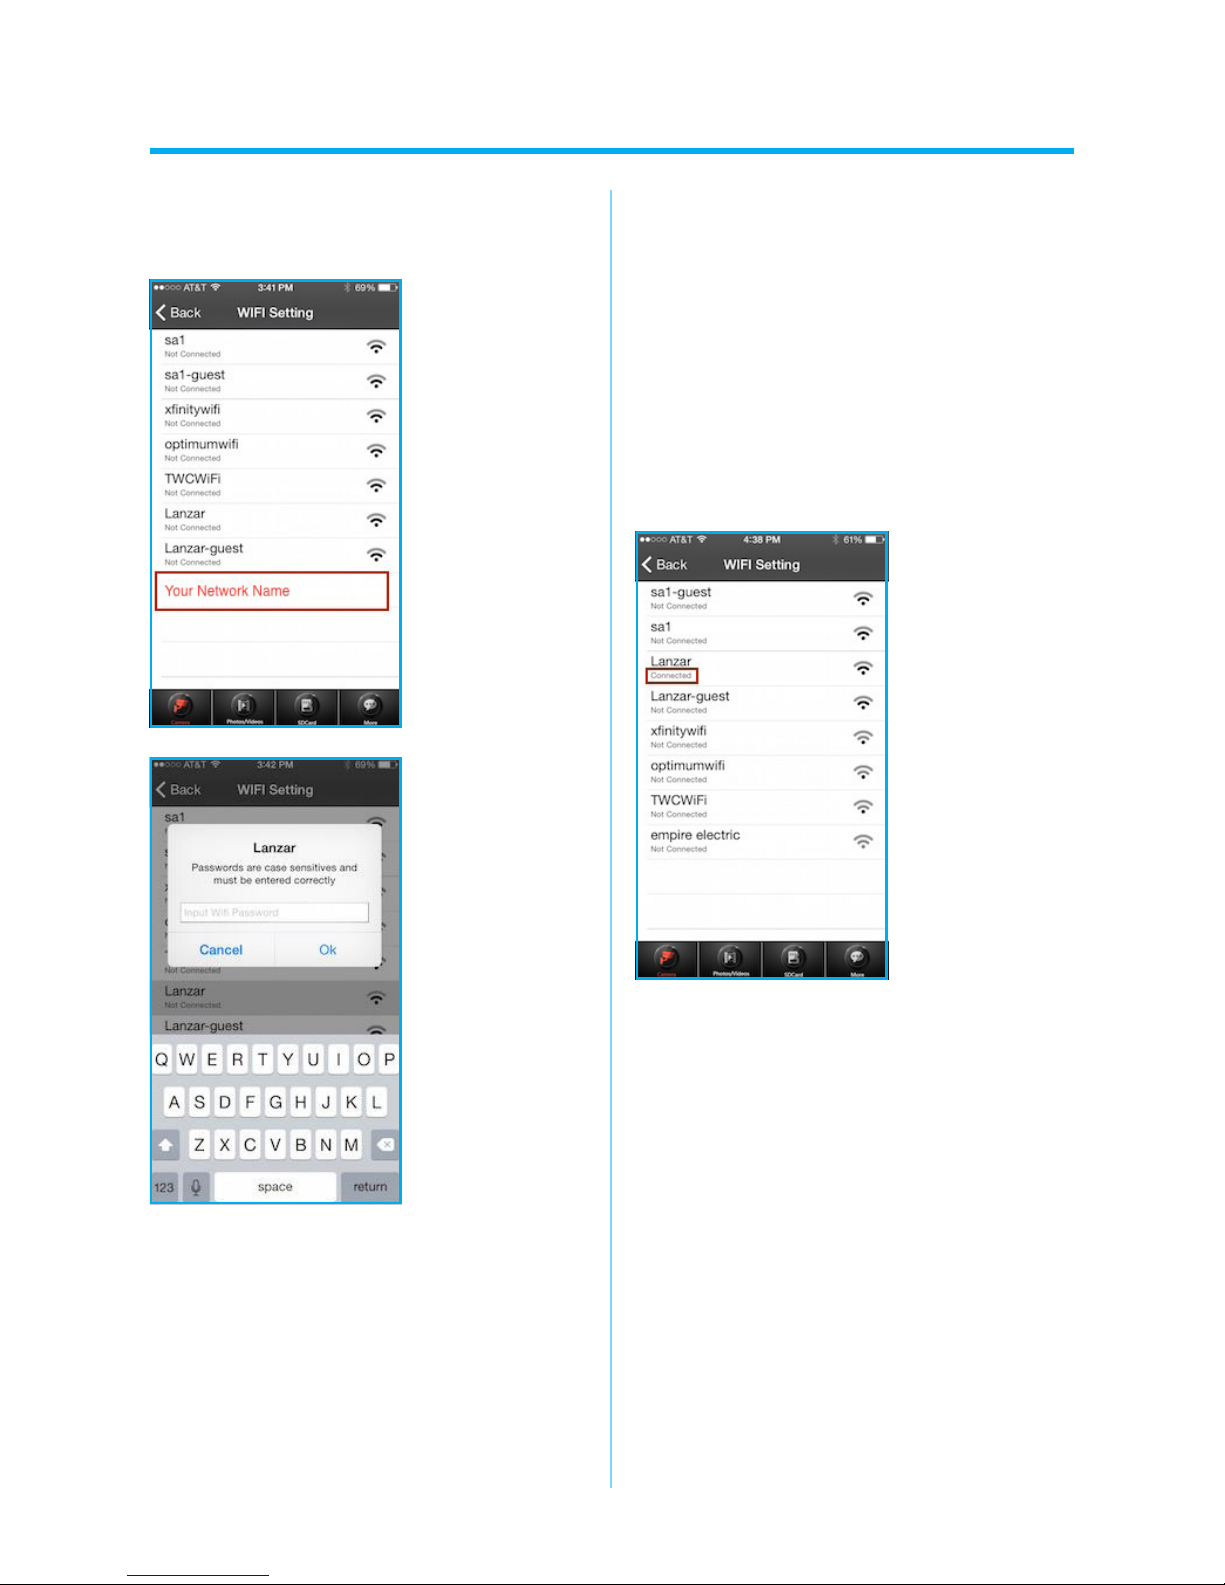
4. Check that you have WIFI enabled in
your phone's system settings
WIRED SETUP

5. OpenupthePyleIPProappandselect
"add camera"
6. Select the option to“Scan QR Code”
7. Scan the QR code on your camera with
your smartphone's camera
8. Name your camera to your preference
-Then input the camera default password
"pylecam"
WIRED SETUP

9. Make sure to change the password to
a custom password
10. Now navigate to the“Camera”tab to
see a list of all of your cameras. Select the
newly added camera to check you can
see the video feed.
11. Select“Edit”in the top left corner,
then“set”on your camera’s entry.
12. Select“WIFI Setting”
13. Wait for the list of available WIFI
networks to appear. Select your home
network.
- No networks displayed? Go to www.
pipcamwireless.com and search“I am
having trouble connecting to WiFi”for
more help
WIRED SETUP

14. Add the wireless password for your
home router
Note: Passwordsarecasesensitiveandthe
appisn'tsmartenoughtotellyouifyouhave
typeditcorrectly.Ifyouhaveanydoubtabout
yourhomenetwork'spasswordIwould
recommendtroubleshootingthevaluein
yoursmartphone'sWIFIsettingsbeforetrying
toconnectthecamera.
15. The camera will now reboot. Please
wait for the app to countdown from 60
seconds
DO NOT REMOVE THE DATA CABLE
FROM THE CAMERA
16. Once the countdown stops, look for
the“Connected”to show next to your
network
17. Now you can disconnect the wired
ethernet cord and move the camera to its
desired location
WIRED SETUP

Pyle H.264 Solution Desktop Setup QSG
Find FAQs including setup video and support online at
http://www.pipcamwireless.com
This guide covers the following models
-PIPCAM8
-PIPCAMHD17
-PIPCAMHD45
-PIPCAMHD46
-PIPCAMHD47
Before you begin
*Setup should be done in the same room as the wireless router in your home.
* Camera and PC must share the same network. Verify the setup PC is on the
SAME network as the wireless router in your home.
1) Plug your camera into power
2) Attach the wireless antenna to your camera (If Applicable)
3) Plug your camera directly into your router with wired Ethernet wire
4) Wait 2-3 minutes for camera to boot

-You will see the camera run through a full range of pan and tilt motion.
-When boot up completes, your camera's Ethernet port will flash yellow and
green lights indicating the camera is connected to your router.
If you do not see the flickering lights - DO NOT CONTINUE
please refer to the FAQ online
https://pyleaudio.helpshift.com/a/pyle-ip/?s=general&f=the-green-and-yellow-
lights-at-the-back-of-my-camera-do-not-flash-when-plugged-into-power-and-
ethernet
5) Copy/Paste or type the link below into your Internet browser to Download the
software package online
www.pyleaudio.com/manuals/drivers/pipcam8.zip
6) Unzip the zip file and select Mac or the other folder depending on your OS
7) Open the “IP Address Tool”folder and install the “SearchIPCam Setup”file on your
PC

8) Once installed – open the “S-CAM Finder”app
Click the “Refresh”icon to find your camera
No Camera Detected?
-Check again your PC and camera are connected to the same wireless network
-Verify you do not have any network security settings that will hide the network
-Try a hardware reset by holding in the camera reset switch for 10 seconds with a pin and
retry steps 1 – 4
9) Double Click the Http://XXX.XXX…address in the IP Camera tool or copy paste the
address into your internet browser

NOTE: Some users may see a blue background in the web UI – while the options may be
in slightly different places, the setup process is the same
10) Log in using your camera’s default user name and password
USER: admin
PASS: “pylecam”OR “admin”
11) Select the login option appropriate for your browser
-Google Chrome: Server Push Mode
-Internet Explorer: ActiveX Mode
-Safari/Firefox: VLC Mode
-I recommend using Google Chrome for fast initial wireless setup – to continue setting up
using Internet Explorer, skip to the link at the end of the guide to learn how to install the
Active X plugin – then resume step 12 for wireless configuration

12) Check that you see a live video feed for the camera
No Video?
-If you aren’t using Google Chrome – back up to step 9 and try logging in using Google
chrome in server push mode now
-Your login password may be incorrect – try both default passwords suggested step 11
-If still no video – do a hardware reset to make sure the camera password is set back to
default passwords
IE Issues
-Refer to main manual to check computer security settings
-Make sure Activex is installed
-Right click the Internet browser and click “Run as Administrator”
Now we can configure WiFi
1) Click the “Gear”icon along the top tab to access the camera’s settings
2) In the left column - click “Network Settings”> “Wireless Settings”
3) Click the “Search”button to display any wireless networks in range
Ce manuel convient aux modèles suivants
1
Table des matières


